
Level 100
HARDHow to solve Sand Loop level 100? Get instant solution for Sand Loop 100 with our step by step solution & video walkthrough. Sand Loop 100 tips and guide.
Play Sand Loop Now
Experience the puzzle challenge firsthand
Game Screenshots
Sand Loop Level Guides
Sand Loop Level 100: Complete Strategy & Walkthrough Guide
Level Overview & Core Mechanics
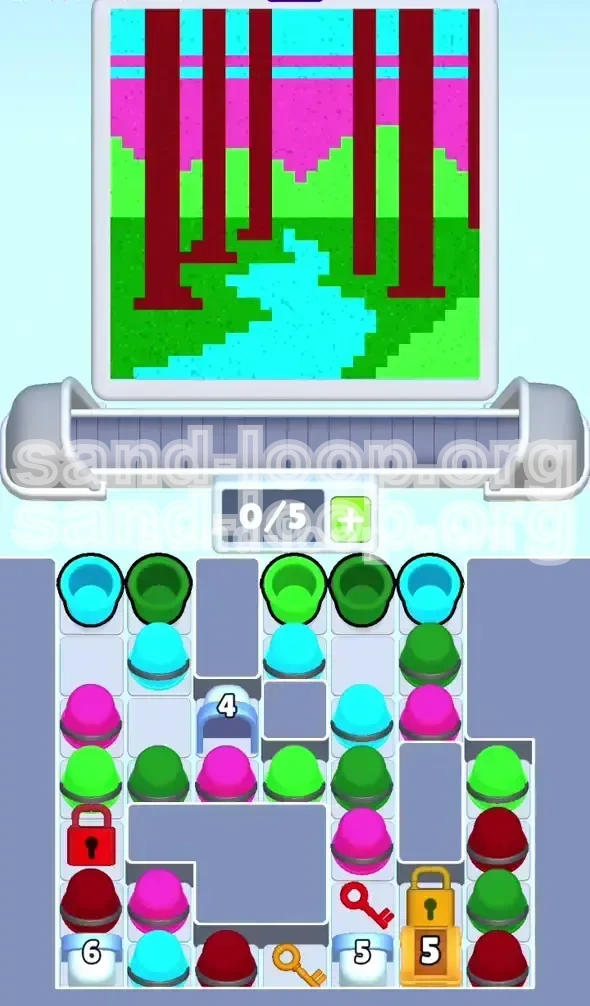
Sand Loop Level 100 acts as the final gatekeeper for the game's primary chapter, testing your ability to manage logistics rather than just colors. Unlike previous levels where cups were readily available, this level introduces a heavy reliance on unlocking mechanics and stack management. The visual landscape is split vertically: massive cyan skies and rivers in the upper center, grounded by dark green and lime grasslands at the bottom. Intersecting these are thin, unforgiving maroon pillars that will punish any lack of precision.
Visual Analysis of the Canvas
Before loading a single cup, analyze the canvas distribution. Approximately 40% of the canvas requires Cyan (Sky/River), while 30% is dedicated to the dual-green zones (Grass). The Magenta strip accounts for roughly 20%, and the Dark Red pillars are a mere 10%. This visual ratio dictates your strategy: you must prioritize Cyan and Green throughput while treating Red and Magenta as "precision pours" that can easily cap out and lock your progress.
The Conveyor Constraint
You start with a standard 5-slot conveyor belt (0/5 capacity). While this seems like ample space, the "stacked" nature of the supply tray means space will vanish quickly. If you fill all 5 slots with the wrong colors, you cannot unblock the necessary cups beneath them. The core mechanical challenge of Level 100 is maintaining a 1-slot "buffer" zone to allow for cup manipulation without stopping the flow of sand to the pour point.
Primary Victory Conditions
To secure victory, you must fill five distinct color meters to 100%: Cyan, Magenta, Lime Green, Dark Green, and Dark Red. The "Lockout" mechanic is your enemy here—pouring even a single second of extra sand into a full color slot will invalidate the run. Success requires not just filling the canvas, but timing the cessation of each color perfectly.
Strategic Priorities
The hierarchy of needs in this level is: Unlocking > Flow > Precision. You cannot win if you don't unlock the Cyan and Magenta stacks early. You cannot win if you jam your belt. You cannot win if you overshoot the thin Red pillars. Keep this hierarchy in mind; it is the filter through which all your decisions should pass.
Why This Level Stalls Players
Most players fail Level 100 because they treat it like a standard puzzle, trying to fill visible colors immediately. They grab the exposed Greens, load the belt, and then realize they have no way to access the locked Cyan and Magenta without letting the timer run out or causing a belt jam. The level is a test of patience; the solution happens in the supply tray, not just at the canvas.
Step-by-Step Walkthrough: The Opening Sequence
Phase 1: The Initial Load (0% - 15% Completion)
Do not touch the locked stacks yet. Begin by loading the exposed Dark Green cup from Position 1 into your conveyor slot. Immediately start the pour. While this first cup is cycling (approx. 2 seconds), load a Lime Green cup into the second slot. Your goal here is to establish a "rhythm base" using the colors that are already accessible. Do not fill slots 4 and 5 yet; keep them empty for the upcoming unlock phase.
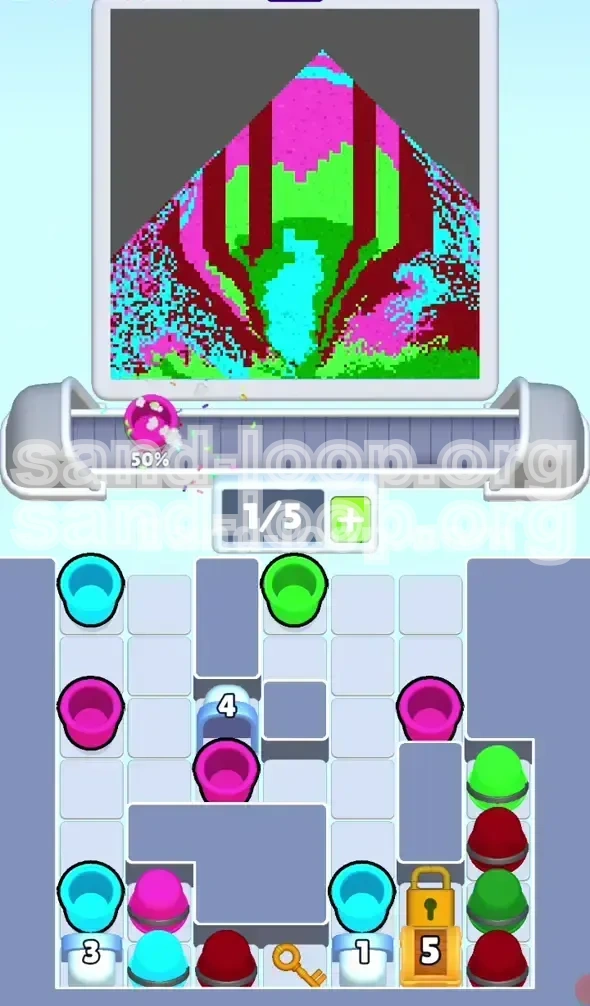
Phase 2: The Great Unlock (15% - 25% Completion)
While your initial greens are pouring, shift your focus to the supply tray. Position 6 holds the Cyan but is locked. Position 5 holds the Magenta but is buried under a stack. You must use the wrench/key mechanic found in the tray to unlock Position 6 first. Once unlocked, drag the Cyan cup into slot 3. Now, dig into the stack at Position 5 to reveal the Magenta cup and load it into slot 4. You should now have a belt order resembling: Green -> Green -> Cyan -> Magenta -> [Empty].
Phase 3: Establishing the River Flow (25% - 50% Completion)
Once Cyan is on the belt, it becomes your workhorse. The Cyan river and sky are the largest features of the canvas. Allow the Cyan cups to pour continuously. You will notice the Cyan meter climbing rapidly. Your job now is to feed the beast. As soon as a Cyan cup pours and leaves the belt, replace it with another Cyan or a Green if the Green meter is lagging. Do not worry about Magenta or Red yet; they are smaller zones and can wait.
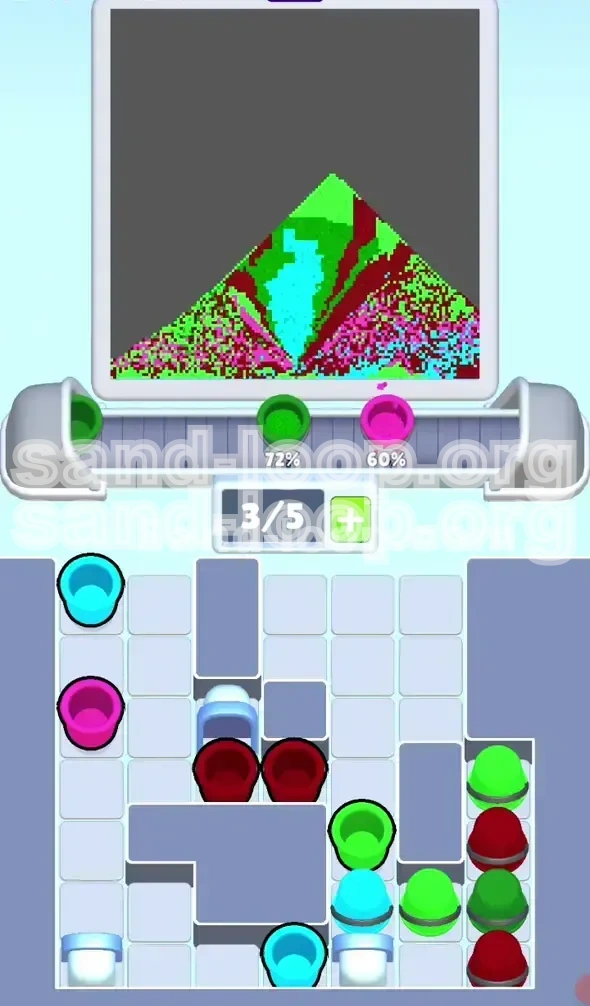
Phase 4: The Mid-Game Balancing Act (50% - 75% Completion)
This is the danger zone. Your Cyan and Green meters will likely be hitting the 80-90% mark. You must stop loading these colors. If you continue pouring Cyan at 85%, you will fail. Shift your loading strategy immediately to Magenta and the remaining Greens. The "1-Slot Gap" rule is critical here—always leave one slot open so you can shuffle cups if a meter fills up unexpectedly.
Phase 5: The Scavenger Hunt for Red (75% - 90% Completion)
By now, the big zones are full. You will likely be left with Dark Red and Magenta hovering around 50-60%. Dark Red is trapped in the tray behind other cups or in the remaining stacks. Dig it out now. Because the Red zones are thin vertical pillars, they require very little sand. Load one Red cup, pour for 2 seconds, then pause. Check the meter. It should jump significantly. Do not let a full Red cup cycle automatically; it will almost certainly overfill.
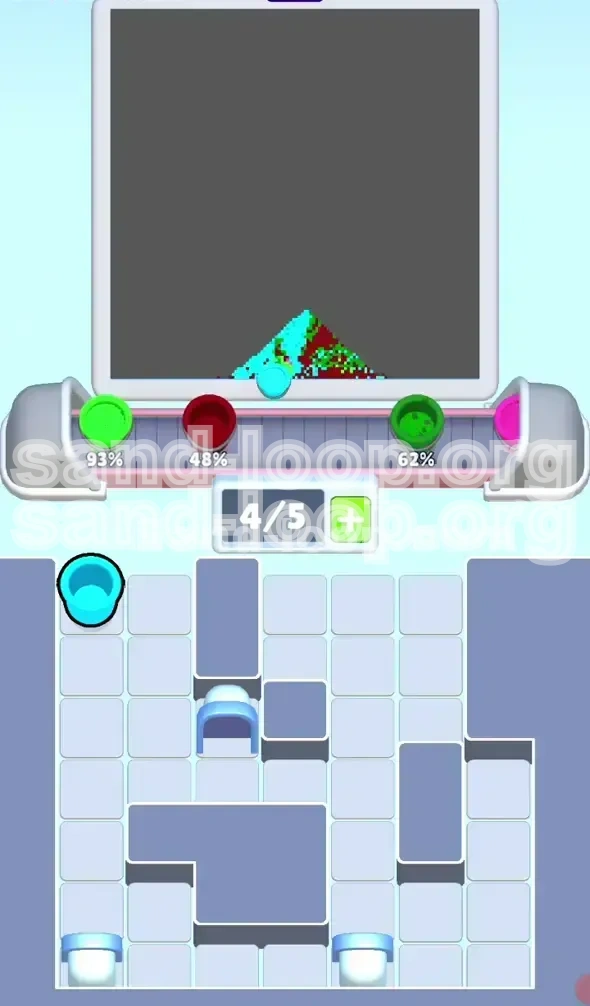
Phase 6: The Final 10% (90% - 100% Completion)
This is the "Micro-Management Phase." All colors are likely sitting at 90-95%. Do not trust auto-pours. Load a cup, tap to pour for 0.5 seconds, tap to stop, check the meter. Repeat. Treat the conveyor like a surgical instrument. The last 5% of Sand Loop 100 is about willpower—resisting the urge to just let it flow and instead manually controlling every grain of sand.
Color Order & Processing Logic
Priority 1: Cyan (The Base Layer)
Cyan is processed first and most aggressively. It covers the sky and the central river, acting as the backdrop for the entire level. You want to get Cyan to roughly 80% capacity before you seriously slow down its production. If you finish Cyan too late, you won't have the belt space to manage the smaller, trickier colors.
Priority 2: Dark Green & Lime Green (The Fillers)
These are your "buffer" colors. When you are unlocking other cups or waiting for a slot to clear, keep the Greens flowing. They cover a large area and are more forgiving than the Red or Magenta. Use Dark Green to keep the conveyor belt moving and your time bonus alive while you plan your next move for the rarer colors.
Priority 3: Magenta (The Bridge)
Magenta connects the sky and the ground. It is a medium-sized strip, so it requires a moderate amount of sand. Process Magenta in the middle of the level (around the 40-60% mark). Do not leave it for the very end, or you will find yourself frantically trying to fill a medium-sized zone while running out of belt space.
Priority 4: Dark Red (The Finisher)
Dark Red is dead last. The vertical pillars are visually striking but cover very little surface area compared to the river or sky. Processing Dark Red too early is the number one cause of failure. It should be the very last color you top off, usually done in short, controlled bursts to avoid the dreaded overshoot.
The "Tap-Stop" Technique
For all colors, but especially Red and Magenta, utilize the Tap-Stop method. Instead of letting the cup pour until empty, tap the pour icon, then tap it again to stop the flow. This gives you absolute control over the percentage gain. For Red, try to gain only 5% per pour cycle.
Managing Color Transitions
Never switch abruptly from one color to another without checking the meters. If you are pouring Cyan and switch to Red, but Cyan was at 95%, you might accidentally come back to Cyan and overshoot while you were distracted. Always ensure a color is "safe" (below 90%) before shifting your primary focus to another.
Key Tips for Level 100 Mastery
Tip 1: The "Slot 5" Buffer
Keep your 5th slot empty whenever possible. This open slot acts as a "breathing room" for your conveyor logistics. If you accidentally unlock a cup you didn't want, or if you need to shuffle a stack, that empty slot prevents a deadlock. Filling all 5 slots creates a rigid system that breaks the moment you make a single error.
Tip 2: Pre-Loading Strategy
While a cup is pouring from Slot 1, use that travel time to dig through the stacks in the supply tray. Do not wait until the belt is empty to look for the next cup. The moment you pour a Cyan, start looking for the next Magenta or Red. Efficiency in the tray is just as important as efficiency at the canvas.
Tip 3: Watch the Progress, Not the Art
It is tempting to look at the beautiful canvas filling up with color, but the UI progress bars are your only truth. Sometimes the canvas looks full but the meter is only at 90%. Trust the numbers. If the Cyan bar says 90%, stop pouring Cyan, even if the river looks like it has a few bald spots.
Tip 4: Handling "Stacked" Unlocks
When unlocking Position 5 (Magenta), remember that you might need to move the top cup to a temporary slot on your belt to access the bottom one. This is why the "Slot 5 Buffer" is essential. If you have to move a Green cup out of Position 5 to get to the Magenta, put that Green in Slot 5, grab the Magenta, and then deal with the Green.
Tip 5: Recovery from "Bad Loads"
If you load a Dark Red cup by mistake when you needed Green, do not panic. Do not immediately reload and try to overwrite it. Instead, let the belt cycle. If you can, pause the game (if available) or just prepare to load the correct color immediately after the mistake passes the pour point. One bad cup won't fail the level; panic-loading three wrong cups will.
Common Mistakes & How to Fix Them
Mistake 1: The "Red Overshoot" Disaster
Players often see the Red pillars and assume they need as much sand as the Blue river. They load Red early and let it pour for 5 seconds. Suddenly, the Red meter locks at 100% while everything else is at 40%. The Fix: Red is thin. Treat it like a precious resource. Pour it in 1-second intervals. If you see the Red meter climbing faster than the Green meter, you are pouring too fast.
Mistake 2: Ignoring the Lock Icons
New players often waste time tapping on the locked slots (Position 1 and 6) hoping they will open. The Fix: Look for the "Key" or "Wrench" icon hidden under the stacks in the central positions (usually Position 4 or 5). You must manually drag this tool to the lock to open it. It is not automatic.
Mistake 3: Filling the Belt Too Early
Loading 5 cups immediately gives a sense of control, but it eliminates your flexibility. The Fix: Start with 2 or 3 cups max. Let the rhythm of the pour dictate your loading speed. A slower start prevents the "Logistics Jam" where you have the right color on the belt but it's 3 cups away from pouring, causing you to overfill while waiting.
Mistake 4: Neglecting the Small Colors
It is easy to focus on Cyan and Green because they are big. Suddenly you realize you are at 90% overall completion, but Lime Green is only at 20%. The Fix: Every 10-15 seconds, do a "Status Check." Look at the *lowest* meter. That is your bottleneck. Go fill that specific color immediately.
Mistake 5: Relying on Visual Estimation
Guessing "that looks like enough" is a trap. The Fix: The game's hitboxes for color filling are precise. A pixel-thin line might need 5% more sand to register as complete. Always wait for the distinct "click" or meter stop before declaring a color finished.
Mistake 6: Forgetting to Clear the Tray
Sometimes you unblock a cup, and the previous cup doesn't disappear; it just sits there blocking the slot. The Fix: You must actively drag these "waste" cups out of the way (usually back into a holding slot or onto the belt if they are useful) to access the cups buried beneath them. The tray does not auto-clear in Level 100.