
Level 104
HARDHow to solve Sand Loop level 104? Get instant solution for Sand Loop 104 with our step by step solution & video walkthrough. Sand Loop 104 tips and guide.
Play Sand Loop Now
Experience the puzzle challenge firsthand
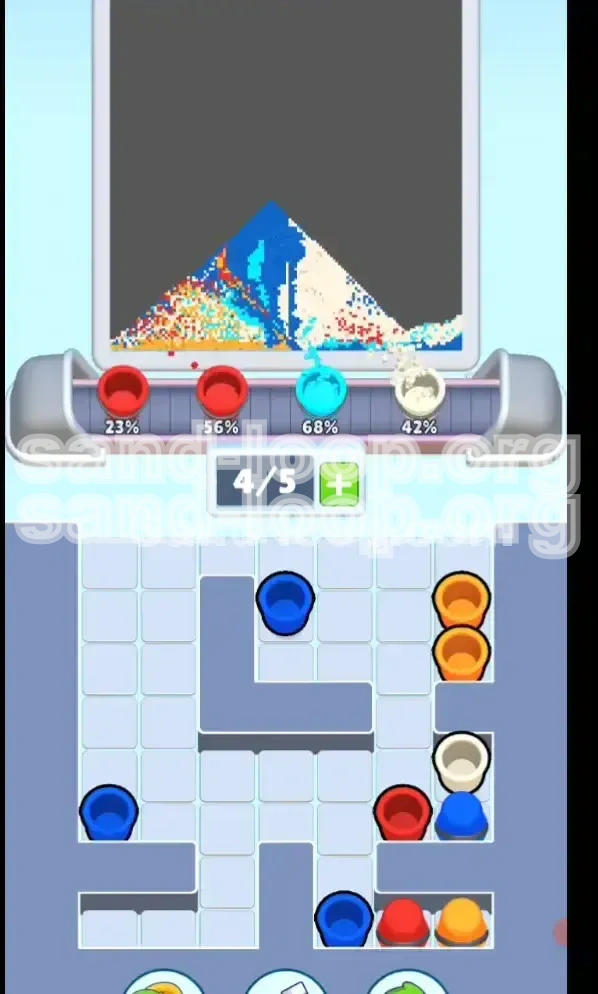
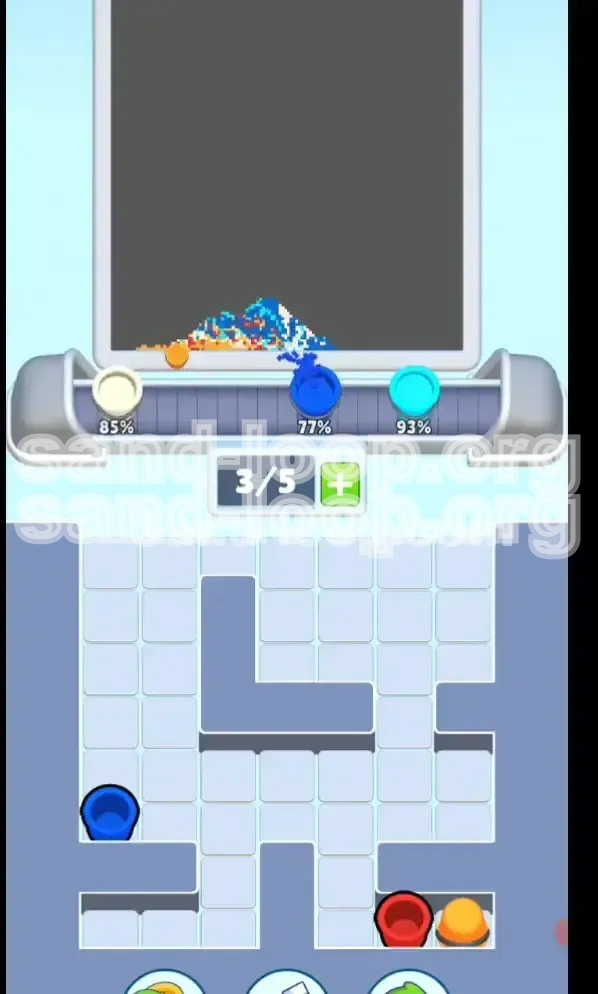
Game Screenshots

Sand Loop Level Guides
Sand Loop Level 104 Walkthrough: Mastering the Blue-Necked Goose
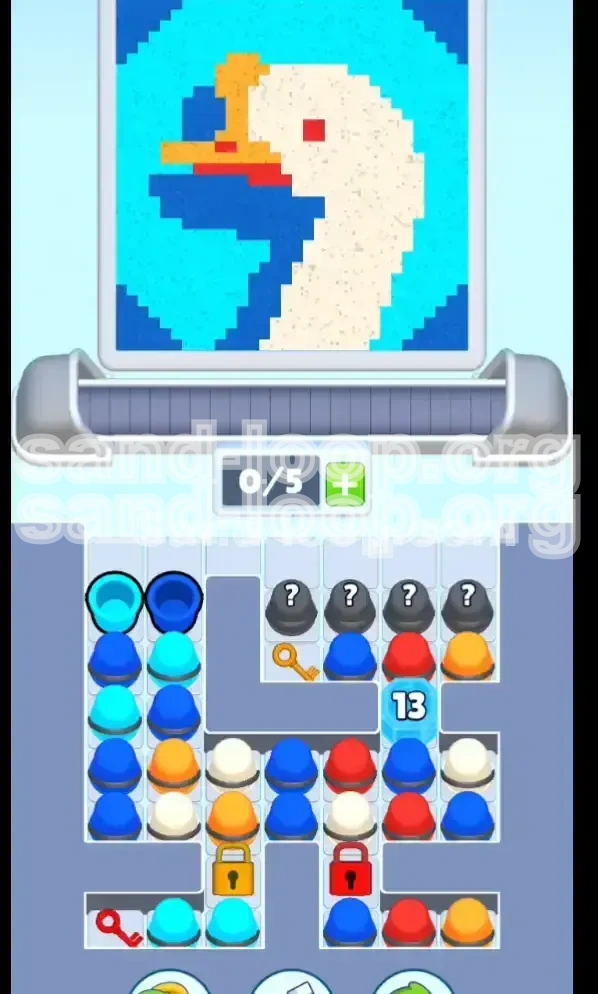
Welcome to the definitive guide for Sand Loop Level 104. This stage is a significant difficulty spike that tests your ability to manage resources under pressure. The objective is to paint a pixel-perfect portrait of a White Goose featuring a dark blue neck and a vibrant yellow beak. However, the challenge lies not just in the art, but in the logic required to unlock your resources.
This level is a hybrid of "Time Attack" and "Logic Puzzle." You are racing against a clogged conveyor belt while trying to solve a key-and-lock problem that is buried under debris. Most players fail because they get distracted by the shiny Ice Block on the right, ignoring the critical setup required on the left. This guide will break down exactly how to clear the path, manage the queue, and paint the Goose without running out of moves.
Visual Analysis: The Goose Canvas
Before you tap a single cup, analyze the target image. The canvas is divided into four distinct color zones. Understanding the volume of each color is crucial for planning your cup usage:
- Cyan (Light Blue) - The Background (Approx. 45%): This is the largest area. You are flooded with Cyan cups, but they are mostly trapped in the left stack. This is your "spam" color—use it to clear space whenever the nozzle is over empty background areas.
- Dark Blue - The Neck & Head (Approx. 25%): Plentiful in the left stack. You will process this immediately after Cyan.
- White - The Face (Approx. 20%): This is your mid-game resource. These cups are locked behind the Ice Block on the right. You cannot touch the face until the ice is shattered.
- Red & Orange - The Beak (Approx. 10%): These are rare and dangerous. The distribution is tight. If you waste these on the wrong pixels, or—worse yet—use them to break the ice, you will fail the level. You must hoard these for the final touches.
Primary Objective: Unlock the Flow
Your main goal is to prevent a deadlock (where the conveyor stops moving because all 5 slots are full of unusable cups). To do this, you must follow a strict unlock order:
- Phase 1: Drain the Left Stack to expose the Red Key.
- Phase 2: Chip away at the Ice Block to access White cups.
- Phase 3: Retrieve and use the Red Key to unlock the final supply.
Secondary Objective: Precision Painting
Once the locks are open, the challenge shifts to accuracy. The beak is small and surrounded by white and blue feathers. One misplaced Red cup can ruin the contrast. You must exercise patience and wait for the nozzle to align perfectly with the target pixels.
Winning Condition
To achieve 3 stars or simply complete the level, you must finish with the nozzle clearing the final pixel. Efficiency is key. Avoiding "spam tapping" random cups just to clear slots is the difference between a win and a "Game Over."
Step-by-Step Instructions: The Execution Phase
This section details the exact sequence of moves required to navigate Level 104. Do not deviate from this order until the late game.
Step 1: The "Left Stack" Aggression (Turns 1-15)
As soon as the level starts, your eyes should be on the left-most column. Do not look at the Ice Block yet. The conveyor belt will feed you cups from the bottom left.
- Action: Rapidly tap the Cyan (Light Blue) and Dark Blue cups in the left slot.
- Target: Aim the nozzle at the background (Cyan) and the neck (Dark Blue).
- Why? You need to burn through the top 6-8 cups of the left stack. Beneath them lies the Red Key. If you don't clear these now, they will clog your slots later when you need to process the Ice Block.
- Tip: If the nozzle moves over the neck or head, prioritize Dark Blue over Cyan to maximize progress.
Step 2: Managing the "Mystery" Cups (Mid-Game Setup)
While draining the left stack, you will notice "Mystery Cups" (marked with a ?) appearing in the top middle slot.
- Action: Tap these whenever the nozzle is over a "safe" zone (like the finished background) or if the color matches a large unpainted area.
- Risk Assessment: These cups are low-risk. Using them helps keep the conveyor belt moving.
- Hidden Bonus: The Gold Key is hidden beneath these Mystery Cups. By clearing them, you naturally progress toward retrieving the Gold Key without needing to dedicate specific turns to it.
Step 3: The Ice Block & White Cup Strategy
Now, shift your focus to the right side. You will see a block of ice labeled "13". This is a health bar.
- Action: Use any color cup (except Red/Orange if possible) to chip away at the ice. Every tap reduces the count by 1.
- The Strategy: The nozzle will likely hover over the goose's face during this phase. Since the face is White, and the White cups are trapped inside the ice, you are temporarily "painting blind."
- Workaround: Use this time to clear your conveyor slots. If you have excess Blue cups, tap them while the nozzle is on the Blue neck to free up slot space for the incoming White cups.
- Result: Once the count hits 0, the ice shatters, releasing a cache of White cups.
Step 4: The Gold Key Retrieval
By the time the Ice Block is breaking, you should have cleared enough Mystery Cups to reveal the Gold Key.
- Action: Tap the Gold Key the moment it is accessible.
- Effect: This unlocks the Gold Lock located in the middle-left section of the board.
- Benefit: Unlocks a fresh batch of Cyan and Orange cups. This is crucial because your conveyor is likely getting clogged with unusable colors from the right stack. Opening this lock acts as a "pressure valve" for your inventory.
Step 5: The Red Key Sprint (Critical Phase)
This is the most dangerous moment in the level. You are likely running low on empty conveyor slots. You must return to the left stack.
- Current State: You drained the left stack in Step 1, but you likely left a few cups at the very bottom.
- Action: Clear any remaining Cyan/Dark Blue cups resting on top of the Red Key.
- The Tap: Tap the Red Key.
- Immediate Aftermath: This unlocks the Red Lock on the bottom right. This releases the final specific colors you need but floods your tray. Ensure you have at least 1 empty slot before tapping this key!
Step 6: Detailing the Beak and Face
The board is now fully open. The hard work is done. Now it's about precision.
- The Face: Use the newly released White cups to fill in the remaining pixels of the goose's face and neck.
- The Beak: Wait for the nozzle to align perfectly with the beak. Use the Orange and Red cups sparingly.
- Final Polish: Use any remaining Cyan cups to fix background errors.
Color Order and Processing Guide
Success in Level 104 depends on processing colors in the correct "burn order." If you process rare colors too early, you will not have them when you need them for the details. Here is the priority hierarchy:
Priority 1: Cyan (The Bulk Clearer)
Cyan is your most abundant resource. It makes up nearly half the painting.
- Usage: Use Cyan aggressively to clear the conveyor belt.
- Timing: Early to Mid-game.
- Note: Do not hold onto Cyan cups. If the nozzle is anywhere near the background, tap them immediately. Holding them blocks slots for the rarer Red and Orange cups.
Priority 2: Dark Blue (The Structure)
Dark Blue defines the shape of the goose.
- Usage: Process these immediately after Cyan.
- Timing: Early game.
- Synergy: Since Cyan and Dark Blue are grouped in the left stack, you will often process them simultaneously. This dual-stream processing is what allows you to reach the Red Key.
Priority 3: White (The Locked Resource)
White is the "gatekept" color.
- Usage: Do not attempt to "save" White cups you see in the tray before the ice is broken; focus on breaking the ice.
- Timing: Mid-game (Post-Ice).
- Strategy: Once the ice shatters, White becomes your new "spam" color to clear the board and finish the face.
Priority 4: Orange & Red (The Precious Commodities)
These are the "Gold Dust" of this level. Extremely low drop rate.
- Usage: NEVER use these to break the Ice Block. This is the #1 cause of failure.
- Timing: Late game (Final details).
- Storage: If your slots are full and you have a Red/Orange cup, it is better to tap a Cyan cup (even if it paints over a slightly wrong area temporarily) than to waste the Red/Orange cup. You must have Red/Orange available when the nozzle hits the beak, or you cannot finish the level.
The "Ice Block" Exception
The Ice Block requires 13 hits to break.
- What to use: Ideally, use Mystery Cups or excess Cyan/Dark Blue cups that don't match the nozzle position.
- Why: It is better to "waste" a Blue cup on the ice than a Red cup. You have 50 Blue cups and only 3 Red cups. Protect your inventory.
Key Tips and Strategic Advice
These tips are collected from high-level play strategies. Applying these will turn a frustrating retry-loop into a smooth victory.
Slot Management Mathematics
You have 5 available slots in your conveyor tray. A "Deadlock" occurs when all 5 slots are full, and none of the cups match the current nozzle position.
- The 4-Slot Rule: Try to keep at least 1 slot empty at all times during the first half of the level. This buffer allows you to catch new cups from the left stack without being forced to make a bad move.
- The "Tap to Clear" Philosophy: If you are stuck with 5 full slots, look at the nozzle. Is it over Blue? Tap a Blue cup, even if that Blue area is already mostly painted. Over-painting is better than a Game Over.
Anticipating the Nozzle Movement
The nozzle moves in a predictable pattern (usually left-to-right, then down a row).
- Look Ahead: If the nozzle is currently on the Beak (Red zone) but moving towards the Neck (Blue zone), do not panic and tap a Red cup if you have one. Wait 2 seconds. The nozzle will move to Blue, and you can use your abundant Blue cups instead. This "temporal patience" saves rare colors for when the nozzle loops back around.
The "Key Delay" Tactic
Just because a Key is exposed doesn't mean you must tap it instantly.
- Scenario: The Red Key is exposed, but your nozzle is currently on a White face pixel, and your tray is full of White cups.
- Mistake: Tapping the Red Key immediately adds a Red Cup to your tray. You now have 6 cups total (5 in tray + 1 incoming). You are forced to tap a White cup.
- Better Play: Clear your White cups first. Empty your slots. Then tap the Red Key. This ensures you have space to handle the new influx of cups from the unlocked lock.
Utilizing the Mystery Cups
The "?" cups are not random; they are usually the color you currently need or a key component.
- Tip: If you are unsure what to do, tap a Mystery Cup. In Level 104, they are rigged to help clear the path to the Gold Key. They are rarely a "bad" color.
Understanding the "Danger Zones"
The Beak is the danger zone.
- The Trap: The Beak is small. The nozzle spends very little time there.
- The Strategy: You effectively have a small "window" of opportunity to paint the beak. If you miss it, the nozzle moves to the White face. If you use your Red/Orange cups on the White face, you fail. Wait, wait, and wait for the nozzle to center on the beak pixels.
Speed Running the Start
The first 10 moves of Level 104 are scripted.
- Action: Tap the left stack as fast as humanly possible. There is no strategy here, just speed. The faster you clear the left stack, the faster you get the Red Key. The faster you get the Red Key, the less likely you are to get clogged by the Ice Block mechanics.
Common Mistakes to Avoid
Learn from the errors of others. Level 104 is designed to trick you into making these specific mistakes.
Mistake 1: Ignoring the Left Stack
The Ice Block on the right is designed to draw your attention. It has a countdown number and looks like an immediate obstacle.
- Why it fails: If you focus only on the right, the left stack keeps churning out Cyan/Blue cups. Your 5 slots will fill up with Blue. You will then ignore them to break the ice. Suddenly, you have 5 Blue cups and the nozzle is on the Red Beak. Deadlock.
- Correction: Force yourself to look left first. The Red Key is the bottleneck.
Mistake 2: Breaking Ice with Rare Colors
It is tempting to use a Red cup to knock that Ice Block health from "2" to "1."
- Why it fails: That Red cup might be the only Red cup you get for 30 turns. When you finally unlock the beak area, you will have no paint left.
- Correction: Only use Cyan, Dark Blue, or Mystery cups to break the ice.
Mistake 3: Premature Key Usage
Seeing a Key triggers a "collect now" reflex in many players.
- Why it fails: Tapping the Gold Key while your tray is chaotic adds randomness to a controlled system. It can spawn a color you don't need yet, clogging the slot you desperately needed for a different color.
- Correction: Only tap keys when your nozzle position is safe and your slots have room.
Mistake 4: Painting Over the Beak
This is a tragedy of timing.
- Why it fails: You have an Orange cup in hand. The nozzle is next to the beak, on the White face. You get impatient and tap the Orange cup. You now have an orange blotch on the white face. To fix it, you need a White cup. But by the time you get a White cup, the nozzle has moved, and you can't fix the error.
- Correction: Discipline. If the nozzle is not exactly on the target pixel, do not fire the rare color.
Mistake 5: Hoarding Common Colors
Some players try to "save" Cyan cups for the very end.
- Why it fails: The end of the level is about details. You need those slots open for Red and Orange. Saving Cyan clogs your logistics.
- Correction: Cyan is trash currency. Spend it early and often.
Stuck Solutions: Troubleshooting Guide
So you followed the steps, but you are staring at a board that refuses to move. Here is how to unstick yourself.
Scenario: "The Right-Side Deadlock"
Symptoms: The Ice Block is gone, but you have 5 cups in your tray, and none match the nozzle (which is stuck on the White Face). You have 3 Blue cups and 2 Red cups.
Solution: You are in the "Wrong Color Trap."
- Do not tap the Red cup. It will paint over the face.
- Tap a Blue cup. Yes, it will paint over the White face (turning it blue). This seems bad, but it clears a slot.
- Now you have 4 cups. The conveyor moves.
- Hope for a White cup to enter the tray.
- Use the White cup to paint over the Blue mistake you just made. You are back to neutral, but you have cleared the deadlock.
Scenario: "The Red Key Burial"
Symptoms: You need the Red Key, but it's buried under 10 cups, and your tray is full. You can't tap any cups because the nozzle is in a weird spot.
Solution: You must create a "Garbage Slot."
- Identify the most abundant color in your tray (likely Cyan).
- Find a spot on the canvas that is already Cyan.
- Rapidly tap your excess Cyan cups onto this already-finished spot.
- This wastes the cups but clears your tray slots.
- Now, tap the stack covering the Red Key to drain it.
Scenario: "The Missing Beak Color"
Symptoms: The face is done, the neck is done, but the beak is unpainted, and you have no Orange/Red cups left in the tray or visible on the board.
Solution: You likely wasted them on the Ice Block.
- Check the "Mystery Cup" dispenser. Sometimes, late-game Mystery Cups turn into the specific rare color you need.
- If no Mystery Cups are available, check if any "Red Lock" areas remain unpainted. (Unlikely in Level 104, but possible).
- If you are truly out of Orange/Red, the level is mathematically impossible to finish. You must restart. This time, remember: NEVER use Orange/Red on the Ice Block.
Speed Run Tips for Advanced Players
Once you have beaten the level, you might want to optimize your time. Here is how the pros do it.
The "Parallel Processing" Technique
Don't play sequentially (Left side, then Right side). Play both sides simultaneously.
- The Move: Tap a Left Stack cup. While the animation is playing, identify the next cup you need from the Right Stack.
- Timing: Queue up your inputs so that as soon as the nozzle finishes one pixel, you instantly tap the next cup. This shaves seconds off your time.
Pre-Loading the Ice Block
Start breaking the ice before you strictly "need" to.
- The Strategy: If you have a Mystery Cup while the nozzle is on the background, tap it. If it's a color you don't need (like Red), fire it at the Ice Block immediately.
- Benefit: This reduces the "13" count to "8" or "9" passively while you are focusing on draining the Left Stack. By the time you actually focus on the ice, it only takes 2-3 taps to break.
The "Nozzle Prediction" Shortcut
Memorize the nozzle path.
- The Trick: The nozzle usually starts Top-Left, moves Right, drops down, moves Left, etc.
- Application: If you know the nozzle is moving towards the Dark Blue neck, start tapping Dark Blue cups before the nozzle arrives. Have the cup "pre-loaded" in your active finger. As soon as the crosshair turns blue, release. This prevents the "lag" of searching for a cup.
Skip the "Perfect Paint"
For a speed run, 100% accuracy is not required.
- Tip: It is faster to paint a Blue pixel slightly over the border of the neck (touching the white) than to wait 5 seconds for the nozzle to center perfectly.
- Note: Sand Loop is forgiving with edges. You can get away with "bleeding" colors by 1-2 pixels. Use this to your advantage to keep the flow moving.
The "Reset" Metric
Know when to quit.
- The Rule: If you have not broken the Ice Block by the time you have 60% of the background painted, you are too slow. The density of the remaining cups will likely deadlock you.
- Action: Restart immediately. Don't play out a losing hand. A fast restart is faster than a slow, stuck death.