
Level 129
HARDHow to solve Sand Loop level 129? Get instant solution for Sand Loop 129 with our step by step solution & video walkthrough. Sand Loop 129 tips and guide.
Play Sand Loop Now
Experience the puzzle challenge firsthand
Game Screenshots

Sand Loop Level Guides
Level 129 Walkthrough: The Retro "Pac-Style" Challenge
Welcome to Level 129 of Sand Loop. If you have reached this stage, you are likely comfortable with the basic mechanics, but this level introduces a frustrating new variable: high-volume randomness. This stage is not just about painting; it is a logistical puzzle where resource management is just as important as accuracy. The visual subject—a nostalgic yellow character with a distinct purple band—seems simple, but the board layout is designed to choke your supply line and force you into making difficult decisions about what to keep and what to discard.
In this comprehensive guide, we will break down the layering strategy, manage the dangerous "Mystery Cups," and navigate the complex lock-and-key dependencies that define this level. Follow these steps to transform a chaotic mess of grey cups into a clean, high-score completion.
Level Overview and Key Challenges
Before you touch a single cup, you need to understand why this level causes players to fail. It is not the complexity of the art; it is the restriction of access.
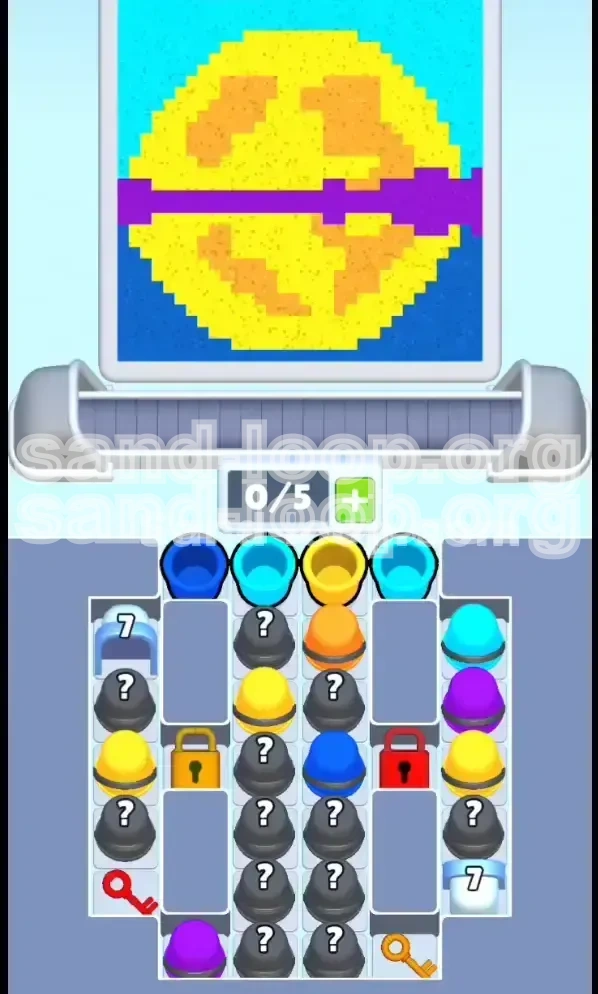
- The "X" Shape Dependency: Unlike previous levels where keys were often on the same side as the locks, Level 129 utilizes a "Cross-Map" dependency. The Red Key (unlocking the Right side) is buried on the Left, and the Gold Key (unlocking the Left side) is buried on the Right. This forces you to constantly zigzag your attention.
- Mystery Cup Overload: Approximately 60% of the center columns consist of grey "Mystery Cups." These are wildcards that can clog your inventory if you aren't careful.
- Layer Sensitivity: The image features a background (Cyan/Blue), a main body (Yellow), shading (Orange), and a foreground stripe (Purple). Painting the background over the foreground, or vice versa, will result in an "Incomplete" rating.
Victory Conditions and Objectives
To achieve a 3-star rating on this level, you must optimize for efficiency. Simply finishing isn't enough if you want to maintain your combo multiplier.
- Accuracy Target: Maintain a 95%+ accuracy rate. This means no "oops" spills where you pour Orange into the Purple zone.
- Ice Management: Clear the number "7" Ice Blocks on the edges within the first 60 seconds. These are blocking your primary color sources.
- Zero Waste: Ideally, you want to finish with an empty buffer. Leaving unused cups on the belt at the end means you wasted time processing them earlier.
Understanding the Color Palette
Let's analyze the paint buckets you will be juggling. Confusing these is the most common cause of failure.
- Cyan & Blue (Background): These form the sky. Cyan is the base, Blue is usually the corner shading. These are your lowest priority colors—don't waste buffer space on them until the foreground is established.
- Bright Yellow (The Body): This is your "meat." You will need more of this than any other color. Prioritize clearing paths to Yellow cups.
- Orange (Shading): This is used sparingly for shadows. It is chemically aggressive to the Yellow; if you pour Orange immediately after Yellow without a gap, you risk muddying the highlight.
- Purple (The Stripe): The "Danger" color. It cuts across the image horizontally. It must be applied with precision timing.
Inventory Management Strategy
Your dispenser has 5 slots. In this level, you should treat it as if it only has 3.
- The 2-Slot Rule: Always keep 2 slots empty at all times. Why? Because when you break a Mystery Cup, you have no control over what comes out. If you have 4/5 slots full and break a Mystery Cup revealing a color you don't need right now, you are stuck with it clogging your machine.
- Early Game: Prioritize breaking Ice Blocks over filling the canvas.
- Late Game: Prioritize clearing the buffer over collecting new cups.
Phase 1: The Setup and Key Acquisition
The first 30% of the level is a race against your own inventory. If you don't unlock the columns quickly, you will run out of moves and be forced to waste costly Mystery Cups.
Step 1: Breaking the Ice (The "7" Blocks)
Look at the far Left and Right columns immediately. You will see Ice Blocks marked with the number 7.
- Action: Scan the top rows of the center board for visible Blue and Cyan cups.
- Execution: Feed these Blue/Cyan cups into the dispenser immediately. Do not save them. Your goal is to shave down the Ice Blocks.
- Tip: Don't worry about painting the canvas perfectly yet. Just chip away at the ice. You need the space underneath to access the keys.
Step 2: The Red Key Priority (Left Side Focus)
The Red Lock is located on the Right Column, but the Red Key is buried deep in the Left Column.
- Strategy: Focus 80% of your attention on the left side initially. You need to drill down through the Mystery Cups and Ice to reach that Red Key.
- Mystery Cup Handling: As you drill down, you will hit Grey Cups. Break them one by one. If the revealed color isn't Red or Yellow (needed for the body), discard it immediately to keep your slots open.
- Why? You cannot access the Gold Key on the right until the Red Lock is gone. The Right side is rich in Gold and Orange, which you need later.
Step 3: The Domino Effect (Getting the Gold Key)
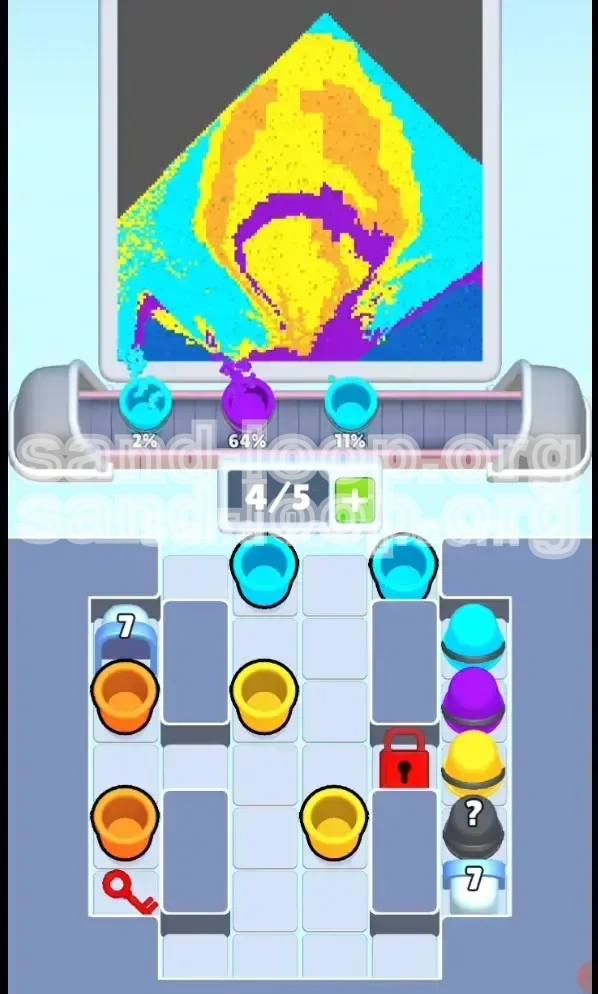
Once you retrieve the Red Key and unlock the Right Column, the board state changes significantly.
- Action: With the Right Side open, scan for the Gold Key. It is usually located near the bottom right.
- Context: While digging for the Gold Key, you will likely uncover a stash of Orange and Purple cups. This is a dangerous moment. Do not start painting with Purple yet! Just secure the key.
- Unlocking the Left: Use the Gold Key on the Gold Lock located on the Left Column. Now the full board is in play.
Step 4: Stabilizing the Buffer
After unlocking both sides, your buffer is likely a mess of random colors from breaking the Mystery Cups during the dig.
- Action: Pause painting. Look at your 5 slots.
- Triage: If you have Purple cups but the nozzle is currently over the Yellow body area, you must discard that Purple cup (let it fall off the belt) or use a "Swap" if you have a power-up. Do not pour it just to get rid of it.
- Goal: Enter Phase 2 with a buffer containing mostly Yellow and Cyan.
Phase 2: The Background and Base Layer
Now that the board is unlocked, we begin the actual painting. The rule of thumb in Sand Loop is Background to Foreground.
Step 5: Establishing the Cyan Sky
The canvas is a giant circle, but the space around it is sky.
- Timing: Wait for the nozzle to move to the top-left or top-right corners (the background areas).
- Execution: Pour Cyan to fill the general sky area. Since Cyan is abundant, you can be fairly aggressive with this.
- Edge Work: Be careful near the edges of the yellow circle. If the nozzle is drifting towards the circle's edge, stop pouring. You don't want Cyan bleeding into the Yellow.
Step 6: Darkening the Corners with Blue
The Blue paint is used for shading the sky, typically in the far corners.
- Gradient Check: Look closely at the canvas preview. The Blue usually creates a vignette effect.
- Technique: Alternate between Cyan and Blue. A good rhythm is Cyan-Cyan-Blue. This creates a smooth transition.
- Warning: Blue is often a "rare" drop in this level compared to Cyan. Don't waste it on areas that are strictly Cyan. Save your Blue cups specifically for when the nozzle hits the deep corners.
Step 7: Preparing for the Yellow Body
While painting the background, you need to be loading your buffer with Yellow.
- Stockpiling: Try to have 2 Yellow cups ready before the nozzle enters the main circle area.
- Clean Up: Ensure the background is 100% finished before moving on. Once you start painting the Yellow body, going back to fix Cyan spots is very difficult without splashing Yellow on the sky.
Phase 3: The Main Event (Yellow and Orange)
This is the core of the level. The nostalgia-inducing yellow circle requires precision, especially where it meets the "shading" colors.
Step 8: Filling the Bright Yellow Body
The Yellow is the largest block of color. This is your "safe zone."
- Aggressive Filling: Once the nozzle is inside the circle, let the Yellow flow. The hit-box for the Yellow body is very forgiving compared to the shading.
- Mystery Cup Risk: This is when those Mystery Cups in the center columns might start refreshing into new colors. If you break a cup and it's Yellow, great. If it's Purple, and your nozzle is on Yellow, just discard it. Don't risk the contamination.
Step 9: The "Orange Shadow" Technique
The Orange shading usually appears on the sides or bottom of the circle (depending on the specific art variant in this level).
- The Bleed Risk: Orange is very similar in hue to Yellow but distinct in value. If you pour Orange too soon after Yellow, the game might register it as "Yellow mixed with Orange," giving you a dirty, brownish edge.
- The Gap Method: When switching from Yellow to Orange, wait for the nozzle to move. If you have a Yellow cup followed immediately by an Orange cup in your buffer, try to waste a split second or use a filler cup in between if possible.
- Precision: The Orange areas are often smaller pixels. Use short bursts of tap (tap-tap-hold) rather than a continuous pour to control the spread.
Step 10: Managing the Inventory Overflow
During Phase 3, you will likely have an influx of Purple cups from the center mystery stack.
- Do Not Hoard: If you have 3 Yellow cups and 2 Purple cups, and the nozzle is in a Yellow zone, do not pick up more Purple.
- Feed the Beast: You must keep the conveyor belt moving. If you stop picking up cups, the flow stops. You have to balance "picking up to keep the game moving" with "picking up what you need."
Phase 4: The Finale (Purple Stripe and Cleanup)
The final stretch is where most combos are broken. The Purple Stripe is the ultimate test of patience.
Step 11: Timing the Purple Stripe
The Purple stripe cuts horizontally across the image. It likely overlays the Yellow body and the background.
- Wait for it: Do not activate your Purple cups until the nozzle is exactly on the purple line.
- The Danger: If you pour Purple while the nozzle is slightly above (on the face) or below (on the chest), you ruin the clean Yellow.
- Strategy: If you see Purple cups coming but the stripe is still 10 seconds away, you have two choices: 1) Let the cups pass and pick them up later (risky if they fall off the belt), or 2) Pick them up and hold them, ensuring you have zero other cups in the buffer to accidentally pour instead.
Step 12: Addressing the "Mystery Cup" Leftovers
At the very end, the board will be mostly painted, but you might have unpainted pixels hidden behind Mystery Cups.
- Scan Mode: Ignore the big painted areas. Look at the greyed-out areas on the top screen map.
- Targeted Breaking: Break Mystery Cups only if they are blocking unpainted sections. If a Mystery Cup is blocking a section that is already 100% painted, leave it alone. You don't get points for repainting finished work.
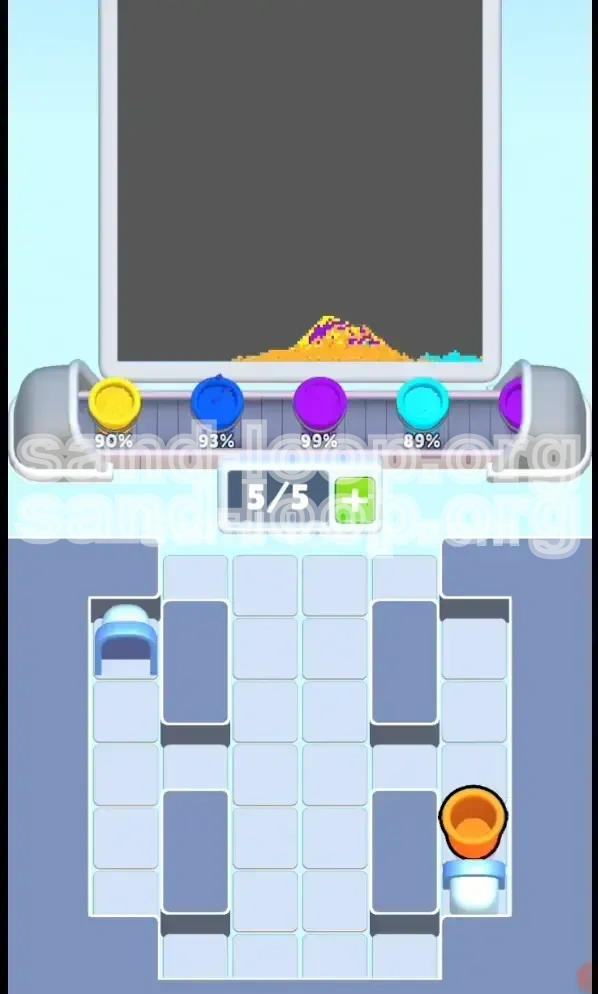
Step 13: Final Polish and Percentage Check
You are aiming for 100% completion.
- The Corner Check: Zoom in (visually) on the four corners of the image. Did you miss a single pixel of Cyan or Blue?
- The Stripe Check: Ensure the Purple connects perfectly from left to right. No gaps.
- Buffer Flush: Empty your remaining cups. If you have extra Yellow and the level is basically done, pour it onto the largest Yellow area to finish the level and trigger the "Level Complete" animation.
Advanced Tactics and Speed Run Tips
Once you have mastered the basic flow, use these tips to improve your time and score.
Speed Run Strategy: The "Rapid Fire" Method
If you are trying to top the leaderboards, you cannot afford to wait for the nozzle.
- Pre-loading: Memorize the color order. Since you know the Cyan comes first, have 3 Cyan cups in your buffer before the level even properly starts (by picking them up instantly during the "Ice Phase").
- Mystery Math: If you are 100% certain a Mystery Cup contains a color you need (based on the probability of remaining colors), break it early. In this level, Mystery Cups are weighted towards Purple and Orange in the mid-game.
Common Mistakes to Avoid
Don't let these simple errors cost you a star.
- The "Muddy Middle": This happens when players mix the Orange shading into the Yellow body. Always let the nozzle clear the Yellow zone before initiating Orange.
- Lockout: Forgetting to pick up the Red Key first. If you try to clear the right side first, you will stall out. Remember: Left Side (Red Key) -> Right Side (Gold Key) -> Win.
- Hoarding Mystery Cups: Never hold more than 1 Mystery Cup in your buffer. If you break it and get a bad color, you want an empty slot to swap it into, or the ability to discard it without blocking a good cup behind it.
What to Do If You Get Stuck
Sometimes RNG (Random Number Generation) just gives you bad luck.
- Stuck Scenario: "I need Yellow, but only Mystery Cups are spawning."
- Solution: Stop painting. Stop breaking cups. Wait for the conveyor belt to refresh. The game recycles colors. If you force-feed bad Mystery Cups, you will just clog your buffer with garbage. Wait 10-15 seconds; the needed Yellow cups will cycle back around.
- Stuck Scenario: "I can't find the last pixel."
- Solution: It's usually a corner pixel or a single pixel inside the Purple stripe that you missed. Look at the silhouette on the top screen. If the silhouette is solid, you are missing something.