
Level 142
HARDHow to solve Sand Loop level 142? Get instant solution for Sand Loop 142 with our step by step solution & video walkthrough. Sand Loop 142 tips and guide.
Play Sand Loop Now
Experience the puzzle challenge firsthand
Game Screenshots
Sand Loop Level Guides
Sand Loop Level 142: Comprehensive Walkthrough Guide
Understanding the Golden Castle Challenge
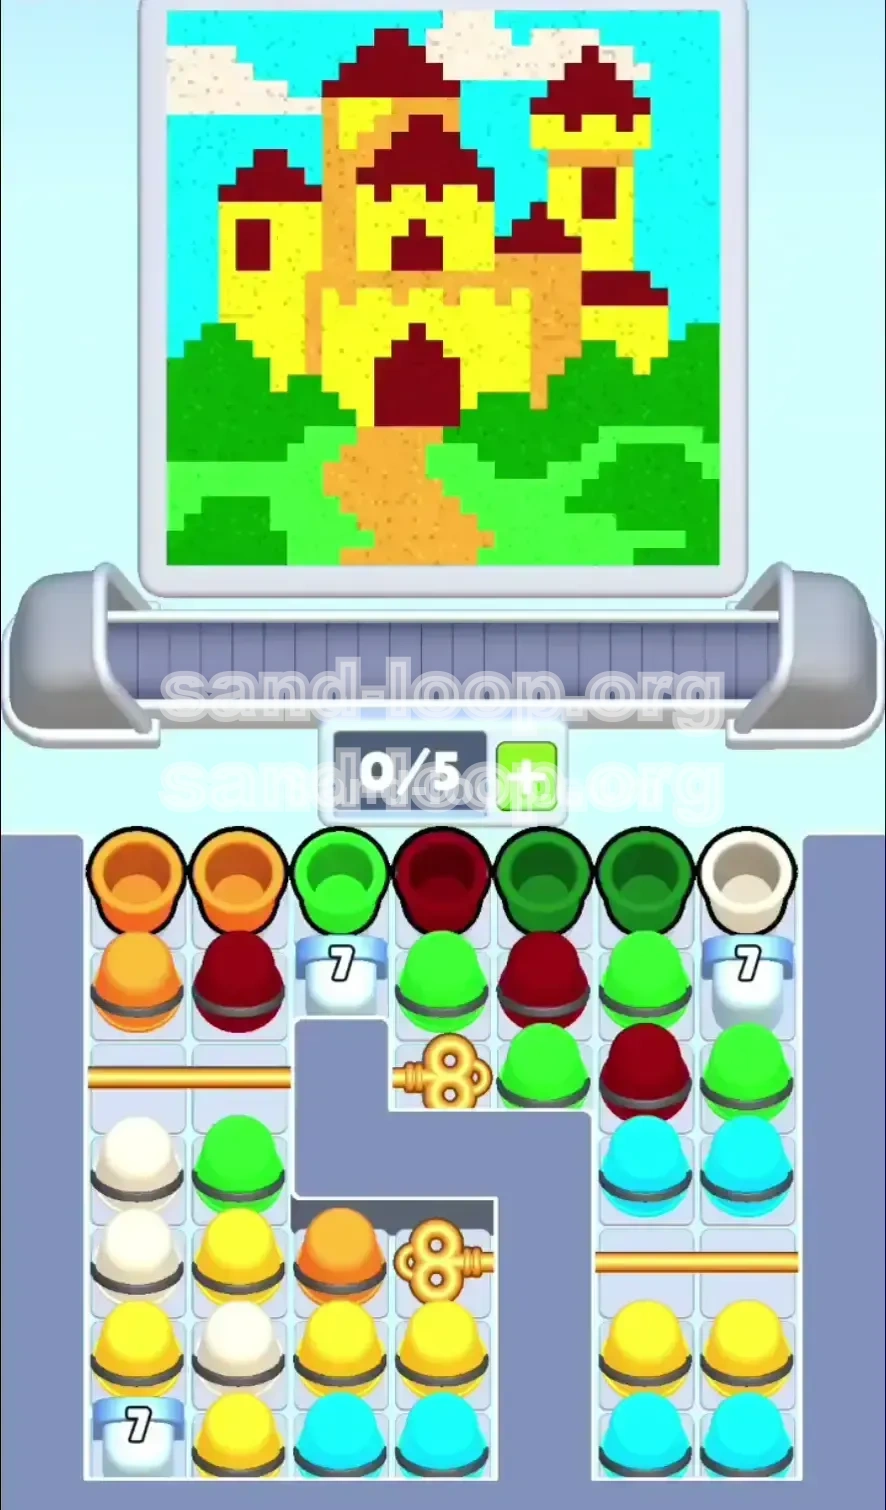
Sand Loop Level 142, known as the "Golden Castle," is a deceptive puzzle that tests your ability to manage resources under strict constraints. Unlike standard levels where you can simply tap matching colors as they appear, this level introduces a dependency chain involving "Golden Keys" that lock away essential colors. The visual of a medieval castle is vibrant, featuring a mix of Yellow (walls), Green (terrain), Dark Red (roofs), and Cyan (sky). However, the Cyan and significant portions of Yellow are inaccessible until specific keys are retrieved.
Level Mechanics and Constraints
The primary mechanic in this level is the "Key Unlocking" system. The paint tray is divided into sections protected by Gold Bars. You are limited to a 5-slot conveyor capacity. If you fill these slots with cups that do not match the current nozzle color, you create a deadlock that forces a restart. The difficulty arises because the keys you need are buried under stacks of non-matching colors (Red and Green), requiring you to temporarily waste moves to dig them out.
The Critical Role of the Dispenser
The dispenser dictates the flow of the game. In Level 142, the dispenser sequence is somewhat predictable: it generally focuses on the foreground (Green/Red) before moving to the mid-ground (Yellow/White) and finally the background (Cyan). A common failure point is panicking when the dispenser requests a color that is currently buried under a key. You must learn to cycle cups on the conveyor without losing your multiplier to clear the path.
Visual Layout Analysis
The castle image is roughly divided into three horizontal zones. The bottom 30% is the Danger Zone, consisting of Green hills and a winding Orange path. The middle 50% is the Yellow castle walls, which consume the vast majority of your paint. The top 20% is the Cyan sky, which is locked until the very end. Recognizing this layout helps you anticipate when the dispenser will switch from Green/Red requests to Yellow/Cyan requests.
Efficiency Metrics
To achieve a 3-star rating, you need to maintain a high combo multiplier. This means minimizing the time between painting pixels. Theoretically, the "idle" time spent digging for keys should not exceed 15% of your total playtime. If you find yourself staring at the tray waiting for a color for more than 5 seconds, you have likely mismanaged the conveyor queue.
Primary and Secondary Objectives
Your Primary Objective is to clear the vertical stacks obstructing Key #1 (Top Center) and Key #2 (Bottom Left). Without these, the level is mathematically impossible to finish. Your Secondary Objective is to prevent the conveyor from overflowing with "garbage" colors (colors you don't need immediately) while digging. You must balance the act of uncovering keys with the act of actually painting the canvas to keep the game timer and score multiplier healthy.
Step 1: The Initial Assessment
As the level loads, do not tap anything immediately. Observe the dispenser's starting color. It is usually Red or Green. Look at the top center of the tray. You will see a Golden Key buried under 2-3 layers of Red and Green cups. These cups are effectively "gatekeepers." You must load them onto the conveyor belt to clear the space above the key, even if the dispenser isn't currently asking for that specific color yet.
Step 2: Managing the Conveyor Capacity
You have 5 slots. If the dispenser is pouring Red, and you need to clear Green cups to get the key, you have a dilemma. Load the Green cups but be prepared to cycle them. Load a Green cup, wait for the dispenser to switch to Green (which it will do periodically), then unload it. Never fill all 5 slots with digging cups unless they match the current active color. Always keep at least 2 open slots for valid paint cups.
Step 3: Retrieving Key #1
Focus strictly on the top-center stack. Tap the Red and Green cups blocking the key. As they move to the conveyor and are used, the key will become exposed. Once the stack is low enough, tap the Golden Key itself. This triggers the first major mechanic shift: the Left Gold Bar slides open.
Step 4: The Left Vault Strategy
Opening the Left Vault reveals a cache of White cups (for clouds) and exposes Key #2 in the bottom left. It also releases more Yellow cups. Immediately prioritize the White cups if the dispenser asks for them, as they are often high-volume. Use this opportunity to clear the left side of the tray. The presence of Key #2 is now your main focus.
Step 5: Unblocking Key #2
Key #2 is trapped under a mix of Yellow and Orange cups. This is dangerous because Yellow is a high-demand color. You must be careful not to use up all your Yellow capacity on the conveyor while digging. Clear the Yellow/Orange cups sitting on top of Key #2. Once Key #2 is tapped, the Right Gold Bar will unlock, revealing the Cyan sky cups.
Step 6: The Endgame Flood
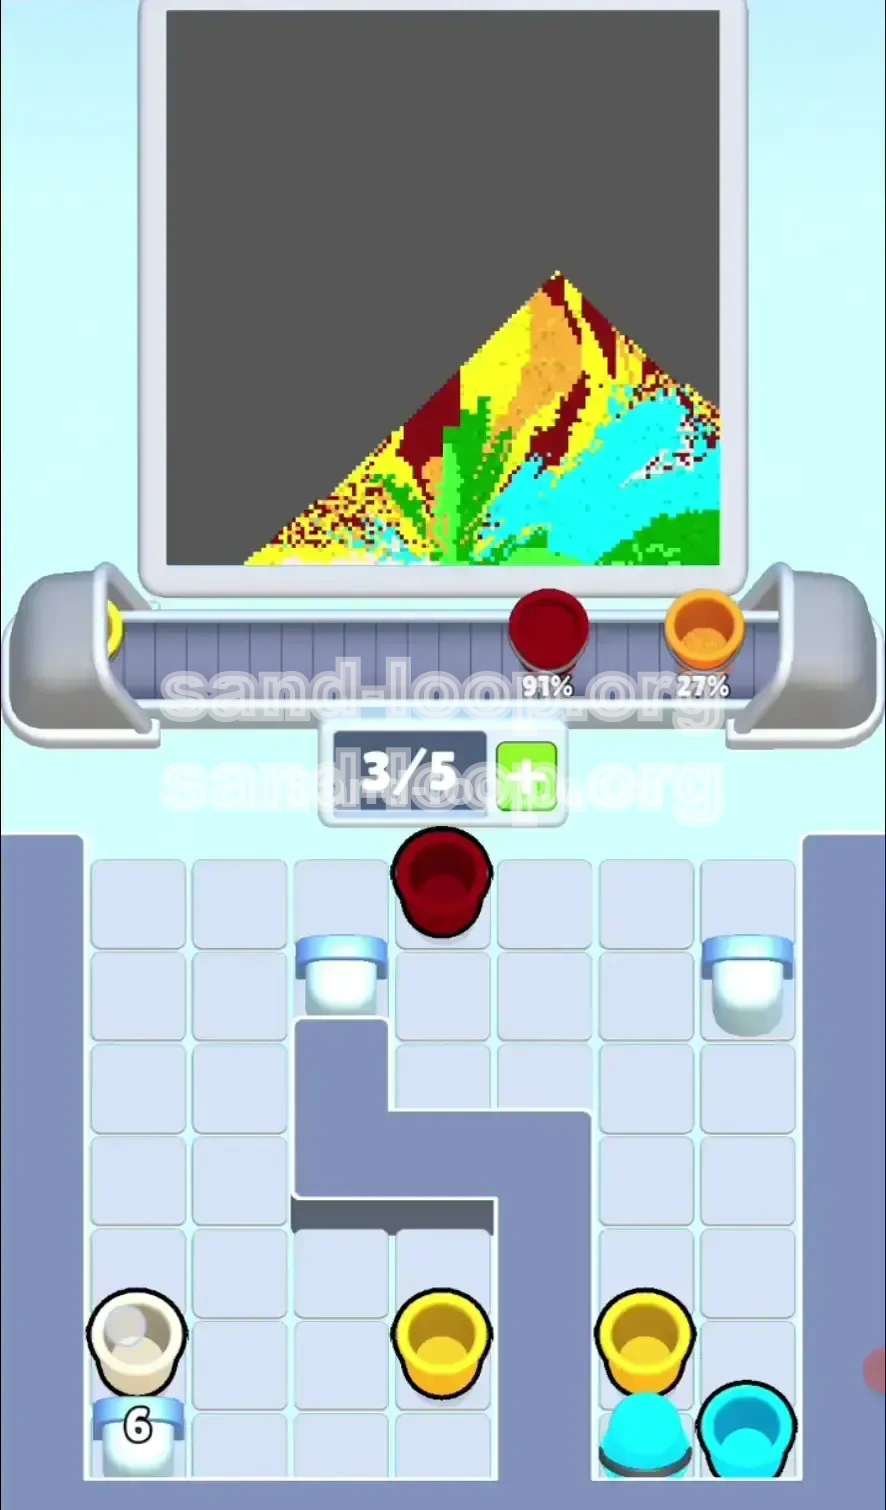
With the Right Vault open, the level shifts to "cleanup mode." The dispenser will aggressively request Cyan for the sky. Flood your conveyor with the Cyan cups from the right. At this stage, the canvas should be mostly complete. Watch for stray Orange or Green pixels that might have been missed during the key digging phase.
Correct Color Processing Order
To maximize efficiency, follow this hierarchy: Priority 1: Dark Red/Green (The Dig). You must process these first to unlock the tray. Priority 2: White/Yellow (The Structure). Once the keys are active, these become your main bulk colors. Priority 3: Orange (The Path). Process this only when convenient, as it snakes through other zones and can break your combo. Priority 4: Cyan (The Sky). Strictly last. Attempting Cyan early is a waste of slots because it is locked.
Buffer Management
The "Buffer" refers to the cups sitting on the conveyor waiting to be sprayed. In Level 142, use your buffer to store specific colors. For example, if the dispenser is cycling between Red and Green, keep 2 Yellow cups on the far right of the conveyor. Do not spray them yet. When the dispenser finally switches to Yellow, you have instant ammo, preventing a dry spell that causes the nozzle to stop.
The "Garbage" Tap Technique
Sometimes you must tap a cup you don't need (e.g., an Orange cup) just to lower the stack height. This is "Garbage Tapping." The trick is to tap it when your conveyor is empty (0/5 slots). The cup moves to the conveyor, taking up space. You simply wait. When the dispenser eventually asks for that color, you unload it immediately. It acts as a temporary placeholder to keep the flow moving while you dig for keys.
Multi-Color Stacking
Try to arrange your conveyor belt in color gradients. Place all Reds on the left, Greens in the middle, and Yellows on the right. This visual organization helps you react faster when the dispenser changes. If colors are mixed randomly on the belt, you will panic and make mistakes, leading to a full conveyor belt and a game over.
Timing the Dispenser Switch
The dispenser usually runs on a timer or a volume-based counter. It will not stay on Red forever. If you are stuck waiting for Red to clear a stack, and the dispenser has been on Red for 10 seconds, it is likely about to switch to Green. Pre-load your conveyor with Green cups in anticipation of this switch. This predictive play is what separates a clear from a fail.
The "Orange Path" Trap
The biggest pitfall in this level is the Orange Dirt Path. It is visually similar to Yellow in the tray but represents a distinct color. If you mistake Orange for Yellow and load it when you need Yellow for the walls, you block a slot. Furthermore, the Orange path often connects to the Green hills. If you leave the Orange path unpainted until the end, you might find yourself with no Orange cups left because they were pushed aside by Sky cups. Always clear the Orange path when the dispenser specifically requests it, don't delay.
Overloading the Conveyor
This is the most common cause of death. Players see a stack of Yellow and tap all 5 slots. Then the dispenser switches to Green. You now have 5 Yellow cups on the belt and no Green. You are forced to dump the Yellow, wasting time and points. Rule of thumb: Never fill your belt with more than 3 cups of the same color unless the dispenser has been stable on that color for a long time.
Ignoring the "Gold Bar" Indicators
Sometimes players are so focused on the painting that they don't notice the Gold Bars unlocking. If you unlock the Right Vault (Cyan) but keep tapping from the Left Vault (Yellow), you are being inefficient. As soon as a Gold Bar slides open, immediately shift your tapping strategy to the newly revealed colors. They are revealed for a reason—the game is signaling that the next phase of the painting requires those specific pigments.
Key Priority Confusion
Attempting to dig for Key #2 (Bottom Left) before Key #1 (Top Center) is useless because the Left Gold Bar often blocks access or stacks weight against the bottom left. Always follow the top-down approach. Clear the top key first to open the left side, which then gives you access to the bottom left key. Reversing this order leads to a clogged tray and an inevitable deadlock.
Misidentifying Cyan and Green
In the tray, the Cyan cups (Sky) and Green cups (Hills) can look similar under poor lighting or if you are colorblind. If you accidentally load Cyan when you need Green, you waste a slot. Since Cyan is the final color, loading it early is a cardinal sin. Double-check the cup shade before tapping. Cyan is generally brighter and more electric, while Green is more saturated and earthy.
What to Do If the Conveyor Is Full
If you have 5 cups and none match the dispenser, do not panic-tap. Look at the cups on the belt. Is there one that is "close" to being finished? No. You must dump them. However, before you dump, check if the dispenser is about to cycle (wait 1-2 seconds). If you dump and the dispenser immediately switches to the color you just dumped, you have lost efficiency. If you are truly stuck, dump the color that has the *least* amount of unpainted area left on the canvas.
Recovering from a Bad Start
If you start the level and accidentally fill your belt with the wrong colors (e.g., you tapped the Orange stack first), you can recover. Stop tapping immediately. Let the dispenser cycle. It will likely ask for the colors you have. Spray them to clear the belt. If it doesn't ask for them within 10 seconds, you must manually dump them (click the trash can icon if available, or just wait for the game over prompt and restart faster). In Sand Loop, a quick restart is better than a 2-minute struggle on a broken board.
Dealing with "Dead Air"
Sometimes the dispenser stops pouring, and you are just waiting. This is "Dead Air." Use this time to rearrange your mental queue. Look at the stacks. Plan your next 3 taps. "I need to tap Red to clear the key, then Green, then Yellow." Having a pre-planned sequence prevents the "deer in headlights" feeling when the action speeds up.
Utilizing the "Pause" Strategically
If the game allows, hit pause when you encounter a new Gold Bar unlock. Take 5 seconds to scan the newly revealed cups. Identify where the Key is. Identify where the high-volume colors are. This brief pause can save you from a frantic mistake that costs you the level.
Resetting the Tray Logic
If you are 60% through the level and realize you don't have enough Yellow cups left to finish the castle walls (because you used them on the wrong pixels), you are likely in a "soft lock" state. You cannot recover. The only solution is to restart immediately. Don't play it out hoping for a miracle. The RNG (Random Number Generator) of the cup drops won't save you. Better to restart with a fresh strategy.
Optimizing Tap Zones
For speed running, you want to minimize finger travel distance. Keep your tapping hand centered on the screen. If you need to tap Top Center (Key #1) and Bottom Left (Key #2), use two hands if possible, or learn the rhythm. Tap the center, then swipe down and left. Avoid hovering over the whole tray. Precision tapping reduces the time between cup loads, which directly increases your score multiplier.
Batch Processing Colors
Instead of tapping one cup, waiting for it to load, tapping another, use a drumming motion with multiple fingers. If you need 4 Red cups, tap the Red stack 4 times in rapid succession. This "batching" ensures that as soon as one cup leaves the conveyor, the next is instantly loaded. This keeps the nozzle spraying 100% of the time, which is the key to getting the highest time bonus.
Skip the "Perfect" Sky Strategy
Perfectionists often fail this level because they try to paint every single pixel of the Cyan sky perfectly while the dispenser is still asking for it. However, the sky is the background. If you have 90% of the sky covered and the timer runs low, switch to the final colors needed for the castle details. Often, the game registers a "complete" even if the sky isn't 100% full, provided the foreground structures (Castle) are fully painted. Prioritize the Yellow/Green/Red complex over the Cyan background.
Pre-Loading the Conveyor
As mentioned in the buffer section, pre-loading is vital for speed. Before the dispenser even switches to Yellow, have 2 Yellow cups on the belt. This requires memorizing the approximate order of the level (Red/Green -> White/Yellow -> Cyan). If you know Cyan is last, don't put Cyan cups on the belt until the very last second to keep slots open for the essential Yellow.
The "Key Dump" Maneuver
Here is an advanced speed run trick. When you are about to unlock a Key, empty your conveyor belt completely. Let the belt run dry (0/5). Then, tap the Key. The Gold Bar opens. Now, aggressively tap the newly revealed high-volume colors (like the Cyan stash) onto the empty belt. This ensures you have a full belt of the *correct* next color immediately, rather than having to cycle out old colors from the previous phase.
Memorizing the Pattern
Level 142 is not random; it follows a set pattern. Red/Green start. Key 1 unlocks. White/Yellow flow. Key 2 unlocks. Cyan finish. Play the level 2-3 times specifically to memorize *when* the dispenser switches. Once you know the switch happens at roughly 40% completion, you can be ready with the next color queue before the game even prompts you.