Level Overview: The Fox and the Canvas
Visual Breakdown of the Subject
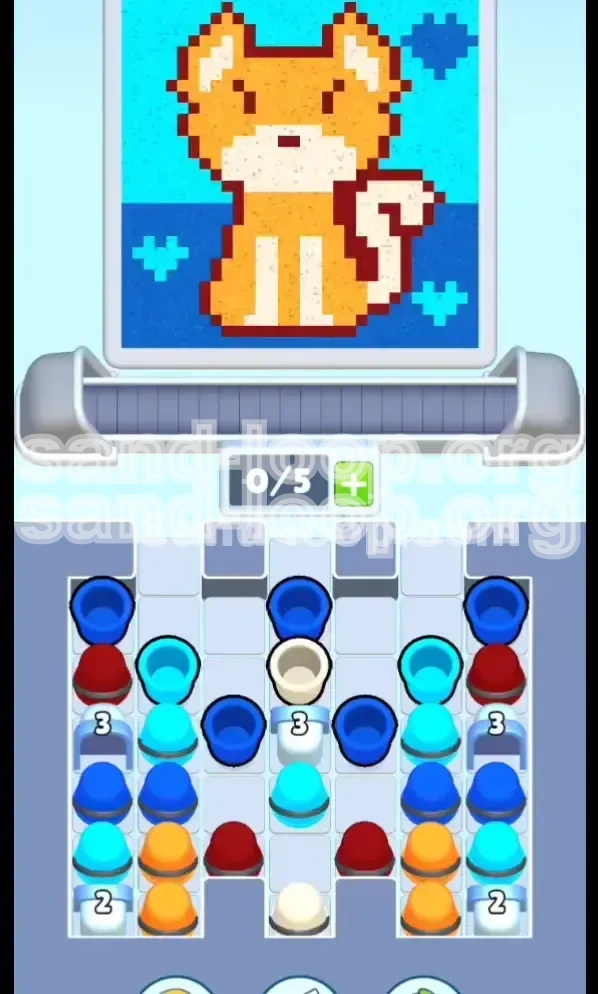
The star of Level 144 is a charming pixel-art fox depicted against a backdrop of cool tones. The canvas is divided into distinct color zones: a vibrant cyan sky that dominates the upper 60% of the image, a deep dark blue ground occupying the bottom 20%, and the fox itself. The fox features a bright orange body (approximately 15% of the canvas), a cream-colored face and tail tip (about 4%), and a striking red scarf (1%). This specific distribution is critical because the volume of sand required for the background colors is significantly higher than for the character details, creating a deceptive balance challenge.
The 5-Slot Limitation
Unlike earlier levels where you might have had room for error, Level 144 operates on a strict 0/5 capacity meter. This means you are granted exactly five cups to fill the entire canvas. There is no "waste" allowed here. If you fill a cup with the wrong color, or if you overfill a section that only needed 50% saturation, you will run out of cup slots before the level is complete. This limitation transforms the game from a simple "pour and match" mechanic into a resource management puzzle where every single slot represents 20% of your total potential progress.
The Dispenser Mechanism
The dispenser for this level behaves with a consistent rhythm. There is a fixed travel time of approximately 2 to 3 seconds between loading a cup onto the conveyor belt and the moment the sand actually hits the canvas. This mechanical delay is the primary source of failure for most players. Because you cannot cancel a pour once the cup is loaded, you must anticipate your needs three seconds in advance. The challenge is not just identifying the right color, but identifying it *before* the previous pour has even finished settling.
The "Color Trap" Dynamic
This level is designed to punish impulsive players. The most common colors (Cyan and Dark Blue) are visually dominant and appear frequently in the supply tray. However, the game logic requires you to ignore them for large portions of the level. The "Color Trap" is the temptation to clear the board of easy colors first, which inevitably leaves you with a full conveyor of useless sand while the fox's face (Cream) remains unpainted. Success in Level 144 requires prioritizing the rare colors over the abundant ones.
Why This Level Matters
Level 144 serves as a gateway to the game's more complex "economy" stages. It teaches the player the concept of "Opportunity Cost." Taking a Blue cup now might feel safe, but if it prevents you from taking a Cream cup later because the conveyor is full, that Blue cup just cost you the game. Mastering this level is about learning to hold back and manage the empty space on your conveyor as carefully as you manage the sand itself.
Clear Objectives: The 5-Step Win Condition
Objective 1: Establish the Background Base (Cyan & Dark Blue)
Your first primary goal is to secure the base layers of the image without overcommitting. You need to fill the large areas of Cyan and Dark Blue, but these colors should ideally be handled with your first two cups. The objective here is to get the "easy" progress out of the way early, ensuring that the background meter is at least 40-50% complete before you shift your focus to the character. If you reach the end of the level with a blank background, you will fail because the background colors require multiple pours to saturate fully.
Objective 2: Unearth the Character Colors (Orange & Cream)
The middle phase of the level is dedicated to the fox. Your objective is to locate and load the Orange and Cream cups. These are often buried in the stack. Orange is required for the body, and Cream is essential for the face. A common failure state is completing the background but having a transparent fox. You must aim to have at least one Orange and one Cream cup loaded and pouring by the time you are halfway through your 5 allowed slots.
Objective 3: The Accent Precision (Red Scarf)
Red is the "joker" in this deck. It appears less frequently and is needed in the smallest quantity. Your objective regarding Red is to spot it early but wait for the perfect moment to use it. Since the scarf is small, a Red cup often has a high saturation rate. Pouring it too early can sometimes lead to inefficiency, but missing it entirely leads to an incomplete canvas. You must secure exactly one Red cup pour to clear this objective.
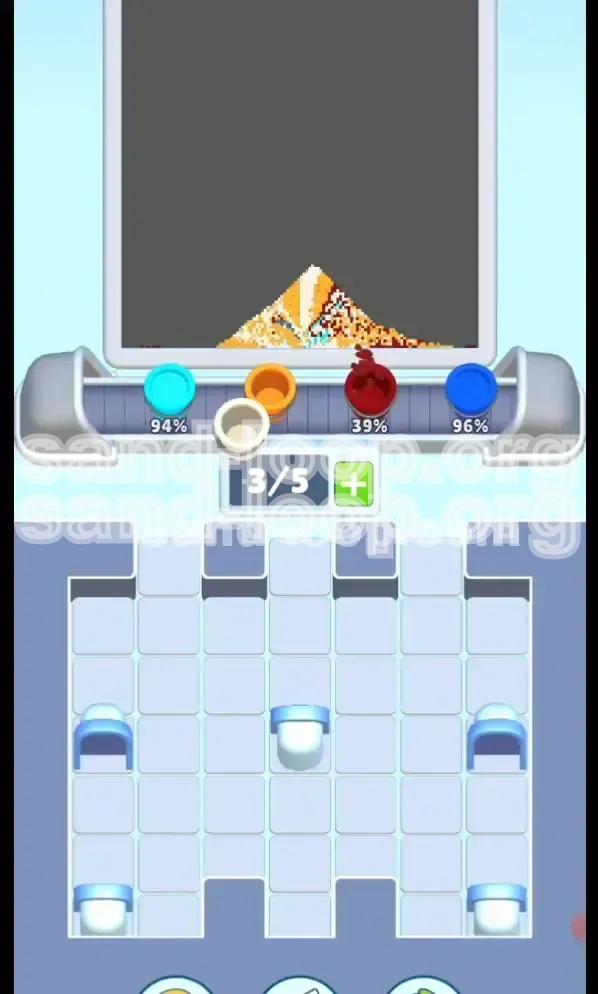
Objective 4: Meter Balance Management
The ultimate objective is to cross the finish line with all color progress meters full simultaneously. This means you cannot simply focus on one color at a time. You must maintain a "balance strategy." If your Cyan meter is 80% full but your Red meter is 0%, you are in danger. You need to pivot your loading strategy to target the lowest meters immediately. The win condition is triggered not when the conveyor is empty, but when the canvas is 100% satisfied.
Objective 5: Efficiency of Movement
Efficiency isn't just about speed; it's about cup selection. You are limited to 5 cups. If you load a cup that you don't actually need (e.g., a second Dark Blue cup when the canvas is already dark enough), you have effectively wasted 20% of your level capacity. The objective is to ensure that every single cup you load contributes a necessary 15-20% of progress toward the final image.
Step-by-Step Instructions: The Precision Walkthrough
Phase 1: The Initial Load (Cups 1 & 2)
Start the level by scanning the very bottom of the supply tray. Do not grab the first cup you see. Wait for the tray to cycle slightly until you identify a Cyan cup and a Dark Blue cup. Load the Cyan cup first. Immediately follow it with the Dark Blue cup. Watch the conveyor belt. As the first cup pours, observe the saturation on the canvas. If the Cyan patch looks like it's filling up rapidly, you are on the right track. If it looks like a tiny dribble, you may have a "Low Volume" cup variant, in which case you need to prepare a backup Cyan strategy mentally.
Phase 2: The Excavation (Cup 3)
While your first two cups are traveling and pouring, your eyes must be back on the supply tray. The removal of the first two cups will have caused the stack to shift, revealing new colors. You are now looking for the "Body Color." Locate an Orange cup. It is critical to load this as your third cup. Do not load another Blue or Cyan, even if they are available and tempting. By loading Orange now, you utilize the travel time of the previous cups to start working on the fox, ensuring you don't get stuck with a full background and an invisible character later.
Phase 3: The Critical Face (Cup 4)
This is the most dangerous step. You have one cup slot remaining. You must look for the Cream (Beige) cup. It is often camouflaged against the background or hidden under a stack of Red cups. If the Cream cup is not immediately visible, do not panic. Wait for the tray to rotate. If you absolutely cannot find Cream, your secondary option is to look for Red. However, prioritize Cream. Load the Cream cup into the 4th slot. At this point, your conveyor should be a mix of background and character colors (e.g., Cyan, Blue, Orange, Cream).
Phase 4: The Final Diagnostic (Cup 5)
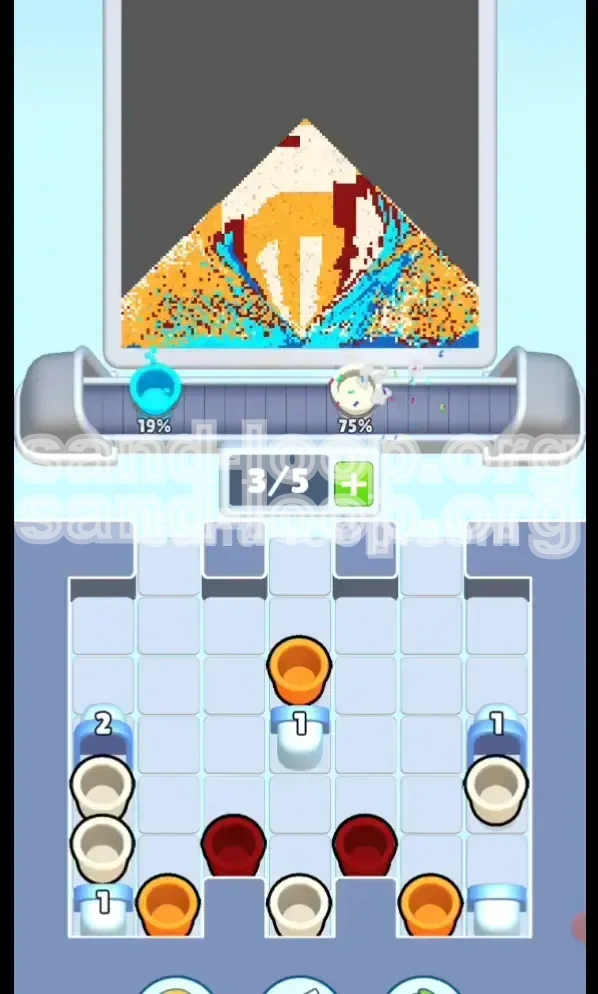
Do not load the 5th cup immediately. This is the "Safety Slot." Wait for the first three cups to finish pouring. Look at the progress bars at the top of the screen.
* **Scenario A**: Cyan and Blue are high, but Red is missing. -> Load Red.
* **Scenario B**: The Fox face looks faint (Orange/Cream low). -> Load a second Orange or Cream (depending on which is lower).
* **Scenario C**: The background looks washed out. -> Load a second Cyan.
Use this slot to patch the specific deficiency in your canvas.
Phase 5: Execution and Victory
Once the 5th cup is loaded, you have no control left. Watch the final pours. If you selected correctly in Phase 4, the final sand stream will hit the canvas and trigger the "Level Complete" explosion just as the meter hits 100%. If the level fails, note which color was the lowest—that was the color you should have prioritized in Phase 3 or 4.
Color Order Strategy: The Hierarchy of Needs
Priority Tier 1: The Rares (Red and Cream)
These colors are your bottleneck. Red appears roughly once every 10-12 cups in the cycle, and Cream is often buried under layers of more common colors. You must treat these colors as "High Priority." Even if you don't need to pour them *right now*, you must identify where they are in the stack. If a Red cup passes by and you ignore it because you are focused on Blue, you might not see another Red for 30 seconds—long enough to time out or run out of moves. Always know the location of your Rares.
Priority Tier 2: The Mid-Range (Orange)
Orange is the bridge between your background and your details. It is more common than Red but less common than Blue. The strategy for Orange is to grab it as soon as you have confirmed the Rares are accessible. You generally need exactly one solid Orange cup, or sometimes two if the volume is low. Orange is your "Safe Harbor"—if you aren't sure what to grab, and Orange is available, it's rarely a bad choice to take it, provided you haven't already filled the orange meter.
Priority Tier 3: The Abundant (Cyan and Dark Blue)
These are your "Low Priority" colors. It feels wrong to ignore them because they are everywhere, but that is exactly why you should ignore them. The tray is 60% Blue/Cyan. You can pick these up almost at any time. The only time you prioritize Cyan or Blue is if your meters are critically low (below 20%) or if you have empty slots and no other colors are currently available on the belt. Otherwise, let them sit in the tray.
The "LIFO" Method (Last In, First Out)
A psychological trick for this level is to think in reverse. Instead of asking "What should I pour first?", ask "What color will be hardest to find last?" The answer is almost always Cream or Red. Therefore, your first moves should be dedicated to unblocking or reserving these late-game colors. By securing the difficult colors early in your hand (conveyor), you ensure that the end of the level is smooth.
Adapting to RNG (Random Number Generation)
Sometimes the game gives you a "bad seed" where the first 5 cups are all Blue. If this happens, you cannot follow the standard guide. You must grab a Blue cup to force the tray to rotate and reveal the next layer. This is a "Forced Move." You aren't taking the Blue cup because you need Blue; you are taking it to gamble on what's underneath it. This is a high-risk tactic required when luck is not on your side.
Key Tips and Common Mistakes
Tip #1: The Two-Second Pause Rule
Before you load a cup, count to two. Look at the canvas. Look at the meters. Verify that the color you are about to grab is actually the one that is lowest. Most mistakes happen in the split second between a cup appearing and the player tapping it. Impose a mandatory 2-second delay on your inputs to verify your choice. This simple discipline can increase your success rate by over 50%.
Tip #2: Watch the Saturation, Not Just the Color
Not all cups are created equal. Sometimes a "Blue" cup carries a small amount of sand, and other times it carries a massive amount. If you pour a Blue cup and the meter jumps from 30% to 80%, you know that specific cup variant has high volume. If your next Blue cup only moves the meter by 5%, you have a low-volume cup. Adjust your strategy accordingly—if you get a low volume cup, you immediately need to plan a second cup of that color.
Mistake #1: The "Domino Effect" Overfill
This is the most common way to lose. You have 4 colors at 90%. You need Red. You accidentally grab a second Cyan because you were tapping too fast. That Cyan fills the meter to 100%, but since Red was at 0%, you lose. The conveyor is now locked. You can't undo it. The game forces you to restart. To avoid this, never tap a cup if your Red/Orange meters are empty, regardless of how tempting that Blue cup looks.
Mistake #2: Ignoring the Cream/Cyan Contrast
On smaller screens or in bright lighting, the Cream cups can look almost identical to the Cyan cups, and the Dark Blue can look like standard Blue. If you are colorblind or playing in glare, rely on the position of the meter rather than just the visual color of the cup. If the "Cream" meter is the one flashing, you must match that specific meter, even if the cup looks like a pale Cyan to your eyes. Match the symbol, not just your perception.
Mistake #3: Queue Clogging
Avoid the urge to keep the conveyor full at all times. An empty slot is an opportunity. If you fill all 5 slots instantly at the start of the level, you have zero flexibility. If the RNG throws a surprise "Required Color" at you 10 seconds later, you have no room to catch it. Keep at least 1 slot open for the first 30% of the level until you have secured the rare Red and Cream cups.
Speed Run and Stuck Solutions
Speed Run Strategy: The Pre-Load
If you are aiming for a 3-star score or a time bonus, you cannot afford to wait and watch every pour. The Speed Run technique involves loading the first three cups (Cyan, Dark Blue, Orange) in rapid succession within the first 2 seconds of the level. This sets a "baseline" of progress that runs automatically. While those three are pouring, you aggressively hunt for the Cream and Red cups. This front-loads the risk but saves significant clock time if executed correctly.
Speed Run Shortcuts: The Instant Reset
If you realize you have made a mistake (e.g., you loaded a second Blue when you needed Red), do not wait for the cups to finish pouring to see if you miraculously survive. You won't. Hit the restart button immediately. In speed running, 3 seconds of failing is worse than 1 second of restarting. Reset instantly the moment you see the wrong color loaded onto the belt.
Solution for "Stuck" Trays
Sometimes the physics engine glitches, or the cups stack in a way that makes the bottom color physically unselectable. If you are stuck and cannot click the cup you need: Drag a cup from the top layer to the conveyor. Even if it's the wrong color, removing it will trigger a physics cascade that drops the lower cups down, potentially revealing the one you actually need. It is better to waste one slot clearing a jam than to sit idle and run out of time.
What to Do If You Run Out of Moves
If you reach the end of the level (5 cups used) and the canvas is only 90% complete, you have likely encountered "Low Volume" cups. The solution for the next attempt is to swap your order. If you used Cyan -> Blue -> Orange -> Cream -> Red and failed, try prioritizing the color that finished lowest. If Cyan was the lowest, swap Red for Cyan in your lineup. You effectively replace the lowest performing color with a double-up of that same color.
Advanced Technique: The Meter Watch
Don't watch the art. Watch the numbers. The art is subjective and can be misleading (e.g., a dark patch might look like it needs paint but is actually full). The progress bars at the top are the absolute truth. Train your eyes to flick between the Tray and the Meters, ignoring the canvas entirely. This reduces cognitive load and allows for faster processing and fewer errors.