
Level 163
HARDHow to solve Sand Loop level 163? Get instant solution for Sand Loop 163 with our step by step solution & video walkthrough. Sand Loop 163 tips and guide.
Play Sand Loop Now
Experience the puzzle challenge firsthand
Game Screenshots
Sand Loop Level Guides
Level 163 Walkthrough: Mastering the Flower Bunny Logic
Welcome to the definitive strategy guide for Sand Loop Level 163. If you have found yourself stuck on the "Flower Bunny" stage, constantly running out of conveyor space or missing that final splash of color, you are in the right place. This guide is designed to move you from random guessing to a precision execution strategy.
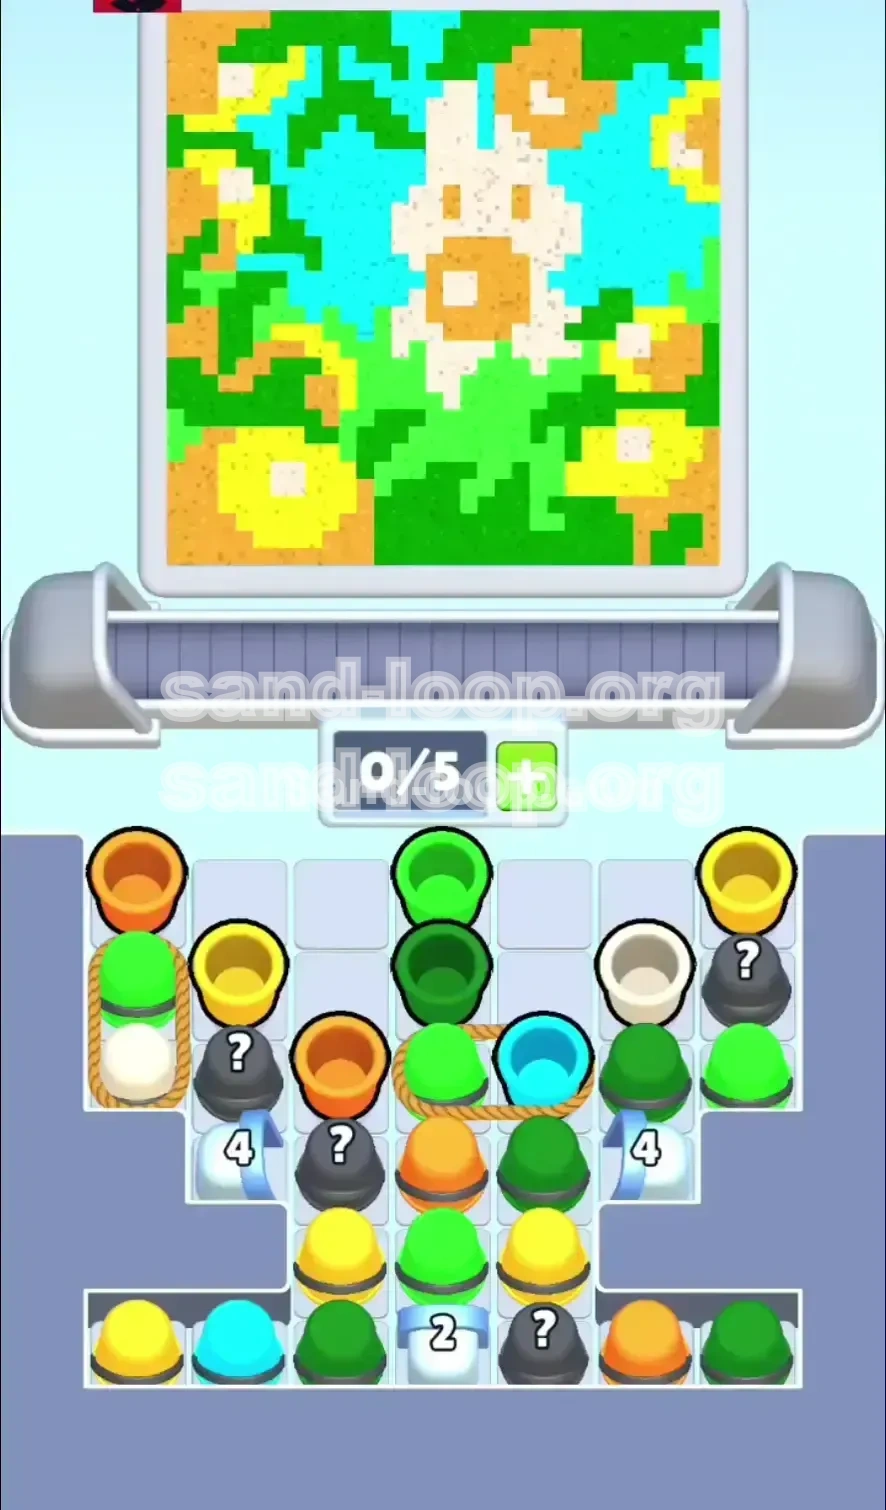
This level is deceptive. It presents itself as a cute, relaxing pixel-art scene of a white rabbit in a spring garden. However, beneath the surface, it is a strict resource management puzzle. The difficulty here does not come from speed (the sand timer is generous) but from Inventory Logic. You must navigate a maze of "Roped Pairs," Ice Block delays, and a tight 5-slot conveyor limit to succeed.
By following the steps below, you will learn how to dismantle the cup formation safely, predict the sand dispenser's rhythm, and achieve a 100% completion rate without the frustration of trial and error.
1. Level Overview: The "Spring Garden" Challenge
Before you tap a single cup, you need to understand the battlefield. Level 163 introduces the "Flower Bunny," a canvas that demands high contrast between the foreground (white rabbit) and the background (lush greenery and flowers). Here is what you are up against.
The 5-Color Palette Distribution
The canvas is dense, utilizing a wide spectrum of colors compared to previous levels. You are not just dealing with two or three shades; you are managing six distinct color streams:
- White (Primary): Used for the Rabbit’s head, body, and ears. This is your most critical resource.
- Bright Green & Dark Green (Secondary): These form the layered foliage background. Mistakes here are forgiving, but clogging your belt with them is fatal.
- Yellow & Orange (Accents): Used for the flowers surrounding the bunny. These are scarce.
- Cyan (Minor): Likely used for small sky or water details, usually hidden at the bottom.
The Rope Mechanic Constraint
This is the core logic trap. Approximately 40% of the available cups are tied together with ropes. This means you cannot pick and choose freely. If you need a Green cup but it is roped to a White cup, you are forced to take both. This consumes two slots of your precious conveyor capacity instantly.
The Ice Block Locks
You will notice rows of cups trapped behind Ice Blocks marked with numbers (4, 2). These are time-gated resources. You cannot access the bottom row of essential colors until you clear the cups directly above these blocks. This creates a "vertical dependency" where the top of the puzzle dictates the speed of the bottom.
Capacity Management (The "0/5" Limit)
Your conveyor belt only holds 5 cups. Because of the Rope Mechanic, a single tap can fill 40% of your belt instantly. If you tap a rope pair when you have 4 cups, the game jams, and you lose precious time. We call this the "Jam State," and we will teach you how to avoid it entirely.
The Canvas Topography
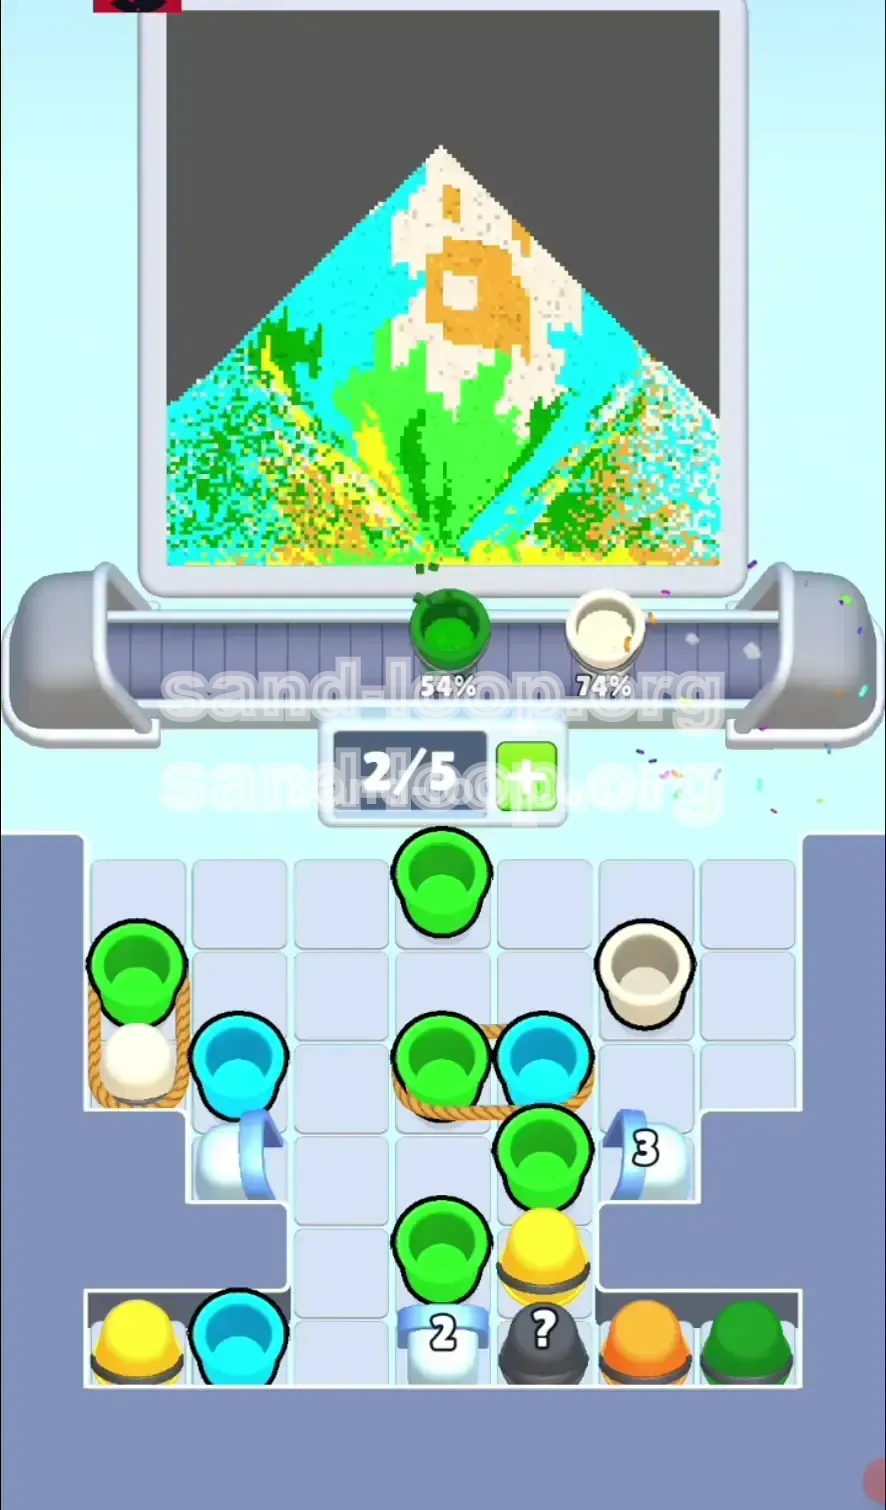
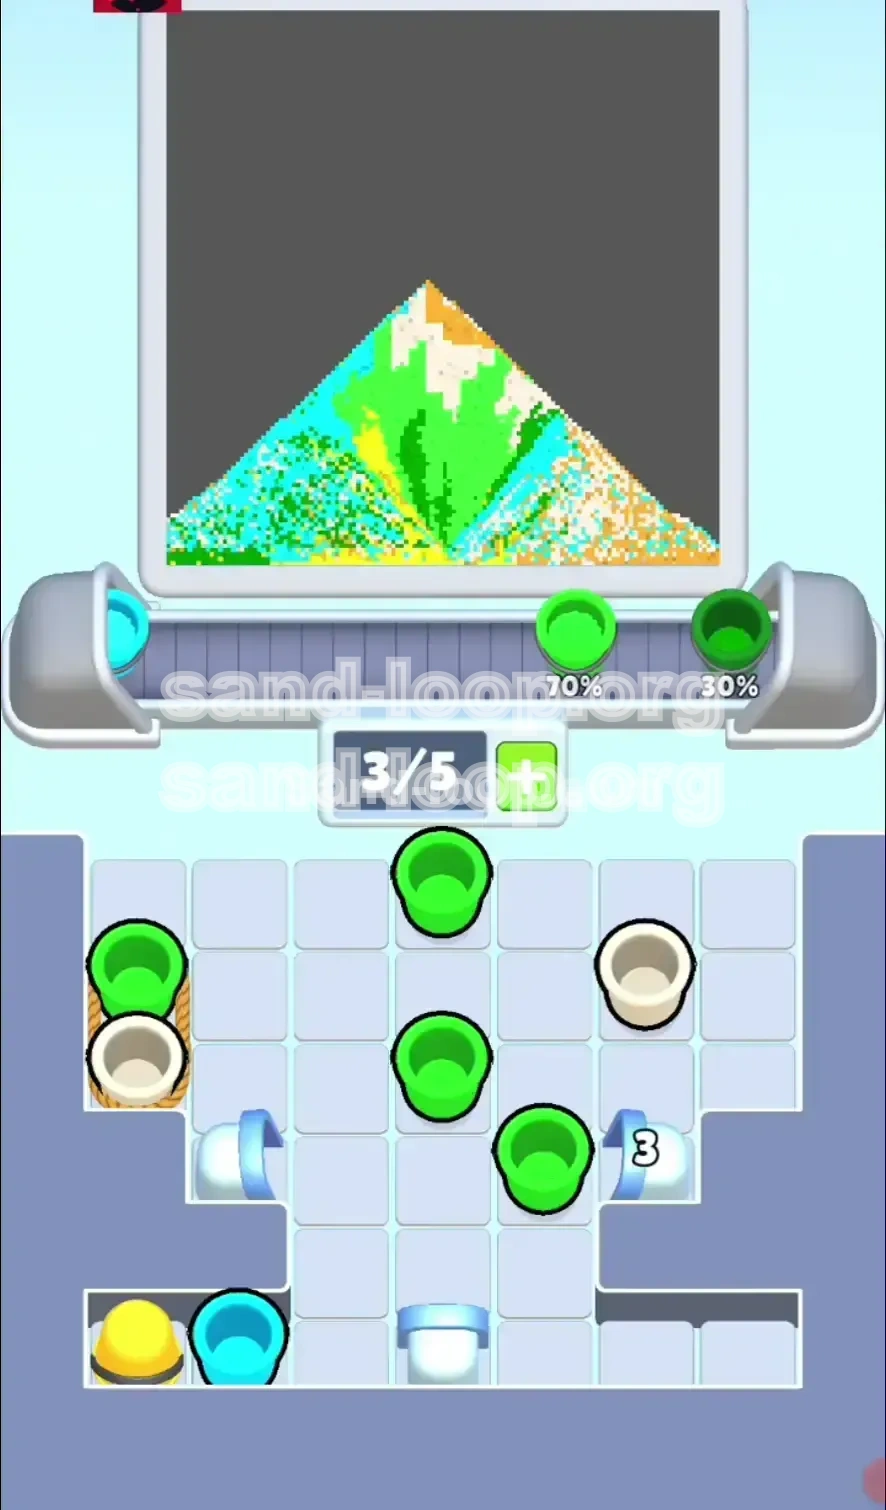
The pixel art forms a pyramid shape. The base is wide (greenery), and the peak is narrow (rabbit head). This means you will be using Green and Yellow colors for the first 50% of the level, saving White and Orange for the final 30%. Playing your White cards too early is a common cause of failure.
The Dispenser Rhythm
The sand dispenser does not cycle randomly; it follows the geometry of the art. It will linger on Green for long periods, switch briefly to Yellow/Orange for the flowers, and then switch to White for the rabbit. You must align your cup pulls with this rhythm to avoid mismatching colors.
2. Clear Objectives: Your Mission Checklist
To beat Level 163 with a 3-star rating, you need more than just luck. You need a clear set of goals. Keep these objectives in mind as you play.
Objective #1: Preserve Conveyor Fluidity
Your primary goal is to never reach a full belt (5/5) unless the cups match the immediate need. Always keep at least 2 empty slots available to accommodate Roped Pairs. If the belt gets clogged with Green cups while the dispenser is pouring White sand, you have failed the rhythm check.
Objective #2: Decode the Ice Blocks
You must clear the specific cups sitting on top of the Ice Blocks to trigger the countdown. Focus on the center column first. The "2" block at the bottom center hides critical Yellow/Cyan cups needed for the flower details. Clearing the path to these is a short-term priority.
Objective #3: Execute the Color Queue Strategy
Do not treat colors equally. You must prioritize the "Base Colors" (Greens) first. The "Detail Colors" (White, Orange) must be queued on the belt but protected from being filled until the correct moment. Ideally, you want White cups arriving on the belt just as the sand pile reaches the rabbit's head level.
Objective #4: Efficient Rope Pairing
Identify all Roped Pairs before you start tapping. Plan your moves so that when you pull a Green/White pair, the dispenser is currently set to Green. This allows you to empty the Green cup immediately (freeing up a slot) while the White cup waits safely on the belt for the color change.
Objective #5: Avoid Color Contamination
The most common failure point in Level 163 is "contamination"—using a Dark Green cup on a Bright Green section, or wasting Orange sand on a leaf. Your objective is 90%+ color accuracy. Wasting the scarce Orange cups will leave the flowers unfinished and grey.
3. Step-by-Step Instructions: The Execution Phase
This is the actionable part of the guide. Follow these phases in order. Do not rush ahead. The level is divided into three distinct phases based on the sand pile height.
Phase 1: The Foundation (0% - 30% Completion)
Goal: Establish the base foliage and unlock the bottom row.
- Step 1: Start by tapping the loose Dark Green and Bright Green cups at the top of the screen. Ignore the roped pairs for now.
- Step 2: Look at the center column. You will see a vertical stack of cups above the "2" Ice Block. Prioritize tapping these to clear the block.
- Step 3: As the sand starts pouring Green, fill the bottom corners of the canvas. The art here is mostly leaves, so you can be slightly loose with Green variants, but try to keep them distinct.
- Step 4: Do not tap the "4" Ice Blocks on the far left and right yet. The cups behind them are likely White, which we don't need until the rabbit appears.
Phase 2: The Flower Field (30% - 60% Completion)
Goal: Integrate Yellow and Orange while managing the Rope Pairs.
- Step 1: Once the "2" Ice Block breaks, you will gain access to Yellow and Cyan cups. Bring these onto the belt.
- Step 2: Now, identify the Green/White Roped Pair on the left. Tap this only when the dispenser is pouring Green.
- Step 3: Immediately pour the Green cup into the foliage. The White cup will now sit on your belt. Do not let it fill with Green sand. Wait for the dispenser to cycle.
- Step 4: Use the Mystery Cups (Grey "?") to fill in the ambiguous background areas. Save your specific colors for the defined pixels.
- Step 5: Watch for the Yellow flowers. When the sand turns Yellow, you must have Yellow cups ready. If you are full of Green, you will miss the flower window.
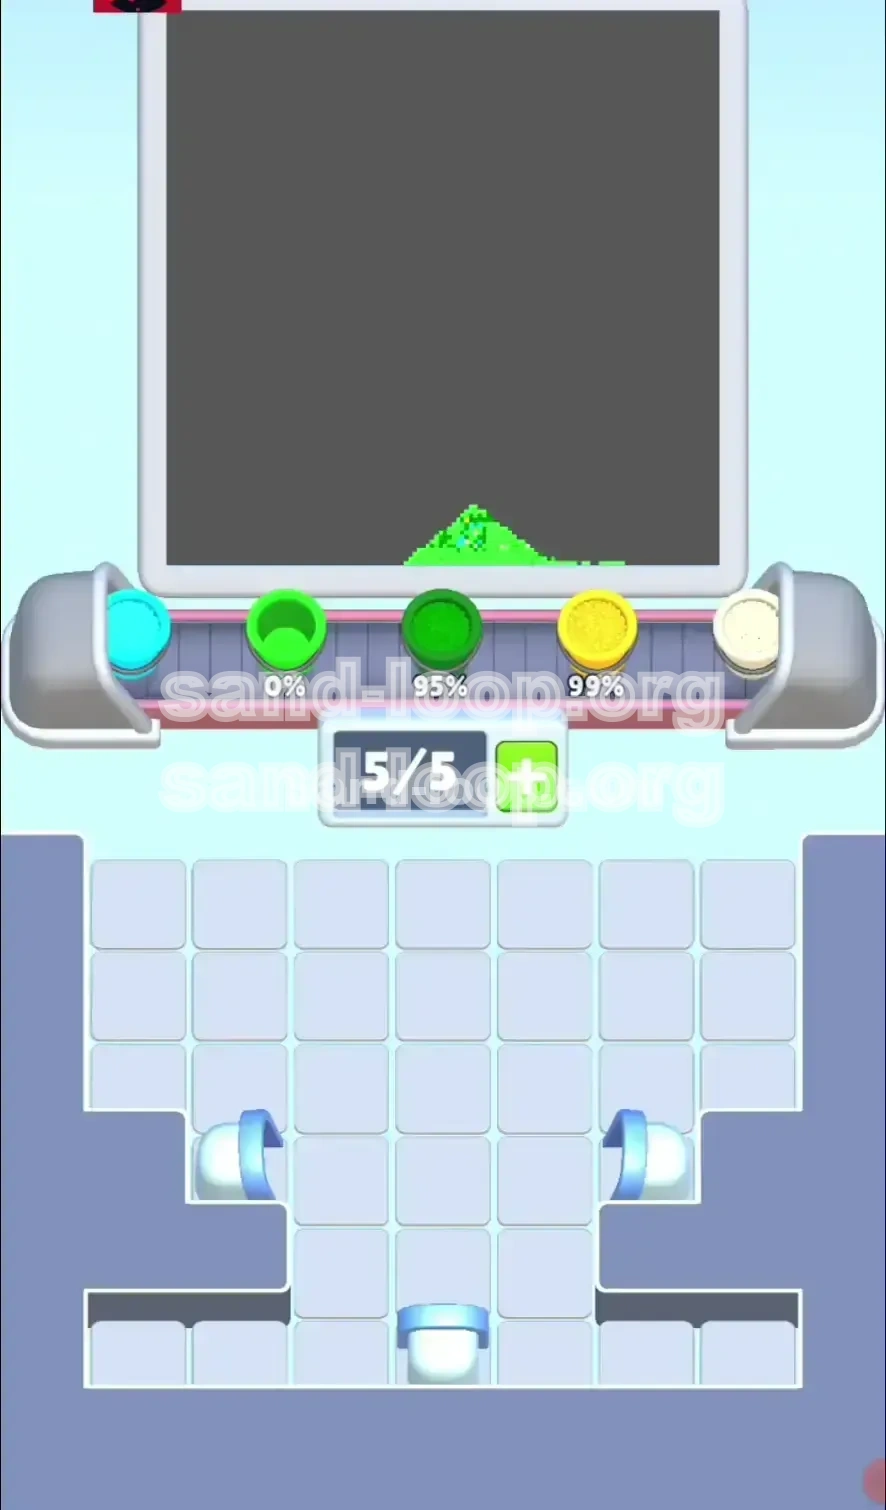
Phase 3: The White Rabbit (60% - 100% Completion)
Goal: Precision execution for the Rabbit and final details.
- Step 1: As the sand pile rises above the greenery, the dispenser will switch to White. This is your cue to unleash the White cups you have been saving.
- Step 2: Clear the "4" Ice Blocks on the sides now. These usually contain the reserve White cups needed for the ears and head.
- Step 3: Be extremely careful with the Green/Cyan Rope. If you haven't used it yet, now is the time for the Cyan (sky/water), but ensure the Green part doesn't ruin the White rabbit face.
- Step 4: Use your final Orange cups for the center of the flowers. These are the final touches.
- Step 5: If you have leftover Mystery Cups, use them to patch any grey pixels remaining on the board.
4. Color Order & Processing Strategy
Winning is about timing. You cannot control the sand, but you can control when you ask for the cups. Here is the optimal processing order to minimize waste and maximize efficiency.
The "Green First" Protocol
Why Green? Because it covers the largest area (approximately 50% of the canvas). If you have a belt full of Green cups, you are safe for the first half of the level.
- Strategy: Fill your belt with Dark Green and Bright Green immediately.
- Warning: Do not mix Bright Green and Dark Green randomly. The canvas usually has a distinct pattern (e.g., Dark Green outlines, Bright Green fills). Pay attention to the pixel preview.
The "Yellow/Orange" Window
The dispenser will switch to Yellow for a short period (approx. 10-15 seconds) during the mid-game.
- Strategy: You must have Yellow cups loaded on the belt before the sand changes. If you try to fetch Yellow cups while the sand is already pouring Yellow, you will run out of time.
- Tip: Queue the Yellow cups behind Green cups on the belt. As the Green cups finish, the Yellow ones will be ready exactly when the sand switches.
The "White" Reservation
White is the victory condition. Without enough White, the rabbit remains a grey outline.
- Strategy: Treat White cups as "Gold." Do not use them to fill gaps in the leaves.
- Timing: You want White cups to be the last things on your belt. If you pull a White cup too early, it occupies a slot that could be used for Green, risking a belt jam.
The Cyan/Blue Anomaly
Cyan is often the trap color. There are very few Cyan pixels on the Flower Bunny canvas (likely just eyes or background sparkles).
- Strategy: Do not prioritize Cyan. If a Cyan cup is roped to a Green cup, pull the pair for the Green, but be prepared to hold the Cyan cup for a long time until the specific pixel appears.
5. Key Tips & Mistakes to Avoid
Even with a strategy, small errors can compound. Here are the pro-tips to keep your run smooth, and the pitfalls to sidestep.
The "Slot Calculation" Tip
Always do mental math before tapping. Current Cups + Incoming Cups = Must be ≤ 5.
- Scenario: You have 3 cups. You see a roped pair you need. 3 + 2 = 5. Safe to tap.
- Scenario: You have 4 cups. You see a single cup. 4 + 1 = 5. Safe to tap.
- Scenario: You have 4 cups. You see a roped pair. 4 + 2 = 6. DANGER. Do not tap. You must flush one cup first.
The "Ice Block" Priority Mistake
Many players ignore the numbers on the ice. Do not be fooled.
- Mistake: Focusing only on the top cups and letting the ice blocks melt naturally (which takes too long).
- Correction: The numbers on the ice (2, 4) indicate how many cups above them must be cleared. You must actively clear the cups directly on top of the ice. The game will not auto-clear them for you fast enough.
The "Color Bleed" Error
This is the most frustrating way to lose a pixel-perfect run.
- The Error: You have a White cup on the belt, but the dispenser is pouring Green. You accidentally place the White cup on the canvas, filling a white rabbit pixel with green sand. Now the rabbit has a green smudge.
- Prevention: If the cup on the belt doesn't match the sand, do not place it. Either wait for the sand to change (if the cup is urgent) or place a different cup (if the sand matches a different cup). Never force a mismatch.
The "Rope Sync" Technique
Use the dispenser as a timer.
- Tip: If you need to pull a difficult roped pair (like Green/White), wait until the dispenser is pouring the more abundant color (Green). This ensures you can clear one half of the pair immediately, freeing up space.
6. Speed Run & Stuck Solutions
For those looking to optimize their time or dig themselves out of a hole, these advanced tactics are for you.
I'm Stuck: The "Full Belt" Emergency
If your belt is full (5/5) and none of the cups match the current sand color, you are stuck.
- Solution A (The Sacrifice): Is there a "Mystery Cup" (Grey) on the belt? If so, use it immediately on a grey pixel or a non-critical background area. This frees a slot.
- Solution B (The Wait):strong> If the sand is Green and you have only White/Orange on the belt, you must wait. Watch the sand pile fill. Do not panic-tap. As soon as the sand switches, clear your backlog.
- Solution C (The Preview):strong> Look closely at the canvas. Is there a single pixel of the color you are holding? Use the zoom function (if available) to find that one pixel and dump the cup there.
Speed Run Strategy: The "Pre-Load"
To achieve the fastest time on Level 163, you must anticipate the canvas layers.
- Tactic: While the sand is filling the bottom leaves (Green), do not just watch. Use that time to clear the Ice Blocks and pull the White cups onto the belt.
- The Aim: By the time the sand level reaches the rabbit's head, you should have a belt fully loaded with White cups, ready to deploy instantly. This eliminates the "searching for cups" downtime during the critical final phase.
Shortcut: Ignoring the Minor Details
Perfectionism kills speed runs.
- Shortcut: The small Cyan/Blue dots and the deepest Darkest Green shadows can often be filled with Mystery Cups. Don't waste time hunting for specific Cyan cups if you have a Mystery Cup available. The score difference is negligible, but the time saved is significant.
Final Check: The "Ears" Trap
The Rabbit's ears are the highest point of the canvas.
- Note: The sand usually stops flowing just as it reaches the ears. Ensure you have two White cups reserved specifically for the very end. If you use your last White cup on the body, you might run out of sand before filling the ears, resulting in a "Game Over" or incomplete score.