Level 182 Comprehensive Overview: The Tree of Rhythm
The Core Challenge: Asymmetry and Blockades
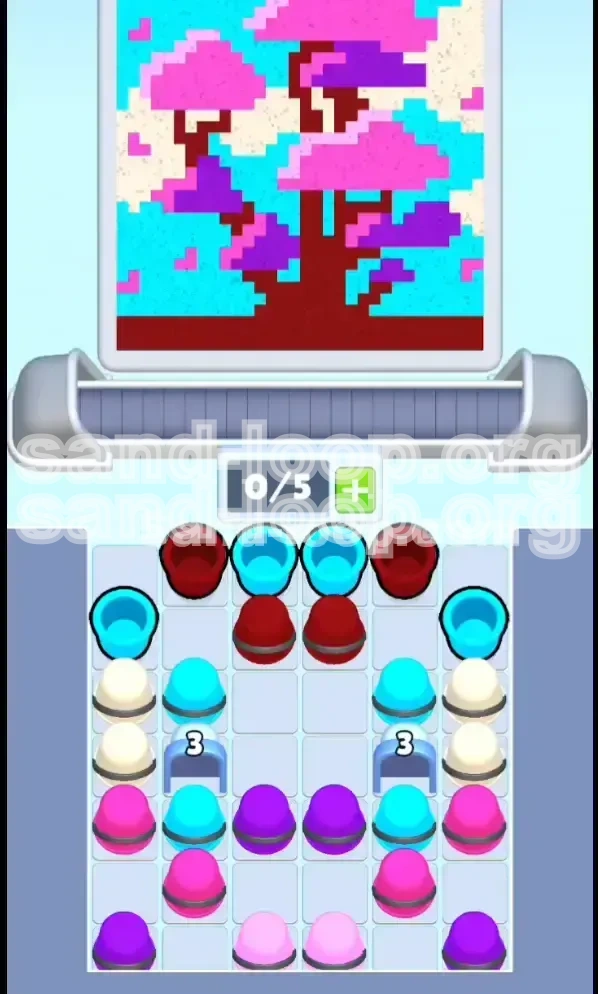
Level 182 in Sand Loop introduces a deceptive asymmetry that breaks the rhythm of standard "fill" levels. Unlike previous stages where colors are evenly distributed, this level features a massive dark-red trunk and a sprawling canopy that heavily favors Cyan and Magenta. The primary difficulty here isn't just the volume of paint required, but the physical obstruction of your supply tray. You are not fighting the timer; you are fighting the "deadlock" created by useless filler cups blocking your essential colors. The stage requires a mental shift from reactive tapping to predictive planning.
Canvas Layout and Color Distribution
The canvas depicts a stylized tree, which dictates a strict color hierarchy.
1. **Cyan (High Volume):** Occupies approximately 40% of the upper canopy.
2. **Magenta (Medium Volume):** Scattered along the outer edges and lower branches, roughly 25% of the canvas.
3. **Dark Red (Medium Volume):** Forms the trunk and structural roots, about 20% coverage.
4. **Purple (Low Volume):** Used for shading and depth, representing only 10-15% of the image.
5. **Cream/Filler (Zero Volume):** These colors are traps. They appear on the tray but do not exist on the canvas. Loading them consumes your limited conveyor slots without contributing to the 5/5 goal.
The Mechanic: Conveyor Capacity Management
Your biggest constraint is the 5-slot conveyor limit. In Level 182, hitting 5/5 capacity is a death sentence. When the belt is full, you cannot pull new cups from the tray to unblock the ones underneath. This guide operates on the "3/5 Rule"—never let more than three active cups occupy the belt at once. Keeping two slots open is your only buffer against the inevitable "Cream Cup Deadlock."
Win Condition
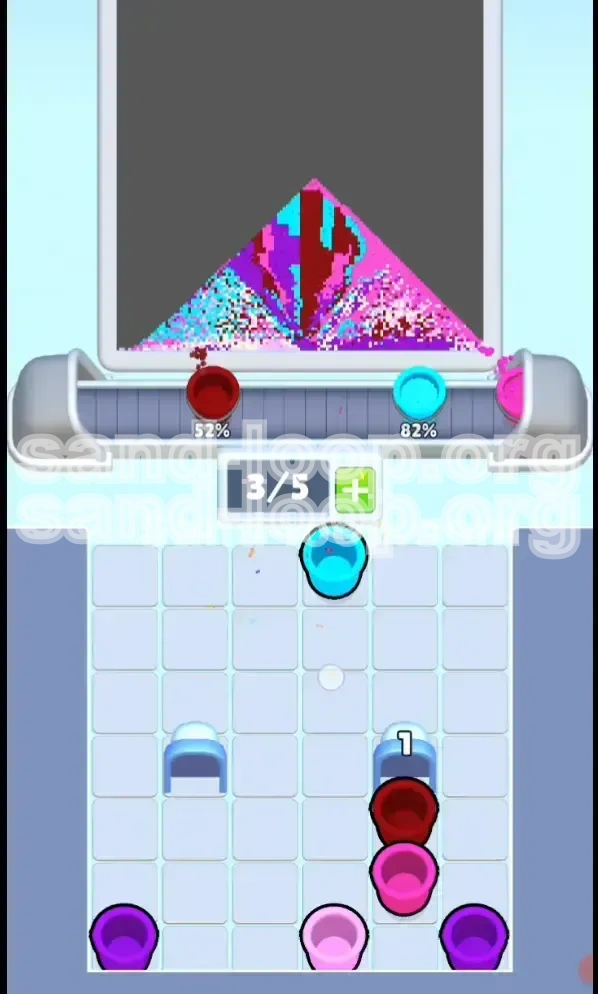
Victory is achieved when the progress meter hits 5/5 distinct colors. However, because of the volume disparity, you can easily "max out" Cyan (overfilling it to 100% while other colors lag at 30%). The true win condition is a *balanced* fill: reaching near-completion on Cyan simultaneously with the completion of Purple and Dark Red. If Cyan finishes too early, you will run out of conveyor space trying to scrape together the last bits of Purple.
Strategic Objectives and Key Metrics
Objective 1: Establish the "Opening Trifecta"
Your immediate goal in the first 10 seconds is to load the three primary colors: Cyan, Magenta, and Dark Red. Do not touch Purple, and do not touch Cream. You need one of each on the belt immediately to begin generating progress points. If you start with a Cream cup, you are effectively playing with a 4-slot limit, which makes the level exponentially harder.
Objective 2: Maintain the "Two-Slot Buffer"
Throughout the entire level, your conveyor belt should never have more than 3 cups loaded. Why? Because you need the "gravity" of the tray to shift. When you pull a cup, the stack drops. If your belt is full, you can't pull, and the stack stays static. If the stack is static, you can't reach the buried Purple cups. Keep the belt flowing, keep the slots open.
Objective 3: Execute the "Mid-Game Pivot"
Around the 40-50% completion mark, you must shift priorities. Cyan is naturally easy to pour because it's often unblocked. You must deliberately *ignore* accessible Cyan cups to hunt for blocked Purple ones. This counter-intuitive step is where most players fail. You must prioritize the hardest-to-reach color (Purple) while the easy color (Cyan) sits waiting.
Objective 4: The Final 10% Precision
The last 10% of this level is a "surgical phase." Bulk pouring is forbidden. You will be pouring single cups, waiting for the dispense, and checking the meter before pulling the next one. One mistake here—like accidentally loading a wasted Cream cup—can spell failure because you won't have the time/space to cycle it off.
Step-by-Step Walkthrough: The Perfect Run
Phase 1: The Opening Sequence (0-30% Completion)
Start by scanning the tray. Identify the Cyan cup on the far left (usually unblocked) and the Magenta cup on the right edge.
1. **Pull Cyan** from the left. Load it onto the belt.
2. **Pull Magenta** from the right. Load it.
3. **Pull Dark Red** from the center. Load it.
* **Action:** Tap to pour all three as they pass the dispenser.
* **Observation:** Check the meter. Cyan should jump significantly, Magenta moderately, and Dark Red slightly.
* **Critical Check:** Ensure you have 2 empty slots remaining on the conveyor.
Phase 2: Unblocking the Tray (30-50% Completion)
After the first cycle, you will likely see Cream cups blocking the bottom row and more Cyan hidden behind them.
1. **Do not pull the Cream cups.**
2. Look for "Light Pink" or other waste cups at the bottom of the stack. Pulling these is sometimes necessary to trigger the physics engine to drop the stack and reveal the cups underneath.
3. **Target:** You need to expose the **Dark Red** cups buried in the center and the **Cyan** cups buried at the bottom.
4. **Tactic:** If you are blocked, pull a single waste cup, let it load, and immediately focus on the newly exposed color. Do not queue multiple waste cups.
Phase 3: The Purple Hunt (50-80% Completion)
This is the danger zone. Cyan is likely nearing 70-80% completion. Magenta is lagging. Purple is untouched.
1. **Stop pulling Cyan.** Even if Cyan is available, skip it. You need to catch the other colors up.
2. **Locate Purple:** It is usually buried deep in the tray. You may need to pull a waste cup or two to get the stack to drop low enough to reach it.
3. **Load Purple:** Once Purple is on the belt, pour it.
4. **Cycle Magenta:** While hunting for Purple, keep loading Magenta whenever it appears to balance the meter.
Phase 4: Endgame Control (80-100% Completion)
The meter is showing 4/5 colors near completion. You are likely missing the last 10% of Magenta or Purple, or the final touch of Dark Red.
1. **One-Tap Strategy:** Pull exactly one cup. Pour it. Watch the meter. *Then* decide on the next pull.
2. **Visual Inspection:** Ignore the meter numbers for a second and look at the canvas. Do you see small white gaps? Those gaps dictate the color you need next.
3. **Avoid Cream:** At this stage, a single Cream cup taking up a slot for 5 seconds can cause you to lose the rhythm and fail the "perfect" clear.
Color Processing Order and Priorities
Priority Tier 1: Cyan (The Anchor)
Cyan is your anchor color. It has the largest surface area on the canvas (the upper canopy). Because it covers so much ground, it fills up slowly but consistently. You don't need to hunt for it aggressively; it will naturally be available. However, because it is so abundant, it is the easiest color to "waste" pours on if the meter is already full.
Priority Tier 2: Magenta (The Balancer)
Magenta is your balancing act. It appears in distinct patches. If you let Magenta drop below 50% while Cyan is at 80%, you will struggle to finish the level because you'll run out of conveyor space trying to play catch-up. Always keep Magenta within 20% of Cyan's progress.
Priority Tier 3: Dark Red (The Structure)
Dark Red is the trunk. It’s straightforward but often blocked. It requires medium attention. You usually only need 2-3 solid pours of Dark Red to complete it, but finding those cups without pulling Cream is the challenge.
Priority Tier 4: Purple (The Bottleneck)
Purple is the bottleneck. It is required for the win, takes up the least space, and is the hardest to reach. You must prioritize Purple *above* Cyan in the late game. If you have 4/5 slots full and Cyan is done, but Purple is waiting to be pulled, you must clear a slot immediately to get that Purple cup.
Key Tips, Mistakes, and Solutions
Key Tip: The "Waste Cup" Sacrifice
Sometimes, you *must* pull a Cream or Light Pink cup. Do not fear this. If a critical Cyan cup is trapped underneath two Cream cups, pull the Cream cups quickly. Load them, let them pass through the dispenser (wasting the pour), and get them off the belt. This "sacrifice" clears the tray for the color you actually need. It is better to waste 10 seconds clearing the tray than to stare at a blocked screen for 30 seconds.
Key Tip: Rhythmic Tapping
Level 182 has a "heartbeat." Tap-pour, wait, tap-pour, wait. Do not spam taps. The dispenser has a travel time. If you tap too fast, you might queue up a pour you didn't want (e.g., pouring a Cyan cup that you meant to remove or ignore). Respect the 1.5-second travel time of the dispenser.
Common Mistake: The "Cyan Lock"
**The Mistake:** Players see Cyan cups available and keep pulling them because it feels productive. Suddenly, the meter shows Cyan is 100% full, but Magenta is only 40% full and Purple is 0%. You now have 3 useless Cyan cups on the belt taking up space.
**The Fix:** As soon as Cyan hits 70-80%, visually ignore it. Do not pull another Cyan cup until Magenta and Purple are above 60%.
Common Mistake: Premature Belt Filling
**The Mistake:** Filling all 5 slots early because "I need lots of paint."
**The Fix:** An empty slot is a tool. It allows you to pull a blocker cup (Cream) to drop the stack and reveal a good cup (Purple). If your belt is full, you are stuck. Keep 2 slots open until the very last second.
Stuck Solution: The "Hard Reset" Pull
If you are completely stuck—no useful colors are visible, and the belt is clogged with waste—you have to bite the bullet. Stop caring about the meter for 10 seconds. Rapidly pull waste cups to force the tray to shift violently. This will cycle the entire tray and bring new colors into the "pickable" zone. It costs time, but it breaks the deadlock.
Speed Run Tip: Pre-Loading
For experienced players looking to optimize: While the current cup is pouring, you can already be dragging the *next* cup from the tray. Don't wait for the pour to finish to start looking. As the dispenser is pouring a Cyan cup, scan the tray for the Magenta cup you need next. This reduces the "decision time" between pours to near zero.