
Level 188
HARDHow to solve Sand Loop level 188? Get instant solution for Sand Loop 188 with our step by step solution & video walkthrough. Sand Loop 188 tips and guide.
Play Sand Loop Now
Experience the puzzle challenge firsthand
Game Screenshots
Sand Loop Level Guides
Level Overview: The Yellow Submarine Challenge
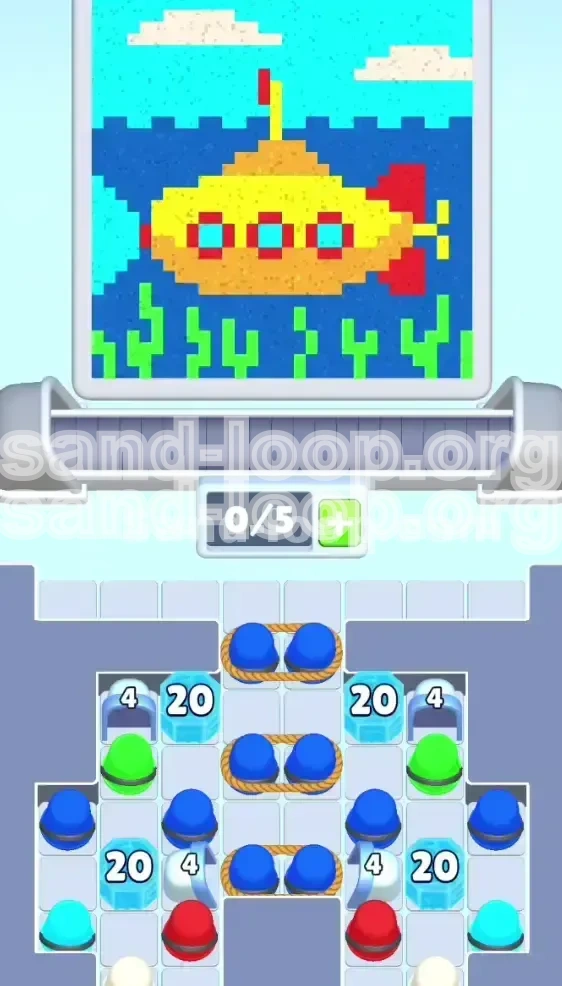
Welcome to Level 188, commonly known as "The Yellow Submarine." This stage is a significant shift in pace from previous levels, prioritizing logic, inventory management, and patience over quick reflexes. You are tasked with recreating a vibrant underwater scene featuring a bright yellow submarine, deep blue water, and green seaweed.
The primary difficulty in this level lies in the extreme restriction of your resources. Unlike standard stages where you might have an open tray to work with, here you begin with a severely clogged board. Your dispenser belt is limited to a tiny 5-slot capacity, which acts as a bottleneck. The board is initially flooded with high-durability obstacles, specifically "20-hit" Ice Blocks and complex Roped Cup configurations that force you to play in a very specific, rigid order.
Compounding this is a deceptive resource scarcity. The target image is dominated by Yellow sand, yet at the start of the game, your tray is virtually devoid of Yellow cups. This guide will walk you through how to navigate these bottlenecks, clear the path to the resources you need, and layer your colors correctly to achieve a 100% completion rate.
Core Mechanics & Layout
- 5-Slot Belt Constraint: Your conveyor belt can only hold 5 items at once. If a sixth item is dispensed or a roped pair pulls a double-item load when the belt is full, the game ends immediately.
- High-HP Obstacles: The level features Ice Blocks marked with "20." These require 20 adjacent hits to break. They act as anchors, preventing movement in the tray until cleared.
- Roped Pairs: Many cups, particularly in the center column, are tied together. Tapping one pulls both. This effectively takes up 2 slots instantly (40% of your capacity).
The Resource Shortage
One of the biggest psychological hurdles of Level 188 is the "False Start." The submarine requires approximately 60-70% Yellow sand to paint the body. However, the initial spawn rates for Yellow are abysmally low, likely below 5% for the first 30 moves. You must resist the urge to pour the colors you *do* have (Blue/Cyan) over the entire canvas, or you will bury the area where the submarine needs to sit.
The Physics Trap
Sand Loop physics dictate that heavier or larger piles of sand push lighter ones out of the way, but generally, everything settles at the lowest available point. The "Seaweed" (Green) is located at the absolute bottom of the canvas. If you pour the Yellow submarine body too early, the yellow sand will slide down the slopes and settle at the bottom, mixing with the green zone. Once the colors mix, they cannot be separated. You must build the floor before you build the object floating above it.
Victory Conditions
To clear this level, you must achieve a 95% or higher match rate with the target image. This means:
- A complete, unblemished Yellow oval for the submarine body.
- Green seaweed rising cleanly from the bottom floor without blue contamination.
- Blue water filling the background without bleeding into the submarine.
- Red detailing on the periscope and propeller.
Clear Objectives: Your Mission Goals
Before you tap a single cup, understand the three distinct phases of this level. Trying to rush Phase 3 while still in Phase 1 is the guaranteed path to a "Game Over."
Phase 1: The Clear-Out (Moves 1-20)
Your immediate goal is not to paint the picture, but to create space. You are currently suffocated by Ice Blocks and Roped Cups. You must clear the bottom corners and the central column to allow the circulation of new cups into the tray. Think of this as unclogging a drain. You cannot reach the Yellow resources until the physical blockage (ropes and ice) is removed.
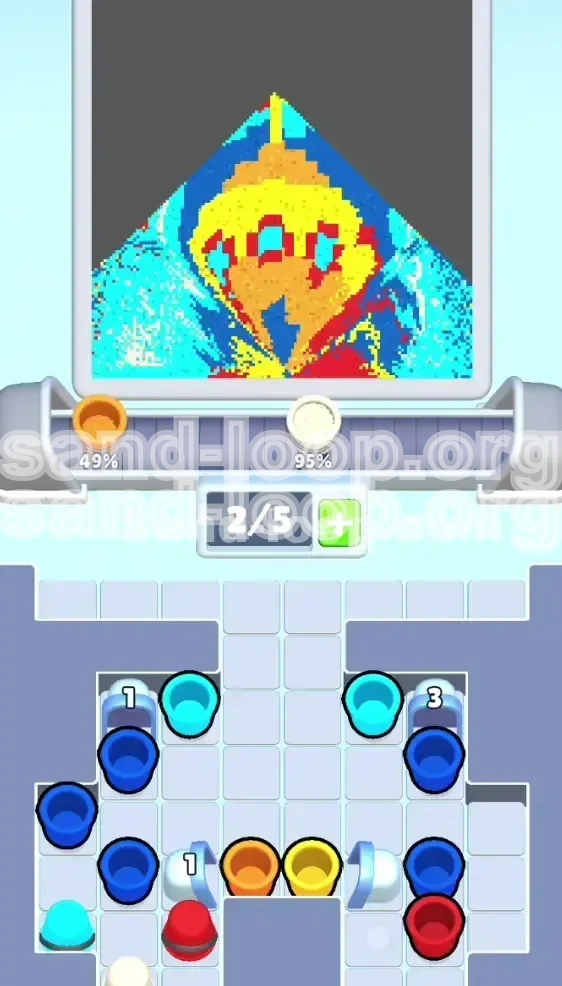
Phase 2: The Foundation (Moves 20-40)
Once the blockage is cleared, you will gain access to Green and Blue cups. Your objective here is the "Ocean Floor." You must secure the bottom 20% of the canvas with Green and Blue sand. This acts as a plug, preventing future Yellow pours from sliding off the screen. Do not touch the Yellow cups until this phase is complete.
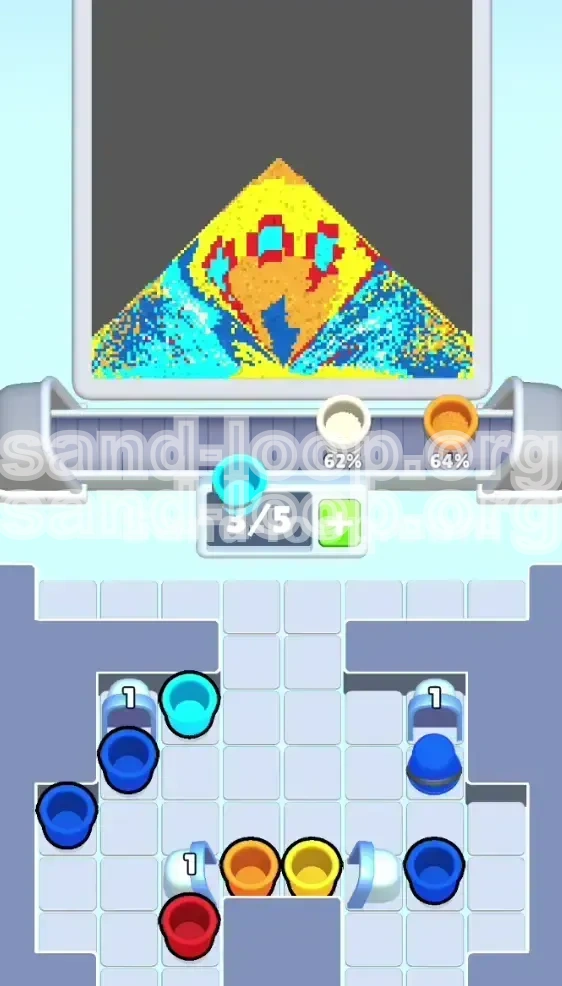
Phase 3: The Construction (Moves 40+)
This is the payoff phase. With the bottom secured and the tray flowing freely, the game will begin dispensing Yellow cups in bulk. Your goal is to rapidly fill the center of the screen with the Yellow submarine shape, keeping the edges contained so it doesn't bleed into the background water.
Inventory Management Goals
Throughout all phases, maintain a "Belt Health" of 60% or lower. Never let your conveyor belt sit at 4/5 or 5/5 capacity for more than a turn. Always prioritize pouring cups to free up slots before tapping new dispensers. This is a game of rhythm: Tap, Pour, Check, Repeat.
Step-by-Step Instructions: The Complete Walkthrough
Follow this exact sequence to navigate the start of the level safely. This path minimizes the risk of jamming your belt.
Step 1: The Bottom Corner Sweep
Start by ignoring the center of the screen entirely. Look at the bottom-left and bottom-right corners of the tray. You will typically find loose Cyan, Red, or single Blue cups here.
Action: Tap these loose corner cups immediately to send them to your belt.
Why: These are "free" moves. They don't involve ropes, so they only fill 1 slot. Sending them up clears the vertical space in the tray, allowing the heavy Ice Blocks to slide down. This movement is crucial to eventually expose the Roped Pairs in the middle.
Step 2: Surgical Removal of the Roped Column
Once the corners are cleared, identify the Roped Blue Pairs in the center. They are likely anchored by the "20" Ice Blocks.
Action: Check your belt. Ensure you have 3 or more empty slots (e.g., 2/5 or 1/5 filled). Tap the center roped pair.
Warning: This will pull two cups onto your belt simultaneously. If you only had 2 empty slots, your belt is now 4/5 full. You must pour these immediately.
Pouring Strategy: Pour these Blue cups onto the upper sides of the canvas (where the water goes). Do not pour them in the center bottom. You need to save that space for Green.
Step 3: Chipping the Ice
With the ropes gone, you now have direct access to the "20" Ice Blocks.
Action: You don't need to shatter them completely in one go. Focus on making matches adjacent to them. Use loose Blue or Cyan cups to pour near the ice blocks. Every pour counts as a "hit."
Goal: Reduce the ice blocks by 5-10 hits just to shift their position. This usually frees up the trapped Green cups sitting behind or beneath them.
Step 4: Establishing the Seaweed (Green)
As the ice breaks, Green cups will start to flow into the tray.
Action: Prioritize Green over everything else. Pour Green sand into the absolute bottom center of the canvas first, then fan out to the left and right corners.
The "Floor" Logic: You are building a raised platform of Green and dark Blue at the bottom. Treat this like concrete. Once this layer is thick enough, you can pile Yellow on top of it without the Yellow sliding down.
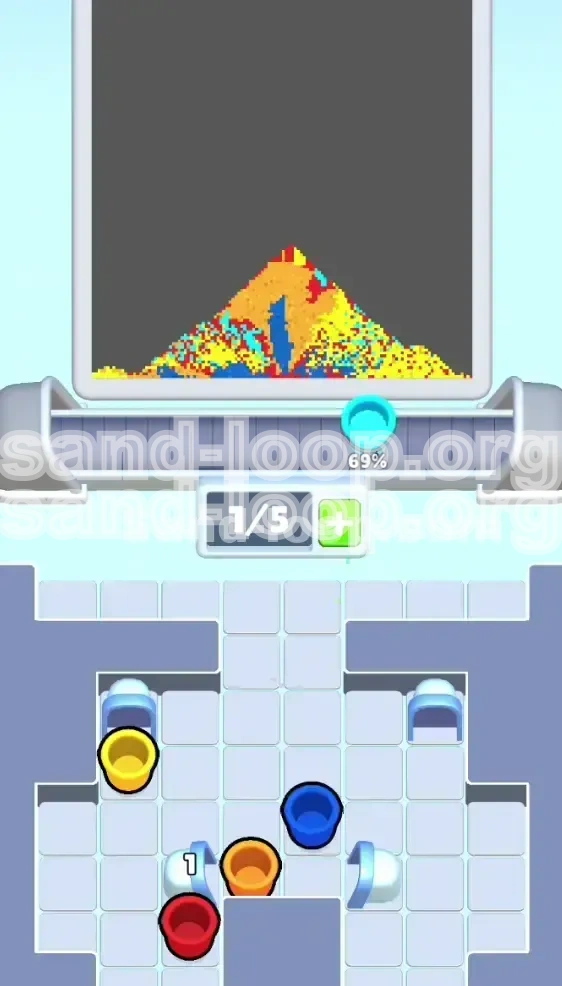
Step 5: The Yellow Flood
Once the "20" blocks are gone and the Green seaweed is visible on the canvas, the game logic shifts. The dispenser will now flood you with Yellow cups.
Action: Tap Yellow cups rapidly. Pour them in a thick oval shape in the direct center of the screen, hovering just above the green seaweed.
Tip: Don't worry about being messy with the edges yet; you can tidy up the borders with Blue water later. Focus on getting the volume of Yellow sand into the middle of the screen.
Step 6: Detail Work (Red & Cyan)
With the main body painted, you will be left with a few straggling Red and Cyan cups.
Action: Pour the Red sand onto the top of the Yellow sub (Periscope) and the back right (Propeller). Use Cyan for the windows inside the Yellow body. Do these last to ensure they remain distinct and don't get buried under the massive amount of Yellow sand required for the hull.
Color Order: The Science of Layering
In Sand Loop, the order in which you apply colors is often more important than the colors themselves. This level is a perfect example of "Top-Down" logic failing; you must use "Bottom-Up" logic.
Priority 1: Green (The Foundation)
Green is your critical color. It must be the first color you fully finalize.
- Why: Green represents the seaweed on the ocean floor. If you pour Blue water first, it covers the floor. If you pour Yellow first, it sinks to the floor and turns your seaweed into a muddy brownish mess.
- Technique: Pour Green until the pixels at the very bottom of the screen stop moving. This indicates they have hit the "floor" of the game world and are stable.
Priority 2: Blue (The Background)
Blue should be your second primary layer.
- Why: Blue fills the "negative space" around the submarine. It acts as a buffer.
- Technique: Pour Blue along the top and sides. Be careful not to let Blue wash over your Green seaweed. Use a gentle stream rather than a hard dump to keep the water above the seaweed line.
Priority 3: Yellow (The Subject)
Yellow is the dominant color, but it is physically the "lightest" in terms of visual weight, meaning it needs to sit on top of other colors to stand out.
- Why: The Yellow submarine needs to contrast against the Blue water. If you paint the water first, you can easily paint the sub over it. If you paint the sub first, painting the water around it without smudging the yellow edges is incredibly difficult.
- Technique: Wait until the Green and Blue are 80% done before you start the major Yellow pours.
Priority 4: Cyan & Red (Accents)
These are your detail colors. They have small, specific targets (windows, propellers).
- Why: They occupy the least amount of space. If you do them too early, a heavy pour of Yellow or Blue will completely bury them, rendering them invisible.
- Technique: Save these for the final 10% of the level. Place them delicately on top of the dried Yellow sand.
Key Tips & Common Mistakes
Even experienced players can fail Level 188 if they fall into common traps. Here is how to play smart and avoid the "Game Over" screen.
Key Tip: The "3-Slot Rule" for Ropes
Always keep a mental counter of your belt slots. When you see Roped Cups in the tray, ask yourself: "Do I have 3 empty slots?"
If the answer is no, do not tap the rope. Pour what you have on the belt first. If you tap a rope pair with only 2 slots open, the game will try to push 2 items into 2 slots. Sometimes the physics engine glitches and jams, or it fills the belt to 100%, leaving you zero room to maneuver the next cup. Always keep a buffer.
Common Mistake: The "Yellow Panic"
Players see the target is a Yellow Submarine. They get Yellow cups (rare as they are) and immediately pour them onto the canvas to "get started."
The Consequence: That yellow sand slides right down to the bottom of the ocean floor. When you finally get Green cups for the seaweed 20 turns later, you pour them, but they just sit on top of the yellow. The result is a yellowish-green sludge at the bottom of the screen, causing a failed level.
Common Mistake: Ignoring the "20" Blocks
It is tempting to ignore the giant Ice Blocks because they take too long to break. You might try to work around them, pouring sand over them or focusing only on the cups.
The Consequence: The Ice Blocks act like a dam. They stop the flow of cups from the top of the tray to the bottom where you need them. If you don't chip the ice, you will run out of moves because the new cups can't spawn. You must break the dam to get the resources.
Key Tip: Create "Sand Dams"
Use physics to your advantage. When pouring Blue water for the background, pour a little bit of sand near the edge of the canvas first to create a "ridge."
The Benefit: This ridge will catch the rest of the Blue sand you pour, keeping it contained in the upper corner. This prevents the Blue water from flooding down and mixing with your Green seaweed at the bottom. It’s a way of sculpting the canvas to control the flow.
Stuck Solution: Clearing the Belt Jam
If you find yourself with a full belt (5/5) and no obvious moves:
- Don't Panic Tap: Tapping a dispenser or a rope will end the game instantly.
- Analyze the Colors: Look at the 5 cups on the belt. Is there any place on the canvas that can accept them? Even a slightly wrong color spot is better than a jam.
- The "Dump" Maneuver: If you have a cup that you absolutely cannot use (e.g., a Red cup when you haven't even painted the sub yet), look for the darkest corner of the canvas where the contrast is low. Pour it there just to free the slot. It's better to have a messy background than to lose the game.
Speed Run Tips
Once you understand the logic, you can try to optimize your time. While this isn't a speed level, efficiency saves moves.
Pre-Loading the Tray
While you are busy clearing the "20" Ice Blocks, don't just wait for matches to happen. Try to tap loose cups in the tray even if your belt is getting full (as long as it's safe). Keeping the tray in a state of constant flux causes the Ice Blocks to shift faster. If the tray is static, the blocks sit still. If the tray is moving, gravity chips away at the blocks faster.
The "Combo" Pour
When you finally reach the "Yellow Flood" phase, don't tap one cup, pour it, then tap the next. Tap 3 Yellow cups in a row to load your belt (assuming you have the space), then pour them in rapid succession onto the same spot. This builds the sand pile higher faster, which helps you "bridge" over areas you might have missed with the Green floor.
Identifying the "Sweet Spot"
The submarine body is an oval. There is a specific "sweet spot" in the dead center of the screen where you can pour almost indiscriminately. If you aim your stream right in the middle, the sand will naturally pile up into the correct oval shape due to the game's collision physics. This saves you from having to trace the outline manually. Let the physics do the drawing for you.