
Level 217
HARDHow to solve Sand Loop level 217? Get instant solution for Sand Loop 217 with our step by step solution & video walkthrough. Sand Loop 217 tips and guide.
Play Sand Loop Now
Experience the puzzle challenge firsthand
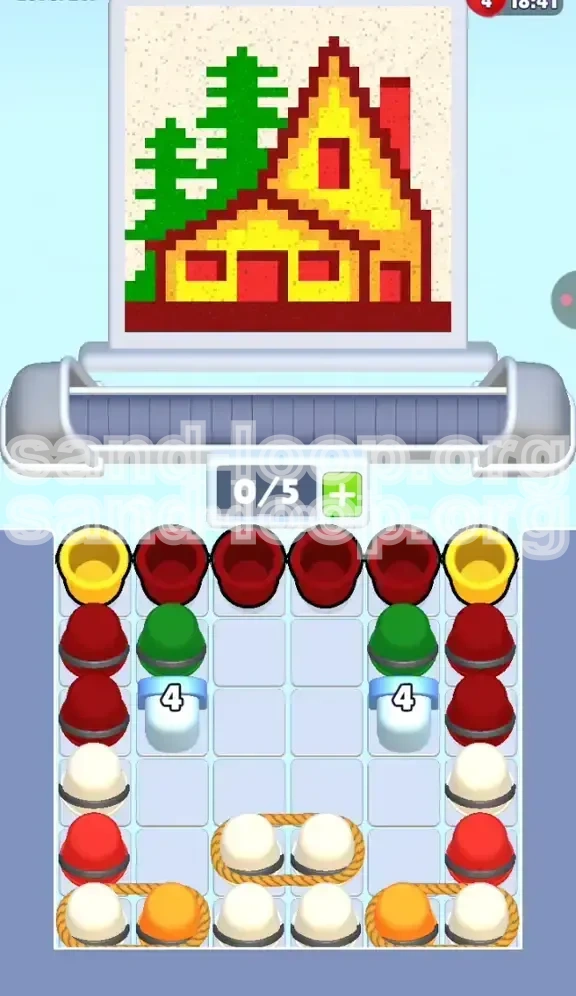
Game Screenshots
Sand Loop Level Guides
Level Overview: The Cozy Cabin Strategy Guide
Welcome to the definitive walkthrough for Sand Loop Level 217. This stage presents a charming visual of a pixel-art A-Frame cabin nestled in a pine forest, but do not let the cozy aesthetics fool you. Underneath the surface, this level is a rigorous exercise in resource management and logic dependency chains. Unlike speed-focused stages, Level 217 demands patience and precise execution.
The core challenge lies in the "dependency lock." The game forces you to construct the central architectural elements (the cabin) before you can access the landscaping elements (the trees). This is because the essential colors for the forest—Green—are physically trapped behind Ice Blocks that can only be destroyed by clearing the Red and Yellow cups assigned to the house. If you attempt to rush or ignore the structural logic, you will find yourself with a clogged conveyor belt and an unfinished canvas.
Structural Analysis of the Tray
The layout in this level is designed to create a bottleneck. Understanding the physical arrangement of the cups is crucial for success.
- The Central Tower: The middle of the tray is dominated by Red and Yellow stacks. These are your primary focus for the first 50% of the game.
- The Ice Bastions: On either side, often slightly elevated, you will see large Ice Blocks marked with a "4". These sit directly on top of the Green cups.
- The Rope Bundles: At the very bottom of the screen, there are pairs of cups connected by ropes. These act as "space eaters" and can easily clog your belt if triggered prematurely.
- The Gridlock: The tray is tight. There is very little wiggle room to maneuver cups around each other. You must clear space vertically before you can move horizontally.
- Visual Cues: The game visually stacks the "House" colors over the "Tree" colors, subtly hinting that you must build the shelter before the garden.
- Capacity Constraints: The conveyor belt has a standard capacity, but the roped pairs consume double the space, effectively reducing your maneuverability by 40% if not managed correctly.
Color Palette and Distribution
Success in Level 217 depends on understanding how the paint colors are distributed across the board.
- Bright Red (High Volume): Used for the roof, chimney, and foundation. This is your most critical resource. If you run out of Red early, the level becomes impossible to finish.
- Sunshine Yellow (Medium Volume): Used primarily for the cabin walls. These cups are usually interspersed with Red cups to force you to alternate colors.
- Forest Green (Locked Volume): Used for the tall pine trees. These are abundant but inaccessible until the mid-game. Do not worry about them initially.
- Neutral/White (Background): Likely hidden in the roped pairs at the bottom. These are used to clear the sky and negative space.
- The Foundation Risk: The foundation of the cabin requires a significant amount of Red sand—approximately 30% of your total Red supply. Budget accordingly.
- Tree Density: The left side of the canvas features dense tree coverage, meaning you will need to tap Green cups in rapid, unbroken chains once they are unlocked.
Understanding the Mechanics
This level relies on specific mechanics that you must master to progress.
- Ice Block Physics: The Ice Blocks are not random obstacles; they are mathematical locks. They require exactly 4 adjacent clears to shatter. This is the timer for your first phase.
- Rope Tension: Tapping one cup in a roped pair triggers both instantly. There is no "unrolling" animation. It is an immediate dump of two units into your processing queue.
- The Belt Flow: Your conveyor belt is your lifeline. If it stops moving because you are waiting for paint to apply, you are losing valuable time.
- Gravity Logic: Once the Ice Blocks shatter, the Green cups do not just appear; they fall down to fill the empty spaces left by the cleared Red/Yellow cups. This changes the topology of the tray.
- Adjacency Rules: Only cups physically touching the Ice Blocks count toward the damage counter. Diagonal touches usually do not count in this game engine. Focus on direct neighbors.
- Fill Order: The canvas paints in layers. Background first, then mid-ground (House), then foreground (Trees). Attempting to paint foreground elements before the background is cleared often results in pixel errors.
Why This Level Is Difficult
Many players fail Level 217 because they play it like a standard tapping game. Here is why it requires a shift in strategy.
- The False Start: The temptation is to clear the easy cups at the bottom first. This is a trap. Clearing bottom cups early often leaves you with isolated Red/Yellow cups at the top that are harder to reach when the belt is full.
- Resource Starvation: If you clear Red cups too fast for the roof and ignore the foundation requirements, you will be left with a floating house and no sand to ground it.
- The Bottleneck: The middle section of the tray is a choke point. If you clear the sides before the center, you create a column of isolated cups that is difficult to clear without causing a jam.
- Timing the Ice: Breaking the ice too early can be just as bad as breaking it too late. If the Green cups drop while your belt is full of Red, you will have nowhere to put the Green paint, leading to overflow.
- Complexity Spike: This level introduces a multi-stage logic puzzle within an arcade game. It tests your short-term memory as much as your reflexes.
- Pixel Precision: The cabin art requires precision. Spilling Green paint over the Red roof because of a tap order mistake ruins the aesthetic and forces a restart.
Clear Objectives and Goals
To conquer Level 217, you need to shift your mindset from "clearing cups" to "executing a project plan." Here is exactly what needs to be done to secure the win.
Phase 1: The Ice Breaker (Opening)
Your immediate goal is to gain access to the Green cups. The Ice Blocks are the gatekeepers of this level.
- Objective: Reduce the Ice Block counter from 4 to 0.
- Method: Clear exactly 4 cups that are physically adjacent to the Ice Blocks. Do not worry about painting the canvas perfectly yet; focus on the mechanics of breaking the ice.
- Target Selection: Prioritize Red and Yellow cups that are touching the ice. Ignore any roped pairs at the bottom for now.
- Success Indicator: The screen will flash, the ice will shatter, and you will hear the distinct sound of glass breaking.
- Failure State: If you tap cups elsewhere on the board and ignore the ice, you will run out of moves on the main board, leaving the Green cups permanently locked.
- Efficiency Tip: Since you need 4 hits, try to plan your taps so that the 4th adjacent cup clears is a color you need immediately (Red or Yellow), ensuring a smooth transition into the next phase.
Phase 2: Cabin Construction (Mid-Game)
Once the ice is broken, the game opens up, but the real work begins. You are now in "build mode."
- Objective: Complete the painting of the A-Frame Cabin (Roof, Walls, Chimney, Foundation).
- The Roof Strategy: The roof requires large, continuous pours of Red. Do not alternate colors here. Get the Red on the belt and let it flow.
- The Wall Strategy: The walls are Yellow. Once the roof is done, switch to Yellow cups to fill in the sides of the cabin.
- The Foundation: This is often the last part of the cabin to be painted. Ensure you reserve 3-4 Red cups for the very bottom of the structure.
- Canvas Management: Do not let the belt run dry. While the roof is painting, you should already be lining up the Yellow cups for the walls.
- Synchronization: Try to time the completion of the cabin with the clearing of the upper tray. You want the tray to be relatively empty when the trees start to fall.
Phase 3: Forest Plantation (End-Game)
With the house built and the tray cleared, the Green cups will have fallen into accessible positions.
- Objective: Paint the Pine Trees on the left side of the canvas.
- The "Green Rush": Green cups are often stacked. You will likely need to tap 3-4 Green cups in a row. Ensure your belt has 4+ empty slots before you start tapping these.
- Placement Precision: The trees are in the foreground. Make sure the cabin behind them is fully dry (or fully painted) before overlaying the green pixels.
- Final Touches: Use any remaining White/Neutral cups to clean up the background sky or snow patches.
- Belt Cleanse: By this point, the belt should be moving very fast as you process the final stacks.
- Win Condition: The level ends when the last pixel of the leftmost pine tree is filled and the belt is empty.
Belt Management Goals
Throughout all phases, managing the conveyor belt capacity is a distinct objective in itself.
- Capacity Awareness: Keep a mental counter of your belt slots (usually 5). Never let it sit at 5/5 full.
- Flow Maintenance: Aim for a "tick-tock" rhythm. One cup loads, one cup paints. If you load 3 cups in a row, you risk a jam.
- Buffer Zone: Always try to keep 2 slots open. This gives you enough room to trigger a roped pair without losing the game.
- Clearing the Jams: If the belt stops, identify the bottleneck immediately. Is it a roped pair? Is it a color you don't need yet?
- Prioritization: If the belt is full, stop tapping the tray. Wait for the paint to hit the canvas. Tapping a full belt is the number one cause of failure.
Step-by-Step Walkthrough
Follow this exact sequence of actions to navigate the tray layout of Level 217. This walkthrough assumes a standard playthrough with no power-ups.
Step 1: Targeting the "Neighbors"
The moment the level starts, do not look at the bottom of the screen. Lock your eyes onto the center-top.
- Action: Identify the Ice Blocks marked "4". Look immediately to the left and right of these blocks.
- Target: You will see Red cups stacked in columns adjacent to the ice.
- First Tap: Tap the Red cup that is touching the Ice Block. This counts as "1" damage to the ice.
- Second Tap: Look for the Yellow cup adjacent to the ice. Tap it. Count is now "2".
- Observation: Watch the number on the ice drop. This is your progress bar.
- Warning: Do not touch any cup that is not touching the ice yet. Preserve your moves.
Step 2: Cracking the Code
Continue the assault on the Ice Block. We need to shatter it before the belt fills up.
- Third Action: Tap the next available Red or Yellow cup that is a direct neighbor to the ice.
- Fourth Action: Deliver the final blow. Tap the last adjacent cup.
- Result: The Ice Block shatters. The Green cups sitting on top of it will now slide or fall down into the playable area.
- Immediate Pause: Take a split second to check your belt. Is it half full? Good.
- Note: Do not tap the Green cups yet. They are safe where they landed. We need to clear the backlog of Red/Yellow first.
Step 3: Establishing the Cabin Core
With the ice gone, we can focus on the house. We need to get the roof painted.
- Action: Focus entirely on the Red cups in the center of the tray.
- Technique: Tap Red cups until you have a solid stream of Red on the conveyor belt (approx. 3 cups).
- Canvas Feedback: Watch the top screen. You should see the Red Roof filling in rapidly.
- Transition: Once the roof is visually 80% done, look for the Yellow cups.
- Optimization: If you have a "Roped" pair of White/Neutral cups at the bottom, ignore them for now. They are for the background cleanup later.
Step 4: The Yellow Walls and Foundation
Transition your color focus to complete the main structure.
- Action: Tap the Yellow cups to load the Sunshine Yellow paint.
- Visual Check: Ensure the walls of the cabin are filling in. If you see Red bleeding into the walls, you tapped the wrong color.
- The Foundation Trap: Look at the bottom of the house on the canvas. Is the base painted? If not, you need to load one more Red cup.
- Execution: Tap a single Red cup, then immediately switch back to clearing remaining structural cups.
- Belt Check: Ensure the belt is clearing out. You want to enter the next phase with an empty belt.
Step 5: The "Green Wave" Strategy
Now that the house is done, the tray should be mostly clear of Red/Yellow, leaving the Green cups accessible.
- Condition: Ensure your belt is empty (0/5).
- Action: Rapidly tap all available Green cups. Since the ice is gone, they should be easy to access.
- Chain Reaction: Try to tap 3 or 4 Greens in a row. This loads the belt with a pure stream of Forest Green.
- Canvas Effect: The trees on the left should materialize almost instantly.
- Why this works: Doing it all at once prevents the paint from mixing with the residual Red/Yellow on the belt, ensuring clean lines.
Step 6: Cleanup and Roped Pairs
The endgame. Just cleanup and background items remaining.
- Target: Look at the bottom of the tray where the Roped Pairs are.
- Calculation: If you have 2 slots open, tap a roped pair. If you have 3 slots open, tap a roped pair.
- Action: Clear the White/Background colors.
- Final Polish: These cups will fill in the sky and any remaining snow patches on the ground.
- Winning Move: As the last cup clears the belt, the "Level Complete" animation should trigger.
Color Order and Processing Guide
The order in which you process colors is not just a suggestion; it is a mathematical requirement for Level 217. Processing colors in the wrong order is the primary cause of failure.
The Priority Pyramid
Think of your color processing as a pyramid. The base must be built before the peak can be achieved.
- Tier 1 (Foundation): Red. This is non-negotiable. The roof and foundation are the anchor of the image. Red must be the first color you systematically process.
- Tier 2 (Structure): Yellow. Once Red is flowing, Yellow is your secondary priority. It supports the Red structure.
- Tier 3 (Foreground): Green. This comes last. Processing Green early is impossible due to the ice, and attempting to do so later before the house is done results in a messy canvas.
- Tier 4 (Background): White/Neutral. This is filler. Process this only when you have a gap in the main colors or as a final step.
- The Interlock: Notice how the colors interlock on the canvas. Red (Roof) is above Yellow (Walls). If you paint the walls before the roof, you might overlap, which wastes paint.
- Volume Ratio: Expect to process Red and Yellow for 60% of the level duration, and Green/White for the remaining 40%.
The "Sandwich" Technique
Sometimes, you cannot process just one color. You need to sandwich them.
- The Setup: You have Red on the belt, but the roof is done. You need Yellow for the walls, but you have a roped pair coming up.
- The Move: Red (Roof) -> Roped Pair (Clean up) -> Yellow (Walls).
- Why: This breaks up the color streams on the belt, preventing the game from confusing the pixels. It keeps the workflow rhythmic rather than clunky.
- Fluidity: The sandwich technique maintains belt fluidity. It ensures you are never waiting for one specific color to clear.
- Timing: Use the "sandwich" fill when the canvas is transitioning between major elements (e.g., House to Trees).
Transition Timing
Knowing when to switch colors is an art form.
- The 80% Rule: Do not switch colors until the current color section is 80% full. Switching too early leaves patchy areas; switching too late wastes paint.
- Visual Cues: Watch the canvas opacity. When the red starts to look solid, stop tapping red immediately.
- Belt Check: If the belt is full of Red, but the roof is done, you have switched too late. You are now in "damage control" mode.
- Anticipation: Look at the tray. If you see a massive block of Green coming up, finish your current Red/Yellow sequence immediately to make room.
Key Tips for Mastery
To truly master Level 217 and achieve consistent wins, integrate these tips into your playstyle.
Patience Over Speed
This is the Golden Rule for this level.
- The Philosophy: Level 217 is a logic puzzle, not a clicker test. Tapping faster will not help you if the logic is wrong.
- The Pause: Take a 1-second pause after the Ice Blocks break. Re-evaluate the board.
- Consequence: If you rush, you will fill the belt with the wrong colors. Once the belt is clogged with 3 wrong colors, the game is effectively over.
- Focus: Focus on the *result* of the tap (does the ice break?), not the *action* of the tap.
- Breathing Room: Keeping 2 slots open on your belt gives you the breathing room to think. Filling the belt to capacity creates anxiety and mistakes.
The "Roped Pair" Rule of Thumb
Roped pairs are the most dangerous element in this level.
- The Rule: Never tap a roped pair unless you have at least 3 empty slots on your conveyor belt.
- The Math: A roped pair adds 2 units instantly. If you are at 3/5 capacity, you go to 5/5. If you are at 4/5, you jam.
- Safe Zone: Only tap roped pairs when the belt is at 2/5 or lower. This guarantees they flow into the processing slot without blocking the entry point.
- Strategy: Treat roped pairs as "mini-bosses." Clear them deliberately, then go back to clearing single cups.
Visualizing the "Fall"
Understanding physics in Sand Loop is key.
- Gravity: When you clear a cup, everything above it falls down.
- Planning: Don't just look at the cup you are tapping. Look at what is *above* it. Will tapping this Red cup bring a Green cup into a tapping position?
- Chain Reactions: Sometimes, tapping one cup clears a column, allowing you to tap the whole new column rapidly.
- Tray Evolution: The tray changes shape 3 times during this level. Initial -> Post-Ice -> Post-Cabin. Adapt your strategy with each shape change.
Belt Optimization
Master the machine that processes your colors.
- Flow State: You want the belt to move constantly. Stop-and-go movement wastes time.
- Pre-loading: While the current cup is being painted, you should already be tapping the next cup to enter the queue.
- Color Blocking: Avoid alternating Red-Yellow-Red-Yellow on the belt. It is better to do Red-Red-Yellow-Yellow. This is because the brush head on the canvas cleans itself faster when processing similar colors.
- Empty Slot Strategy: If you have 1 empty slot, look for a single cup. If you have 3 empty slots, look for a roped pair. Match your input to your capacity.
Common Mistakes to Avoid
Learning from others' mistakes is the fastest way to improve. Here are the most common errors players make in Level 217.
The Premature Green Tap
This is the most frequent error, occurring right after the ice breaks.
- The Mistake: As soon as the Green cups drop, the player immediately taps them.
- The Result: The belt is currently full of Red/Yellow from breaking the ice. The Green cups get stuck in the queue or clog the intake.
- The Fix: Wait until the belt is clear of the initial Red/Yellow rush before tapping the Greens.
- Why it happens: Excitement. The player sees the color they need and instinctively taps.
- Prevention: Train yourself to look at the belt *first* before looking at the new cups.
Ignoring the Foundation
A subtle but devastating mistake regarding the house structure.
- The Mistake: Painting the roof and walls but forgetting the base of the cabin.
- The Result: You reach the end of the level with a completed forest but a floating cabin. You have no Red cups left to fix it.
- The Fix: Always reserve 2-3 Red cups for the very end of the "Cabin" phase.
- Visual Check: Look at the bottom edge of the cabin. Does it touch the ground? If not, you aren't done with Red.
- Resource Audit: Halfway through the level, count your remaining Red cups. If you have zero, you have used them too early.
The "Full Belt" Panic
A psychological error that leads to game overs.
- The Situation: The belt is full (5/5). The player panics and keeps tapping.
- The Result: The intake mechanism jams. The game timer keeps running, but no progress is made. You lose.
- The Fix: If the belt is full, stop tapping. Lift your finger. Watch the canvas until a cup clears.
- Recovery: It takes 2-3 seconds to clear a full belt. Patience is the only cure.
- Prevention: Never let the belt get past 4/5. Keep it flowing.
Fighting the Dependency
Trying to outsmart the game design.
- The Mistake: Trying to clear side cups or background cups before dealing with the Ice Blocks.
- The Result: You run out of moves. The Ice Blocks never break. The Green cups never unlock.
- The Reality: You cannot bypass the Ice Blocks. They are the gate.
- The Strategy: Accept the linearity of the level. Ice -> Cabin -> Trees. Do not try to do Trees -> Cabin.
- Signs: If you find yourself making small, insignificant clears at the edges of the screen, you are making this mistake.
Stuck? Here Are the Solutions
If you find yourself stuck at a specific point in Level 217, use these diagnostic steps to get moving again.
Stuck in Phase 1 (Ice Won't Break)
Problem: You have tapped cups, but the Ice Blocks are still up.
- Diagnosis: You are tapping cups that are not adjacent to the ice.
- Solution: Zoom in (mentally) on the number "4". Look strictly at the cups immediately to the left, right, and below the ice block.
- Action: Ignore the rest of the board. Tap only those direct neighbors.
- Check: Are you trying to tap the Green cups *on top* of the ice? That doesn't work. You must clear the neighbors.
- Reset: If you have cleared all neighbors and it didn't break, you might have encountered a bug, or missed a "hidden" neighbor cup behind another stack.
Stuck in Phase 2 (Belt is Clogged)
Problem: Your belt is full of Red, but you need Yellow, or vice versa.
- Diagnosis: You failed to alternate colors and created a bottleneck.
- Solution: Stop tapping. Wait for the belt to clear one slot.
- Desperate Measure: If you are desperate and have room, tap a roped pair of a different color to break the flow, but this is risky.
- Prevention for next time: Don't load 3 Reds in a row. Load Red, Yellow, Red, Yellow.
- The Wait: Sometimes you just have to wait 10 seconds for the paint to dry. It feels slow, but it's faster than failing.
Stuck in Phase 3 (Trees Won't Paint)
Problem: The Green cups are accessible, but the trees aren't filling in.
- Diagnosis: You likely have "dirty" paint on the belt (mixing colors).
- Solution: Let the belt run completely empty. Do not put *any* cups on the belt until it is 0/5.
- Resetting the Brush: The game needs to reset the brush color to pure Green. Any residual Red or Yellow contaminates the Tree pixels.
- Action: Once the belt is empty, tap 3 Green cups rapidly. This forces a pure Green stream.
- Check Canvas: Ensure the cabin isn't overlapping the tree area. Sometimes the house is painted too large, blocking the tree zone.
Out of Moves
Problem: The tray is empty, but the canvas isn't finished.
- Diagnosis: You wasted taps on useless cups or cleared inefficiently.
- Solution: There is no in-game solution other than restarting. However, analyze *why*.
- Analysis: Did you clear background White cups before the house? That is usually the culprit.
- Strategy Adjustment: In the next run, ignore the background. Focus 100% on the "Object" colors (Red/Yellow/Green) first.
Speed Run Tips and Shortcuts
Once you have mastered the level, you might want to improve your time. Here is how the pros do it.
The "Pre-Break" Setup
Gain speed before the game even really starts.
- Technique: While the level is loading (during the "3-2-1" countdown), visually locate the 4 cups you need to tap to break the ice.
- Execution: As soon as control is granted, tap those 4 cups in less than a second.
- Benefit: This shaves 2-3 seconds off your run immediately.
- Risk: If you miss-tap, you lose momentum. Only do this if you are confident.
Batch Processing
Minimize transitions to maximize speed.
- Technique: Instead of tapping Red-Wait-Red-Wait, tap Red-Red-Red.
- The Logic: The belt moves at a constant speed. Loading it fully means you don't have to tap as often.
- Application: Fill the belt to 4/5, then take your hands off for 2 seconds to check the canvas. Repeat.
- Efficiency: This reduces micro-management errors.
Ignoring Perfection
Speed running requires tactical negligence.
- Technique: Don't fill the corners of the background.
- Focus: Paint the Cabin and the Trees to 90% completion.
- Skip: You can often skip the roped pairs at the bottom if the main cabin is finished.
- Win Condition: The game often registers a "Complete" even if the background isn't 100% white. Test where the threshold is.
- Note: This is risky. If you don't clear enough, you fail. Use with caution.