
Level 231
HARDHow to solve Sand Loop level 231? Get instant solution for Sand Loop 231 with our step by step solution & video walkthrough. Sand Loop 231 tips and guide.
Play Sand Loop Now
Experience the puzzle challenge firsthand
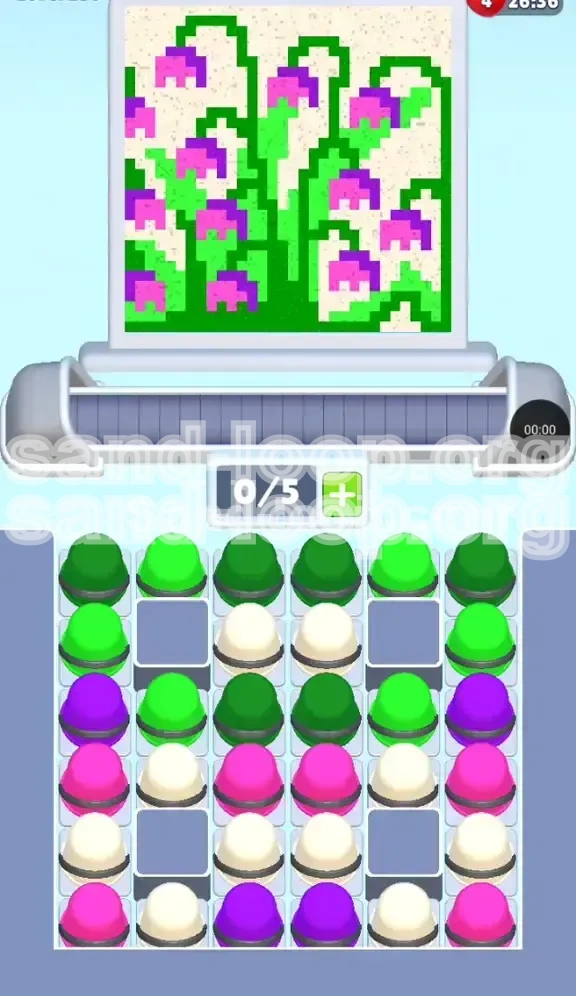
Game Screenshots
Sand Loop Level Guides
Level 231 Overview: The "Spring Bellflowers" Challenge
Introduction to the Canvas
Welcome to Level 231, a stage defined by its dense, vertical composition and vibrant floral aesthetics. In this level, you are presented with a complex arrangement of drooping bellflowers set against a soft, cream-colored background. The image is stylized with heavy contrasts between the foreground greenery and the colorful flower heads. Unlike previous stages where colors might be evenly distributed, this level relies on a "layered" approach that will test your ability to manage the conveyor belt queue effectively.
The Inventory Constraint
The primary mechanical challenge in Level 231 is the strict limitation on your queue capacity. You are operating with a maximum of 5 slots (0/5). The game deliberately generates cups in an order that creates bottlenecks. If you thoughtlessly tap every available cup, you will fill your belt with colors you don't immediately need, causing the specific color you *do* need to pass by untouched, leading to a restart.
Visual Analysis
The canvas can be broken down into three distinct zones. The bottom 40% is dominated by dark and light green foliage. The middle 30% features the transition from stems to flower heads. The top 30% is a mix of flower petals (pink and purple) and the negative space (beige). Understanding this vertical stratification is crucial for deciding when to load specific colors onto your conveyor belt.
The Core Mechanic: Vertical Stratification
This level introduces a "Vertical Stratification" mechanic in the supply tray. The game forces a linear progression: You must deal with the stems before you can effectively access the flower petals. The tray is designed so that Green cups are stacked on top of Pink and Purple cups. This means you cannot simply prioritize the pretty flowers; you must earn your way to them by clearing the green foliage first.
Why This Level Is Difficult
Players often fail here because of "queue clogging." It is tempting to clear the initial row of greens and immediately tap the Beige cups that appear underneath. However, doing so fills your limited slots with background color while the nozzle is still actively painting the green stems. This results in a missed timing window, forcing you to wait for the loop to restart, wasting valuable time and queue space.
Primary Objectives and Strategy
Objective 1: Clear the "Green Wall"
Your first major goal is to clear the massive amount of greenery that forms the base of the image. The stems are thin, often only a few pixels wide, but they are numerous. You must prioritize Dark Green and Light Green cups above all else. Do not focus on the flowers or the background until the stems are at least 80% complete. If you try to jump ahead, you will run out of queue space for the necessary greens.
Objective 2: Unlock the Flower Layers
Once the foliage is thinned out, the nozzle will move upward toward the flower heads. Your goal here is to transition smoothly from Green to Pink and Purple. You must ensure that your queue is empty enough to accept these new colors when they arrive. If your belt is full of leftover Green or Beige cups when the nozzle hits the first flower, you will fail to paint the petals.
Objective 3: Manage the Negative Space
The beige (cream) background is deceptive. It covers about 15-20% of the canvas, mostly in the gaps between stems and in the top corners. Your objective is not to ignore Beige, but to use it as a "filler" color. Load Beige cups only when the nozzle is explicitly moving over the empty gaps, never while it is hovering over a dense cluster of flowers or stems.
Objective 4: Precision Paint Application
Because the stems are so thin (often 1-2 pixels wide), precision is key. The nozzle moves quickly. You must anticipate the path. If you load a Green cup a split second too late, the nozzle might skip a critical stem segment, leaving you with a 99% complete level and no way to finish without restarting. Timing your taps to match the nozzle's position over the stems is the ultimate skill check.
Objective 5: Queue Flow Maintenance
Throughout the level, maintain a rhythm of "Load -> Paint -> Empty." Never let your 5 slots sit full and stagnant. A full belt means you have zero flexibility for new colors. Ideally, keep 1 or 2 slots open as a buffer to catch cups that are about to expire or to grab a critical color that suddenly appears in the next row.
Step-by-Step Walkthrough Guide
Phase 1: The Initial Green Surge (Start - Row 2)
As the level begins, ignore the flowers completely. Look at the tray. The first row (Row 1) will contain a mix of Dark Green and Light Green cups.
- Step 1: Immediately tap all Dark Green cups in Row 1. The nozzle usually starts near the bottom center where stems converge.
- Step 2: Tap the Light Green cups from Row 1. Use these for the upper leaf highlights.
- Step 3: As Row 1 clears, you will see Row 2. Row 2 typically contains Beige cups. DO NOT TAP THEM YET.
- Step 4: Watch the nozzle. If it moves into the "sky" area (empty background), then consider tapping one Beige cup. If it stays on stems, wait for more Green cups to appear in the randomizer or wait for Row 3.
Phase 2: The Transition and Foliage Cleanup (Row 3)
Row 3 is a critical mix. It usually holds the remaining Green cups hidden behind or mixed with other colors.
- Step 1: Aggressively target any remaining Green cups in Row 3. You want to eliminate the "Green dependency" before moving to flowers.
- Step 2: You may see Purple cups appear here. Resist the urge to tap them. The nozzle is likely still painting the lower parts of the stems or leaves. Purple is wasted here.
- Step 3: If the tray offers a choice between a Green cup and a Beige cup, and the nozzle is on a stem, choose Green. Prioritize the hardest colors first.
- Step 4: Keep your queue count low (2-3 items max) during this phase to allow for quick swapping if the nozzle suddenly jumps to a flower head.
Phase 3: The Flower Heads (Row 4 & 5)
Now the canvas shifts. The greenery is mostly gone. The nozzle is moving into the bell-shaped flowers.
- Step 1: Scan Row 4 for Pink cups. The main body of the bells is Pink. This is your priority.
- Step 2: Look for Purple cups in Row 4 or 5. The rims and tips of the bells are Purple.
- Step 3: The Strategy: Load 2 Pinks and 1 Purple. The nozzle will often sweep across the body of a flower (Pink) and then catch the tip (Purple) in the same pass.
- Step 4: If you run out of Pink, use Purple sparingly on the flower bodies, but be aware it might look slightly off. It's better to wait for the Pink cups to cycle back from the side tray than to waste Purple on the wrong pixels.
Phase 4: Final Polish and Background (Row 6+)
You are in the endgame. The flowers are colored, but the background has speckles, and you might have missed a stem pixel.
- Step 1: Check your completion percentage. If it's 95%+, you likely have "orphan pixels" (tiny 1-pixel dots you missed).
- Step 2: Look for Beige cups. Now is the time to fill the vast empty spaces in the upper corners and the gaps between flowers.
- Step 3: Keep 1 Green cup in reserve if possible. It is very common to miss a single pixel on a curved stem. Having that final Green cup prevents a "Game Over" due to a single missed spot.
- Step 4: Clear the belt. As the level finishes, ensure your queue is emptying out to maximize your score and visual clarity.
Color Order and Processing Logic
1. Dark Green (The Foundation)
Priority Level: Highest (Start)
Dark Green is the most abundant color in the first 30 seconds of the level. It covers the main stems and the lower leaves. Because the supply tray generates this first, you have no choice but to process it immediately. Failure to clear Dark Green quickly results in a queue backup where you can't reach the other colors.
2. Light Green (The Highlight)
Priority Level: High
Light Green appears almost immediately alongside Dark Green. It serves as the highlight for the leaves. The nozzle often switches between Dark and Light Green rapidly as it traces the veins of the foliage. You should process these immediately after Dark Green, but don't be afraid to skip a Light Green cup if the nozzle is currently traversing a dark, shadowy stem section.
3. Pink (The Mass)
Priority Level: Medium-High
Pink covers the largest surface area of the flowers. Once the greens are gone, Pink becomes your primary color. The bulk of the visual "weight" of the image is Pink, so you need a steady stream of Pink cups. Do not let Pink cups sit in the tray; tap them as soon as the nozzle enters the flower zone.
4. Purple (The Detail)
Priority Level: Medium
Purple is purely for detail—the tips of the bells and the stamens. It covers less surface area than Pink but requires higher precision. Process Purple after you have established a flow of Pink, or interleave them if the nozzle path allows. If you have to choose between loading Pink or Purple, and the flower is 50% Pink/50% Purple, check the nozzle position. Is it on the bell body? Go Pink. Is it on the rim? Go Purple.
5. Beige (The Filler)
Priority Level: Low
Beige is the negative space. It should always be your last priority. Only load Beige when the nozzle is hovering over an area that is definitely not green, pink, or purple. If you load Beige too early, it clogs your inventory. Treat Beige as a "palette cleanser" between the more complex color phases.
Essential Tips for Success
Tip 1: The "Two-Slot" Buffer Rule
Throughout the early game (Rows 1-3), try to keep at least 2 slots empty on your conveyor belt. This buffer is crucial for catching emergency colors. If you have 5/5 slots full of Green, and the nozzle suddenly jumps to a flower that needs Pink, you are out of luck. Keeping space open gives you the flexibility to adapt to the nozzle's rapid movements.
Tip 2: Identifying the "Trap" Cups
Learn to recognize the "Trap" configuration. If Row 1 is all Green, and Row 2 is all Beige, the game is tempting you to clear Row 1 and immediately tap Row 2. Don't do it. Recognize that the nozzle hasn't moved to the background yet. Acknowledge the trap, leave the Beige cups in the tray, and wait for the Green cups to cycle back around or for the nozzle to move.
Tip 3: Watch the Nozzle, Not the Canvas
Beginners stare at the canvas to see what color is missing. Pros stare at the nozzle. The nozzle tells you what you need right now. If the nozzle is over a green stem, it doesn't matter that the canvas has a big pink flower elsewhere; you need Green now. Synchronize your tapping with the nozzle's current position, not the canvas's overall needs.
Tip 4: Rapid-Fire Tapping for Thin Lines
The stems in Level 231 are incredibly thin—sometimes just 1 or 2 pixels wide. If you are too slow, the nozzle will pass over the stem before the cup dispenses the paint. Practice rapid-fire tapping when you see a long line of stems approaching. It is better to have a little extra paint (which disappears) than to miss the stem entirely.
Tip 5: Reserve a "Cleanup" Color
In the final 10% of the level, you will often be left with a chaotic mix of unpainted pixels. If you can, save one specific cup (usually Dark Green) from the mid-game to deal with the final hard-to-reach stem pixels. If you use every single Green cup early on, you might find yourself helpless against a single pixel blocking your 100% completion.
Common Mistakes to Avoid
Mistake 1: Premature Background Painting
This is the number one cause of failure. Players see the Beige cups unlock in Row 2 and tap them immediately because they are "available." They fill their belt with Beige while the nozzle is still drawing stems. When the nozzle finishes the stems and moves to the flowers, the player's belt is full of useless Beige, and they miss the Pink/Purple window. Lesson: Availability does not equal priority.
Mistake 2: Confusing Pink and Purple
The flowers are two-tone. Players often assume the whole flower is one color (usually Pink) and ignore the Purple cups, or vice versa. If you paint the whole flower Pink, the tips remain uncolored. If you paint it all Purple, the body looks wrong. Lesson: Zoom in mentally. Treat the flower body and the flower tips as two separate objects requiring two separate colors.
Mistake 3: Ignoring the Queue Capacity
Having a full belt (5/5) makes you rigid. If you tap everything in sight just to "clear the tray," you lose the ability to react. Lesson: A full belt is a losing belt. Leave cups in the dispensing tray if your belt is full and the nozzle isn't currently in that color's zone.
Mistake 4: Panic Tapping
When the nozzle starts moving fast, or when multiple colors appear at once, players often panic and start tapping randomly. This leads to a mixed queue where colors are out of order. Lesson: Pause for a split second. Identify the dominant color under the nozzle right now, and tap only that. Speed is useless without accuracy.
Troubleshooting: What to Do When Stuck
Problem: "My Belt is Full of Useless Colors!"
Symptom: You have 5 cups on the belt, but the nozzle is currently over a color you don't have (e.g., you have Green, but the nozzle is on a Pink flower).
Solution: You have to waste them. Look at the canvas. Is there any area, even a small one, that matches the colors you have? If you have Green, find the smallest unpainted green pixel and click it to clear the cup. If not, you have to wait for the nozzle to circle back. To prevent this, always check the nozzle's next destination before loading your belt.
Problem: "I Can't Find the Last Percent!"
Symptom: You are at 98% or 99%, and you can't see what's missing.
Solution: It's almost always a Dark Green stem pixel hidden in the curve of a leaf or flower, or a tiny Purple tip on a flower that you painted entirely Pink. Don't look for the "obvious" big spots. Scan the edges of the stems and the rims of the bells. Use the "Next" preview to see what color is coming up—if it's Green, look for a stem pixel.
Problem: "The Colors Are Coming Too Fast!"
Symptom: The tray is refilling faster than you can process, and you are overwhelmed by choice.
Solution: Ignore the bottom rows. Stop looking at Rows 4, 5, and 6. Blind yourself to everything except the top 2 rows (Rows 1 and 2). Force yourself to deal with colors strictly in the order they are presented, or even skip valid colors if your belt is full, to slow the game down to a manageable pace.
Advanced Strategies and Speed Run Tips
Strategy 1: The "Pre-Load" Technique
Advanced players don't just react; they anticipate. If you know the nozzle path loops in a specific pattern (e.g., Stems -> Leaves -> Flowers), you can pre-load your queue. While the nozzle is on the final stem, load a Pink cup. By the time the cup travels down the belt and is ready to pour, the nozzle will have arrived at the flower. This saves precious seconds compared to waiting for the nozzle to reach the flower before tapping.
Strategy 2: Batch Processing
Instead of tapping one cup at a time, look for "chains." If you see three Dark Green cups in a row in the tray, tap all three in rapid succession. This guarantees that even if you miss one pixel, the next cup will catch it. Batching is particularly effective for the background Beige color—load 3 Beige cups when the nozzle enters the top corner, then clear them all at once.
Strategy 3: The "Waste" Management
Sometimes, speed running requires strategic waste. If a Pink cup is about to expire and fall off the belt, but the nozzle is currently on a Green stem, let it expire. Don't try to force a paint job on a green stem just to save the cup. Letting the wrong color expire is better than clogging your queue or making a mess of the canvas. Wait for the cycle to bring the correct color back.
Strategy 4: Memorizing the "Sweet Spots"
The level 231 canvas has "sweet spots"—areas where the nozzle lingers slightly longer or where colors transition predictably. For example, the center of the canvas usually has the densest cluster of stems. Memorize these spots. When the nozzle enters the center zone, you should already have Dark Green loaded. When it moves to the top corners, you should have Beige loaded. Moving in rhythm with the map is faster than reacting to the visuals.