
Level 254
HARDHow to solve Sand Loop level 254? Get instant solution for Sand Loop 254 with our step by step solution & video walkthrough. Sand Loop 254 tips and guide.
Play Sand Loop Now
Experience the puzzle challenge firsthand
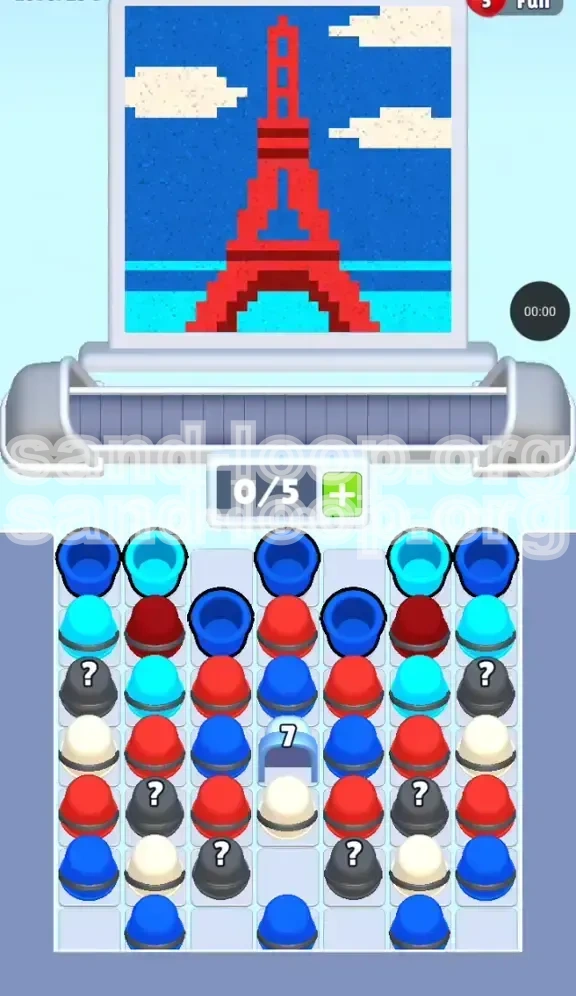
Game Screenshots
Sand Loop Level Guides
Sand Loop Level 254: The Parisian Architect Walkthrough
Welcome to the City of Light, or at least, a pixelated tribute to it. Level 254, famously known as "The Eiffel Tower," represents a significant spike in difficulty for Sand Loop players. Unlike previous levels where you could rely on rapid reflexes, this stage is a strict exercise in resource management and spatial logic. You are tasked with painting a detailed landscape featuring a towering red iron structure against a complex twilight sky. The board layout is claustrophobic, the colors are deceptively similar, and the "0/5 Slot Capacity" rule means a single misclick can spell disaster. This guide is designed to navigate you through the tight corners of the Paris skyline and ensure your victory.
Decoding the Level Layout
The playing field is divided into three distinct vertical zones, which correlates to how you must manage your cup queue. The left and right sides are dominated by deep Royal Blues and Cyans, representing the vast Parisian sky. The center column, however, is the danger zone—it is packed with the Reds required for the tower and Whites for the clouds, but it is barricaded by a stubborn Ice Lock.
The Slot Capacity Crisis
Your conveyor belt allows for a maximum of 5 active slots. In this level, that number is misleading. Because there are three different shades of blue (Dark, Cyan, Teal) plus Red and White, keeping your belt full is a death sentence. You should aim to keep 2 slots empty at all times to accommodate the rapid switching of the dispenser. If you find yourself sitting at 5/5 capacity, stop tapping immediately and wait for the current color to finish processing.
The Color Palette
Success depends on distinguishing between the "Blue" family. You have Royal Blue (Top Sky), Cyan (Mid-sky/Clouds outline), and Teal (Horizon/Ground). Mixing these up accounts for 80% of failed attempts. The dispenser is ruthless; it will frequently give you Cyan when you need Royal Blue, and vice versa. You must memorize the specific shade of the target pixels before you make a move.
The "0/5" Constraint
This notation in the level info refers to your available margin for error. You cannot afford to let "wrong" cups sit on the belt. A wrong cup isn't just a cup you don't need right now; it's a cup that blocks the cup you *do* need. In Level 254, if you queue a Red cup while the dispenser is pouring Blue, and your belt is full, the Red cup becomes a permanent blocker, forcing a restart.
The Ice Lock Mechanic
Sitting directly in the middle of the board, on row 3, is a "7" Ice Lock. This isn't just a static obstacle; it is a countdown timer. The lock sits atop a crucial White cup and is flanked by Reds. You cannot access the bottom half of the tower or the final cloud details until you shatter this lock. Shattering it requires clearing 7 adjacent cups, which means you cannot ignore the perimeter blues if you want to finish the center.
Strategic Objectives for Victory
To conquer Level 254, you need a plan rather than a reaction. The goal is not just to fill the board, but to control the flow of cups so that the Ice Lock breaks at the exact moment you are ready to finish the tower. Rushing the red tower at the start is the most common way to get stuck.
Primary Goal: Clear the Perimeter
Your first objective is to clear the outer columns of Royal Blue and Cyan. Do not focus on the tower yet. The Ice Lock is buried in the center, and the only way to reach it is to remove the "skin" of the level—the outer blues. By clearing the edges, you reduce the board's clutter and ensure that when the lock breaks, you have open slots to catch the falling White cup trapped underneath it.
Secondary Goal: Establish the Red Anchor
Once the edges are thinned out, you must establish a "Red Anchor." This means filling the bottom base of the Eiffel Tower first. The base is wide and requires a high volume of red cups. If you start working on the spire (the top) before the base is full, you risk running out of Red cups later when the board is more chaotic. Secure the wide red base early to give yourself a stable foundation.
Tertiary Goal: Manage the "Blue Phase"
The dispenser operates in phases. It will often dump a long sequence of Blue/Cyan cups, followed by a burst of Reds. You must be prepared to store the excess Blues on your conveyor belt temporarily, but you must process them immediately when the dispenser switches back to Red. Do not let the Blues linger when the Red phase starts, or you will clog the intake.
Quaternary Goal: The Mystery Cup Timing
There are two Grey Mystery Cups (?) on the board. These are your emergency buttons. Do not use them until you have a clear understanding of what colors are missing. Ideally, save them for the final 10% of the level when you are desperate for a specific shade of Blue or a single White pixel to finish a cloud. Using them early is a gamble that rarely pays off in this specific level layout.
Final Goal: The Spire and Clouds
The top of the Eiffel Tower (the Spire) is only 1-2 pixels wide. It overflows if you look at it wrong. Leave this for the very end. Similarly, the White clouds are jagged and require precision. Your final sequence should be: Break Lock -> Finish Red Tower -> Polish Clouds -> Fill remaining Sky.
Step-by-Step Walkthrough
Follow this sequence exactly for the highest probability of success. Deviating from this order usually leads to a deadlock around the 60% completion mark.
Phase 1: The Outer Shell (0% - 30% Completion)
As soon as the level starts, ignore the tempting Red cups in the center. Look at the far left and far right columns. You will see tall stacks of Dark Blue and lighter Cyan.
- Step 1: Tap the top-left Dark Blue cup. This starts the flow.
- Step 2: Immediately tap the top-right Dark Blue cup.
- Step 3: Work your way down the outer edges. Your goal is to create a "tunnel" of cleared space around the board.
- Step 4: If the dispenser gives you Red, drop it into the bottom-left or bottom-right corner of your conveyor belt (safest spot), but prioritize pouring the Blues into the sky first.
- Step 5: Do not touch the center column yet. You are thinning the herd to make room for the inevitable chaos.
Phase 2: Breaching the Center Lock (30% - 50% Completion)
Now that the edges are manageable, look at the center. You see the Ice Lock with a "7" on it. It is surrounded by Red cups.
- Step 1: Identify the Red cups that are physically touching the Ice Lock.
- Step 2: Tap these specific Red cups. Every time you clear one, the lock counter drops.
- Step 3: Alternate between tapping "Lock-Adjacent Reds" and "Safe Sky Blues" on the edges. Never tap a non-adjacent Red while the Lock is active; it's a waste of a turn.
- Step 4: Watch your slot count! If you have 4 cups on the belt and the next one is Red, but the dispenser is pouring Blue, you must wait. Do not tap the Red.
- Step 5: Once the Lock shatters (after clearing roughly 6-7 adjacent cups), a White cup will be released from underneath it. Let it sit on the belt for a moment; do not force it in if the dispenser isn't ready.
Phase 3: Constructing the Iron Lady (50% - 80% Completion)
The center is open. Now you build the icon of Paris. The dispenser will likely start favoring Red now.
- Step 1: Focus on the Base of the tower (the wide red section at the bottom). Fill this completely before moving up.
- Step 2: Use the White cup you freed from the lock to patch up the left cloud. The clouds are finicky; just tap the White cup when the dispenser is idle or pouring a color you already have plenty of.
- Step 3: Work on the Mid-section of the tower (the lattice work). This requires careful timing. If the dispenser spits out Teal (Horizon color), put it on the belt but don't pour it yet.
- Step 4: Avoid the Spire (the very top tip). It is safer to have an empty red slot than to overflow the tip. If the tower is 90% done and the spire is empty, leave it.
Phase 4: The Sky and The Finish Line (80% - 100% Completion)
The tower is done. The clouds are mostly done. Now you just need to paint the air.
- Step 1: The dispenser will likely enter a "Blue Cycle," dumping massive amounts of Royal Blue and Cyan.
- Step 2: Rapidly tap the remaining Blue cups on the belt. Fill the dark upper sky first.
- Step 3: Switch to the Cyan/Light Blue cups for the mid-sky.
- Step 4: Fill the Teal strip at the very bottom (the ground).
- Step 5: If you have a Mystery Cup left, use it now to fill any stubborn last pixel. If it turns into a color you don't need, tap it onto the belt and let it loop around; don't force it into the picture.
- Step 6: The Spire. Now, and only now, do you tap the final Red cup to top off the Eiffel Tower.
Color Order and Processing Logic
This section is critical for high-score runs and avoiding "Soft Locks" (where no moves are possible). The order in which you process colors is counter-intuitive.
Priority 1: The "Lock-Breakers" (Red & Outer Blue)
Why? Because the Ice Lock controls the entire board state. You cannot process the Whites or the inner Cyans effectively until the center is open. Therefore, even though the Sky is Blue, you prioritize Red *if* it touches the lock, and Outer Blue *if* it frees up space.
Priority 2: The Separation of Blues
This is the hardest part. The target image has Darkest Blue at the top, Medium Blue in the middle, and Teal at the bottom.
- Rule of Thumb: Always fill the top (Darkest) first. It covers the largest area.
- Secondary: Fill the Teal/Horizon last. It is a thin strip. If you fill the Teal strip early, you might accidentally use a Cyan cup on it, leaving you with no Cyan for the larger mid-sky sections.
- The Cyan Trap: The dispenser likes to give you Cyan when you need Dark Blue. Queue the Cyan on the belt (safely) and wait for the Dark Blue to finish pouring.
Priority 3: The Whites (Clouds)
White is a "floater" color. It doesn't connect to anything but itself. Treat it as a filler. Whenever you have a break in the Blue/Red action, tap a White cup. Do not queue multiple Whites unless you have massive empty slot space (3+). Two Whites on the belt is dangerous because it blocks space for the more frequent Blues.
The Mystery (?) Variable
The Grey cups are usually "Wildcards." In Level 254, they tend to morph into the color you have the *least* of on your current belt.
- Scenario A: Belt has 4 Blues. You tap Grey. It turns Red. (Good!)
- Scenario B: Belt has 2 Blues, 2 Reds. You tap Grey. It turns Cyan. (Bad! You just clogged the belt.)
- Advice: Only tap Grey when your belt is diverse (e.g., 1 Red, 1 Blue, 1 Empty). This minimizes the risk of a bad transform.
Key Tips for 100% Completion
These tips are gathered from top-ranking players who have mastered the "Paris" stage.
The "Slot Buffer" Technique
Never let your slots hit 5/5 unless you are 100% certain the very next cup coming down the chute is the *exact* match for the next pixel. Ideally, keep your slots at 3/5 or 4/5. This gives you the "wiggle room" to catch a Mystery Cup or a random color shift without causing a collision. Treat empty slots like gold; they are your breathing room.
Spire Safety
The top of the Eiffel Tower is the most fragile part of the image. It overflows if you pour even one drop too many. When you are nearing the end of the Red phase, stop tapping Red cups manually. Let the dispenser auto-fill the loop. If you see the Spire is full, switch immediately to a different color, even if there are still Red cups on the belt. It is better to waste a Red cup than to overflow the Spire and fail the level.
The "Teal" Horizon Line
Players often mistake the Teal cups for the Sky Blue cups. The Teal strip is at the very bottom of the canvas. If you accidentally pour Teal into the Blue sky, it creates a dirty patch that is very hard to fix later because you likely won't have enough Teal cups left to fill the bottom properly. Always check the bottom of the screen before pouring a blue-ish cup.
Using the "Loop" to Store
The conveyor belt is a storage unit, not just a processing line. If you have a Red cup on the belt, but the dispenser is currently pouring Blue, you can safely tap more Blue cups from the supply *onto* the belt (if you have space) to sort them. However, be careful not to bury the Red cup behind 4 Blues. If the dispenser switches to Red while your Red cup is buried, you have to wait for 4 cups to process before you can use the fresh Red. Keep high-priority colors (Red/Lock-breakers) closest to the dispenser (front of the line).
Common Mistakes to Avoid
Learning from others' errors is the fastest way to improve. Here is what not to do in Level 254.
Mistake 1: Ignoring the Ice Lock
The biggest mistake is focusing entirely on the sky and ignoring the center. You might hit 50% completion filling the beautiful blue sky, only to realize the Ice Lock is still active and you have no moves left to clear the Reds around it. You end up with a full belt of Blues and a blocked center. Always chip away at the Lock.
Mistake 2: Premature Spire Filling
Filling the top of the tower early seems like a good idea ("get it out of the way"), but it's not. The Spire is connected to the main red reservoir. If the main reservoir isn't full, the fluid logic in the game might divert flow oddly. More importantly, if you accidentally tap an extra Red cup later, it overflows the Spire instantly. Leave the tip for the absolute final second.
Mistake 3: Mystery Cup Panic
Players see the Grey cup and panic, thinking they need it immediately. They tap it when their belt is full. It turns into a useless color, jams the line, and the game ends. The Grey cup is patient. Let it sit on the tray until you have a clear plan.
Mistake 4: Confusing Cyan and Royal Blue
This sounds obvious, but under pressure, they look identical. The Royal Blue is for the top 40% of the screen. The Cyan is for the middle band. Pouring Cyan into the Royal Blue section creates a "washed out" look that lowers your score significantly. Double-check the shade before every tap.
Solutions for When You Are Stuck
So, you are midway through, the belt is jammed, and nothing matches. Here is how to troubleshoot.
Stuck Scenario: The "Full Belt" Lockup
Situation: Your 5 slots are full. You have 3 Blues and 2 Reds. The dispenser is pouring Blue. The next pixel on the board is Red.
Solution: You are in a deadlock. You cannot pour the Blue because the pixel is Red. You cannot hold the Blue because the belt is full.
- Option A: If there are any "junk" pixels nearby (e.g., a corner of the sky that you filled loosely), pour a Blue cup there to free up a slot.
- Option B: If the board is pristine, you must wait. Usually, the game cycles colors. Wait for the dispenser to switch to Red, pour the Red from the belt, then immediately switch back to Blue.
- Option C: If a Mystery Cup is on the belt, tap it now. It might transform into the Red you need, or a Blue that allows you to clear space.
Stuck Scenario: The Ice Lock Won't Break
Situation: You have cleared the visible Reds, but the Lock is at "1" and won't break.
Solution: You missed a connection. Look closely at the corners of the Ice Lock. Sometimes a cup is "diagonally" touching or obscured by the UI zoom. Clear the cups *immediately* adjacent (up, down, left, right) to the lock. If no cups are adjacent, you may need to clear a layer of Sky Blues that is visually blocking the adjacency count.
Stuck Scenario: Last 1% Missing
Situation: The board looks 100% done, but the game says 99%.
Solution: It is almost always the Spire or a single pixel in the Clouds. Zoom in (if possible) or look for the "greyed out" unfilled pixel. It is usually located at the very top tip of the tower or a tiny notch in the white cloud formation. If you truly can't find it, you might have mis-colored a pixel (Teal where Blue should be). In that case, you have to restart; pixel-by-pixel correction is not possible.
Speed Run Tips and Shortcuts
For players looking to achieve 3 stars or leaderboard dominance, speed is essential. Here is how to shave seconds off your time.
The "Pre-Load" Method
As the level loading animation finishes, you can actually tap the first cup before the fade-in is complete. Memorize the starting position (Top Left Blue). Start tapping immediately as the screen fades. This saves 0.5 seconds, which matters in a Speed Run.
Chain Reactions
Try to time your taps so that as soon as one cup finishes pouring, the next is already under the dispenser. Don't wait for the "clink" sound effect. Watch the fluid level. When it hits 90%, tap the next cup. This keeps the flow constant and prevents the "idle" animation from triggering.
The "Spam" Technique
During the "Blue Phase" (the end of the level), stop looking at the individual pixels. The sky is huge. Just tap the Blue cups on your tray as fast as humanly possible. The overflow protection for the sky is very generous compared to the Spire. You can spam-tap 5 Blue cups in a row and dump them all into the top corners rapidly to clear your tray and finish the level.
Ignore Perfection
Speed running requires sacrificing 100% accuracy for speed. If you pour a Cyan cup into a Royal Blue section, don't restart immediately unless it causes an overflow. A small color penalty is better than a time penalty. Only restart if you physically jam the machine. Focus on keeping the belt moving; momentum is more important than perfection.