
Level 261
HARDHow to solve Sand Loop level 261? Get instant solution for Sand Loop 261 with our step by step solution & video walkthrough. Sand Loop 261 tips and guide.
Play Sand Loop Now
Experience the puzzle challenge firsthand
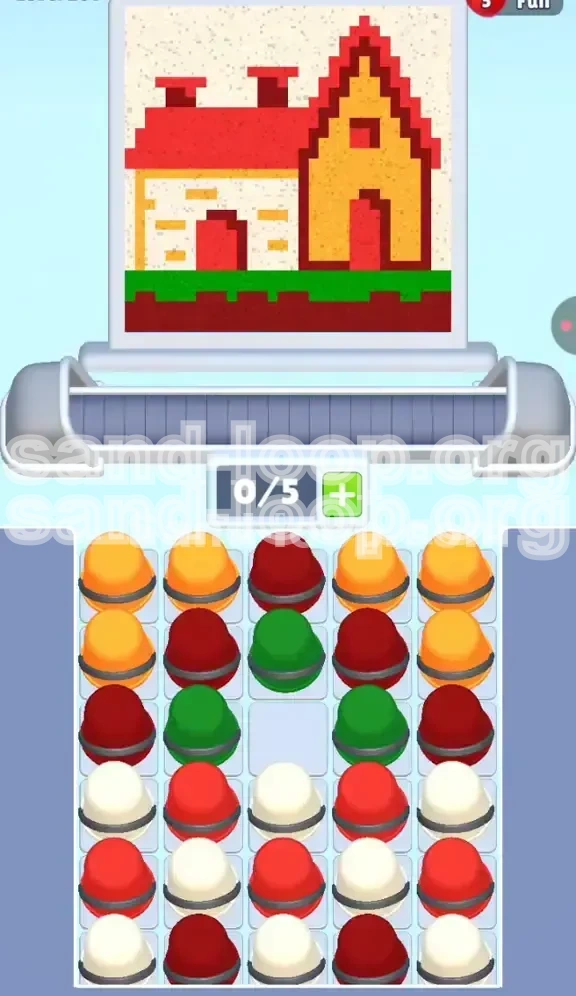
Game Screenshots
Sand Loop Level Guides
Sand Loop Stage 261: Mastering the Cozy Cottage Logic Puzzle
Welcome to the ultimate walkthrough for Level 261, famously known as the "Cozy Cottage" challenge. This stage is a deceptive test of your sorting logic and spatial awareness. While the final image—a charming pixel-art house with a red roof and green grass—appears simple, the path to getting there is fraught with supply tray bottlenecks. Unlike previous levels that relied on gimmicks like ice or keys, Stage 261 is a pure test of how well you can manage a tightly packed, color-cluttered grid. The central conflict here is the "Symmetrical Jam," where the middle column becomes a graveyard for unusable colors if you don't plan your taps three steps ahead.
Core Mechanics of the Cozy Cottage
Understanding the anatomy of this level is the first step toward victory. The puzzle is built on a 5x5 grid concept where color distribution is intentionally designed to create friction.
- The Grid Structure: You are facing a supply tray where colors are not just mixed but strategically buried. The outer columns (1 and 5) are "feeder" columns, while the inner columns (2, 3, and 4) act as the "lock."
- The Scanner's Path: The painting scanner moves in a specific rhythm: bottom-to-top. It prioritizes the soil and grass first, then the walls, and finally the roof. If you feed it "roof" colors while it's painting "grass," you waste valuable slots.
- Slot Scarcity: You only have 5 available slots on your conveyor belt. With 5 active colors in play (Red, Dark Maroon, Yellow, White, Green), you have zero margin for error. Every slot must count.
Analyzing the Color Palette Requirements
To beat the system, you must understand exactly what the house demands. The pixel art is not a freeform drawing; it requires strict adherence to a specific color hierarchy.
- Red (High Volume): This is your bulk color. The steep roof consumes approximately 40% of the total canvas. You will need to tap Red constantly, but only during the final phase.
- Dark Maroon (Accent): Don't confuse this with Red. Maroon is used for the soil foundation and door shadows. It is critical early on but becomes a hazard later if it's still on your belt.
- Yellow & White (Medium Volume): These form the "beige" walls and window frames. They are the bridge between the ground and the roof.
- Green (Low Volume): Used only for the grass strip. It is the first color you need, but once the grass is done, Green cups become obstacles that must be cleared from the belt immediately.
The Central Column Trap
The single biggest reason players fail Stage 261 is the center column (Column 3). It is densely packed with a "Maroon-Green-White" sandwich.
- The Isolation Risk: If you clear the outer columns too quickly without chipping away at the center, you will be left with a vertical stack of mismatched colors in the middle that cannot be paired.
- The No-Swap Zone: Unlike the outer edges, the center column has no "buddy" column to easily swap with. You must manually reduce its height layer by layer.
Winning Condition Overview
Completing this level requires a shift in mindset from "speed tapping" to "rhythm tapping." You must balance the rate of consumption with the rate of extraction. The goal is not just to empty the tray, but to empty the tray in the specific order the scanner demands, ensuring your conveyor belt never hits a deadlock where you need a color that is currently buried under three other cups.
Strategic Preparation: Analyzing the Supply Tray
Before you tap a single cup, take 10 seconds to scan the board. The layout in Level 261 follows a predictable "Mirrored Mix" pattern. Recognizing this pattern saves you from future headaches.
The Outer vs. Inner Dynamic
The tray is divided into two distinct zones: the "Safe Zone" (Edges) and the "Danger Zone" (Center).
- Columns 1 & 5 (The Safe Zone): These are heavy on Yellow and White. These colors are needed for the middle section of the house (the walls). They are abundant and relatively easy to access because they are on the edge.
- Columns 2 & 4 (The Bridge): These contain the bulk of your Red and Maroon. They act as a barrier protecting the center column.
- Column 3 (The Core): This is the nightmare column. It usually starts with a Green or Maroon cup at the top, but immediately underneath is a chaotic mix of Whites and Reds that don't match the immediate needs of the scanner.
Calculating "Tap Depth"
A common mistake is tapping the same column twice in a row early on. This is called "Digging."
- The Rule of One: In the first 10 moves, limit yourself to one tap per column. If you tap Column 1, immediately move to Column 3, then Column 5.
- Exposing the Layer: By rotating your taps, you ensure you are exposing the second row of cups evenly across the board. If you dig deep into Column 1, you create a "well" that makes it hard to match colors from adjacent columns later.
Predicting the Scanner's First Move
The scanner always starts at the bottom-left corner. In this level, that is the "Soil & Grass" layer.
- Immediate Needs: The scanner will instantly request Dark Maroon (soil) and Green (grass).
- Early Bottleneck: If you load your belt with Yellow (walls) or Red (roof) right now, you will block the Maroon and Green from entering the belt. You will be forced to waste cups or watch the scanner paint the grass red (which fails the level).
Setting Your Opening Sequence
Based on the tray analysis, your opening gambit is fixed. Do not deviate from this priority list.
- Priority 1: Locate and tap any accessible Green cups. These are usually scarce.
- Priority 2: Tap Dark Maroon cups to establish the foundation.
- Priority 3: Only if Green and Maroon are unavailable, tap a White or Yellow to keep the belt moving, but be prepared to shuffle them.
Identifying "Poison Cups"
In the context of the opening moves, Red cups are "poison." The roof is the last thing painted. Therefore, any Red cup currently sitting at the top of Column 2 or 4 must be ignored. Tapping it now is a wasted move that clogs your workflow.
Phase 1: The Foundation and Grass (Bottom-Up Strategy)
This phase covers the first 15-20% of the painting progress. The objective is to clear the ground layer without trapping essential colors underneath the roof supply.
Securing the Soil (Maroon Focus)
The painting begins with the dark foundation. This is the easiest part, but it sets the tempo.
- Scan the Top Layer: Look at the very top row of the supply tray. You will likely see 2-3 Dark Maroon cups.
- The Execution: Tap the Maroon cups immediately. They should fill slots 1 and 2 on your conveyor belt.
- Why this matters: If you don't secure these Maroons early, they will get buried under Whites and Yellows later. When the scanner eventually returns to the door shadow (mid-game), you won't be able to reach them.
The Grass Strip Maneuver
Grass is tricky because it is a "thin" color requirement. You only need a few Green cups, and then the color is done.
- Target Column 3: The Green cups are almost always clustered in the center column or near the bottom of the outer columns.
- Single-Tap Rule: Tap the Green, let it paint, and then stop looking for Green. Do not load a second Green cup until the first one is fully utilized. Overloading Green here causes a jam when the scanner moves up to the walls.
Transitioning to the Walls
Once the soil is dark and the grass is green, the scanner will lift its "head" to the middle of the canvas. This is the danger zone for "Color Lag."
- The Shift: You must stop tapping Ground colors immediately.
- The Handoff: As the last Green cup is painting, your fingers should be hovering over the Yellow/White cups.
- Mistake to Avoid: Do not finish the grass and then look for the next color. You must be loading the wall colors while the grass is finishing to ensure a seamless transition.
Managing the First Belt Jam
Inevitably, you will have a leftover Maroon or Green cup on the belt when the scanner wants Yellow.
- The Shuffle: If you have a full belt and the scanner needs Yellow, but your next cup is Maroon, you are in a "Soft Jam."
- The Fix: You must tap a Yellow cup immediately to put it in the queue. Even if the belt is full, getting the Yellow into the pipeline (even if it waits behind the Maroon) is better than leaving it buried in the tray.
Phase 2: The Wall Construction (The Middle Game)
This is the longest phase of the level. The scanner will zigzag across the house body, alternating between Yellow (beige walls) and White (stone textures), with occasional interruptions for the door.
The Yellow/White Rhythm
The walls are not a solid block; they are a checkerboard. This requires a specific cadence.
- Alternating Taps: Tap a Yellow from Column 1, then immediately tap a White from Column 5. This alternating pattern matches the checkerboard scan pattern of the game engine.
- Batching Warning: Never tap three Yellows in a row. If you do, the scanner will paint the wall Yellow, then hit a "stone" spot requiring White, see your Yellow cup, and skip it, leaving the stone unpainted. This creates "holes" in your wall that are hard to fix later.
Handling the Door Interruption
Just as you get comfortable with the Yellow/White flow, the scanner hits the center of the house: The Door.
- The Door Palette: The door requires a splash of Red (for the wood) and Maroon (for the shadow).
- The Preparation: You should have kept 1 Maroon cup in reserve from Phase 1. Now is the time to use it.
- The Red Insert: You must dig into Column 2 or 4 to retrieve a Red cup now. Do not wait for the roof. If you wait, the door will be painted the wrong color, and you won't be able to repaint it without restarting.
Dealing with the "Roof Creep"
As you clear the walls, the scanner starts inching toward the roof line. You will see the "sky" (negative space) appearing.
- The Danger Zone: If the scanner touches the first pixel of the roof, it will immediately demand Red.
- Belt Management: Ensure your belt is clear of low-priority Whites and Yellows. You need 2-3 empty slots ready to accept the massive influx of Red cups that is coming.
- Clearing the Deck: If you have a useless cup (like an extra Green) on the belt, you might need to strategically waste it or tap a column just to shuffle the belt if the game mechanics allow passing. However, usually, you just have to wait for it to cycle.
Draining the Outer Columns
By the end of Phase 2, Columns 1 and 5 should be visually lower than the center.
- The Funnel Effect: By keeping the outer edges low, you ensure that any cups you tap from the center (Column 3) can easily slide to the sides if needed.
- Final Taps: Use the remaining White and Yellow cups in the outer columns to finish the window frames and upper walls.
Phase 3: The Roof and Final Details (Endgame)
The finale is a race against time and capacity. The roof is large, red, and unforgiving. Any mistake made in Phase 1 or 2 usually comes back to bite you here.
The Red Surge
The roof consumes the majority of your Red cups. These were buried deep in Columns 2 and 4.
- Unleashing the Stockpile: Now you can aggressively tap the Red cups. Don't worry about alternating colors anymore. It's a Red marathon.
- Column 3 Access: With the outer columns drained, you can finally access the Red cups lurking in the top rows of the center column. Tap these to finish the peak of the roof.
- The 5-Slot Flow: Ideally, all 5 slots on your belt should be Red (or Red Maroon) at this point. This creates a "flow state" where the painter moves rapidly across the canvas.
The Chimney and Shadow Details
Watch the scanner closely as it hits the top-right or top-center. There might be a small chimney or roof shadow.
- Detail Work: If the scanner suddenly rejects your Red cup, it's asking for a shadow detail (Maroon or White).
- The Emergency Tap: You might need to stop tapping Red for one second to find that specific detail color. If you don't have it, check the bottom of your stacks—this is where "Digging" is finally acceptable.
Final Cleanup Protocol
The roof is done, but the level isn't. There are often stragglers.
- The Window Check: Look at the windows. Are the panes fully White? Sometimes a stray Yellow cup accidentally paints a window pane beige.
- Tray Clearance: Ensure the supply tray is empty. If you have cups left, the game isn't over. Scan for any missed pixel spots on the canvas that correspond to your leftover colors.
Victory Lap
Once the final Red pixel dries and the supply tray is empty, the "Cozy Cottage" is complete. You have successfully navigated the Symmetrical Jam and managed a complex color palette.
Key Tips and Common Pitfalls
To ensure your success rate stays at 100%, review these critical insights before your next run.
Common Mistake: The "Roof Rush"
New players often see the Red cups and want to start tapping them immediately.
- Why it fails: Tapping Red early fills your belt with roof paint while the scanner is still trying to paint the Yellow walls. The Red cups get rejected or clog the slots needed for Yellow.
- The Fix: Trust the process. Ignore the Red cups until the scanner physically touches the roof line. Be patient.
Pro Tip: The "Save One" Strategy
Always keep one "buffer" cup of a secondary color on the belt if possible.
- Strategic Reserve: For example, keep one White cup on the belt while painting the roof. If there is a small cloud or a chimney detail, you have it ready.
- Flow Maintenance: An empty belt is dangerous because it relies on your reaction speed. A belt with 1-2 cups acts as a buffer, giving you time to think.
Stuck Solution: Clearing the Belt
Sometimes you get stuck where the scanner needs Color A, but you have 5 cups of Color B, and you can't tap Color A because the belt is full.
- The Panic Move: Don't just tap randomly. Look for a column where the top cup matches what is on the belt. This minimizes the disruption.
- The Reset: If you are truly stuck, you may need to tap a cup that is currently useless just to cycle the belt, hoping the shuffle brings a needed cup within reach.
Speed Run Tips
If you are aiming for a 3-star time score:
- Pre-loading: While the "Level Complete" animation is fading out, mentally map the locations of the first 3 Green and Maroon cups so you can tap them instantly.
- Batch Tapping: During the Roof Phase, don't wait for the belt to move. Tap the next Red column the millisecond the previous cup enters the painter. This "rapid fire" tapping is essential for sub-30 second times.
Understanding the "Ghost" Pixels
Sometimes it looks like you are done, but the percentage is at 98%.
- Zoom In: The issue is usually a single pixel of soil that was painted Yellow by accident, or a window pane that wasn't filled.
- The Fix: Pause and scan the edges of the color boundaries. The "Ghost" pixel is almost always hiding at the transition point between two colors (e.g., where the grass meets the wall).