
Level 282
HARDHow to solve Sand Loop level 282? Get instant solution for Sand Loop 282 with our step by step solution & video walkthrough. Sand Loop 282 tips and guide.
Play Sand Loop Now
Experience the puzzle challenge firsthand
Game Screenshots
Sand Loop Level Guides
Level Overview: The Pixel Watermelon Challenge
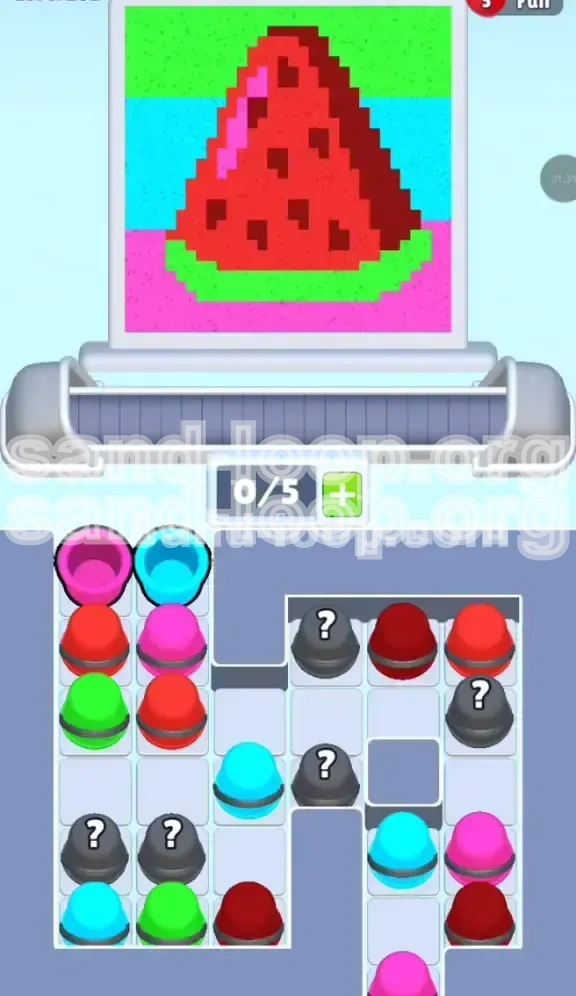
Sand Loop Level 282 is a deceptive puzzle that hides its difficulty behind a vibrant, summer-themed Pixel Watermelon design. While the artwork appears simple—a slice of juicy fruit—the gameplay mechanics are designed to test your precision and patience rather than your speed. Unlike previous levels where rapid tapping might suffice, this stage is a strict exercise in inventory management and spatial logic.
The core challenge lies in the restrictive tray layout. You are operating with a severely limited belt capacity of just 5 slots (0/5). The tray is cluttered with "Mystery Cups" (gray cups marked with a question mark), which obscure critical colors until the very last moment. This introduces a high-risk "blind" element to the game. If you attempt to spam taps or clear the board indiscriminately, you will inevitably clog your belt with unusable colors, forcing a restart. To succeed, you must treat this level as a surgical operation, prioritizing information gathering over speed.
Primary Mechanics
The level introduces a unique mechanic known as the "Color Split." This means that while the palette appears limited, the colors are reused in distinct zones. For example, the shade of Green used for the background stripes is identical to the Green used for the watermelon rind. This duality means you cannot simply clear all Greens at once; you must target them based on the nozzle's current position. Furthermore, the "Mystery Cups" add a layer of RNG (Random Number Generation) risk, requiring you to keep buffer space in your belt to accommodate unwanted colors without blocking your flow.
The 5-Slot Bottleneck
The most critical constraint is the 5-slot limit on your conveyor belt. In other levels, a full belt might be a minor inconvenience; here, it is a game-over state. With Mystery Cups potentially yielding colors you don't need, having a full belt leaves you zero room for error. If a Mystery Cup reveals a color you aren't ready for, and your belt is full, that cup becomes a permanent blocker, disrupting the timing for every subsequent cup. Managing this "inventory space" is just as important as painting the canvas.
Visual Layout Analysis
The tray is split into two distinct sections: the "Safe Zone" on the left and the "Chaos Block" on the right. The left side consists of two solid columns of visible cups, primarily Pinks and Cyans. The right side is a fortified block of stacked cups, guarded by Mystery Cups on the top layer. This layout forces a specific play order: you must systematically dismantle the left side to generate space and rhythm before attempting to breach the right-side bunker.
The "Seeds" Precision Hazard
Unlike the broad strokes required for the background stripes or the red flesh, the watermelon seeds demand pixel-perfect timing. These are represented by Dark Red cups, which are scarce and buried deep within the right-side stack. The danger is acute: if you pour Standard Red while the nozzle is hovering over a seed slot, you will fill that slot with the wrong color. Once a seed slot is filled with Standard Red, it is permanently blocked, preventing you from achieving a 100% completion rating. This single mechanic accounts for 90% of failed attempts in this level.
Psychological Factor
Level 282 is a patience test. The bright colors and fast-paced music may tempt you to play aggressively, but the optimal strategy is slow and deliberate. You must resist the urge to chain cups rapidly. Instead, adopt a rhythm of "Tap-Wait-Assess." The level rewards players who can pause and analyze the nozzle's position relative to the canvas rather than reacting instinctively to the cups appearing on the belt.
Clear Objectives and Goals
To conquer Level 282, you need a clear set of objectives that go beyond simply "filling the board." The goal is to achieve 100% completion without getting your belt stuck. This requires a prioritized list of tasks that must be executed in a specific order.
Objective 1: Secure the Belt Space
Your immediate goal in the first 10 seconds is to prevent the belt from reaching capacity (5/5). You must prioritize cups that you can immediately dispatch. This means focusing on colors that align with large, forgiving areas of the canvas, such as the Red flesh or the Cyan stripe. Do not touch the Mystery Cups until you have established a steady flow and have at least 2 open slots on your belt. Think of your belt space as a currency; spend it wisely to clear obstacles.
Objective 2: Decipher the Mystery Cups
The secondary objective is information gathering. You must reveal the contents of the gray cups on the right side without letting them clog your machinery. The goal here is not necessarily to use the colors immediately, but to identify what is available. If a Mystery Cup reveals a Dark Red, your objective shifts immediately to preparing for the seeds. If it reveals a Green when the nozzle is over the Red zone, your objective becomes "survive the loop" without crashing your belt into the dump zone.
Objective 3: Execute the Seed Protocol
This is the most critical objective in the level. You must successfully fill the small, single-pixel seed slots using Dark Red cups. This requires you to hold off on painting the main body of the watermelon until the seeds are addressed, or to carefully paint around the seed zones. The objective is to isolate the Dark Red cups and deploy them exactly when the nozzle hits the seed coordinates. Failing this objective means failing the level.
Objective 4: Strategic Color Splitting
You must separate the "Background" jobs from the "Foreground" jobs. The Pink, Green, and Cyan colors are split between the background stripes and the fruit details. Your objective is to clear the background stripes first (Top Green, Middle Cyan, Bottom Pink) to get them out of the way. Once the background is solid, you can focus entirely on the fruit (Rind, Flesh, and Seeds) without worrying about accidentally painting the background the wrong color.
Objective 5: The Empty Slot Buffer
Maintain a "Buffer Slot" on your belt at all times. This means you should never let your belt fill up past 4/5 if possible. Keeping one slot open gives you the flexibility to absorb a bad roll from a Mystery Cup. If a Mystery Cup turns into a color you don't need, having an empty slot allows it to pass through the system without forcing you to dump other valuable cups. This safety net is essential for the final cleanup phase.
Step-by-Step Walkthrough Guide
This guide provides a turn-by-turn strategy for navigating the Pixel Watermelon challenge. Follow these steps in order to maximize your efficiency and minimize the risk of a stuck belt.
Phase 1: The Initial Safe Zone Clear
Start the level by ignoring the right side of the tray completely. Focus your eyes on the two left-most columns.
- Identify the Lead Cup: Look at the very top-left cup. It is usually Pink or Cyan.
- Pink Priority: If it is Pink, tap it immediately. The nozzle should align with either the bottom background stripe or the fruit highlight. If the alignment is wrong, wait one loop cycle.
- Cyan Follow-up: Once the Pink is moving, tap the Cyan cup sitting directly below or beside it. The Cyan stripe is in the middle of the canvas and is usually safe to pour early.
- Maintain 2/5 Capacity: After these two moves, check your belt. You should have 2 or 3 cups moving. Do not tap anything else until one of these clears the nozzle.
- Green Trap: You might see a Green cup in the left stack. Do not tap it yet. If the nozzle is currently over the Red flesh zone (where it usually starts), pouring Green will be a waste. Let the Green sit until the background cycles around.
Phase 2: The Right-Side Breach
Once the left columns are lowered and your belt is stable, look at the "Chaos Block" on the right.
- Locate the Dark Red: Scan the right stack. You will likely see a Dark Red cup buried behind a Gray cup or a Standard Red cup.
- The Standard Red Shield: Is there a Standard Red cup accessible? If yes, tap it. The Red flesh area is large, so you can almost always pour Standard Red safely. This clears space and might lower the stack to reveal the Dark Red.
- The Mystery Gamble: You will see a Gray Mystery Cup at the top of the right stack. This is the danger moment. Ensure you have 2 empty slots on your belt. Tap the Mystery Cup.
- React and Adapt:
- If it turns Dark Red: Celebrate, but don't tap yet. Wait for the seed slot (Dark Red zone) to align.
- If it turns Green: Check the nozzle. If it's not on the Green zone, let it ride the belt. Do not force it.
- If it turns Red: Pour it immediately if over the fruit.
Phase 3: The Critical Seed Placement
This is the specific sequence to handle the "Seeds" logic bottleneck.
- Scan for Seeds: Look at the canvas template. Identify the small black/dark red dots representing seeds. They are usually located near the bottom right or center of the fruit.
- Halt Production: Stop tapping any other cups (Red, Pink, etc.). Let the belt clear out so you only have 1 or 2 cups active.
- The Solo Dark Red Pour: When the nozzle is directly over a seed slot, tap your Dark Red cup.
- Crucial: Do not have other cups pouring at this exact moment. You want 100% of the paint stream to go into that small slot.
- Verify Fill: Watch the pixel fill. If it misses, you may need to use a second Dark Red cup if available. If you miss the seed slot, you cannot fix it later.
- Resume Flesh Paint: Only after the seeds are filled should you go back to tapping Standard Red cups to finish the watermelon body.
Phase 4: The Background Stripe Order
With the fruit done, focus on the remaining background colors.
- Top Green: Wait for the nozzle to reach the very top of the canvas (or the bottom rind, depending on the loop direction). Tap your Green cups now. Do not pour Green on the middle Cyan stripe.
- Middle Cyan: Usually handled earlier, but if you have straggling Cyan cups, ensure the nozzle is clear of the Green and Pink zones.
- Bottom Pink: The final background layer. Ensure the nozzle is at the bottom before releasing the last of your Pink inventory.
Phase 5: Final Cleanup
The endgame is about managing the last few cups in awkward positions.
- Assess the Tray: You likely have a few scattered cups left—maybe a Green trapped under a Gray, or a leftover Red.
- The "Ride the Loop" Strategy: If the nozzle alignment is bad (e.g., you have a Green cup but the nozzle is stuck in the Red zone), do not panic tap. Let the cup ride the conveyor belt all the way around. It is better to wait 10 seconds than to dump paint in the wrong place.
- Mystery Cup Clearing: If any Mystery Cups remain, you have more freedom now. Pop them and dump the contents if necessary, or use them if they match a remaining spot.
Understanding the Color Order
Mastering Level 282 requires a deep understanding of the color hierarchy and processing order. Not all colors are created equal, and treating them with the same priority will lead to failure. The "Color Split" means that knowing *when* to process a color is just as important as knowing *where* it goes.
Priority Tier 1: The Dark Red (Seeds)
Dark Red is the VIP of this level. It is the rarest color and has the most unforgiving target (the tiny seed slots).
- Scarcity: There are usually only 2-3 Dark Red cups in the entire tray.
- Target Size: The seed slots are less than 5% of the total canvas area.
- Strategy: You must process Dark Red the moment the nozzle aligns with the seeds, regardless of what else is on the belt. If you miss this window, you cannot finish the level. Do not use Dark Red on the main fruit body; it is wasted there. Save it strictly for the seeds.
Priority Tier 2: Standard Red (Flesh)
Standard Red is your "workhorse" color. It covers the largest area of the watermelon.
- Volume: You will see the most Red cups.
- Safety: The Red zone is massive. It is safe to pour Red almost anytime the nozzle isn't on a background stripe.
- Strategy: Use Red to clear your belt. If you are clogged and need to dump a cup to make space, Red is usually your best candidate because it's easy to pour. However, ensure you don't pour Red *over* the unfilled seed slots. This is the most common conflict: Tier 1 (Dark Red) needs the seeds empty, but Tier 2 (Red) wants to fill everything. Prioritize Tier 1.
Priority Tier 3: Cyan (The Divider)
Cyan is exclusive to the middle background stripe.
- Constraint: Cyan has a very specific zone. If the nozzle is on the top or bottom stripe, Cyan is useless.
- Strategy: Process Cyan only when the nozzle is passing the horizontal center of the canvas. Since it doesn't overlap with the fruit, it is relatively safe, but it requires good timing. If you have Cyan cups ready, wait for the nozzle to leave the Red zone before tapping.
Priority Tier 4: Green and Pink (The Rind and Background)
These colors are tricky because they are used in two different places (Background + Rind/Highlight).
- Green: Used for the Top Stripe AND the Bottom Rind. This gives you two opportunities to pour Green, but also means you must be careful not to pour it on the Pink stripe or the Red flesh.
- Pink: Used for the Bottom Stripe AND the Fruit Highlight. Similar to Green, you have two zones, but they are usually separated by the Cyan stripe.
- Strategy: Treat these as "Cleanup" colors. Once the Red and Dark Red are handled, you spend the rest of the level chasing the nozzle position to fit these in. They are low priority because the zones are intermittent.
The Interaction: Red vs. Dark Red
The most critical relationship in this level is between Standard Red and Dark Red.
- The Conflict: They occupy the same general vertical space on the fruit.
- The Rule: Dark Red must be applied *before* Standard Red fills the seed slots.
- The Execution: If you have a Standard Red cup and a Dark Red cup ready on the belt, and the nozzle is approaching the seeds: Ignore the Standard Red. Let it loop back around. You must focus entirely on getting the Dark Red into the seed slot before the Standard Red inadvertently paints over it.
Key Tips, Mistakes, and Stuck Solutions
Even with a strategy, things can go wrong. This section covers the pro-tips for efficiency, the common pitfalls that ruin runs, and how to recover when the level seems impossible.
Pro Tips for Efficiency
- The "Nozzle Watch" Technique: Stop looking at your finger; start looking at the nozzle. The most important variable in Sand Loop is the position of the dispenser. Train your eyes to track the nozzle's loop cycle. If you know the nozzle is 3 seconds away from the Green zone, you can safely tap a Green cup now and know it will pour exactly when needed.
- Mystery Cup Prep: Before you tap a Mystery Cup, ensure your belt count is 3/5 or lower. This gives you a 2-slot buffer. If the Mystery Cup reveals a useless color, you have enough room to keep it on the belt until it reaches the dump/trash zone without it blocking other cups behind it.
- Pause Before the Pour: If you are unsure about a color match, let the cup pass once. It is better to lose 5 seconds of time waiting for the perfect alignment than to force a pour and ruin the canvas, requiring a complete restart.
Common Mistakes to Avoid
- The "Seed Overwrite" Error: This is the #1 cause of failure. Players pour Standard Red into the main fruit body, but the nozzle drifts slightly over a seed slot, filling it with Standard Red. Later, when the Dark Red cup arrives, it has nowhere to go. Solution: Be hyper-aware of the seed locations. If the nozzle is near them, stop pouring Red immediately.
- The "Belt Full" Panic: Seeing the belt at 5/5 causes players to tap randomly to clear space. This usually leads to pouring the wrong color in the wrong place. Solution: If your belt is full, identify the *least* useful cup and plan to dump it, or wait for a zone match to clear it naturally. Do not spam-tap.
- Ignoring the Tray Layout: Focusing only on the belt and ignoring the tray stacks. If you don't check the tray, you won't know that a Dark Red cup is about to become available. Solution: Constantly scan the tray to see what colors are coming up next so you can plan your belt management.
Solutions for When You Are Stuck
- Stuck Scenario: "I can't reach the Dark Red." The Dark Red is buried in the stack, and Mystery Cups are blocking it.
- Fix: You must clear the cups above it. Identify the color of the cup directly on top of the Dark Red. If it's a Standard Red, pour it. If it's a Mystery Cup, tap it. If the Mystery Cup reveals a bad color, you have to bite the bullet and let that bad color take up a belt slot until you can dump it, just so you can access the Dark Red underneath.
- Stuck Scenario: "My belt is full of useless colors."
- Fix: You are in the "Death Spiral." Look at the nozzle position. Is there *any* zone on the canvas that matches one of your useless colors? If yes, tap it immediately. If no, you must wait for the nozzle to cycle. Do not tap new cups. Let the existing ones clear. If you are truly blocked, the level is designed to force a restart, so don't waste time—restart immediately and try to keep the belt cleaner (lower capacity) next time.
- Stuck Scenario: "The seeds won't fill."
- Fix: You are likely trying to fill them with Standard Red, or the nozzle isn't centered. Ensure you are using the Dark Red cup. Also, check if the seed slot is already "full" of the wrong color (Red/Pink). If it is, you cannot fix it. Restart the level.
Speed Run and Advanced Strategies
Once you have mastered the basics and can consistently beat the level, you may want to improve your time or achieve a higher score. These advanced strategies focus on optimization and rhythm.
The Speed Run Mindset
Speed running Level 282 is counter-intuitive. To go fast, you must be slow. Speed runs are lost when players get stuck with a full belt for 15 seconds. Therefore, the fastest strategy is one that prioritizes belt fluidity over rapid tapping.
- Rhythm Tapping: Establish a rhythm of "Tap-Pause-Tap." Tap a cup, watch it align, wait for the pour to start, then tap the next. This prevents cups from stacking up at the nozzle entrance.
- Pre-loading: If you know the nozzle is moving from Red to Green, tap your Green cup *slightly before* the nozzle reaches the Green zone. This minimizes downtime between pours.
The "Mystery Skip" Maneuver
Advanced players often skip the Mystery Cup gamble entirely if it isn't necessary.
- Analyze: If the left side (Safe Zone) has enough Reds and Cyans to finish 80% of the board, do not touch the Mystery Cups on the right until the very end.
- Benefit: This keeps your belt clean and predictable. You only crack the Mystery Cups when you have no other choice, reducing the chaos factor.
Chain Reaction Techniques
Look for opportunities to set up "Chain Reactions" using gravity.
- The Drop: Sometimes, clearing a cup on the left will cause a stack on the right to shift, revealing a needed color without you having to tap it directly.
- Execution: Clear the bottom-left cup. Watch the right stack. If a Dark Red drops into a playable position, you can immediately tap it without having to clear the obstruction manually. This saves valuable seconds.
Optimized Seed Pathing
Instead of waiting for the nozzle to naturally cycle to the seed slot, manipulate your cup timing.
- The Hold: If you have a Dark Red cup ready but the nozzle just passed the seed slot, do not tap it immediately. Hold it. Wait for the nozzle to complete a full loop. Tapping it early might cause it to pour on the background, wasting the precious Dark Red paint.
- Timing: Ideally, you want to tap the Dark Red cup so that it arrives at the nozzle exactly when the nozzle hits the seed slot. This requires predicting the travel time of the cup from the tray to the nozzle.