
Level 286
HARDHow to solve Sand Loop level 286? Get instant solution for Sand Loop 286 with our step by step solution & video walkthrough. Sand Loop 286 tips and guide.
Play Sand Loop Now
Experience the puzzle challenge firsthand
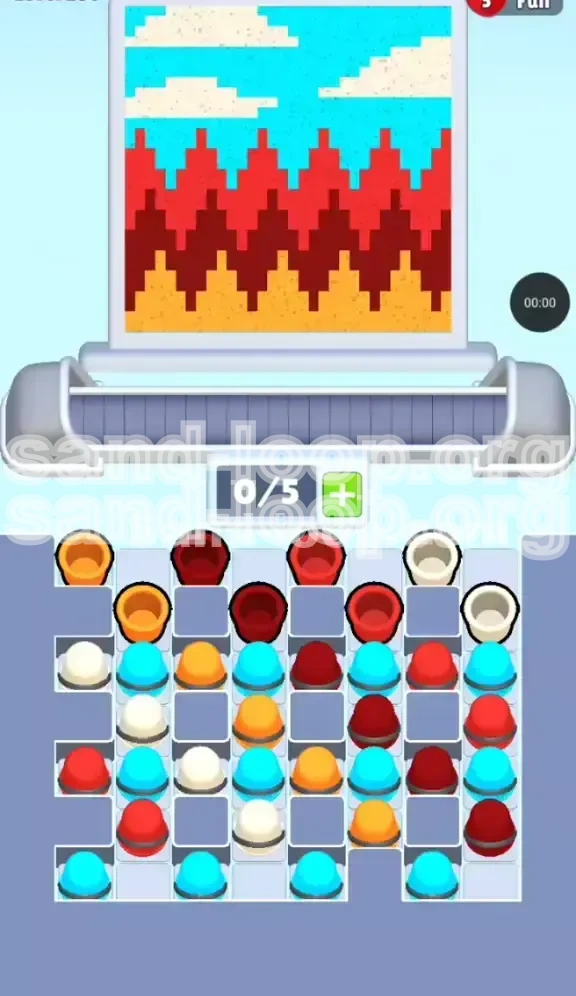
Game Screenshots
Sand Loop Level Guides
Level Overview: The Zig-Zag Mountain Challenge
Welcome to the Sand Loop Level 286 guide. This stage presents a unique artistic challenge: rendering a jagged, abstract mountain landscape against a bright blue sky using falling sand mechanics. Unlike previous levels that may have focused on character portraits or simple geometric shapes, Level 286 is a strict test of Color Density Management.
The board is visually deceptive. While the final image appears to be distinct layers—ground, mountains, and sky—the tray configuration is a chaotic "checkerboard" designed to induce deadlock. You are not merely filling a container; you are sculpting a landscape where the order of operations is absolute. Pour a color too early, and you’ll bury a layer under the wrong sand, forcing a restart. The primary constraint is your limited conveyor belt space (5 slots) combined with a tray that aggressively blocks access to essential base colors.
The Core Mechanics: Vertical Layering
In this level, gravity is your enemy if you don't plan ahead. The puzzle relies on the concept of "strata." The sky (Cyan/White) must sit on top of the mountains (Red/Maroon), which must sit on top of the foundation (Orange). If you accidentally fill the sky zones first, the sand for the ground will never reach its destination. You must build from the bottom up, strictly adhering to the vertical axis.
The Landscape Layout
The target image is divided into three distinct horizontal zones with sharp, non-linear transitions:
- Zone 1 (Base): A Golden Orange layer representing the earth/foreground. It has jagged peaks.
- Zone 2 (Mid-ground): A complex layering of Dark Maroon and Bright Red. These zig-zag aggressively, requiring precise timing.
- Zone 3 (Background): Cyan sky with floating White clouds.
The Slot Constraint
You only have 5 available slots on your dispensing belt. This sounds like enough, but because the tray is packed with alternating colors, you will frequently find yourself needing to hold onto a specific color (like Orange) while digging through others. If you fill your belt with "useless" colors (like Cyan) early on, you won't have space to retrieve the essential Orange cups buried underneath.
The "Meta" Strategy
The overarching strategy for Level 286 is Selective Starvation. You must intentionally avoid picking up certain colors (Sky Blue and White) until the very end, even if they are easily accessible. Picking them up early acts as a penalty, clogging your belt and forcing you to waste moves pushing cups back into the tray.
Difficulty Spike
This level represents a difficulty spike due to the "interleaved" nature of the Red and Maroon layers. Unlike simple blocks where you pour all Red then all Maroon, here they are tightly woven. Expect to switch nozzles frequently, but only when the spatial alignment allows for it.
Clear Objectives: Your Mission Goals
To beat Level 286, you need to achieve three primary objectives in a specific sequence. Failing to respect this sequence is the number one reason players fail.
Objective 1: Establish the Foundation (Orange)
Your immediate priority is to locate and pour all Golden Orange sand. This forms the bottom 15-20% of the image. Without this base, the mountain layers have nothing to rest upon. You must clear the top blockers in the tray to expose the Orange cups buried in the middle rows.
Objective 2: Construct the Peaks (Red and Maroon)
Once the orange bedrock is laid, you must tackle the most difficult section: the zig-zag mountains. This requires alternating between Dark Maroon and Bright Red. You cannot finish one entirely before starting the other; you must follow the visual contour of the canvas, pouring the darker base first and then capping it with the brighter red peaks.
Objective 3: Paint the Atmosphere (Cyan and White)
Only when the mountains are fully rendered should you touch the Cyan or White cups. This is the "clean up" phase. The sky takes up the top 40% of the canvas and fills relatively quickly, provided you haven't clogged your belt with blue cups prematurely.
Minimize Nozzle Switching
A hidden objective is efficiency. Every time you switch from pouring Red to Maroon, the machine takes a moment to purge the tube. While unavoidable here, minimizing unnecessary switches (e.g., pouring Red, then Orange, then Red again) saves precious time and prevents overflow errors.
Maintain Belt Fluidity
Always keep at least one slot open on your belt if possible. A full belt (5/5) is a dangerous state. If the next cup you need is at the bottom of the stack in the tray, you have nowhere to put the cup currently in the nozzle, leading to a deadlock.
Achieve 100% Coverage
The final victory condition is filling every pixel of the canvas. The "danger zones" are the deep valleys between the red peaks. Make sure the Maroon sand settles deep into these crevices before you cap them with the Red layer.
Step-by-Step Instructions: The Walkthrough
Follow this exact sequence of actions to navigate the tray and canvas efficiently. This guide assumes a standard tray layout; slight variations may occur in "Random Mode," but the logic holds true.
Phase 1: The Excavation (First 10 Moves)
The start of the level is a race to clear the "Blockers." Look at the top row of the tray.
- Action 1: Identify the Top Left Orange Cup. Tap it immediately. This is your starter cup.
- Action 2: Look for Dark Maroon Cups in the top row. Even though we aren't pouring the full Maroon layer yet, we need to move these cups to access the second row.
- Action 3: Tap one or two top-row Maroons to expose the Second Row Orange Cups.
- Action 4: As soon as an Orange cup is revealed in the second or third row, tap it. Get it onto the belt immediately.
- Rule: Do not tap any White or Cyan cups yet, even if they are in the top row. Treat them as invisible walls.
Phase 2: Pouring the Base (Orange Layer)
Now that you have Orange cups on your belt, focus entirely on the bottom of the canvas.
- Step 1: Pour the Golden Orange sand. Move the nozzle to cover the entire bottom width of the canvas.
- Step 2: Don't worry about filling the jagged peaks perfectly yet; just get a solid layer of orange established.
- Step 3: If you run out of Orange on the belt, pause. Go back to the tray. Move more Maroon/Red cups if necessary to dig for the remaining Orange cups.
- Goal: The bottom 20% of the screen should be solid Golden Orange with no gaps.
Phase 3: The Mountain Infill (The Hardest Part)
With the base done, we move to the complex zig-zags. This requires managing two colors simultaneously.
- Step 1: Load up Dark Maroon. You want this to be the primary color on your belt (3-4 slots).
- Step 2: Pour the Maroon to create the "body" of the mountains. Fill the valleys and build up the slopes. Stop pouring when the mountain shape is about 80% defined but looks "dark" and flat.
- Step 3: Introduce Bright Red. Tap Red cups now.
- Step 4: Pour Bright Red *only* on the peaks and upper slopes of the Maroon structure. The Red acts as a highlight. If you pour Red too early, it will sink to the bottom and mix with the Maroon, turning the mud brown.
- Tip: Alternate: Maroon (Valley) -> Red (Peak). Maroon (Valley) -> Red (Peak).
Phase 4: The Sky and Clouds (The Finish Line)
The mountains are done. Now you clear the tray of the remaining colors.
- Step 1: Unleash the Cyan. Tap all those Blue cups you ignored in Phase 1.
- Step 2: Pour the Cyan to fill the top 40% of the canvas.
- Step 3: Retrieve the White cups. There should be 2-3 of them.
- Step 4: Pour White to create the clouds. Since the cloud layer is thin, pulse the tap (tap-tap-tap) rather than holding it down, to create puffy shapes rather than a solid white line.
- Final Check: Ensure no blue "sky" is bleeding into the red mountains.
Color Order and Processing Logic
Understanding the "Why" behind the order helps you adapt if the tray randomizes. The color processing in Level 286 follows a strict hierarchy based on gravity and canvas position.
The Bottom-Up Rule
Always process colors from the bottom of the final image to the top.
- Golden Orange: (Lowest Y-axis). Must be poured first. If poured last, it covers the mountains and sky, ruining the image.
- Dark Maroon: (Middle Y-axis). Acts as the anchor for the mountains.
- Bright Red: (Middle-High Y-axis). Must be poured *after* Maroon to sit on top of the peaks, not inside them.
- Cyan: (High Y-axis). The background fill.
- White: (Highest Y-axis/Details). The clouds are the "frosting" on top.
The Density Principle
Sand Loop simulates basic physics where colors displace each other.
- Displacement: Pouring Cyan first creates a "floor" of blue. When you later pour Red, the Red sinks *through* the Blue. This results in a purple mix or a layer of Blue floating above Red, which is physically wrong for a sky-over-mountain landscape.
- Correct Physics: By pouring Red first, you create a solid "ground." When you pour Cyan later, it naturally settles *above* the Red, correctly simulating the sky sitting behind the mountains.
The Zig-Zag Complexity
The Red/Maroon transition is the hardest part of the order.
- Why not finish Maroon completely? Because the peaks are sharp. If you fill the shape entirely with Maroon, you have to pour a huge amount of Red to cover the tips.
- The 70/30 Split: Aim to fill the mountain volume with 70% Maroon and 30% Red. This preserves the jagged texture without wasting color.
Queue Management
Your belt (queue) should reflect the color order.
- Early Game: Belt should contain Orange + Maroon.
- Mid Game: Belt should contain mostly Maroon, transitioning to Red.
- Late Game: Belt should be a mix of Cyan and White.
- Error State: If your belt has White cups while you are still pouring the Orange base, you have mismanaged the order.
Key Tips for Success
These are the pro strategies that separate a clear from a chaotic restart.
Tip 1: The "Tap and Release" Technique
For the jagged mountain peaks, don't hold the pour button down continuously. This creates a "melted" look. Instead, use short bursts. Tap the nozzle, let a pile of sand form, move slightly, tap again. This builds sharper, more defined peaks that match the abstract art style of the level.
Tip 2: The "Ignore" Strategy
This is the single most important tip for Level 286. When the level starts, you will see Cyan and White cups in the top row of the tray. Do not tap them. Pretend they are locked. By leaving them in the tray, they act as "bookends," preventing the tray from shuffling too much and allowing you to predict where the Orange and Maroon cups will surface.
Tip 3: Predicting the Shift
In Sand Loop, when you tap a cup, the remaining cups shift to fill the empty slot (usually from the right, or shuffling down). If you need a cup from the bottom row, calculate which tap will cause the cascade that brings that bottom-row cup into a tappable position. Sometimes tapping a *useless* top-row cup is necessary to shift the grid and unlock the cup you actually want.
Tip 4: Belt Conservation
Try to keep your belt at 4/5 capacity, not 5/5. Why? If a crucial Orange cup appears in the tray, and your belt is full, you have to waste a move pouring something you don't need or—worse—pushing a cup back into the tray (which might bury the one you just tried to retrieve). That one empty slot is your "buffer" for maneuvering.
Tip 5: Visualizing the "Negative Space"
Look at the white (empty) parts of the canvas, not just the colored parts. The sky is the largest block of negative space. It’s tempting to fill it first because it’s big, but resist. The empty space is your playground for pouring the heavy, messy ground colors first without worrying about staying in the lines.
Tip 6: The "Valley" Check
Before you finish the Maroon phase, zoom in (mentally) on the valleys between the red peaks. Are they filled to the top with Maroon? If there is a gap, and you pour Red over it, the Red will fill the gap. This makes the valley look red instead of dark maroon, losing the depth effect of the image. Ensure the valleys are packed tight before capping them.
Common Mistakes to Avoid
Learning from others' failures is the fastest way to beat the level. Here are the pitfalls that catch 90% of players.
Mistake 1: The "Sky First" Error
The Trap: The blue sky is the largest area. Instinctively, you want to fill the big empty space first.
The Consequence: You pour Cyan, filling the bottom of the canvas. Then, when you try to pour the Orange ground, the Orange sinks *through* the Blue, or sits on top and turns the sky brown/orange. The physics engine will prioritize the existing sand, causing the layers to mix into a muddy purple/grey mess.
Mistake 2: Premature Cloud Deployment
The Trap: You see a White cup in the tray and think, "I'll just get this out of the way."
The Consequence: You pour White too early. It ends up buried under the Red mountains or mixed into the Orange ground. You waste a White cup (which are usually scarce in this level) and have to dig it out later, or worse, you run out of White for the actual clouds at the end.
Mistake 3: Over-filling the Red
The Trap: You have plenty of Red cups, so you just pour it all over the mountain section.
The Consequence: You lose the "Dark Maroon" contrast. The image becomes a flat, bright red blob. Level 286 requires the *texture* of the dark mountains to be visible. You must stop pouring Red when the highlights are hit, not when the whole shape is full.
Mistake 4: Belt Deadlock
The Trap: Tapping cups randomly just to clear the top row.
The Consequence: Your belt becomes a rainbow soup: Orange, White, Cyan, Red, Maroon. When you need to pour Orange, the nozzle is full of White. You have to pour the White somewhere (ruining the canvas) or shuffle endlessly, wasting time until the timer (if active) runs out or you get frustrated and restart.
Mistake 5: Ignoring the "Tap" Sound
The Trap: Playing on mute or not paying attention to the audio cues.
The Consequence: In Sand Loop, the sound of the sand pouring changes slightly when the container is "full" or when the sand is hitting a different surface. If you are trying to fill a deep valley and the sound suddenly becomes "sharper" or "higher pitched," it means the valley is full and you are now spilling over onto the peak above. Stop pouring immediately!
Mistake 6: Panic Pouring
The Trap: You realize you made a mistake early (e.g., poured some Sky Blue), so you try to fix it by pouring Orange faster to "cover it up."
The Consequence: You cannot cover up mistakes in Sand Loop easily by pouring over them; you just mix the colors. If you mess up the base layer, it is usually better to restart the level immediately rather than fight the physics for the next 5 minutes trying to hide it.
Solutions for When You Are Stuck
So, you followed the guide, but something went wrong, and now you are staring at a mess. Here is how to salvage the situation.
Scenario 1: "I ran out of Orange, but the ground isn't finished."
Diagnosis: You have Orange cups buried deep in the tray, likely under White or Cyan cups that you tapped earlier.
The Fix: You must perform a "Tray Shuffle." Pour a color you currently have on the belt (like Cyan) into a temporary holding area on the canvas (a corner where it doesn't matter much). This empties a slot on your belt. Use that empty slot to tap the "useless" top-layer cups blocking your Orange. It might cost you 3-4 moves to dig one Orange cup out, but it's the only way forward.
Scenario 2: "The Red and Maroon mixed into a brown sludge."
Diagnosis: You poured them in the wrong order or didn't let the first layer settle.
The Fix: Unfortunately, there is no "un-mix" button. However, if the mix is only in a small area (like one valley), you can try to over-pour the correct color (Maroon) very heavily into that spot to dilute the Red back to the correct shade. If the whole mountain is brown, restart the level. It's faster than fixing it.
Scenario 3: "My belt is full of wrong colors, and I can't pour them."
Diagnosis: A "Soft Lock." You have White on the belt but are still working on the ground.
The Fix: Look for the "least damaging" place to dump the wrong color.
- If you have White/Blue early: Pour them into the very top corner of the canvas. Even if it's messy, you can cover it up later with the final Sky layer.
- If you have Orange/Red late: Pour them into the bottom corners or behind where the mountains will be. Never pour them into the sky area.
Scenario 4: "I can't find the last White cup for the cloud."
Diagnosis: It's buried under Red or Cyan in the tray.
The Fix: This is easier to fix than Scenario 1. Since you are at the end, your belt should be emptying as you pour the Sky. Aggressively tap the remaining cups in the tray. Even if you bring a Red cup onto the belt, just pour it onto a mountain peak (it adds texture!) to clear the slot and keep digging for that last White cup.
Scenario 5: "The image looks complete, but the level won't end."
Diagnosis: "Pixel Perfection" error. There is a tiny gap, usually 1-pixel wide, in the transition between the Orange and Red, or Red and Blue.
The Fix: Don't pour big piles. Instead, just tap the pour button once for every color you have left. Move the nozzle slowly along the borders/edges of the colors. Listen for the sound of sand hitting "bottom" vs hitting "sand." When you find the hole, the sand will sound deeper. Fill that micro-gap.
Speed Run Tips and Shortcuts
Once you have beaten the level and want to achieve a faster time (or 3-star rating), use these advanced techniques.
Speed Run Tip 1: The "Pre-Load" Method
While the opening animation is playing (before you have control), quickly scan the tray. Identify exactly where the first three Orange cups are. As soon as control unlocks, tap those three specific cups instantly. Do not wait to see where the nozzle is. Getting the belt pre-loaded with your primary color before the canvas even appears saves 2-3 seconds.
Speed Run Tip 2: Continuous Motion
Never let the nozzle stop moving. Static pouring creates piles. Moving the nozzle in a "Figure 8" or "Zig-Zag" pattern while pouring distributes the sand faster and more evenly. For the Orange base, simply sweep left-to-right continuously. For the mountains, sweep up-and-down.
Speed Run Tip 3: Batch Processing
Don't switch colors every 5 seconds.
- Grab 3 Orange cups. Pour them all.
- Grab 3 Maroon cups. Pour them all.
- Grab 2 Red cups. Pour them.
- Grab 2 Blue cups. Pour them.
Minimizing the "Tap Tray -> Move to Belt -> Move to Nozzle" cycle saves significant time.
Speed Run Tip 4: Ignore the Small Gaps
Perfectionists are slow. In a speed run, you only need ~95% coverage. If a pixel is missing in the corner of the sky, or a mountain peak is slightly uneven, the game will usually still register it as complete. Don't waste time micro-managing the last 1% of a layer unless the "Victory" screen hasn't triggered.
Speed Run Tip 5: The "Last Cup" Shortcut
If you are down to the last cup of a color (e.g., one Red cup left) and the mountain is mostly done, don't try to find the perfect spot for it. Just dump it in the general area. The game's collision detection is lenient enough that it will likely fill a gap you didn't even see.
Speed Run Tip 6: Memorize the Tray "Shuffles"
The tray layout isn't truly random; it follows templates. After playing Level 286 twice, you will realize that the Orange cups are *always* buried in the same relative spot (e.g., "Row 3, Column 2"). On your third try, go directly to that spot and tap the blocker above it without thinking. This reduces your reaction time to zero.