
Level 327
HARDHow to solve Sand Loop level 327? Get instant solution for Sand Loop 327 with our step by step solution & video walkthrough. Sand Loop 327 tips and guide.
Play Sand Loop Now
Experience the puzzle challenge firsthand
Game Screenshots
Sand Loop Level Guides
Level Overview: The Retro Platformer Puzzle
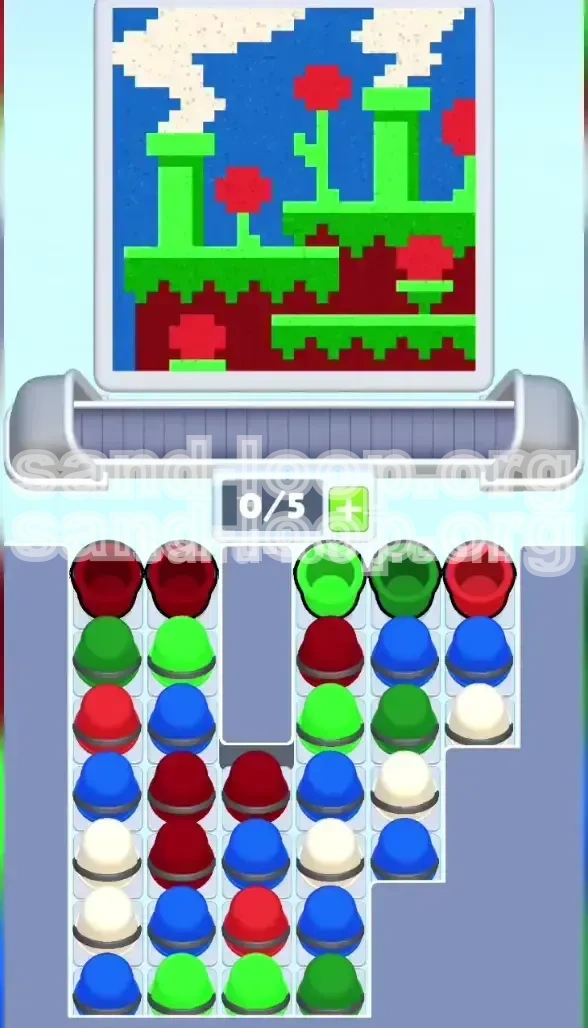
Sand Loop Level 327 is a distinctive stage that deviates from the game's usual abstract aesthetics, instead presenting a challenging homage to 8-bit platformers. The visual complexity lies in the layering of pixel art elements—you are constructing a scene with warp pipes, brick ground, and pixelated flora. The primary difficulty in this level is not speed, but precision. The game's physics engine treats "sand" as a fluid, but the pixel art requires rigid adherence to boundaries. A single pour of a color slightly out of sequence can bleed into adjacent areas, ruining the definition of the pipes or flowers. This level tests your ability to manage a congested inventory tray while executing a strict color sequencing protocol.
The Visual Aesthetic
The level is designed to mimic a retro video game screen. The bottom 15% of the canvas is reserved for the brick ground, the middle 60% for vertical structures (pipes), and the top 25% for atmospheric elements (clouds and sky). Because the pipes are tall and vertical, they act as barriers. If you fill the background "Sky Blue" too early, the sand will stack up against the unpainted pipe areas, preventing you from fitting the green sand into the narrow pipe columns later. This level forces you to build from the foreground to the background.
The "Dual-Green" Complexity
Unlike previous levels where "Green" might be a single resource, Level 327 introduces a shading mechanic. The supply tray generates two distinct types of green cups: "Bright Green" (for highlights and grass tops) and "Dark Green" (for shadows and depth). Using them interchangeably is a guaranteed fail. The level logic requires these to be applied in a specific sequence to create the 3D effect of the pipes. If you apply Dark Green where Bright Green belongs, the game's validation system will reject the final image, even if it looks 90% correct to the naked eye.
The Inventory Bottleneck
The conveyor belt in this level is uniquely aggressive. The spawn rate for cups is approximately 20% faster than the average stage. You have a 5-slot capacity, but the tray will frequently present you with 3 or 4 colors that you *cannot* use immediately (such as Sky Blue while you are still working on the ground). This creates a "logistics" puzzle where you must cycle unusable cups onto the belt and let them orbit the loop without pouring them, simply to clear space in your tray for the colors you actually need.
Completion Criteria
To achieve a 100% completion rating, every pixel must be filled without overflow. This means the "Maroon" ground must be perfectly flat, the "Bright Red" flowers must sit exactly on top of the pipe rims without dripping down the sides, and the "Sky Blue" must fill the negative space without overlapping the pipe shadows. The margin for error is roughly 2-3 pixels of overflow. Anything more than that will trigger a "Messy Canvas" fail state.
Clear Objectives: From Ground to Sky
Your goal is to deconstruct the image into logical painting layers. You cannot simply color what you see; you must color based on what is "in front" versus what is "in back." In 2D side-scrolling logic, the ground is the front-most layer, followed by the pipes, followed by the sky. You must clear the tray and execute the pours in this specific order: Ground > Pipes & Vegetation > Sky > Clouds.
Objective 1: The Foundation
The first and most urgent objective is to secure the "Deep Red" or "Maroon" sand. This creates the floor of the level. Until the floor is poured, the rest of the elements have no anchor. Furthermore, clearing the Maroon cups from the tray is critical because they sit on top of the "Bright Green" cups in the spawn column. If you ignore the ground, you block your ability to access the pipe colors.
Objective 2: Structure Definition
Once the ground is laid, you must immediately shift focus to the vertical structures. This is the most complex phase involving the Green and Red colors. You must define the shape of the warp pipes and the flowers before filling in the air behind them. If you pour the blue sky first, the blue sand will pile up behind where the pipes should go, and when you eventually pour the green pipe sand, it will sit on top of the blue, ruining the layering effect.
Objective 3: Background Fill
Only after the pipes and flowers are fully rendered should you address the "Sky Blue." This phase requires managing the "Blue Wall"—a massive influx of blue cups that threaten to clog your tray. The objective here is to efficiently filter these blue cups, pouring them only into the empty air spaces surrounding the pipes, without spilling over the pipe tops.
Objective 4: Atmospheric Detail
The final objective is the "White" cloud layer. These are the last items to spawn and the safest to use. They float above everything else. However, accessing them requires clearing the bottom rows of the tray, which are often buried under the massive pile of Blue cups generated during Objective 3.
Step-by-Step Instructions: The Execution Phase
This section provides the exact button presses and management strategies needed to clear the level. Follow this sequence rigidly. Do not improvise the order, or you will face a gridlock where your tray is full of unusable colors.
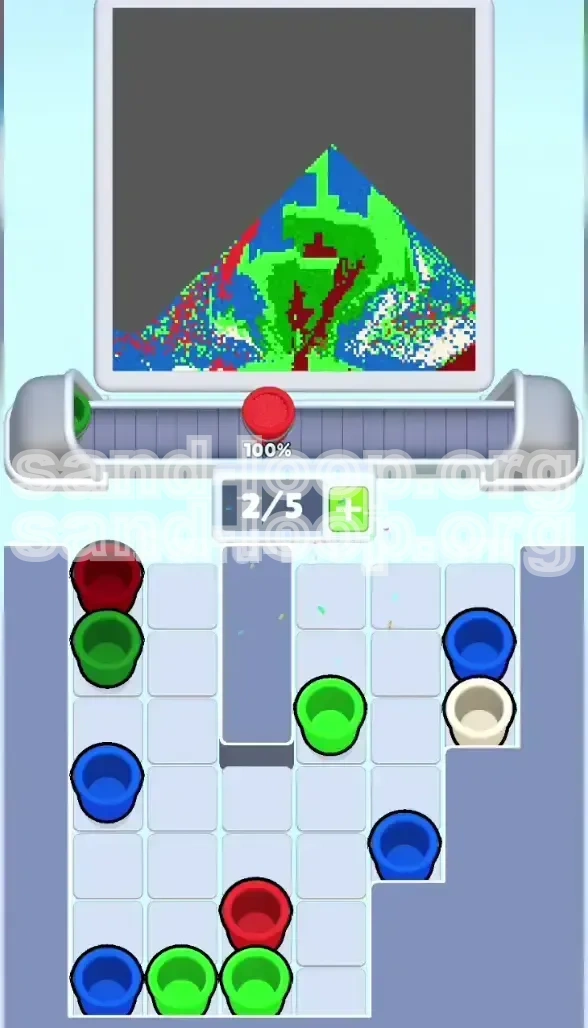
Phase 1: The Maroon Anchor (Start - 15% Progress)
As soon as the level loads, look at the top-left quadrant of the supply tray. You will see Deep Red/Maroon buckets.
- Action: Tap every Maroon bucket immediately.
- Targeting: Pour exclusively into the bottom rectangle of the canvas. Do not let the sand touch the pipe stems.
- Tray Management: Do not touch any other color yet. Even if you see a Bright Green, ignore it until the Maroon flow is stabilized or the tray slots are forcing your hand.
- Result: The bottom 15% of the screen turns brick-red. This also uncovers the first wave of Bright Green cups in the tray.
Phase 2: The Pipe Construction (15% - 60% Progress)
With the ground set, the Maroon cups stop spawning as frequently. Now you must deal with the Greens.
- Identify: Look closely at the green cups. Distinguish the "Light Green" (lime) from the "Dark Green" (forest).
- Sequence: Alternate your pours. If you pour a Light Green, your next immediate target should be the corresponding Dark Green shadow area.
- The Flower Interlude: While managing the greens, keep a close eye on the top-right corner of the tray. A "Bright Red" cup will spawn. You must pause your green pouring to grab this Red cup immediately.
- Red Targeting: Pour the Bright Red ONLY onto the small flower pixel clusters popping out of the pipes. If you miss this window and the Red cup sits on the belt too long, it may cycle behind other cups, causing you to forget it, leading to a unfinished flower later.
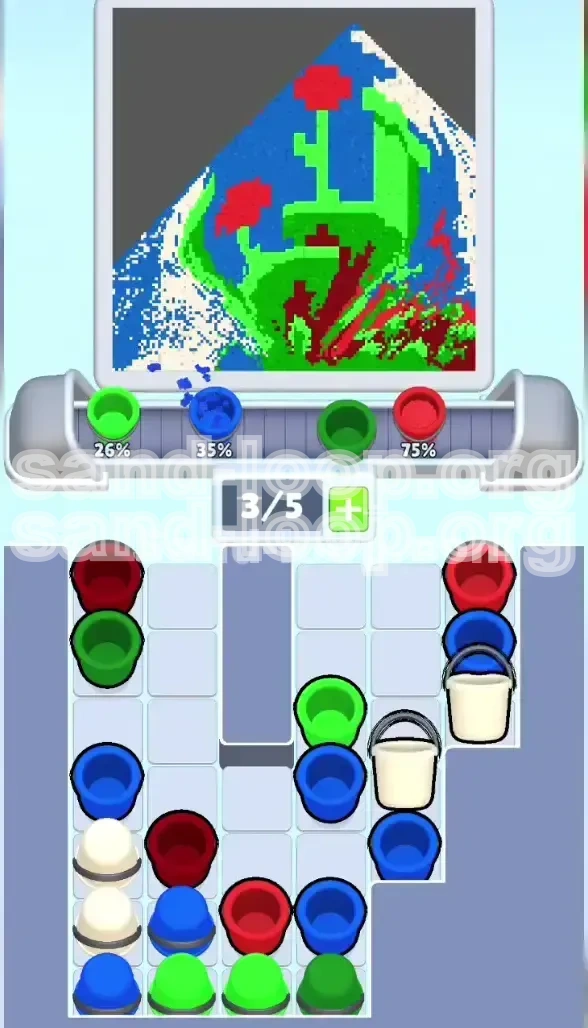
Phase 3: The Blue Wall Strategy (60% - 90% Progress)
This is the crisis point. The tray will flood with Sky Blue cups. They are heavy, they spawn often, and they are blocking the White cups you need for the finish.
- Orbiting: If your tray is full of Blue but the canvas isn't ready for the sky (because you are still fixing a pipe shadow), do not pour. Instead, tap the Blue cup to move it from the Tray to the Conveyor Belt.
- The Loop: Let the cup ride the belt all the way around and back into the tray if necessary. This buys you time to finish a different color without "wasting" the Blue cup.
- The Pour: Once the pipes are perfect, unleash the Blue. Pour rapidly into the empty air. The blue sand will fill the gaps between the pipes.
- Warning: Stop pouring before the blue level reaches the top of the pipes. You need a distinct silhouette.
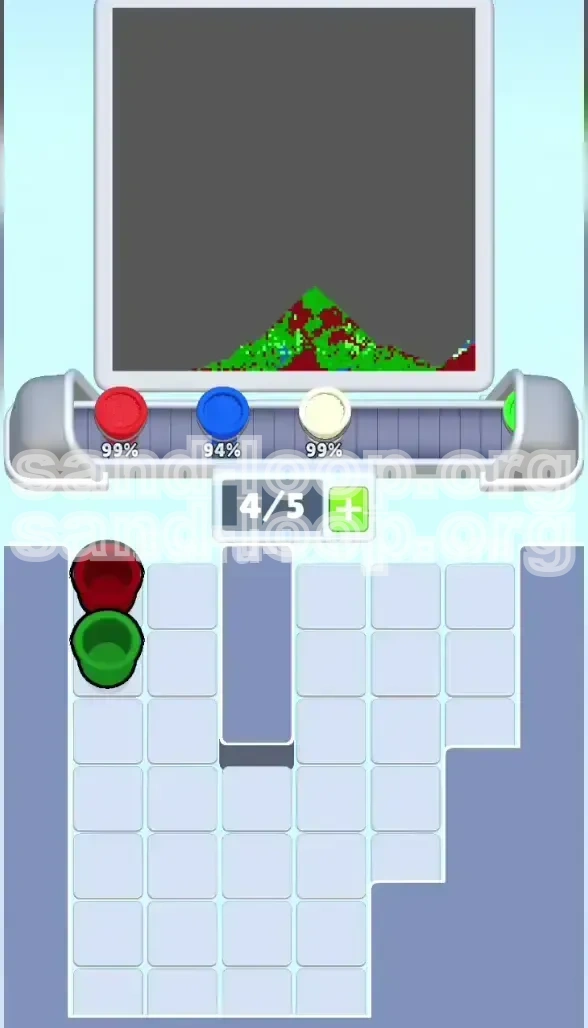
Phase 4: The Cloud Cleanup (90% - 100% Progress)
With the sky filled, the tray should finally reveal the White cups.
- Access: The White cups are often located at the bottom-left or bottom-right of the tray stacks.
- Action: Spam the White cups. They are for the very top of the screen (the clouds).
- Safety: Since the clouds are the highest layer, you don't need to be as careful with boundaries here, provided the blue sky below is already full. The white sand will sit on top of the blue safely.
Color Order: The Sequencing Logic
Understanding the logic behind the color order is vital for when the RNG (Random Number Generator) of the level throws you a curveball. If you know *why* the order matters, you can adapt.
Why Maroon is First
Physics dictates that sand settles at the bottom. If you were to pour the Sky Blue first, it would fill the bucket. Then, when you pour Maroon for the ground, the red sand would sink *under* the blue sand, potentially mixing and creating a muddy purple sludge at the border, or simply pushing the blue sand up into the pipe areas where it doesn't belong. The heavy, ground-level colors must establish the "floor" of the physics simulation first.
The Green Layering (Light vs. Dark)
The game renders the pipes with a light source coming from the top-left.
- Order: Ideally, pour the Bright Green (the main body) slightly before the Dark Green (the shadow).
- Reasoning: If you pour the Dark Green shadow first, the Bright Green body sand poured on top of it might mix slightly at the edges, blurring the sharp line needed for pixel art. By pouring the body color first, and then touching up the shadow side, you maintain cleaner edges.
- Exception: If the shadow area is a deep recess (like the inside of the pipe), pour Dark Green first to ensure it reaches the bottom of the "tube," then cap it with Bright Green.
The "Red Trap"
Bright Red (flowers) is a "spot" color, meaning it covers less than 5% of the total surface area. However, it is visually critical. Because it spawns rarely, you must prioritize it the instant it appears, even if you are in the middle of a Blue pour. If you miss the Red, you end up with a beautiful scene of green pipes and blue sky, but with missing pixelated flowers, resulting in a failed run.
Sky Blue as the Filler
Sky Blue is the "solvent" of this level. It fills the void. Because it covers the largest area (roughly 50% of the canvas), it has the highest spawn rate. You treat it as the default "dump" color when no other critical tasks are pending. However, you must respect the "Air Gap"—never let Blue touch the active work zone (pipes) until the pipes are fully cured.
Key Tips and Common Mistakes
Even experienced players can fail Level 327 due to specific traps built into the level design. Here is how to avoid them.
Key Tip: The "Tap-Hold" Technique
When pouring the Sky Blue, do not mash the tap button. Use a "Tap-Hold" rhythm. Tap to release the sand, hold for a split second to let it settle into the air gaps, then tap again. This prevents the blue sand from building up a "mound" that might spill over into the pipe areas if the physics engine calculates a slight overflow.
Key Tip: Tray Awareness
Don't stare at the canvas; stare at the tray. Spend 60% of your visual attention on the incoming colors. If you see a White cup spawning under a stack of Blues, you need to clear those Blues immediately (even if it means pouring them imperfectly) to rescue that White cup. If the White cup gets pushed off the belt because your tray was full, you cannot finish the level.
Common Mistake: Over-pouring the Shadows
Players often overuse the Dark Green because they want the pipes to look "detailed." However, the game is strict about pixel volume. The shadow is only meant to cover 30% of the pipe's surface. If you pour 50% Dark Green, the validation system will see it as "Too Dark" and fail you. Exercise restraint with the Dark Green buckets.
Common Mistake: Ignoring the "Brick" Texture
The ground isn't just a flat block; it has a subtle texture implied by the pixels. If you pour the Maroon too violently (tapping rapidly), the sand settles flat and loses the pixelated "brick" definition. Pour the Maroon slowly to let it stack with a natural, rough texture that mimics the brick pattern.
Stuck Solutions: The Gridlock Fix
Scenario: Your tray is full (5/5), and the belt is bringing a color you need (e.g., White), but you can't pick it up.
Solution: You must sacrifice. Look at your tray. Is there a Blue cup? Grab the Blue cup and pour it immediately onto the sky, even if the sky isn't perfectly done yet. Just get it out of your hand. Free up the slot to grab the White cup. It is better to have a slightly messy sky and finish the level than to have a perfect tray but a full inventory and lose the game.
Speed Run Tips and Advanced Optimization
Once you understand the mechanics, you can aim for a high-score speed run. Level 327 can be cleared in under 45 seconds if you execute these advanced maneuvers.
The "Pre-Load" Maneuver
As the level loading screen fades, you can often tap the screen *before* the timer starts to register the first tap. Pre-tap the top-left Maroon bucket. By the time the clock starts, the sand is already flowing, shaving 0.5 seconds off your time. In a speed run, every millimeter of movement counts.
Combo-Pouring Pipes
Instead of pouring a whole Bright Green pipe, then going back for the Dark Green, try to "Juggle" two cups. If you have a Bright Green and a Dark Green on the belt, alternate taps: Left hand (Bright), Right hand (Dark). This creates a mixed stream that settles into the correct layers faster than doing them sequentially. It requires practice, but it prevents the sand from drying/settling too hard between layers.
Cloud Skipping (High Risk)
If you are aiming for pure speed, you can start pouring the White clouds *before* the Sky Blue is 100% finished. As long as the Sky Blue is at 80% coverage, you can start dumping the White at the top. The White sand is heavy enough to push the remaining Blue sand sideways, filling the rest of the background automatically. This saves you the time of meticulously filling the last corners of the sky.
Spawn Cycle Memorization
The tray follows a pseudo-random loop. After about 10 playthroughs, you will notice that the "Red Flower" cup always spawns 12 seconds after the start. Use this knowledge. Don't wait for it. At the 10-second mark, stop pouring whatever you are doing and clear a slot in your tray to catch that Red cup the instant it appears.