
Level 330
HARDHow to solve Sand Loop level 330? Get instant solution for Sand Loop 330 with our step by step solution & video walkthrough. Sand Loop 330 tips and guide.
Play Sand Loop Now
Experience the puzzle challenge firsthand
Game Screenshots
Sand Loop Level Guides
Level 330: The Rainbow Cloud Challenge - Complete Walkthrough
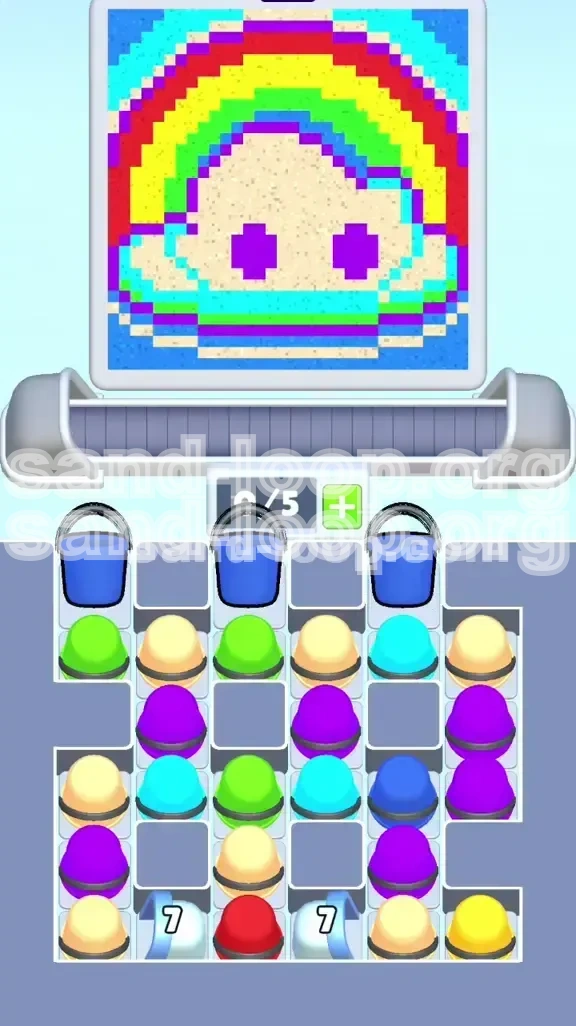
Sand Loop Level 330 is a deceptive puzzle that masquerades as a simple art project but functions as a rigorous test of resource management and spatial reasoning. In this level, players must paint the "Rainbow Cloud Girl"—a pixel-art portrait featuring a face surrounded by a vibrant, multi-colored arch. The difficulty lies not in the art itself, but in the restrictive tray layout and the "Counted Glass Locks" that govern your access to essential colors. With a strict capacity limit of 5 active slots and a board that starts heavily obstructed, you cannot rely on brute force. You must execute a precise sequence of moves to clear the board without clogging your conveyor belt.
The Volume Lock Mechanic
Unlike standard stages where you can pick any color at will, Level 330 utilizes a "Volume Lock" system. This is indicated by the number "7" emblazoned on the white glass panes in the bottom row. These locks cover your Red and Yellow cups, which are critical for the outer rainbow. The counter only decreases when you successfully send a cup from the top or middle rows to the conveyor belt. This creates a forced economy: you must spend resources to unlock resources. You cannot save the top cups for later; you must aggressively cycle through 7 cups to shatter the glass and access the bottom tier.
The Layered Arch Structure
The artwork is constructed like a jawbreaker candy, with concentric circles demanding a specific pour order. The "Rainbow Cloud" isn't just a flat image; it is a topographical map of colors. The outermost ring is Red, followed by Yellow, Green, Cyan, and Purple, with the Beige face in the center. If you pour the outer rings first, the inner colors will never reach the bottom. You must visualize the sand accumulation from the bottom up. The background and chin (Blue/Cyan) must be laid down first, followed by the facial structure, and finally capped with the rainbow bands.
Color Palette Distribution
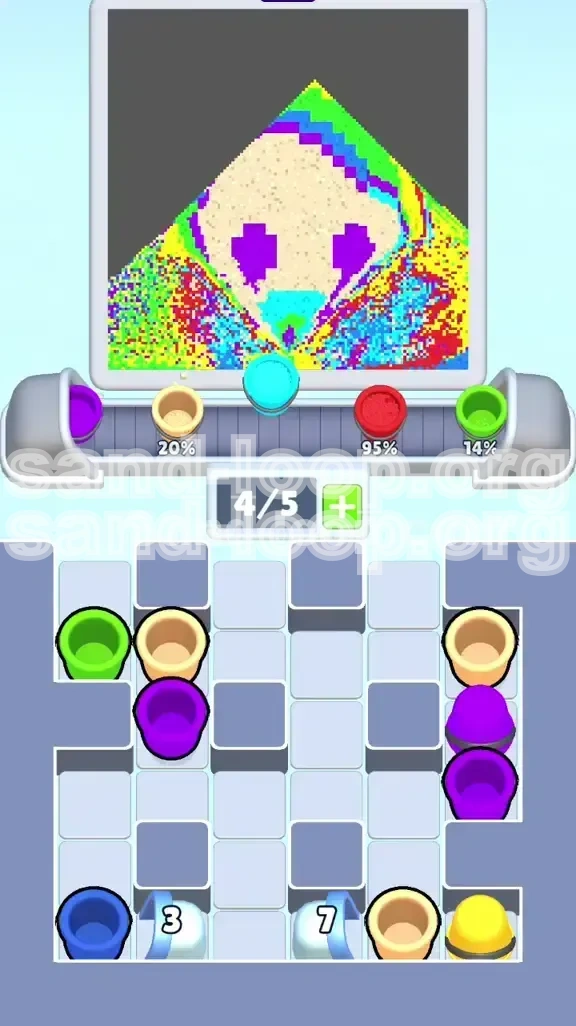
The color distribution is uneven, which adds to the complexity. Beige is the dominant volume, accounting for approximately 40% of the canvas. However, the "trouble colors" are Purple and Cyan. Purple is required for both the thin chin stripe and the eyes, but these two areas are physically separated by the massive Beige face. Cyan is needed for the background and the chin detail. Mismanaging these small-volume colors early on will result in " Purple Sunglasses"—where the eye color spills over the face instead of settling into the eye sockets.
The 5-Slot Capacity Trap
One of the biggest threats in this level is the 5-slot capacity limit on your active tray. Because you are forced to burn through the top rows to break the "7" locks, your tray will fill up fast. If you simply click cups without a plan, you will hit the capacity cap, rendering you unable to cycle new cups. This leads to a soft lock where you cannot make moves. You must prioritize sending cups immediately, even if you don't need their color right away, simply to keep the flow moving and reduce the lock counter.
Victory Conditions
To achieve 100% completion and three stars, you must not only fill the canvas but also manage your "Waste" meter. Efficient pouring is key. You are penalized for overfilling areas or spilling sand into the wrong zones. The challenge is to break the glass locks with the minimum number of "filler" moves so that you have enough space left to maneuver the complex Rainbow Arch at the end. A perfect run requires balancing the speed of unlocking the Red/Yellow cups with the precision required to layer the face.
Strategic Objectives and Color Order
Success in Level 330 depends entirely on your ability to reverse-engineer the painting process. You are painting from the bottom layer up. If you try to paint the details last, they will float on top of the base layers. This section outlines the critical objectives and the scientifically correct order to process your colors.
Objective 1: The Chin Lock-In
Your first objective is to secure the bottom of the canvas. The image features a distinct Cyan and Purple stripe at the very bottom of the chin. If you pour the massive Beige face first, it will cover the chin area, making it impossible to place the thin stripes underneath later. Therefore, your opening moves must be dedicated to "locking in" the bottom details before the main face is formed.
Objective 2: The Glass Breaker
You cannot start the real painting until you shatter the "7" locks. Your secondary objective is to reduce the counter on the bottom row locks from 7 to 0. This requires you to sacrifice 7 cups from the upper rows. You must identify which cups in the top row are "expendable" or useful as a base layer, and send them to the conveyor belt rapidly to clear the path for the Red and Yellow cups.
Objective 3: The Face Foundation
Once the locks are open and the chin is secured, the bulk of your work involves the Beige face. This is the anchor of the image. You must pour enough Beige to form the facial structure but stop before it overflows into the eye sockets. This requires a "pause and wait" approach—you pour the Beige, let it settle, and then introduce the Purple for the eyes before capping it off.
Objective 4: The Rainbow Cap
The final objective is the Rainbow Arch. This acts as a cap for the entire level. Because the Red and Yellow bands sit on top of the Green and Cyan bands, they must be poured last. The physics of Sand Loop means that heavier, later pours push earlier pours down. By saving Red and Yellow for the very end, you ensure they sit prominently on the outer rim of the cloud.
The Correct Processing Order
To avoid layering errors, follow this strict processing hierarchy:
- Phase 1 (The Base): Cyan and Blue (Background/Chin).
- Phase 2 (The Detail): Purple (Chin Stripe only).
- Phase 3 (The Mass): Beige (The Face - Partial).
- Phase 4 (The Feature): Purple (The Eyes).
- Phase 5 (The Inner Arch): Green.
- Phase 6 (The Outer Arch): Yellow and Red.
Step-by-Step Walkthrough: The Opening Phase
The first 30 seconds of Level 330 are the most chaotic. You are dealing with a full tray of blocked colors and a locked bottom row. Do not panic. This phase is about clearing the "trash" to reveal the tools you need. Follow these steps to establish your foundation.
Step 1: Assess the Top Row Blue
As soon as the level starts, look at the top row. You will see three massive Blue buckets. These are blocking your view of the middle row. Blue is used for the background, so it is not "waste," but it is not your priority. However, you need to clear these slots to unblock the Green and Beige cups behind them.
- Send all three Blue buckets to the conveyor belt immediately.
- Do not try to pour them precisely. Let them flow into the background areas.
- This action counts as "3" towards your glass lock counter.
Step 2: Trigger the Chin Stripe
Once the Blue is cleared, you will see the middle row. You need to find the Purple cup. Look for the cup that is easiest to access without disturbing the others.
- Select one Purple cup.
- Pour it carefully into the bottom center "Chin" area.
- Stop pouring as soon as the stripe is filled. Do not overfill.
- This secures the bottom layer so the face sand can sit on top of it later.
Step 3: The "Beige" Rush
With the chin stripe wet, you now need to build the face. The Beige cups are usually located in the middle row, now exposed after removing the Blue.
- Identify the Beige cups.
- Send two Beige cups to the belt.
- Pour them into the central facial area.
- Crucial Note: Leave the eye sockets empty! If you pour Beige into the eye sockets, you will have to dig it out later, which wastes moves. Pour around the center or let the sand fall naturally, but keep the center clear for the upcoming Purple.
Step 4: Managing the Glass Lock Countdown
At this point, you have likely sent 5 or 6 cups (3 Blue + 1 Purple + 2 Beige). The glass locks on the bottom row are cracking. You need 1 or 2 more sends to shatter them completely.
- Look for a Green or Cyan cup in the top/middle rows.
- Send one to the belt to finish the countdown.
- The glass will shatter, revealing the Red and Yellow cups at the bottom.
- Do not use the Red or Yellow yet! They are for the finale.
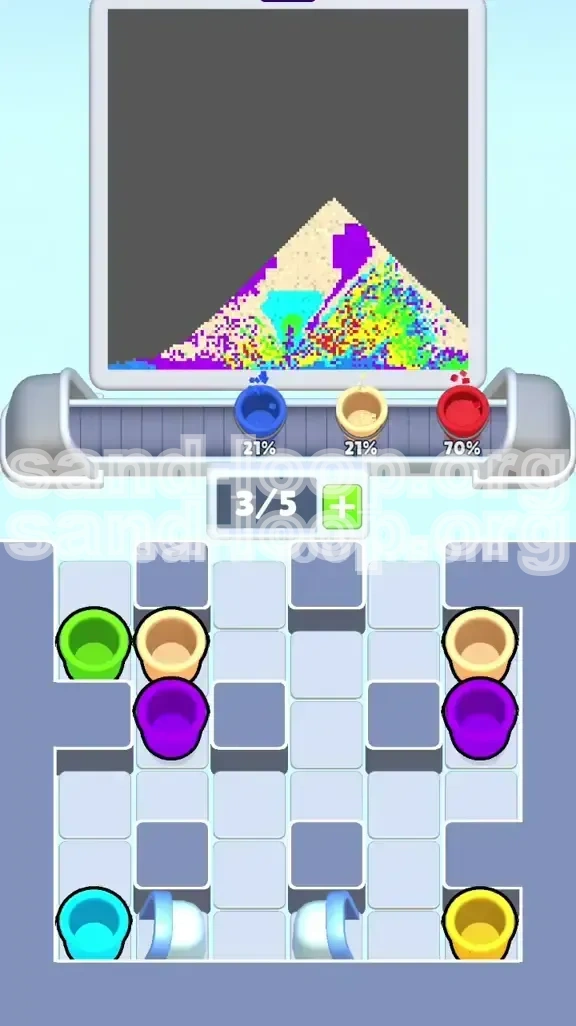
Step 5: The Background Fill
While you were clearing the top, your Blue/Cyan mix has been pouring. Now you need to solidify the sides of the canvas.
- Use any remaining Cyan or light Blue cups to fill the left and right background areas.
- This creates a "wall" that will contain the Rainbow Arch later.
- Ensure the background is level with the bottom of the chin.
Step 6: Tray Management Check
After these steps, pause and check your active tray.
- Are your slots full? If so, you need to pour or trash cups immediately.
- The goal is to have only the colors you need for the next phase (Green, Purple for eyes, Yellow/Red) active.
- If you have leftover "trash" colors you don't need, pour them into a safe corner or discard them to free up space.
Step-by-Step Walkthrough: The Face and Arch
You have successfully cleared the board, broken the locks, and laid the foundation. Now comes the precision work. In this phase, you will sculpt the face, place the eyes, and construct the rainbow cap. This is where most players get stuck, so follow these steps precisely.
Step 7: Placing the Purple Eyes
You should have a canvas with a filled chin, a background, and a partially filled Beige face with empty eye sockets.
- Retrieve a Purple cup from your tray.
- Zoom in if necessary to aim.
- Pour the Purple gently into the two eye sockets.
- The physics here are tricky; if you pour too fast, the Purple will spill onto the beige "cheeks." If it spills, use a Green or Yellow pour later to cover the mistake, or restart the pour if the game allows undo.
- Once the eyes are filled, do not add more Purple. You are done with this color.
Step 8: Completing the Beige Face
With the eyes locked in, you can now complete the rest of the head.
- Send your remaining Beige cups to the conveyor.
- Pour them to fill the rest of the face mask, surrounding the Purple eyes.
- The Beige should flow around the eyes, integrating them into the face.
- Fill the face until it reaches the bottom of the "hair" or "arch" area.
Step 9: The Green Rainbow Band
The face is done. Now you move to the Rainbow Arch. The order is critical here: Green is the inner ring.
- Locate your Green cups.
- Pour Green to form the inner band of the rainbow.
- This band usually sits directly above the forehead and flows outward.
- Make sure the Green connects smoothly with the background/cyan areas.
- Do not touch the Red or Yellow yet.
Step 10: The Yellow Middle Band
Once the Green is set, grab the Yellow cups (now unlocked from the bottom row).
- Pour Yellow immediately after Green.
- Since Yellow is lighter than Red but often heavier than Green in volume, it will sit on top of the Green band.
- Follow the curvature of the Green band to widen the rainbow.
- This forms the bridge between the inner colors and the outer Red shell.
Step 11: The Red Outer Arch
This is the final step of the painting process. Red is your "cap" color.
- Take the Red cups from the bottom row.
- Pour Red to form the absolute outer edge of the rainbow cloud.
- Because this is the last major color, you can be slightly more aggressive with the pour.
- Let the Red flow over the top of the Yellow and Green to create a smooth, gradient arch.
- This seals the painting.
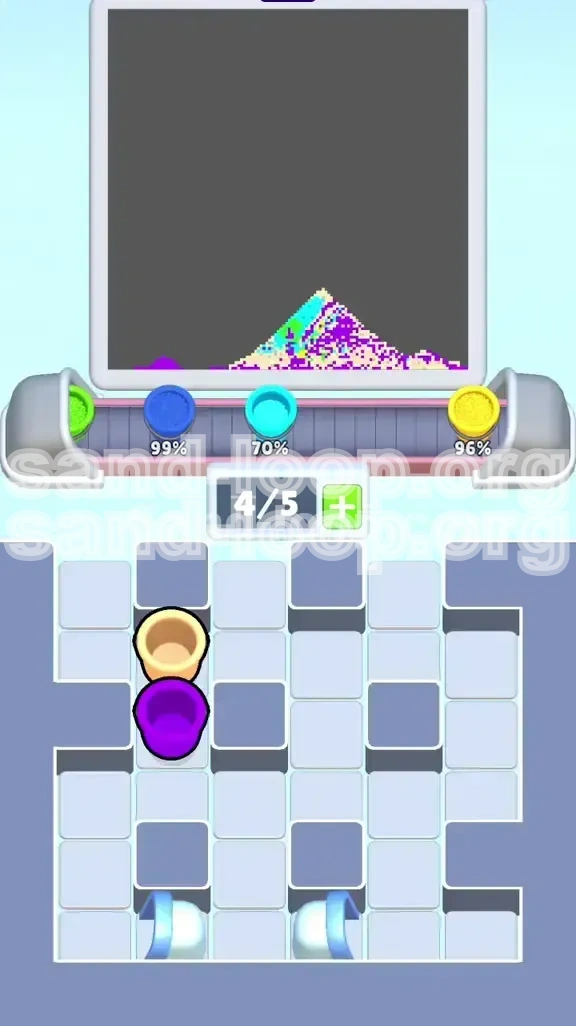
Step 12: Final Touch-ups
Sometimes, despite your best efforts, there are small gaps or "holes" in the pixel art where the background shows through.
- Scan the canvas for any white or empty pixels.
- Use the corresponding cup color (Green, Yellow, or Red) to tap-fill these small gaps.
- Do not use large pours for this; just tap the cup to drop a small amount of sand.
- Once the coverage is 100%, the level is complete.
Key Tips and Common Mistakes
Even with a walkthrough, Sand Loop physics can be unpredictable. This section covers the finer points of strategy, highlighting the most common errors players make in Level 330 and providing pro-tips to optimize your score.
The "Purple Sunglasses" Mistake
This is the number one error in Level 330. Players pour all their Purple at the beginning (for the chin) or wait until the very end.
- The Mistake: If you pour Purple for the chin and then immediately pour more Purple for the eyes without letting the Beige settle, the Purple will spread across the face like a pair of oversized sunglasses.
- The Fix: Treat the "Chin Purple" and the "Eye Purple" as two separate phases. Pause after the chin pour, build the Beige face structure, and *then* come back for the eyes. The Beige acts as a dam to contain the Eye Purple.
Tray Hoarding
New players often try to save specific cups for later, leading to a clogged tray.
- The Mistake: Keeping the Red/Yellow cups in the tray while trying to maneuver the middle row, hitting the 5-slot limit, and being unable to cycle new cups.
- The Fix: The "7 Lock" forces you to be aggressive. You *must* send cups. If you don't need a color right now, send it to the belt anyway just to get it out of the tray and reduce the lock counter. You can always pour it off to the side if necessary, but keeping the flow moving is paramount.
Ignoring the Background
Focusing too much on the face and forgetting the canvas edges.
- The Consequence: You reach the end of the level with a perfect face and rainbow, but the sides of the image are still empty white canvas. You have no Blue/Cyan left.
- The Prevention: The Blue buckets at the start are not just obstacles; they are your primary source of background material. Ensure they pour into the side channels early on. If you skip this, you cannot fix it later.
The "Empty Cup" Soft Lock
A situation where you have empty space on the canvas but no corresponding cups left in the tray.
- The Scenario: You used all your Green on the chin or background, and now you have no Green for the rainbow inner band.
- The Tip: Always glance at the volume of sand in the cup. If a cup looks low, don't use it for minor details. Conserve your high-volume cups for the large areas (Face, Arch) and use the dregs of the cup for small touch-ups.
Overfilling the Eye Sockets
Precision is key for the eyes.
- The Issue: Pouring too much Purple into the eye sockets causes the sand to pile up and overflow, ruining the facial expression.
- The Technique: When pouring the eyes, lift your finger slightly after the initial stream to reduce the flow rate. You want a gentle trickle, not a waterfall. Tap the screen rather than holding it down for maximum control.
Speed Run and Advanced Tactics
For players looking to achieve a high score or complete the level in record time, efficiency is the name of the game. This section provides advanced tactics for speed runners and optimization experts.
The "Pre-Load" Technique
You can start pouring the next color while the current animation is still finishing.
- While the Blue is flowing into the background, immediately scan the tray for the next cup you need (likely Beige or Purple).
- Queue up your next move. Don't wait for the sand to settle completely before sending the next cup to the belt.
- This shaves seconds off your time and keeps the rhythm of the "7 Lock" countdown consistent.
Batch Processing
Group your actions by color zones to minimize switching.
- Instead of alternating: Background -> Face -> Background -> Face.
- Do this: Background (all cups) -> Chin -> Face -> Eyes -> Rainbow.
- Completing one zone entirely before moving to the next reduces cognitive load and prevents "pixel contamination" where one color bleeds into a zone you've already finished.
The "Splash" Entry for Eyes
A faster way to do the eyes without the slow trickle.
- Instead of carefully trickling Purple into the eyes, pour the Beige face to about 90% completion.
- Swipe the Purple cup hard across the eye area.
- The momentum will splash the Purple into the sockets. Immediately follow up with the final 10% of Beige pour to cover any splashes on the "cheeks."
- This is risky but faster than the careful method.
Rainbow Sequencing
The order of the rainbow colors (Green -> Yellow -> Red) is designed to minimize the need for corrections.
- If you pour Red first, you block the Yellow and Green.
- If you pour Yellow first, you block the Green.
- However, since the Rainbow is an *Arch*, you can sometimes pour Green and Yellow simultaneously if you have two cups ready.
- Advanced tip: Pour Green to start the left side of the arch, and immediately switch to Yellow to start the right side, then meet in the middle. This requires excellent spatial awareness but is very fast.
Waste Minimization
To get the highest score, you must avoid overfilling.
- Overfilling the "Chin" area is the most common source of waste.
- The chin strip is narrow. Aim for the center of the strip.
- If sand spills over the edge of the chin into the "void" below, that is wasted percentage.
- Stop pouring the chin stripe the moment the color changes from grey to the target color. Any more is unnecessary.
Utilizing the "Undo" Wisely
If the game allows a limited Undo function (or if you are playing a version with free retries), use it for the "Purple Eyes" step.
- The eyes are the highest risk, highest reward step in the level.
- If you nail the background, face, and rainbow, but mess up the eyes, your score will tank.
- If the Purple spills, do not try to fix it by pouring more colors on top. It will look muddy. Just Undo/Restart the pour immediately.