
Level 353
HARDHow to solve Sand Loop level 353? Get instant solution for Sand Loop 353 with our step by step solution & video walkthrough. Sand Loop 353 tips and guide.
Play Sand Loop Now
Experience the puzzle challenge firsthand
Game Screenshots
Sand Loop Level Guides
Level Overview: The Seaside House Challenge
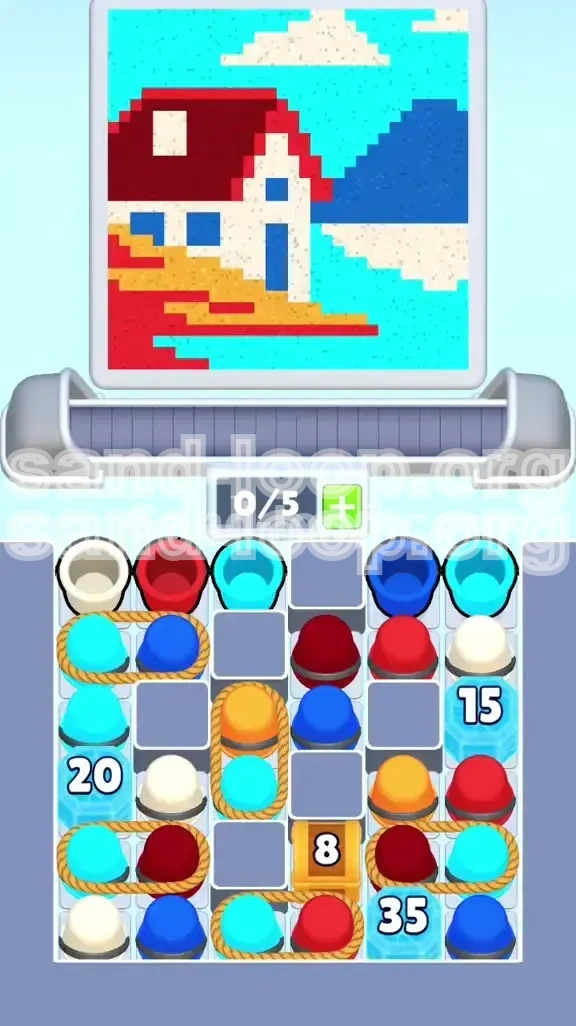
Welcome to Level 353, a stage that combines the aesthetic tranquility of a seaside landscape with the mechanical complexity of a high-level logic puzzle. On the surface, you are painting a charming scene: a white house with a red roof perched on an orange beach, backed by a blue mountain under a cyan sky. However, beneath this pretty facade lies a rigorous test of your resource management skills.
This level is not just about matching colors; it is about managing inventory space under tight constraints. The defining feature here is the heavy use of "Rope Bonds"—pairs of cups that are tied together. These bonds consume double the conveyor capacity instantly, turning your standard 5-slot belt into a cramped 2.5-slot effective capacity. You are forced to play a rhythmic game of "Clear, Tap Pair, Clear" rather than the usual frantic tapping.
The Visual Breakdown
- The Sky (Cyan): Occupies approximately 40% of the canvas. It requires a steady, large volume of sand.
- The Mountain (Dark Blue): A vertical structure on the right side. It acts as a color anchor but is often blocked by ice.
- The House (Red & White): The focal point. Red for the roof, White for the walls. These are high-demand colors.
- The Beach (Orange): The foreground. It appears late in the game due to a crate mechanic.
Core Mechanics: Rope Bonds
The primary antagonist of this level is the Rope Bond mechanic. You will frequently encounter a Cyan cup tied to a Dark Blue cup, or a White cup tied to a Red cup.
- Capacity Penalty: Tapping a bonded pair sends two cups to the belt immediately.
- The Traffic Jam: If your belt has 3 or more cups, you cannot accept a bonded pair. You must clear space to exactly 3 or fewer slots before tapping.
The Ice Block Wall
Progression is gated by three massive ice blocks with values of 20, 15, and 35. These do not just block space; they dictate the order of your operations. You cannot access the essential Dark Blue and White cups needed for the house until the "Right Ice Block (15)" and "Bottom Right Ice Block (35)" are destroyed.
The Crate Bottleneck
The Orange color is locked behind a crate requiring 8 pours. This means the beach cannot be painted until the mid-game. Attempting to start with the foreground is impossible; you must focus on the sky and mountain first.
Difficulty Spike Analysis
Level 353 has a difficulty rating of 4.5/5. The spike comes from the convergence of the Ice Blocks and Rope Pairs. When the ice breaks, it often releases bonded pairs. If your belt is full when the ice shatters, you may face an immediate game over due to lack of space.
Clear Objectives: Your Mission Goals
To conquer Level 353, you need a clear plan of action. Random tapping will lead to a clogged conveyor belt and a failed level. Your primary goal is to manage the "Belt Density"—keeping the number of cups on the conveyor low enough to accept incoming Rope Pairs.
Manage Inventory Space
Your most critical resource is not the sand, but the empty space on your conveyor belt.
- The 3-Slot Rule: Always try to keep 2 slots empty. If you have 4 cups, you are in danger. If you have 5, you cannot tap any Rope Pairs.
- Pair Buffering: Since Rope Pairs add 2 cups instantly, having 3 empty slots is the only safe way to tap them without risking a backup.
Destroy the Ice Blocks
You must prioritize damaging the ice blocks above all else. Do not focus on painting perfect lines early on.
- Target Priority: Focus on the "Right Ice Block (15)" first. It blocks the White and Red cups essential for the house.
- Splash Damage: Remember that pouring any color damages all ice blocks. You don't need specific colors to break ice, just volume.
Execute the Color Order
Painting the image out of order will cause bottlenecks. If you paint the beach (Orange) too early, the cups will clog the belt while you wait for the crate to open.
- Phase 1: Sky (Cyan) and Mountain (Dark Blue).
- Phase 2: House (White/Red) after the ice breaks.
- Phase 3: Beach (Orange) after the crate opens.
Unlock the Crate
The wooden crate (Value 8) is the gatekeeper for the endgame.
- Action: Treat the crate as a secondary ice block. Every pour counts toward it.
- Preparation: Before the crate opens, clear your belt of unwanted colors. When it pops, it floods the board with Orange cups.
Avoid the "Soft Lock"
A "Soft Lock" happens when you have the wrong colors on the belt for the available buckets on the screen.
- Scenario: You have 3 White cups on the belt, but the only open paint slot is Red.
- Prevention: Look at the screen before tapping. If the paint slot is Red, do not tap a White/Blue Rope Pair. Tap a Red/White pair instead.
Step-by-Step Walkthrough
This is the tactical execution of the level. Follow these steps in order to ensure a smooth victory.
Phase 1: The Opening Salvo (0-20%)
The board starts with a mix of accessible single cups and blocked ice blocks.
- Step 1: Tap the single Cyan and Dark Blue cups located in the top row first. These are "free" actions that don't require Rope Bond management.
- Step 2: Pour the Cyan into the Sky (top left/center) and Dark Blue into the Mountain (top right) immediately.
- Step 3: DO NOT tap the Rope Pairs in the second row yet. Your belt is too full, and you need space to maneuver.
- Step 4: Clear your belt to 0 cups. This is your "Reset Moment."
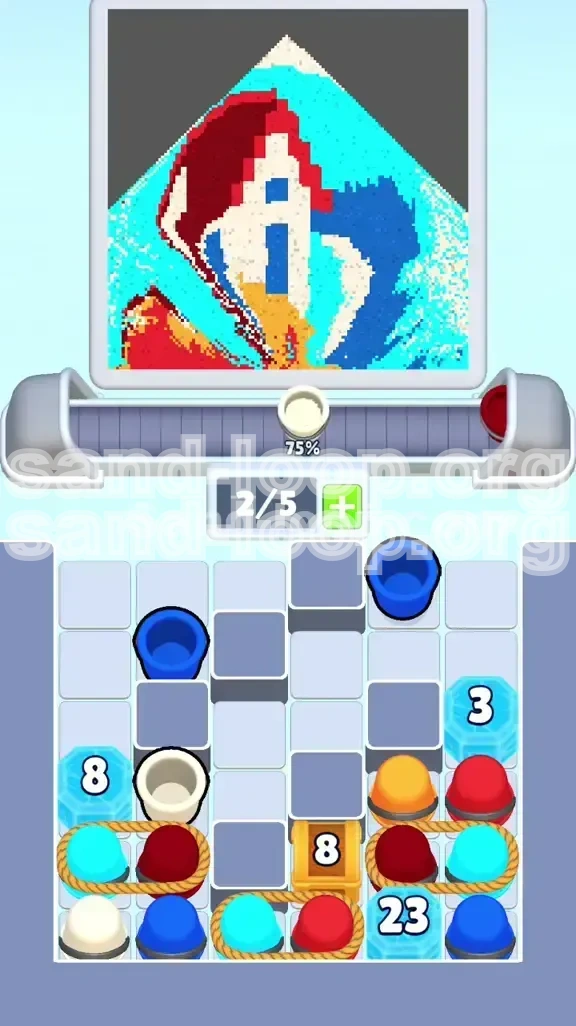
Phase 2: The Ice Breaker (20-50%)
Now we begin the assault on the obstacles.
- Step 1: Look for the Rope Pair connecting Cyan and Dark Blue. Tap this pair now. Since your belt is empty, you can handle the 2-cup load.
- Step 2: Pour these colors aggressively. Even if the painting gets messy, focus on lowering the Ice Block numbers.
- Step 3: Watch the "Right Ice Block (15)." When it hits 0, it will shatter and release White and Red cups.
- Step 4: As soon as the ice breaks, pause tapping for a second. Assess the new layout. Do not immediately fill your belt with the newly released Red cups if the screen is asking for Cyan.
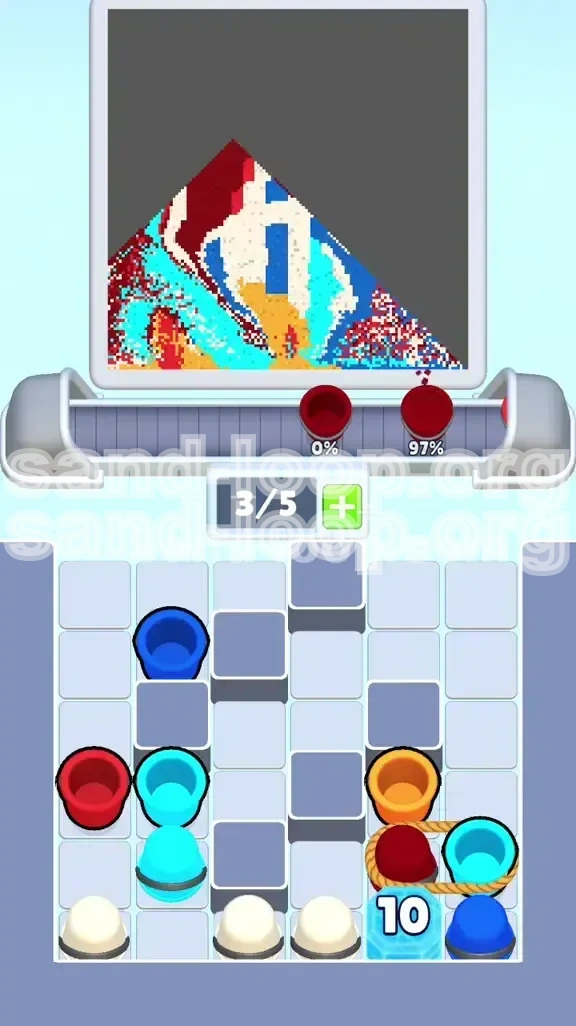
Phase 3: The House Construction (50-80%)
With the ice gone, the house becomes the main focus.
- Step 1: Shift your priority to White and Red cups. The White cups are needed for the walls, and Red for the roof.
- Step 2: Be careful of the White Clouds in the sky. If you over-pour White, you might accidentally finish the clouds while you still need White for the house walls.
- Step 3: Use the "Tap Pair, Clear" rhythm. Tap a Red/White pair -> Pour -> Clear Belt -> Repeat.
- Step 4: Keep an eye on the Crate (8). It should be getting close to opening now.
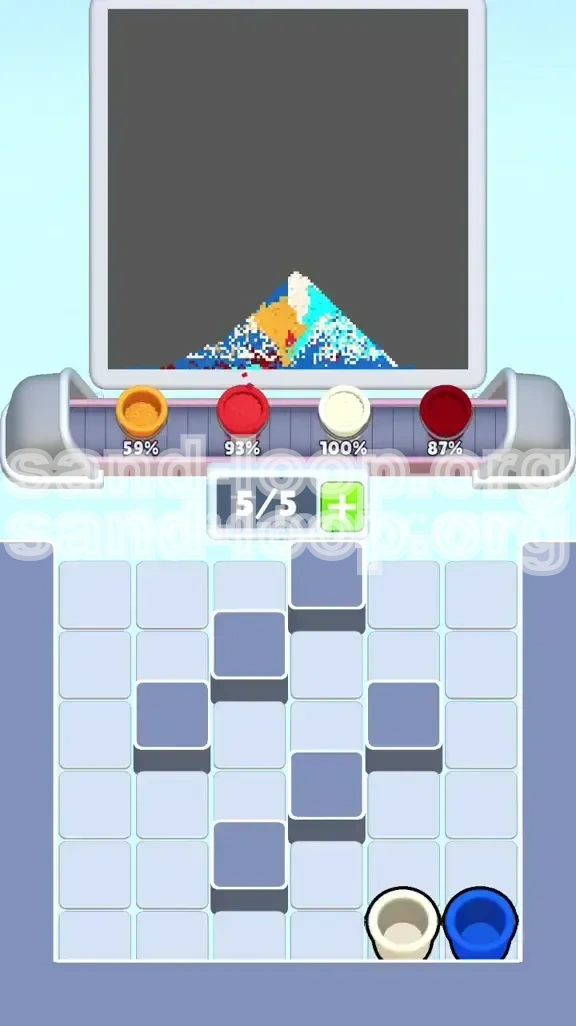
Phase 4: The Crate Explosion (80-100%)
The endgame is triggered by the crate opening.
- Step 1: When the crate breaks, Orange cups will flood the bottom center.
- Step 2: Quickly pour the Orange sand into the Beach area at the bottom.
- Step 3: Finish the remaining touches on the Sky (Cyan) and Mountain (Dark Blue).
- Step 4: If you have a "wandering" cup color (e.g., an extra Red cup when the roof is done), pour it into a completed slot just to clear it from the belt.
Color Order Strategy
Understanding the sequence of colors is vital for maintaining flow. The game forces a specific hierarchy based on how the ice blocks are arranged.
Primary: Cyan (Sky)
Why: Cyan cups are abundant at the start and are not locked behind heavy ice (mostly).
- Strategy: Pour Cyan first and fast. The Sky is the largest area, so it can absorb a lot of sand without clogging.
- Benefit: Clearing Cyan cups frees up space on the belt for the incoming Rope Pairs.
Secondary: Dark Blue (Mountain)
Why: The Mountain is vertically adjacent to the Sky and shares the right-side ice block.
- Strategy: Process Dark Blue immediately after Cyan. Often, these two are linked in Rope Pairs (Cyan + Dark Blue).
- Warning: The Dark Blue area is smaller than the Sky. Stop pouring Dark Blue once the mountain is full, or you will run out of space!
Tertiary: Red & White (House)
Why: These are locked behind the "Right Ice Block (15)".
- Strategy: Ignore these until the ice breaks. Once the ice is gone, these become your highest priority.
- Order: Alternate between Red and White. Don't fill the roof (Red) completely before starting the walls (White), or you might trap White cups behind a full Red paint slot.
Quaternary: Orange (Beach)
Why: Locked behind the Crate (8).
- Strategy: This is a "dump" color. It appears last. You should only start pouring Orange when the rest of the picture is 90% done.
- Risk: If you start Orange too early, it will crowd out the other colors.
The "Hidden" Color: Empty Space
Why: The most important resource is an empty slot on your conveyor.
- Strategy: If no move is obvious, pour a color into a mostly-full slot just to get rid of the cup and free up belt space.
Key Tips and Mistakes to Avoid
Even experienced players can fail Level 353 if they fall into common traps. Here is how to play like a pro.
Key Tips for Success
- Tip 1 - The Rope Rhythm: Get into a groove of "Tap 2, Pour 2, Clear." Don't tap singles when you know a pair is coming up soon.
- Tip 2 - Ice Block Melt Rate: Don't stress about specific colors for the ice. Just pour whatever you have. The faster you pour, the faster the ice melts, regardless of color.
- Tip 3 - Pre-Crate Cleanup: When the crate is at "1 hit left," stop tapping new cups. Clear your entire belt. When the crate opens, you want zero cups on the belt so you can grab the new Orange cups immediately.
- Tip 4 - Paint Slot Management: If the Red paint slot is full, but you have a Red cup, pour it into the Cyan slot if Cyan is also full. This "overfill" trick can help clear a jammed belt.
- Tip 5 - The Bottom Corners: The last Cyan cups are often hiding in the bottom corners behind the beach. Look there when you think you are out of Cyan.
Common Mistakes to Avoid
- Mistake 1 - Tapping Pairs with a Full Belt: This is the number one cause of failure. If you have 3 cups, do not tap a pair. You will hit 5 cups instantly and have no room to pour or maneuver.
- Mistake 2 - Ignoring the White Clouds: The clouds in the sky need White sand. If you use all your White sand on the house walls, you might get stuck waiting for more White cups for the clouds. Don't 100% the house before starting the clouds.
- Mistake 3 - Painting the Beach Early: You cannot paint the Orange beach effectively until the crate opens. Trying to force Orange cups early will just clog your conveyor.
- Mistake 4 - Single Tapping during Ice Phase: Tapping single cups when you should be tapping pairs to break ice faster slows down the whole level. Efficiency is key.
- Mistake 5 - Panic Tapping: When the board looks full of cups, don't just tap randomly. Pause, find the color that matches the open paint slot, and tap that specific cup (or pair).
Stuck? Here is the Solution
If the belt is full and no moves are possible:
- Look for "Open" Paint Slots: Which color bucket has available space?
- Match That Color: Find a cup of that color on the belt.
- Pour It: Even if it's not the "perfect" placement, pour it to clear the cup from the belt.
- Chain Reaction: Clearing one cup often allows a new cup to slide forward, unlocking a new move.
Speed Run and Advanced Tactics
Once you understand the mechanics, you can aim for a high score or a fast clear time.
Speed Run Strategy
- Optimized Tapping: Don't wait for animations. As soon as the cups land on the belt, tap the next pair.
- Pre-Loading: While the ice block shattering animation is playing, you can often tap the next row of cups in the background queue. This saves valuable seconds.
- Target: The 15-Block: Use your first 3-4 moves specifically to target colors that will damage the "Right Ice Block (15)". Getting that White/Red combo early is the key to a sub-60 second run.
- Ignore Perfection: In a speed run, a messy paint job is fine. Don't waste time pouring perfectly within the lines. Just get the colors on the canvas to clear the cups.
Advanced Tips for High Scores
- Combo Counting: Try to pour colors in a continuous stream without switching. Pouring 5 Reds in a row gives a higher combo multiplier than switching Red, White, Red, White.
- Belt Prediction: Watch the "Next" queue at the top of the screen. If you see a Rope Pair coming up, clear your belt before it even arrives.
- The "Free Real Estate" Trick: Sometimes, pouring a color into a slot that is 95% full (and thus wasting a bit of sand) is better than letting the cup clog your belt. The cost of wasted sand is lower than the cost of a deadlock.