
Level 356
HARDHow to solve Sand Loop level 356? Get instant solution for Sand Loop 356 with our step by step solution & video walkthrough. Sand Loop 356 tips and guide.
Play Sand Loop Now
Experience the puzzle challenge firsthand
Game Screenshots

Sand Loop Level Guides
Sand Loop Level 356: Comprehensive Walkthrough & Strategy Guide
Introduction to the Mushroom House Challenge
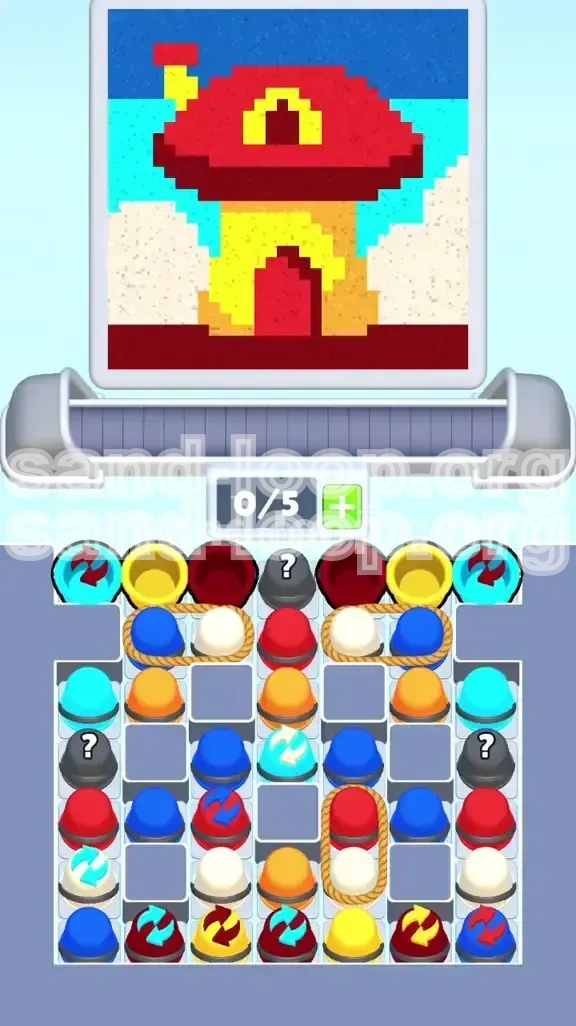
Welcome to Level 356 of Sand Loop, a stage that disguises a complex logic puzzle behind a charming pixel-art aesthetic. While the objective—to fill a Mushroom House illustration—seems straightforward, the level is notorious for its "rope-lock" mechanics and restrictive tray capacity. You are dealing with a 0/5 starting capacity, which means you cannot afford to hold onto colors; you must pour immediately and manage your tray space with surgical precision.
The visual theme features a vibrant cottage set against a cyan sky, requiring a precise arrangement of six specific colors. The difficulty here lies not in the artwork itself, but in the physical constraints of the cups beneath. Many players fail because they focus on the pretty picture rather than managing the tangled web of ropes connecting the sand cups. This guide will break down exactly how to dismantle the rope system and fill the canvas without getting stuck.
The Core Challenge: Ropes and Capacity
The primary obstacle in Level 356 is the dual-layered rope system combined with a very low initial tray capacity. Unlike previous levels where you might store a color for later, here you are forced to make immediate decisions. The ropes create dependencies; you cannot access the White sand needed for the clouds without first dealing with the Blue or Red cups it is tethered to. If you clear the wrong cup first, you might bury a crucial color underneath a pile of unusable sand, forcing a restart. This level tests your ability to plan three moves ahead.
Level Overview: Objectives and Key Features
Primary Completion Goals
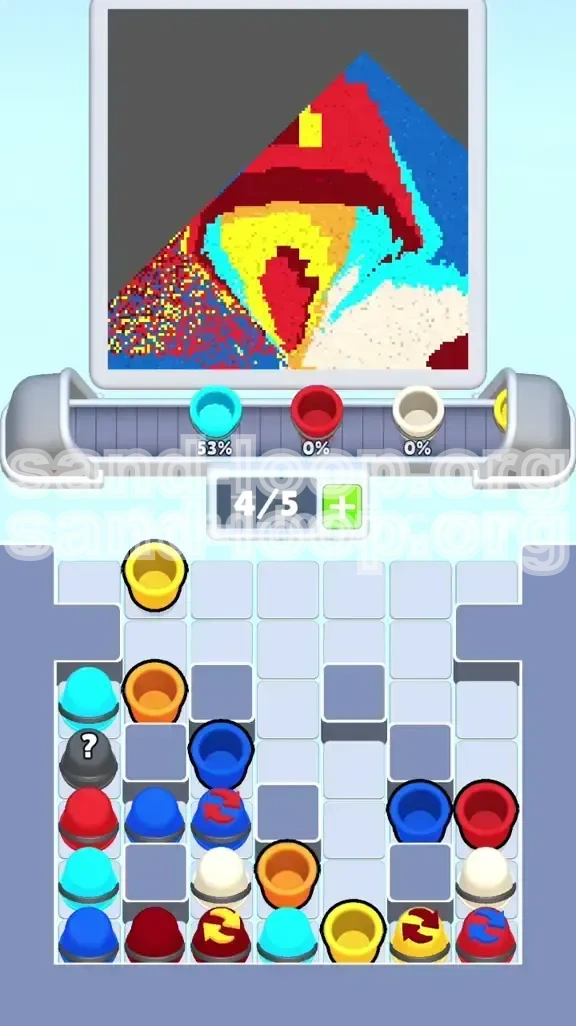
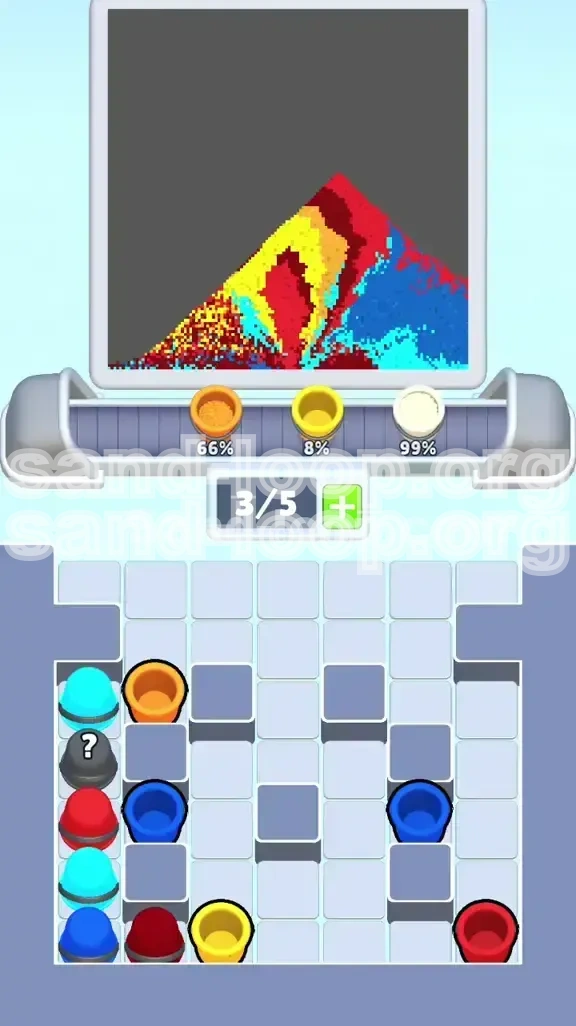
To successfully complete Level 356, you must achieve 100% coverage of the Mushroom House blueprint without getting soft-locked (unable to make any legal moves). This involves filling the ground, the house structure, the roof, and the background sky in a specific sequence that respects the rope mechanics. You are not just painting; you are unlocking resources.
Color Palette Analysis
The level utilizes a tight 6-color palette. Understanding the volume required for each color is critical for inventory management:
- Dark Red (Maroon): Low volume. Used exclusively for the base ground and the door arch.
- Yellow: Medium volume. The main body of the house and the chimney.
- Red: High volume. The massive mushroom cap roof requires a significant amount of this sand.
- Cream/White: Medium volume. Used for the lower background clouds/hills on the flanks.
- Cyan: High volume. The primary sky background.
- Blue: Low volume. A thin strip of dark sky at the very top.
The Tray Layout
Your tray is arranged in a way that promotes deadlock. The top layer consists of easily accessible Dark Red and Yellow cups. The middle and bottom layers contain the roped combinations: Blue linked to White, and Red linked to White. Crucially, the "Swap" cups (which allow you to rearrange the tray) are located on the extreme edges, blocked by gray dividers in the initial setup. You cannot rely on swapping your way out of trouble early on; you must clear the vertical stack first.
Visual Blueprint Breakdown
The canvas is divided into three distinct horizontal zones. The bottom zone is the ground (Dark Red). The middle zone is the house (Yellow walls, Dark Red door, Red roof). The top zone is the sky (Cyan main, Blue tip). The danger lies in the overlapping areas—specifically the roof overlapping the sky and the door overlapping the walls. You must paint from the bottom up, but you must prepare your resources from the top of the tray down.
Why Speed Matters
While this isn't a timed level in the traditional sense, "speed" is relevant because your tray capacity is effectively zero. Every second you hold a cup is a second you are blocking a slot. You must execute the "Tap -> Pour -> Release" rhythm flawlessly. If you hesitate, you will find yourself with a full tray and critical colors still buried under ropes, leading to an inevitable "Game Over."
Step-by-Step Instructions: The Critical Path
Phase 1: Breaking the Seal (Top Row Extraction)
The first 10% of the level is purely mechanical. You must clear the top row of the tray to access the roped chaos below.
- Step 1: Immediately tap the Dark Red cups in the top row. Pour them onto the ground section of the canvas at the very bottom. Do not aim for the door yet; just fill the base layer.
- Step 2: Quickly tap the Yellow cups in the top row. Pour these onto the main walls of the house. Leave a gap in the center for the door, but fill the rest of the yellow wall structure.
- Step 3: Ignore the Cyan or Swap cups on the edges for now. They are distractions. Your goal is to reduce the tray height to expose the rope knots.
Phase 2: The Rope and Door Maneuver
With the top cleared, you now see the roped White cups. This is the most dangerous part of the level.
- Step 4: Assess the White cups. You need White for the background clouds (left and right sides of the house). However, they are roped to Blue and Red.
- Step 5: Locate the Dark Red cup for the door. It is likely in the middle column, possibly blocked.
- Step 6: Crucial Move: If the Dark Red for the door is blocked by a roped White cup, you must temporarily pour the White sand into the "holding" areas on the canvas (the sides of the sky/clouds) just to get it out of the tray. Do not over-pour White; just dump it to clear the cup.
- Step 7: Once the path is clear, pour the Dark Red door. Be precise. The door is a vertical rectangle in the center of the yellow wall. If you miss, the house looks broken.
Phase 3: Clearing the Red/White Deadlock
You are now likely holding a Red cup or have Red cups available. The roof is the biggest feature.
- Step 8: Pour the Red sand onto the mushroom cap roof. This is a large area, so it will take multiple cups.
- Step 9: As you empty Red cups, check if any were roped to White cups. Emptying the Red parent will free the White child.
- Step 10: Pour the newly freed White cups immediately onto the lower background (clouds) to finish the sides of the canvas. You should now have the ground, walls, door, roof, and side clouds complete.
Phase 4: The Sky Gradient (Cyan and Blue)
Only the sky remains. This is the cleanup phase.
- Step 11: Pour the Cyan cups into the main sky area. Be careful not to spill onto the red roof.
- Step 12: You will likely have Blue cups remaining from the rope pairs earlier. You also might have a Mystery cup (?) left.
- Step 13: Pour the Blue sand strictly at the very top of the canvas for that dark strip effect.
- Step 14: If you have a Mystery cup, save it for the very last pixel. If you are missing a tiny bit of sky, the Mystery cup will likely provide the required Cyan or Blue to finish.
Color Order and Processing Logic
The Priority Hierarchy
Why follow the specific order outlined above? Because of "Volume Dependency." The colors you need the least (Dark Red) are often the keys to unlocking the colors you need the most (Red/White). If you prioritize the roof (Red) before clearing the ground (Dark Red), you might find the Dark Red cup buried at the bottom of the tray under a pile of White sand you couldn't pour yet.
- Priority 1: Dark Red (Unlocks the door and ground).
- Priority 2: White (Unlocks the background, but is blocked by ropes).
- Priority 3: Red (Unlocks the roof, but usually blocks White).
- Priority 4: Cyan/Blue (Fillers for the remaining space).
Managing "Waste" Sand
Sometimes, you have to pour a color just to get rid of the cup. In Level 356, it is acceptable to pour White or Dark Red into "overflow" areas (sections of the canvas that are already correct but have a little buffer space) purely to free up a slot in your tray. Do not try to be 100% perfect with every pixel if being perfect means holding a cup for too long and causing a deadlock.
The Swap Cup Strategy
There are Swap Cups in this level, but they are positioned as traps in the early game. Using a Swap Cup before clearing the top 2 rows of the tray usually results in shuffling a needed color (like Red) behind a grey divider where it can never be retrieved. Only use the Swap function in the final 10% of the level (Phase 4) if you are desperate to reorganize the final few Cyan and Blue cups.
Layering Physics
Sand Loop physics dictate that lighter colors poured over dark colors can sometimes look muddy, but in this specific level, the pixel art is separated by black lines, so bleeding is less of an issue. However, "stacking" matters. If you pour the Cyan sky too early, and then try to pour the Red roof over it, the Red might spread into the Cyan if the lines aren't thick. Always fill the "foreground" objects (House, Roof) before the "background" objects (Sky) to ensure clean edges.
Key Tips and Mistakes to Avoid
Common Mistake: The Early Roof
Many players see the large Red roof area and try to fill it immediately. This is a fatal error. The Red cups are deep in the tray, often roped. If you focus on Red first, you will leave the top row (Dark Red/Yellow) untouched. You will run out of tray space holding a Red cup while the White cups (needed for the sides) remain locked behind ropes. Rule of Thumb: Always clear the top row first, regardless of what the picture looks like.
Common Mistake: Ignoring the Ropes
If you treat the ropes as aesthetic rather than functional, you will lose. Do not try to pull a roped cup if the parent cup is still full. You will just waste time. You must empty the parent cup to collapse the rope and free the child cup. Identify the parent-child relationships before you tap anything.
Pro Tip: The "Gap" Method
When pouring the Yellow walls, leave a 1-pixel gap around the door area. Do not fill the entire yellow block. Leave a "hole" where the door goes. If you fill the whole yellow wall, you have to pour Dark Red on top of it. While this works, it uses more Dark Red sand. By leaving the gap, you use less Dark Red, which might be the difference between having enough to clear the cup or running out and getting stuck with an empty Dark Red cup taking up space.
Pro Tip: Tray Rhythm
Develop a rhythm of "Double Tapping." Tap a cup to pick it up, and tap immediately to pour. Do not "drag" the sand unless necessary. Dragging slows down the rate at which the cup empties. In Level 356, you want high-velocity pouring to clear cups as fast as possible to make room for the next one.
Solutions for When You Are Stuck
Stuck Scenario: The "Full Tray" Lock
Symptom: You have 5 cups in your tray, all are wrong colors or full, and you cannot make a move.
Solution: You likely failed to pour "Waste" sand earlier. Look for a cup that has a color you have already finished (e.g., you finished the roof but are still holding a Red cup). Pour that Red cup onto the roof anyway—even if it overflows slightly—to destroy the cup and empty the slot. It is better to have a slightly messy pixel art than a dead game. Alternatively, if you have a Swap Cup available, use it now to try and shuffle a useful color into a clickable position.
Stuck Scenario: Missing the Door
Symptom: You filled the walls and the roof, but you forgot the door, and now you can't reach the door space.
Solution: This is tricky. If the walls are already high, you must carefully pour Dark Red into the center. The physics engine usually allows you to "overwrite" colors if the area is small. Tap the Dark Red cup and tap the center of the house repeatedly. The Dark Red should displace the Yellow. If it doesn't take, you may need to restart the level, as the layer order is now bugged.
Stuck Scenario: Ropes Won't Break
Symptom: You are emptying the parent cup, but the child cup isn't freeing up.
Solution: Ensure you are emptying the parent cup 100%. Sometimes a few grains of sand remain in the bottom corner, keeping the rope active. Shake your device or swipe vigorously in the cup to ensure the last grain falls out. The rope only snaps when the cup is truly empty.
Stuck Scenario: Mystery Cup Anxiety
Symptom: You have a Mystery Cup (?) left and are afraid to use it.
Solution: In Level 356, the Mystery Cup is almost always a "Safety Valve." It will transform into the color of the largest remaining empty area on your canvas. If you have 80% of the sky left, it will turn Cyan. If you have just the top strip left, it will turn Blue. Use it when you are completely stuck on colors; it acts as a wild card that adapts to your failure state.
Speed Run Tips and Shortcuts
The "Blind Pour" Technique
Once you have played this level a few times, you know the layout. You do not need to watch the sand hit the canvas every time. While the Yellow sand is pouring for the walls, immediately look down at the tray to identify your next target (likely the roped White cup). Save seconds by managing your inventory while the physics engine handles the current pour.
Pre-emptive Cup Selection
As you finish the Dark Red pour, your eyes should already be锁定 (locked) on the Yellow cup. By the time the Dark Red cup vanishes from the top of the tray, your finger should already be hovering over the Yellow cup. Minimizing the "dwell time" between pours is the key to shaving 10-15% off your total time.
Ignoring Perfection
For a speed run, forget the "Gap Method" mentioned in the tips section. Pour the Yellow walls completely solid. Pour the Red roof huge. You can "fix" the door by just dumping Dark Red in the general center area. The game is forgiving with overlapping pixels; speed runners rely on the fact that "good enough" coverage counts as a win. Don't aim for 100% pixel precision; aim for 100% area coverage as fast as possible.
Memorizing the Rope Map
The ropes in Level 356 are generated in a fixed pattern. Memorize that the Left-Blue-White rope is the primary bottleneck. Always clear the left side of the tray first. By always clearing the left side before the right, you build muscle memory that prevents you from searching for the "right" cup, saving precious cognitive processing time during the run.