
Level 360
HARDHow to solve Sand Loop level 360? Get instant solution for Sand Loop 360 with our step by step solution & video walkthrough. Sand Loop 360 tips and guide.
Play Sand Loop Now
Experience the puzzle challenge firsthand
Game Screenshots
Sand Loop Level Guides
Sand Loop Level 360: The Master Strategy Guide
Understanding the "Geometric Boxes" Puzzle
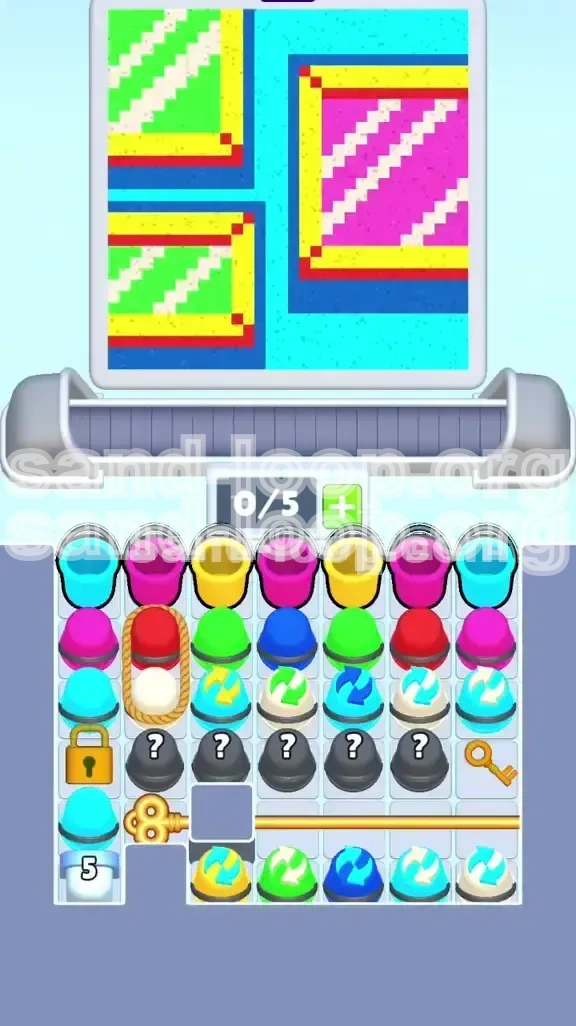
Welcome to Level 360, often referred to by veteran players as the "Texture Trap." This level is not designed to test your reflexes but your ability to manage strict inventory limits and specific color properties. At first glance, the level appears simple: a festive scene of three gift boxes sitting on a cyan background. However, the complexity lies in the dual-layered rendering of the boxes, featuring solid frames and patterned interiors. Unlike previous levels where you could simply pour matching colors anywhere, this level introduces a strict "Type Matching" mechanic. You must distinguish between Solid Colors (Flat paint) and Textured/Cycle Colors (Patterned paint). Failing to respect this distinction will instantly invalidate your run, forcing a restart regardless of how much progress you have made.
Core Mechanics: Solid vs. Cycle Colors
The fundamental challenge of Level 360 is the limited tray capacity (5 slots) combined with blocked generators. To succeed, you must understand the two types of resources at your disposal:
- Solid Cups (Standard): These contain flat, single-hue paint (e.g., Pure Red, Flat Blue). These are used for the "Flat" areas of the canvas, such as the hard shadows and the main frame borders.
- Cycle Cups (Textured): Identified by a circular arrow icon on the cup. These do not contain solid paint; instead, they dispense a repeating pattern (stripes). In Level 360, using a Solid Green cup on a Green Striped area will count as an error. The game engine detects the pattern mismatch, not just the color.
Managing these types within a 5-slot tray is the primary logistical hurdle. You will frequently find yourself needing to hold a specific tool but lacking the inventory space to pick it up.
Victory Conditions and Objectives
To clear Level 360 and claim your victory, you must achieve the following objectives with 100% accuracy:
- Fill the Frames: Completely fill the three box outlines with Solid Yellow. This defines the boundaries of the objects.
- Apply Shadows: Pour Solid Dark Blue into the drop-shadow zones located beneath the boxes. These must be solid, not striped.
- Render Textures: Use the specific Cycle Cups to fill the interiors. Left boxes require Green/White diagonal stripes; the right box requires Pink/White diagonal stripes.
- Detailing: Apply Solid Red to the small corner accents of the frames.
- Background Fill: Flood the remaining negative space with Solid Cyan.
Strategic Color Processing Order
Why Order Matters: The "Bottom-Up" Rule
In most coloring games, you start with the background. Level 360 is the exception. Due to the way the game handles layer overlaps and the specific mechanics of the "Generator" cup (Locked in the bottom left), you must follow a strict Bottom-Up approach. If you fill the background first, you will likely trap yourself in a deadlock where the generator is open but your tray is full of useless paint, preventing you from finishing the details. Always prioritize the foreground objects (Frames and Shadows) before moving to the background.
Phase 1: The Structural Layer (Yellow & Blue)
Your first priority is to clear the "noise" from the top rows of the tray to access the critical tools below.
- Target: Yellow Frames and Blue Shadows.
- Action: Locate all Solid Yellow cups. Pour them into the box frames. Do not worry about staying perfectly within the lines yet; the game is forgiving if you slightly overlap the background, provided you cover it later.
- Action: Locate all Solid Blue cups. Pour these into the drop shadows beneath the boxes.
- Reasoning: Clearing Yellow and Blue serves two purposes: it completes the base layer of the art, and more importantly, it empties the top slots of your tray, giving you room to maneuver the tools hidden in the middle rows.
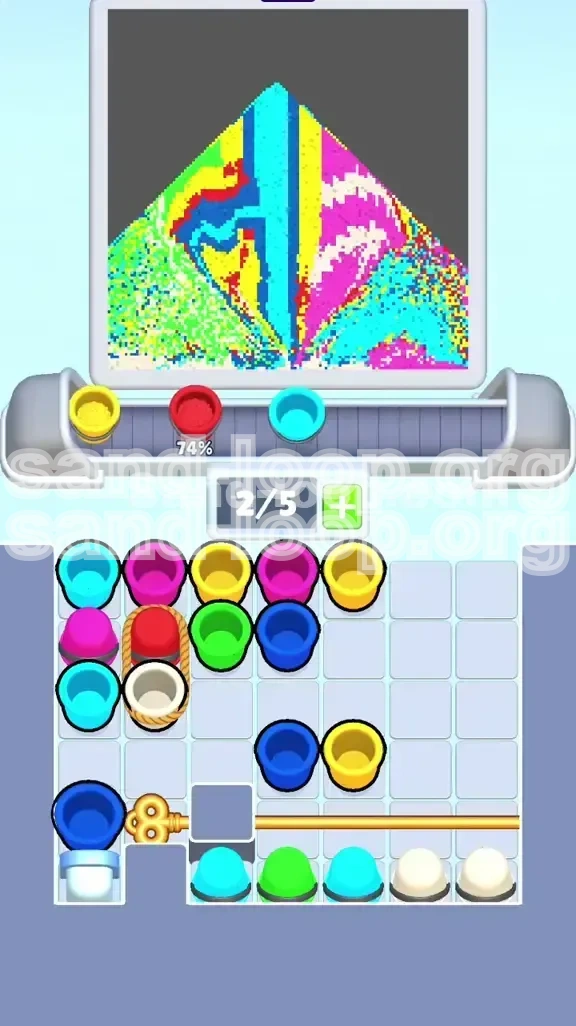
Phase 2: The Textured Layer (Cycle Cups)
This is the most dangerous phase. You must use the "Cycle Cups" (marked with arrows). These are usually buried in the middle rows of the tray, revealed only after clearing the top layer.
- Target: Box Interiors.
- Action: Identify the Green/White Cycle Cup. Pour strictly into the left-side boxes.
- Action: Identify the Pink/White Cycle Cup. Pour strictly into the right-side box.
- Warning: Do not use the Green/White cycle cup on the Pink area, even if you think you can mix them. The patterns are hardcoded.
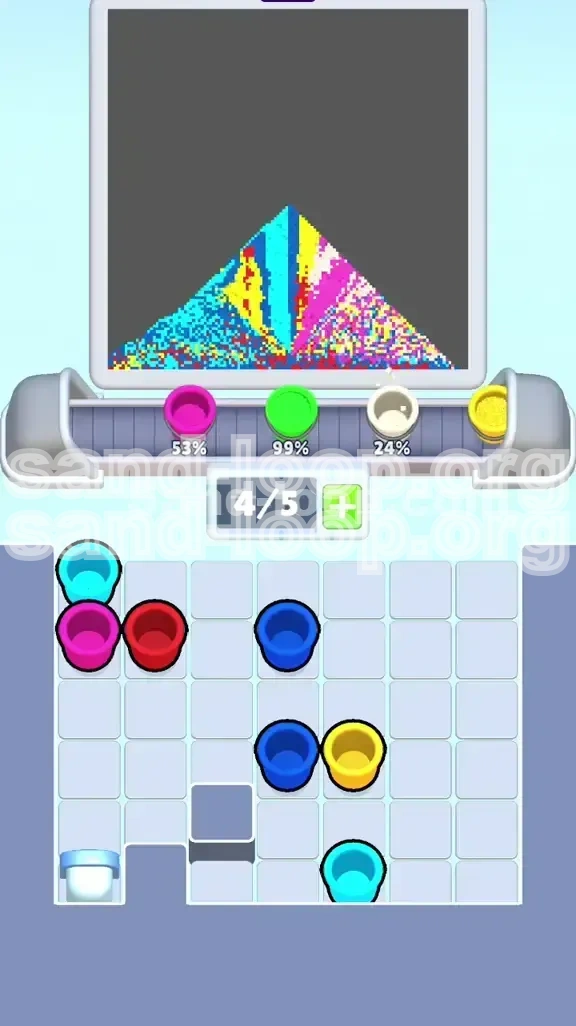
Phase 3: The Detail Layer (Red)
The Red cups are often wrapped in rope or located in hard-to-reach slots (sometimes "frozen" or locked by other cups). You must clear enough space in your tray to move these obstruction cups out of the way.
- Target: Corner Accents.
- Action: Once the tray has space, maneuver the Solid Red cup to the active slot.
- Precision: Pour carefully. The red corners are small targets. Over-pouring into the yellow frame or the background is a common mistake here. If you are struggling with precision, slow down your pour rate.
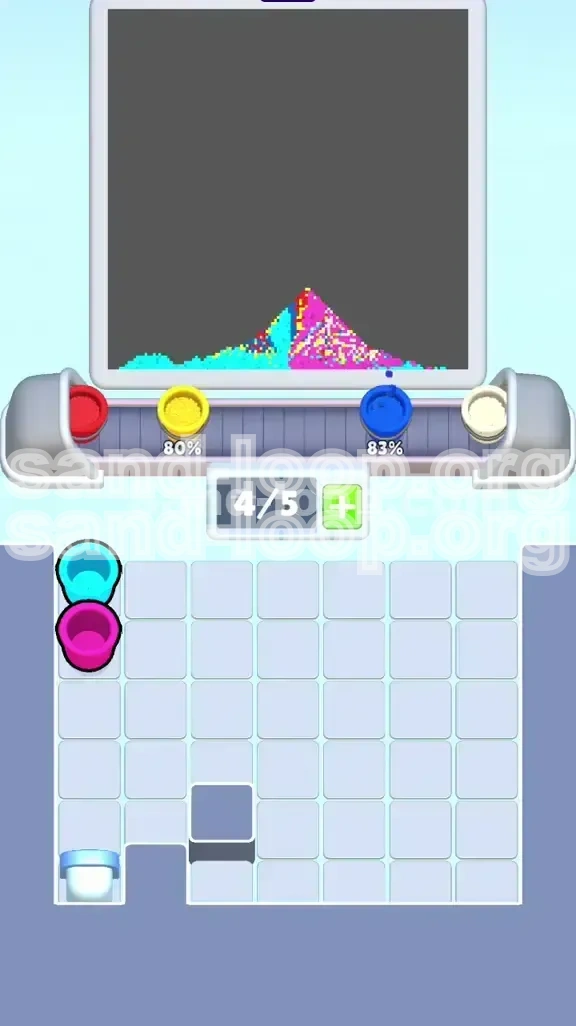
Phase 4: The Generator (Cyan Background)
The Cyan background is unique. It is not supplied by standard cups in this level layout but by a Generator Cup (marked with a '5' or recycling symbol) locked in the bottom left.
- Target: The entire remaining background.
- Condition: You must unlock the generator first (see Walkthrough).
- Action: Only tap this generator when your tray is empty or has only 1 slot occupied. The generator produces infinite paint. If you tap it while your tray is full (5 slots), you will waste the resource and clog your inventory.
Complete Step-by-Step Walkthrough
Step 1: Tray Management and Initial Clears
At the start of the level, your tray is cluttered with Cyan, Pink, and Yellow cups. This is your "Opening Gambit."
- Move 1: Grab the Solid Yellow cups. There are usually two stacked in the top row.
- Action: Pour them immediately into the Box Frames. You will see the yellow borders form.
- Move 2: Look for Solid Blue cups. They are often hidden behind the initial row of Yellows.
- Action: Pour Solid Blue into the Shadows. These are the dark patches under the yellow boxes.
- Status Check: You should have 2-3 empty slots in your tray now. This is crucial. Do not fill them with random cups yet.
Step 2: Unlocking the Generator
Notice the Gold Key on the right side of the tray (Row 3 or 4) and the Gold Lock on the left. The Lock is blocking your access to the Generator.
- Obstacle: The Key is blocked by a row of useless cups (often Solid Pink or Red).
- Strategy: You need to temporarily "park" these blocking cups or use them if they match a target.
- Decision: If the cups blocking the Key are Pink, and you know the Right Box needs Pink Stripes, check if they are Solid or Cycle cups. If they are Solid, do not use them on the box. You must pour them into a temporary holding area or combine them if the game allows mixing. However, the standard strategy is to simply shift them to the empty slots created in Step 1.
- Action: Move the obstruction cups to the empty slots. Grab the Gold Key.
- Action: The Key auto-unlocks the Gold Lock on the left. The Generator is now exposed.
Step 3: The "Texture" Operations
With the top clear and the key handled, focus on the middle rows where the Cycle Cups are located.
- Locate: Find the Green/White Arrow Cup. It usually sits in the middle row.
- Action: Pour into the Left Boxes. These require the diagonal green stripe texture. Pour until the progress bar for that section is 100% full.
- Locate: Find the Pink/White Arrow Cup. This might be at the bottom of the tray.
- Action: Pour into the Right Box.
- Note: If you run out of a specific Cycle Cup before the area is full, you may need to use a standard cup to finish the last 5-10%, but only if the texture doesn't matter. In Level 360, texture always matters. Ensure you have enough Cycle cups by not over-pouring.
Step 4: Precision Detailing (The Red Corners)
The Solid Red cups are often "wrapped" in rope or trapped under other cups, meaning you couldn't move them earlier.
- Prerequisite: Ensure you have at least 1 empty slot in your tray.
- Action: Move the cups sitting on top of the Red cup.
- Action: Pick up the Solid Red cup.
- Execution: Zoom in (if possible) or steady your hand. The target areas are tiny red corners on the yellow frames.
- Pouring: Tap the pour button gently. Do not hold it down. A single tap often dispenses the exact amount needed for these small dots. If you bleed into the Cyan background, don't worry yet, but try to keep the Yellow frame clean.
Step 5: The Final Flood
The canvas is now mostly complete: Yellow frames, Blue shadows, Textured interiors, Red dots. Only the background remains.
- Setup: Empty your tray as much as possible. Use any remaining solid cups on their correct spots if you haven't already.
- Trigger: Tap the Generator (bottom left) to fill your active slot with Cyan.
- Finish: Pour the Cyan into the remaining empty space of the background.
- Magic: Because Cyan is the background color, it will automatically cover any minor "bleeds" or mistakes you made when pouring the Red corners or Yellow frames.
- Result: Level Complete.
Pro Tips, Common Mistakes, and Stuck Solutions
Common Mistakes to Avoid
Players often fail Level 360 not because they can't solve the puzzle, but because of impatience. Avoid these specific errors:
- The "Texture Mismatch": This accounts for 80% of failed attempts. Never pour a Solid Green cup into a Striped Green box. The game logic checks the pattern ID, not just the color. Solid Green has Pattern ID 0; Striped Green has Pattern ID 1. They are incompatible.
- Generator Spamming: Do not tap the Cyan Generator the moment it unlocks. If you fill your tray with 5 Cyan cups early, you will have no room to pick up the Red or Cycle cups required for the foreground. Only trigger the generator at the very end.
- Wasting the Key: If you pick up the Gold Key but have a full tray, you might accidentally drop it on a lock you didn't intend to open, or worse, be unable to pick it up at all. Always ensure you have 1 free slot before picking up the Key.
What to Do If You Are Stuck
Stuck in a deadlock? Here is how to reset your board without restarting the whole app:
- The "Full Tray" Deadlock: If your tray is full of useless paint (e.g., you have 5 cups but none match the remaining canvas), look for the "Trash" or "Recycle" bin on the screen (usually a circular arrow icon). Drag a cup there to destroy it and free up a slot.
- Missing a Texture: If you filled the Left Box with Green Stripes but it says "Incomplete," check for a second layer. Sometimes the boxes have a shadow overlay that needs to be painted separately. Ensure you used the Dark Blue on the shadow first.
- Locked Red Cup: If the Red cup won't move, look for a cup sitting directly on top of it. You cannot move a cup if another cup is physically occupying its slot in the grid. Clear the upper cup first.
Advanced Speed Run Tips
For players looking to achieve a 3-Star rating or top the leaderboard, efficiency is key. Here is the speed-run strategy:
- Chained Pouring: Do not wait for the animation of one pour to finish before selecting the next cup. While the Yellow paint is flowing, you can already be dragging the Blue cup to the active slot. This "Input Buffering" shaves seconds off your time.
- Pre-Positioning: Before you even start the level, identify where the Cycle Cups are. Plan your route so that you clear the cups directly above them first. This minimizes the distance you have to drag items.
- The "One-Tap" Method: For the tiny Red corners, do not drag and pour. Select the Red cup, then rapidly tap the corner spots. Tapping is faster and more precise than holding the pour button for small areas.
- Ignore Perfection: Don't worry if your Yellow frame looks messy or has gaps. As long as the game registers it as "Filled" (even at 90%), move on immediately. The background fill will hide the inconsistencies.