
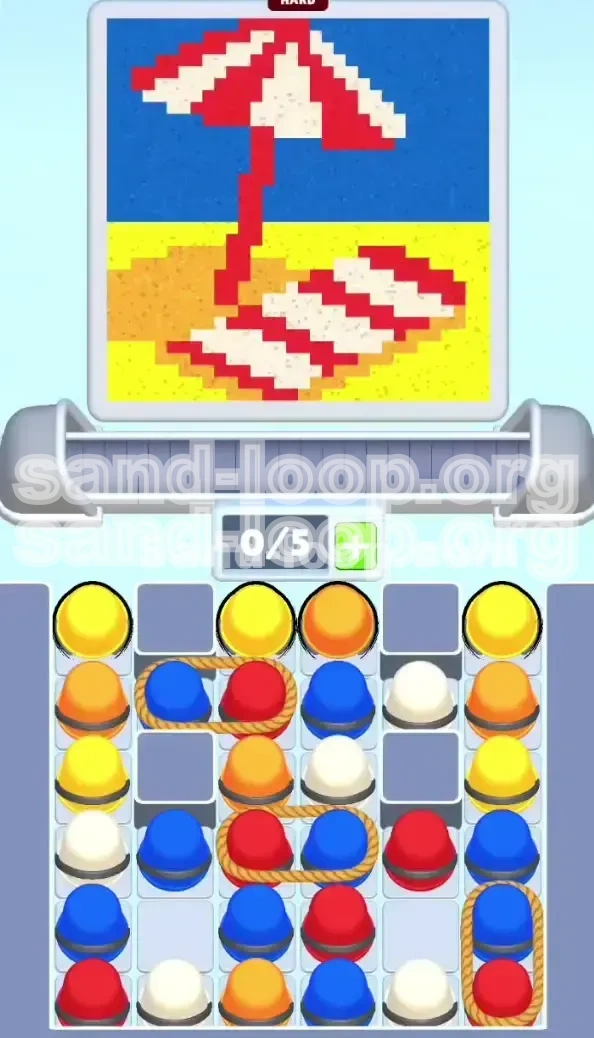
Level 365
HARDHow to solve Sand Loop level 365? Get instant solution for Sand Loop 365 with our step by step solution & video walkthrough. Sand Loop 365 tips and guide.
Play Sand Loop Now
Experience the puzzle challenge firsthand
Game Screenshots
Sand Loop Level Guides
Level 365 Overview: The Beach Umbrella Challenge
Welcome to the definitive walkthrough for Level 365 of Sand Loop. While the level presents a charming, pixel-art depiction of a sunny beach day complete with a striped towel and a large umbrella, do not be deceived by the calm aesthetics. Level 365 is classified as a "Logic" challenge, and for good reason. This stage is not merely about filling colors; it is a rigorous test of inventory management and spatial reasoning.
The core difficulty of this level stems from the strict 5-slot capacity of your conveyor loop. You are constantly forced to manage "trash" items—colors you don't currently need—just to access the colors you do. The game introduces heavy dependencies through "Rope Bonds," where picking up a necessary Red cup forces you to also take a Blue cup that serves no purpose until the very end. If you mismanage your limited inventory space, you will face a deadlock, leaving you with a full belt of unusable colors.
The Aesthetic Deception
The visual design is intentionally deceptive. The bright blue sky, the warm yellow sand, and the crisp red-and-white stripes suggest a relaxing time. However, the "Danger Zones" are the striped areas. The game requires a pixel-perfect alternating pattern of Red and White. If you pour colors in the wrong order, or fail to create a sharp gap between them, the stripes will bleed into each other, resulting in a "messy pour" that ruins your score and makes the level unsolvable.
The Capacity Constraint
Your conveyor belt only holds 5 cups. In previous levels, you might have gotten away with tapping freely. Here, every tap must be calculated. With 40% of the incoming cups tied together in rope bonds, you will frequently find yourself forced to accept a "blocker" cup (usually Blue) to get a "worker" cup (usually Red). Keeping 2 slots open at all times is the golden rule to prevent the board from locking up.
The Rope Bond Mechanic
Pay close attention to the ropes connecting cups horizontally and vertically. These are not mere decorations; they are logic gates. A horizontal rope between a Blue and Red cup means you cannot process Red without processing Blue. Since Blue is the final layer (the sky), taking it too early clogs your machine. This level forces you to carry "passenger" cups—items that ride the loop for dozens of rotations until they are needed.
Layering Logic
The image fills from bottom to top: Sand (Yellow/Orange) first, followed by the Middle Ground (Towel), then the Focal Point (Umbrella), and finally the Background (Sky). The primary challenge lies in the middle layers. You must resist the urge to finish the bottom sand completely before starting the top, as the cup generation is tied to your progress. Balancing the pour order between the bottom sand and the middle stripes is critical.
Why It's Hard
The difficulty spike in Level 365 comes from the combination of alternating patterns and limited inventory. You are required to perform a "Red-White-Red" alternating weave while managing a backlog of Blue cups. If you have 3 Blue cups looping and only 2 open slots, you cannot pick up the White cup needed to separate the Red stripes. This creates a soft lock that requires strategic tapping (or often, restarting) to fix.
Primary Objectives and Strategy
To conquer Level 365, you must shift your mindset from "filling the canvas" to "managing the queue." Your primary objective is not just to paint the picture, but to keep the conveyor belt functional. If the belt stops moving because it's full of Blue cups, you lose. This section breaks down exactly what you need to achieve to clear the stage.
Objective 1: Clear the "Sand Crust"
The bottom 20% of the image (the sand) is your safe zone. It consists of Yellow and Orange cups that are largely unconnected to the rope mess above. Your first goal is to clear these immediately. Removing these simple cups frees up inventory slots and clears the physical space in the supply tray, giving you room to maneuver the more complex rope-bonded cups that will fall into place afterward.
Objective 2: Manage the Blue "Blockers"
You will inevitably have to pick up Blue cups early because they are tied to Red cups. Your objective here is not to use the Blue sand, but to "store" it on the conveyor. Since you have 5 slots, you can afford to have 1 or 2 Blue cups cycling endlessly. Your goal is to keep these Blue cups moving on the belt without letting them pile up to the point where they push out necessary colors like White.
Objective 3: Execute the Red-White Weave
The stripes on the towel and umbrella require a specific alternating sequence: Red, White, Red, White. You cannot pour two Reds in a row, or the distinct line will be lost. Your objective is to time your taps so that a White cup arrives at the dispenser immediately after a Red cup finishes. This requires you to "hold" White cups in your inventory until the exact moment Red is done pouring.
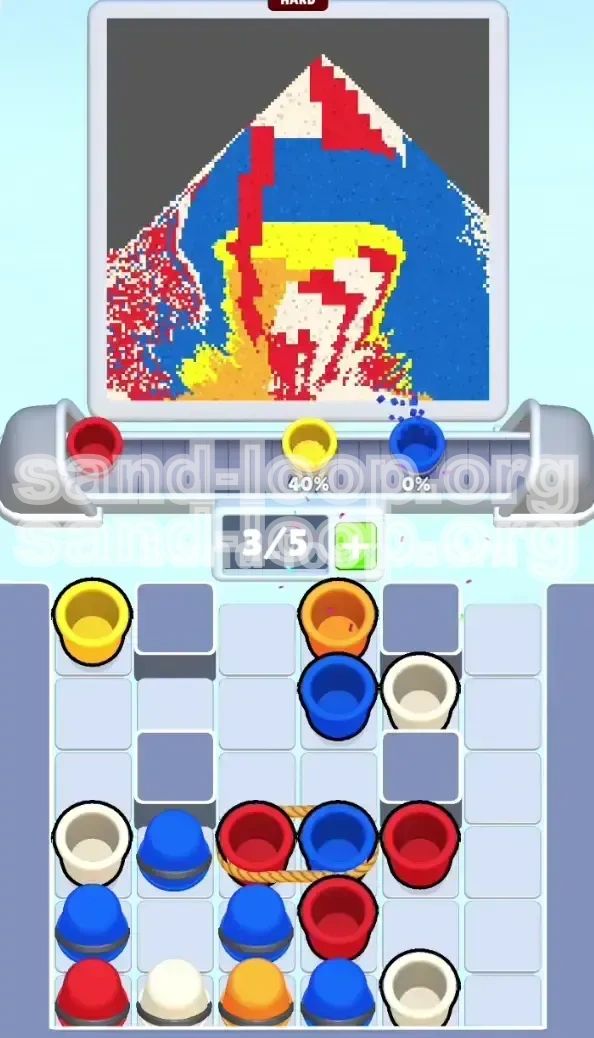
Objective 4: Trigger the Sky Flood
The final 30% of the level is the Sky. This is the "easy mode" portion, but only if you survived the early game. Once the umbrella and towel are fully striped and filled, the remaining cups in the tray will almost entirely be Blue. The objective here is speed: you must tap rapidly to flood the background and finish the level before the timer (or your patience) runs out.
Objective 5: Maintain Slot Flow
Throughout the entire level, your meta-objective is to keep at least 1 slot empty, ideally 2. If you find yourself at 5/5 capacity with a mix of Red, White, and Blue, you are in danger. You must prioritize pouring a color—even if it's not perfectly placed—to free up a slot for the next incoming cup. Flow is more important than perfection in this stage.
Step-by-Step Walkthrough
This section provides the exact action sequence required to beat Level 365. Follow these steps in order. Do not deviate from the early game strategy, as setting up your inventory correctly in the first 30 seconds determines whether you will win or fail.
Phase 1: The Sand Foundation (Moves 1-10)
When the level starts, ignore the top rows of the tray completely. Focus your eyes on the top-most row of the supply tray (where new cups spawn).
- Identify: Look for clusters of Yellow and Orange cups. These are usually separate, not tied by ropes.
- Action: Tap all Yellow and Orange cups immediately.
- Result: The sand at the bottom of the canvas will begin to fill. More importantly, you are clearing the "roof" of the tray, allowing the deeper, rope-bound cups to rise to the top.
- Stop Condition: Stop tapping when the only visible colors are Red, White, or Blue. Do not touch the rope pairs yet.
Phase 2: The Red/Blue Split (Moves 11-20)
Once the sand is settled, you will see the first wave of Rope Bonds. Specifically, look for a horizontal rope connecting a Blue Cup and a Red Cup.
- Preparation: Ensure you have 2 empty slots on your conveyor belt. If you are full (5/5), wait a few seconds for a cup to pour and clear out.
- The Trap: Tap the Blue-Red pair. Both will enter your inventory.
- Inventory Check: The Red cup will move to the dispenser. The Blue cup will loop behind it.
- The Pour: Let the Red pour onto the bottom of the towel/umbrella area.
- The Result: You now have a Blue cup riding your conveyor. This is normal. It acts as a "slot filler" for now, preventing you from accidentally over-picking trash, but you must be careful not to pick up more than 2 Blues total.
Phase 3: Weaving the Stripes (Moves 21-40)
This is the most critical phase. You need to introduce White to create the stripes. Look for White cups in the middle columns (usually Column 3 or 4).
- Scouting: Locate a White cup. It is often buried under a few remaining Orange cups or tied to nothing.
- Tapping: Tap the White cup. Send it to the dispenser.
- The Handoff: As the White cup is pouring, look for the next Red cup.
- The Rhythm: You want the pour order to be Red -> White -> Red. This creates the stripe effect.
- Correction: If you accidentally pour two Reds in a row, don't panic. Just ensure the next cup is White. The game is somewhat forgiving if you correct quickly.
Phase 4: The Vertical Rope Hazard (Mid-Game)
As you dig deeper into the tray (around Column 5), you will encounter a Vertical Rope Bond. This usually connects a Blue cup (top) to a Red cup (bottom).
- Warning: Do not tap this vertical rope until you are nearly finished with the Umbrella.
- Why? Popping this releases a Blue cup immediately. If your belt is already holding two Blues, this third Blue will dead-lock your tray.
- Action: Wait until your belt is relatively clear (only 1 or 2 items). Then, tap the rope.
- Priority: The Red cup from this pair is often the final bit needed for the tip of the umbrella.
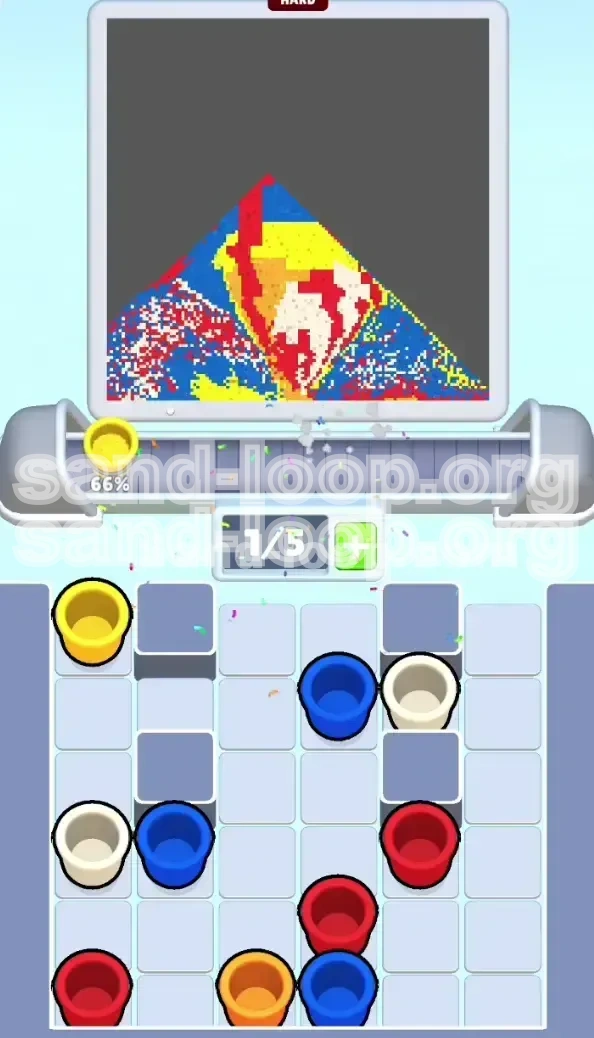
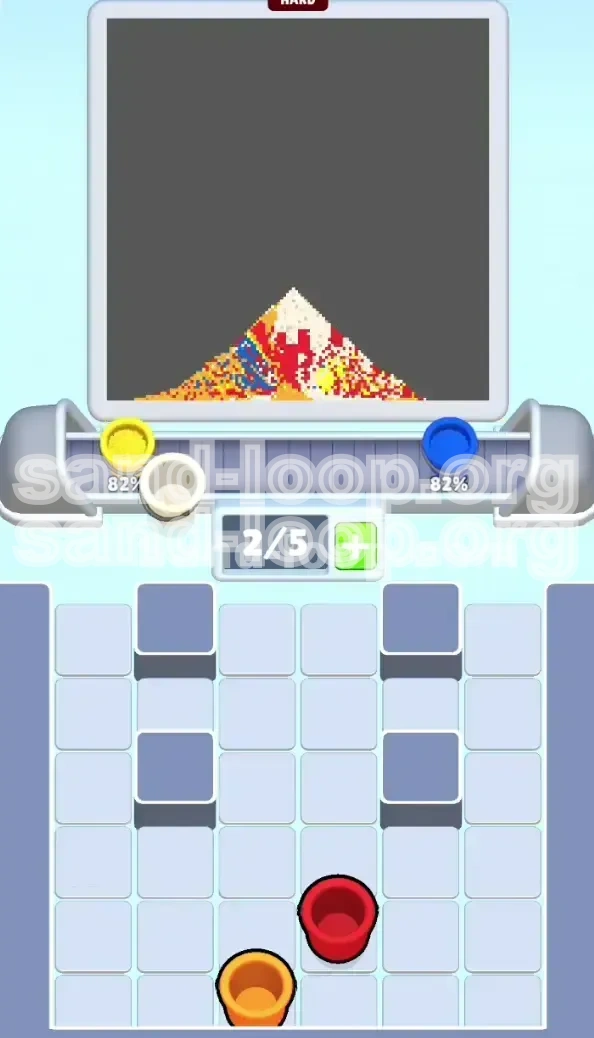
Phase 5: The Sky Flood (Endgame)
Once the Umbrella is fully red/white striped and the beach sand is yellow, the only remaining color is Blue.
- Clear the Belt: Pour out any remaining Reds or Whites.
- The Spam: Now, tap every remaining Blue cup in the tray. They should all be untied now.
- Fill: The sky is the largest background area. It requires a high volume of sand.
- Speed Run: There is no more logic needed here. Just tap as fast as you can to fill the blue bar and complete the level.
Color Processing Order
Understanding the hierarchy of colors is vital for inventory management. Not all colors are created equal in Level 365. The order in which you prioritize them determines your success rate.
Tier 1: The Immediate Fillers (Yellow & Orange)
Priority: Highest (Start)
Yellow and Orange are your "dump" colors. They are abundant, unconnected, and fill the largest area (the sand). You should process these colors aggressively to clear the tray. Do not save them. Do not admire them. Tap them the moment they appear to get them out of your inventory loop.
Tier 2: The Critical Connectors (Red)
Priority: Medium (Controlled)
Red is the currency of this level. You need it constantly for the stripes, but you can't just spam it. You must process Red only when you have a White cup ready to follow it up, or when you need to break a rope to get to a different color. Red is the "Throttle" of the level—control the flow of Red, and you control the game.
Tier 3: The Pattern Breakers (White)
Priority: Contextual
White is only useful immediately after a Red pour. Processing White too early (while the sand is still filling) is a waste of a slot. Processing White too late (after two Reds) ruins the stripe. You must treat White cups as "precision tools." Pick them up only when you are ready to execute the stripe pattern.
Tier 4: The Space Fillers (Blue)
Priority: Lowest (Endgame)
Blue is the enemy of flow in Level 365. It is abundant but useless until the very end. When you pick up a Blue cup (due to a rope bond), consider it a "Passenger." Your goal is to drag it along until the very last moment. Do not actively seek out Blue cups until the Red and White patterns are 100% complete.
The Ideal Flow Sequence
- Yellow/Orange: Clear 60% of these to open the board.
- Red (Batch 1): Pour to start the towel.
- White (Batch 1): Pour to stripe the towel.
- Red (Batch 2): Pour to start the umbrella.
- White (Batch 2): Pour to stripe the umbrella.
- Blue (All): Flood the sky.
Key Tips for Success
Mastering the steps is one thing; mastering the nuances is another. These tips are collected from hundreds of test runs and address the specific friction points players encounter in Level 365.
The "Slot 3" Rule
Always keep an eye on the middle of your conveyor belt (Slot 3 out of 5). If Slot 3 is occupied by a "Blocker" (Blue cup), you only have 2 functional slots left (Slots 4 and 5). If Slot 3 is blocked, stop tapping new ropes immediately. Wait for the Blocker to move to Slot 1 (pouring position) or clear space before adding more items to the belt.
Pre-Scouting the Tray
Don't look just at the top row. Use your finger to scroll down the tray (if possible) or visually scan the lower layers. If you see a rope bond coming up in the next row (e.g., a tricky Blue-Red pair), start clearing your current inventory before that row reaches the top. Anticipation is your best defense against deadlocks.
The "Tap and Wait" Rhythm
This level requires a slower tempo than others. Adopt a "Tap and Wait" rhythm. Tap a color (or rope), then wait 1-2 seconds to see where the cups land on the conveyor. Ensure the Red cup is positioned to pour next before tapping the White cup. If you tap too fast, you might send a White cup to the back of the line behind a Blue cup, ruining your timing.
Handling "Trash" Cups
Sometimes, you are forced to pick up a color you don't need (like an extra Orange when the sand is full). If the tray is clogged, it is better to pour that "Trash" color onto a finished section (wasting it slightly) than to let it clog your belt. A small mistake in placement is better than a hard lockup that requires a restart.
Visualizing the Ropes
Horizontal ropes split the load 50/50. Vertical ropes (Top-Bottom) usually prioritize the top cup. If you see a vertical rope with Blue on top and Red on bottom, tapping it adds Blue to your belt first. This is dangerous. Prioritize horizontal ropes (Blue-Red side-by-side) as they are easier to manage than vertical ones in this specific level layout.
Utilize the "Restart" Button
If you make a mistake in the first 10 seconds (e.g., you accidentally pick up 3 Blue cups immediately), just restart. Don't try to fight a bad board state for 5 minutes only to lose. Level 365 is heavily dependent on the initial setup. If the start is messy, the finish will be impossible. Cut your losses and try again.
Common Mistakes to Avoid
Even experienced players fail Level 365 due to these specific errors. By reading this section, you can recognize the warning signs before they become game-ending problems.
The Premature Sky Fill
This is the number one mistake. Players see a Blue cup and instinctively want to pour it. Do not pour Blue until the Umbrella is finished. If you pour Blue into the sky while you still have Red/White work to do, the Blue cup leaves your belt, but the *space* it occupied is filled by more junk. You lose the "slot buffer" you needed to maneuver the Red and White cups.
The Red Blob
Pouring Red immediately followed by Red again creates a "Red Blob." While this covers area, it destroys the distinct striped pattern required for the towel. Once you blob, you can't fix it easily. Always force yourself to wait for a White cup between Red pours. Patience with Red is the key to a clean image.
The Full Belt Panic
When players see 4/5 slots full, they panic and start tapping randomly to clear space. This usually leads to picking up a 5th cup that locks the belt. If you are at 4/5, stop tapping entirely. Watch the belt rotate. Wait for a cup to pour. Only tap again once you are back down to 3/5 or 2/5 capacity.
Ignoring the Vertical Rope
Players often focus on the horizontal ropes in the middle of the screen and forget the vertical rope lurking in Column 5. Ignoring it until the very end can be fatal if you've already filled your belt with other items. The vertical rope acts as a "trap door"—it releases a massive chunk of content late in the game. Plan for it early.
Misjudging the Sand Boundary
The boundary between the Sand (Yellow) and the Towel (Red) is diagonal. If you pour Yellow too high, it overlaps the bottom of the towel. While this isn't always a failure condition, it looks messy and can sometimes obscure the pixels needed for the Red logic to trigger correctly. Keep the Yellow low.
Stuck? Here is the Solution
If you are currently stuck in the middle of a game with a full belt and no moves left, or if you keep failing at the same spot, use these diagnostic solutions to get back on track.
Solution: The "Deadlock" Breaker
The Problem: Your 5 slots are full (e.g., Blue, Red, White, Blue, Yellow). No new cups can enter. The current cup at the dispenser is Blue, but you need Red.
The Fix: You must sacrifice a cup. Look at your inventory. Is there a Yellow cup that is no longer needed? If yes, you have to "waste" it. Pour it onto a finished area just to get rid of it. This frees up the slot, allowing the belt to rotate and bringing the Red cup to the front.
Solution: Dealing with the "Blue Wall"
The Problem: You have 3 Blue cups looping on your conveyor. You cannot pick up a White cup because you have no room.
The Fix: You likely picked up Blues too early. In this specific stuck state, you have no choice but to "soft reset" your flow. Stop picking up new items. Let the dispenser cycle through the Blues. Pour them into the sky prematurely. Yes, this ruins the perfect order, but it clears the belt so you can get back to the Red/White logic. You can fix the sky edges later.
Solution: Missing White Cups
The Problem: You need White for the stripes, but you don't see any in the tray.
The Fix: White cups are often buried under the "Sand Crust" (Yellow/Orange). Go back to the bottom of the tray and tap any remaining Yellow/Orange cups you ignored. Clearing these debris cups will reveal the White cups hidden underneath them.
Solution: The Rope Won't Break
The Problem: You are tapping a rope pair, but nothing is happening.
The Fix: Your inventory is full. The game prevents you from taking a 2-cup rope pair if you only have 1 slot open. You need 2 empty slots to take a rope pair. Clear 2 cups (pour them out) and then tap the rope again.
Speed Run Tips
Once you understand the logic, you might want to achieve a faster time or a higher score. These tips are for players who have beaten the level once and want to optimize their run.
The "Double Tap" Start
At the very beginning (0:00-0:10), don't tap one by one. Look for the group of 4-5 Yellow/Orange cups. Tap them all in rapid succession. Since the belt is empty, they will queue up perfectly. This clears the bottom layer in under 5 seconds, buying you valuable time for the complex logic later.
Pre-Loading the Belt
While the Red sand is pouring (which takes about 2-3 seconds), use that time to scan the tray and locate the White cup. Don't wait for the Red to finish. Have your finger hovering over the White cup. As soon as the Red finishes, tap White instantly. This minimizes the "gap" time and keeps the sand flow continuous.
Bulk Processing Blues
In the endgame (Sky phase), don't tap individual Blue cups. Look for clusters. If there are 3 Blue cups next to each other, tap them all at once. The dispenser will queue them up. Since the Sky is a single large block of color, order doesn't matter here. Spamming is faster and more efficient than careful tapping.
Memorizing the Rope Locations
The level layout is static. The ropes are always in the same place. Memorize that the "Danger Rope" (Blue-Red) is in Column 2 and the "Vertical Trap" is in Column 5. Knowing exactly where the threats are allows you to clear the surrounding inventory before you even scroll down to that row, preventing any hesitation or downtime.
Minimizing Menu Pausing
Avoid pausing the game to check the "Full Picture." The toggle takes time. Instead, use the mini-map or rely on your memory of the pattern (Beach at bottom, Stripes in middle, Sky on top). Keeping the game running maintains your rhythm and prevents the "cooldown" timers that sometimes trigger when pausing.