
Level 367
HARDHow to solve Sand Loop level 367? Get instant solution for Sand Loop 367 with our step by step solution & video walkthrough. Sand Loop 367 tips and guide.
Play Sand Loop Now
Experience the puzzle challenge firsthand
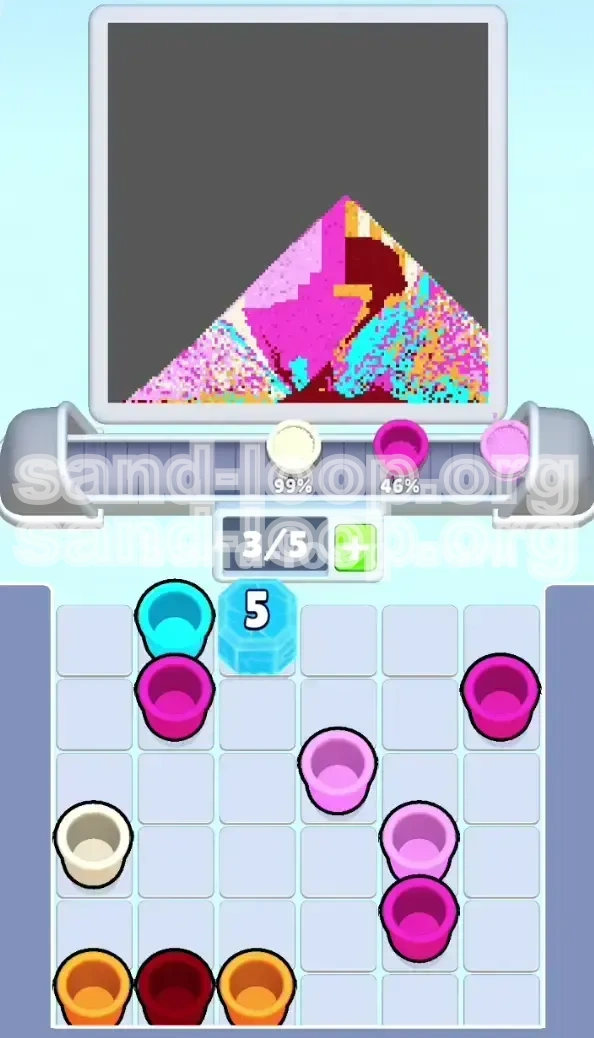
Game Screenshots


Sand Loop Level Guides
Level Overview: The Frozen Supply Crisis
Level 367, often referred to as the "Pink Ice Cream Truck" stage, presents a deceptive challenge. While the pixel art depicts a cheerful summer scene, the underlying gameplay mechanics are strictly unforgiving. This level is a masterclass in Resource Starvation and Sequential Planning. Unlike standard stages where you can freely choose colors based on the canvas, Level 367 locks your most critical resource—the Cyan Sky color—behind a massive, unbreakable barrier for the first half of the game.
The primary difficulty spike comes from the "Ice Block (28)" mechanic. This obstacle sits directly in the center of your supply tray, blocking access to roughly 40% of your available paint cups. To succeed, you cannot simply paint what you see; you must paint what is available while simultaneously managing a countdown timer that only ticks down when you make a move. The level forces you to paint the truck body (Magenta) and the road (Dark Red) with extreme precision, leaving specific "voids" in the artwork to be filled later when the center column finally unlocks.
The Ice Block Mechanic: Usage Counter
The central pillar of this level's difficulty is the Ice Block located in the middle column of the tray.
- Trigger: The block has a durability of 28 points. It does not take damage from matches or power-ups.
- Countdown Method: The block decreases by 1 for every single cup loaded onto the conveyor belt.
- The Bottleneck: While active, the block physically pushes the Cyan and Light Pink cups out of reach. This means you cannot paint the sky, the window background, or the wheel hubs until you have processed 28 cups.
Vertical Canvas Architecture
The canvas is designed to trick players who prefer top-down filling. The layers are arranged in a specific vertical stack that must be respected to avoid "bleeding" colors.
- Layer 1 (Bottom): The Road (Dark Red). This is the foundation.
- Layer 2 (Middle): The Truck Body (Magenta) and Tires (Dark Red).
- Layer 3 (Details): The Window (Orange/Cyan) and Wheel Hubs (Cyan).
- Layer 4 (Top): The Sky (Cyan) and Ice Cream Scoops (Cream/Pink).
Supply Tray Dynamics
Understanding the layout of your paint tray is essential for survival. The tray is effectively split into two zones during the first phase.
- Active Zone (Wings): The left and right columns are open. These primarily dispense Dark Red and Magenta.
- Locked Zone (Center): The center column is blocked by the Ice Block. This hides the bulk of the Cyan cups needed for the sky and the delicate Cream cups needed for the ice cream details.
The Bleeding Risk
The most dangerous technical aspect of this level is color bleeding.
- The Wheel Trap: The wheels are composed of Dark Red tires and Cyan centers. If you paint the surrounding Magenta body before filling the Cyan centers, the Magenta will flow into the empty wheel slots, ruining the tire definition.
- The Sky Trap: The Umbrella and Ice Cream float in the middle of the Sky layer. If you rush the Cyan background, you will bury the fine details of the umbrella handle and scoop shadows.
Clear Objectives and Strategy
To beat Level 367, you must shift your objective from "Paint the Picture" to "Break the Lock." The artwork is secondary to the mechanical necessity of lowering the Ice Block counter. However, you must do this without making a mess that requires costly corrective cups.
Objective 1: Rapid Ice Block Reduction
Your primary goal for the first 50% of the match is purely mechanical.
- Milestone: Reach 28 total cup placements.
- Constraint: You must do this using only the side columns (Dark Red and Magenta).
- Efficiency: Keep the conveyor belt loaded with 3-4 cups at all times. An empty belt is wasted time.
- Warning: Do not focus on perfect edges during this phase. Focus on volume. Fill the large Magenta areas to burn through the counter.
Objective 2: The "Foundation First" Protocol
Before you can worry about the sky, you must secure the bottom of the canvas.
- The Road: Complete the bottom 2-3 rows of Dark Red immediately. This clears the "Road" cups from your tray, preventing them from clogging your supply lines later when you need Magenta.
- The Body Base: Fill the main rectangular block of the truck body.
- Success Indicator: You should have a solid block of Magenta and Red at the bottom, with specific empty holes reserved for the wheel centers.
Objective 3: Strategic Void Management
You must intentionally leave parts of the canvas unpainted to survive.
- The Wheel Wells: Do not fill the wheel centers with Magenta. Leave them empty (or filled with the road color if necessary) until the Cyan unlocks.
- The Window Frame: Stop pouring Magenta when you hit the window line. If you paint over the window area with Magenta, you will need to waste a cup to clear it before you can add the Orange frame.
Objective 4: The Cyan Transition
Once the Ice Block shatters, the strategy shifts from endurance to precision.
- The Unlock: The moment the counter hits 0, the tray shifts. Cyan becomes available.
- The Priority Shift: Immediately pause filling the body. Switch to Cyan to secure the wheel centers and window background. This "locks in" the details so you can safely flood the rest of the screen.
Optimal Color Order and Processing
Processing colors in the wrong sequence is the leading cause of failure. The supply tray in Level 367 is not random; it is weighted. You need to follow a strict processing order to ensure the right colors are available when the Ice Block breaks.
Phase 1: The Dark Red Clearing (Start)
Color: Dark Red
- Target: Road (Bottom 2 rows) & Tires.
- Logic: Dark Red is a "blocking" color. It usually spawns on the wings. If you don't clear these early, they will bury your Magenta cups.
- Action: Load 2 Dark Reds. Paint the road. Outline the tires. Stop. Do not fill the tire centers yet.
- Stat: This should consume roughly 4-6 cups, lowering the Ice Block counter to ~22.
Phase 2: The Magenta Workhorse (Mid-Game)
Color: Magenta
- Target: Truck Body.
- Logic: Magenta is the most abundant color in the left/right columns. It is your primary tool for lowering the Ice Block counter.
- Action: Load the belt with 3 Magenta cups. Stream them into the main body of the truck.
- Boundary: Stop strictly at the window line and the wheel wells.
- Stat: You will likely use 15-18 cups of Magenta. This should bring the Ice Block counter down to 0.
Phase 3: The Cyan Integration (The Unlock)
Color: Cyan (Sky)
- Trigger: Only after the Ice Block shatters.
- Target: Window Background, Wheel Centers, Sky.
- Logic: Cyan is now flooding your tray. If you don't use it immediately, it will clog the belt, preventing you from reaching the Orange and Cream cups.
- Action: Load 1 Cyan. Fill the window and wheel hubs. Load 1 Cyan. Start the sky background.
Phase 4: The Trio of Details (End-Game)
Colors: Orange (Cone/Frame) -> Cream (Scoops) -> Light Pink (Shadows/Accents)
- Logic: These are your rarest colors. They are often buried at the bottom of the center column.
- Orange: Use sparingly for the window frame and cone.
- Cream/Pink: These are the "Finale" colors. Use them to top off the ice cream scoops after the sky is mostly filled.
- Tip: Do not load these until the sky (Cyan) is 80% done, or they will get lost in the tray shuffle.
Step-by-Step Walkthrough Guide
Follow this precise sequence to navigate the level. This guide assumes a standard tray spawn.
Step 1: Initial Tray Assessment
Goal: Plan your first 5 moves.
- Scan the Wings: Look at the Left and Right columns of the tray.
- Identify Road Colors: Are there Dark Red cups in the top row?
- Action: If yes, load them. If no (e.g., only Magenta is visible), you must play Magenta first, but be extremely careful not to cover the road area. Paint the truck body first, then come back down for the road.
- Conveyor Setup: Always try to have 2 cups of the same color on the belt. Switching colors constantly slows down your stream rate.
Step 2: The Road and Tire Outlining
Goal: Secure the bottom layer.
- Pour Dark Red to complete the bottom road stripe.
- Move to the wheel areas. Pour Dark Red to create the "Donut" shape of the tires.
- CRITICAL: Do not fill the center of the donut. The center must be Cyan. Since Cyan is locked, leave the center empty (or paint it the road color if the game allows, but empty is safer to distinguish later).
- Check the Ice Block counter. It should be dropping steadily.
Step 3: The Magenta Body Grind
Goal: Break the Ice Block.
- Switch focus to Magenta.
- Fill the main rectangular body of the truck.
- Stop Point: When you reach the bottom of the window and the top of the wheel wells, STOP POURING.
- Keep loading Magenta cups. You need to burn the tray down to reach the bottom of the stack.
- The Moment: Watch the screen shake. When the Ice Block shatters, immediately stop loading Magenta.
Step 4: The Detail Injection (Window & Wheels)
Goal: Fix the empty spaces.
- The tray has now shifted. The center column is open.
- Priority 1: Look for Cyan. Load 1 cup.
- Pour Cyan into the Wheel Centers and the Window Background. This secures the art against further bleeding.
- Priority 2: Look for Orange. Load 1 cup.
- Pour Orange to create the Window Frame and the Ice Cream Cone outline.
Step 5: The Sky and Scoops Finale
Goal: Complete the background.
- Now you can flood the remaining areas.
- Load 2 Cyan cups. Pour the Sky, but avoid the umbrella tip at the very top.
- Load 1 Cream/Light Pink cup. Pour the Ice Cream Scoops.
- Load 1 final Magenta cup (if available) to fix the Umbrella handle or top stripe.
- Finish the sky. The level is complete.
Common Mistakes to Avoid
Level 367 is designed to punish impatience. These are the specific errors that lead to a "Game Over."
The "Premature Sky" Error
The Mistake: Seeing Cyan in the tray (if RNG spawns a stray cup on the wing) and using it early.
Why it fails: If you paint the sky (top layer) before the truck body (middle layer), you will later have to pour Magenta under the Cyan to fill the truck body. This is technically impossible in most physics engines without bleeding, or it forces you to paint over the sky, wasting cups.
The Fix: Adhere to the vertical order. Body first, Sky last.
The "Flooded Well" Syndrome
The Mistake: Pouring Magenta continuously over the wheel wells to save time.
Why it fails: You end up with pink wheels. To fix this, you have to use a Dark Red cup to outline the tire again, then a Cyan cup for the hub. That is 2 extra cups wasted. In a level with limited resources, this waste causes a soft lock.
The Fix: Treat the wheel wells as "stop signs" for your Magenta stream.
The "Tray Clogging" Panic
The Mistake: Letting the conveyor belt fill up (5/5 cups) with the wrong color right when the Ice Block breaks.
Why it fails: When the block breaks, the tray shifts. If your belt is full of Magenta, you cannot grab the newly unlocked Cyan cups. You are forced to waste the Magenta cups elsewhere, often leading to messy over-painting.
The Fix: When the Ice Block counter hits "5", stop loading the belt. Let it clear to 1 or 2 cups. Make room for the Cyan flood.
Speed Run and Efficiency Tips
For players aiming for the 3-star score or leaderboard positions, you must optimize every second.
Conveyor Belt Rhythm
Tip: Never let the conveyor belt move empty.
- While pouring with one hand, use the other to tap the tray.
- The Rhythm: Tap -> Pour -> Tap -> Pour.
- Maintaining a full belt (3-4 cups) ensures that the 1-second interval between cup drops is utilized fully. An empty belt adds seconds to your final time.
The "Top-Row" Strategy
Tip: Only look at the top row of the tray unless necessary.
- The game generates new cups from the bottom.
- If you need Dark Red, and it's not in the top row, do not dig for it immediately unless it is critical.
- Instead, use the top-row colors (usually Magenta) to burn through the stack. Digging wastes valuable seconds.
Pre-emptive Loading
Tip: Predict the Ice Block shatter.
- Keep a mental count. If you are at 26/28 cups, stop loading Magenta.
- Clear your belt.
- The moment the screen shakes (27->28 transition), be ready to tap the center column where Cyan is hiding. This pre-emptive pause saves 2-3 seconds of fumbling.
RNG Reset Conditions
Tip: When to restart immediately.
- If you start the level and the top row of the tray contains zero Dark Red cups and zero Magenta cups (e.g., it's full of Orange or Cream), restart.
- You cannot break the Ice Block efficiently with only detail colors. You need the bulk colors (Red/Magenta) immediately.