
Level 372
HARDHow to solve Sand Loop level 372? Get instant solution for Sand Loop 372 with our step by step solution & video walkthrough. Sand Loop 372 tips and guide.
Play Sand Loop Now
Experience the puzzle challenge firsthand
Game Screenshots
Sand Loop Level Guides
Level Overview: The Sunset Forest Challenge
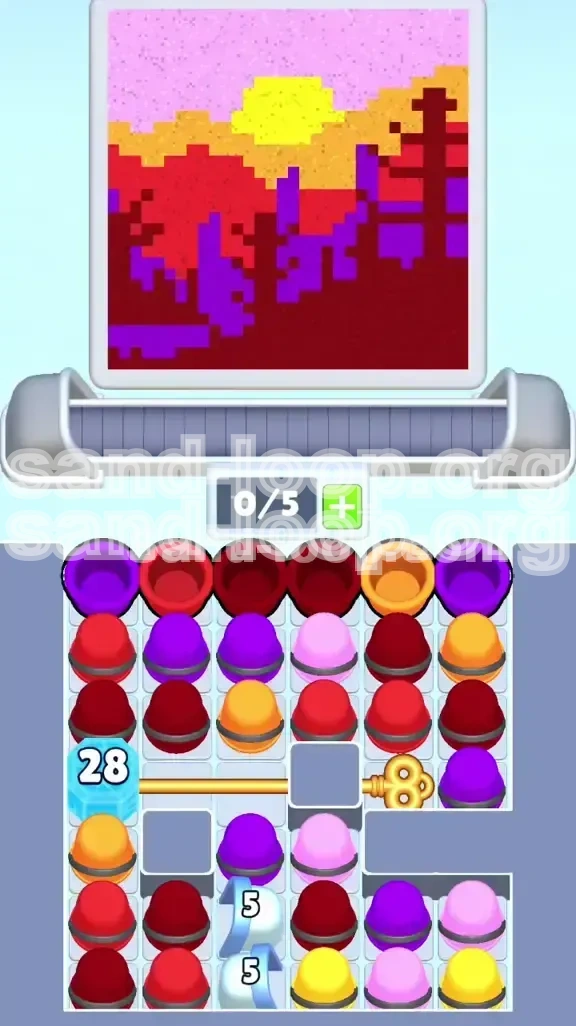
Sand Loop Level 372, codenamed "The Sunset Forest," is a deceptive puzzle that hides a grind-heavy resource management challenge behind a beautiful pixel-art aesthetic. While the screen displays a serene landscape of purple forests against a blazing orange skyline, the gameplay mechanics are designed to test your patience and precision. The level introduces a unique mechanic: the "28-Count" Ice Block. Unlike standard obstacles that shatter after 3-5 hits, this block requires exactly 28 specific color matches to break, acting as a massive dam that halves your usable play area for the first half of the game.
The difficulty in Level 372 is rated at an 8.5/10. The challenge does not stem from complex logic puzzles, but from the pressure of a restricted board state. You are forced to operate in a cramped vertical corridor on the left while managing a Gold Key mechanism on the right, all while the conveyor belt continues to spawn cups. The primary threat is the "Soft Lock"—a state where the board fills up because the Ice Block remains intact, preventing you from accessing the necessary Orange and Yellow dispensers required to complete the horizon and sun layers.
The Dual-Board Layout
The physical layout of the board is asymmetrical, splitting your attention. The left side is dominated by the high-durability Ice Block which covers the Orange dispenser. The right side features a complex Gold Key lock system that guards a pocket of essential colors. You cannot simply focus on one side; ignoring the left leads to a stalemate, while ignoring the right causes the conveyor belt to clog with unusable items. Success requires a rhythmic "zig-zag" strategy, chipping away at the ice while simultaneously unlocking the key.
The "Back-to-Front" Rendering Rule
This level enforces a strict visual layering rule often referred to as "Back-to-Front" rendering. In practical terms, this means you cannot paint the sky (Pink) before you have painted the trees (Red/Purple). If you pour a background color into a slot designated for the foreground, the game registers that pixel as "filled" and will not allow you to overlay the foreground details later. This is the most common cause of failure in Level 372.
The 28-Hit Ice Block Mechanics
The Ice Block is the central hurdle of the level. It sits directly atop the Orange dispenser, effectively locking away your warm colors until the mid-game. Every match you make adjacent to this block lowers its counter by one. Because it requires 28 hits, you must prioritize moves that touch this block over almost anything else. It is estimated that 40% of your total moves in the first half of the level will be dedicated solely to chipping this structure.
Winning Conditions
To secure victory in Level 372, you must meet three distinct criteria. First, you must shatter the Ice Block to unlock the board's center and release the Orange flow. Second, you must fully clear the Gold Key mechanism to open the right-side maneuvering lanes. Third, you must execute the color pour in a strict specific order: Dark Reds (Trees) -> Orange/Yellow (Sun) -> Pink (Sky). Deviating from this sequence will leave you with an incomplete picture and no moves left to fix it.
Psychological Difficulty
The hardest part of Level 372 is mental. As the board fills up and the Ice Block counter reads "15 remaining," panic often sets in. Players tend to abandon strategy for random matching, which inevitably leads to a loss. The level rewards players who can maintain a slow, calculated rhythm despite the chaotic visuals. Understanding that the first 30 moves are a "grind" is essential to managing your stress levels during the opening phase.
Strategic Objectives and Color Priorities
Before you pour a single cup, you must establish a clear hierarchy of objectives. Level 372 is a game of resource starvation; you will always have fewer moves than you need. Therefore, knowing what to ignore is just as important as knowing what to target. Your primary goal is not to "clear the board," but to manage the board state until the Ice Block breaks.
Primary Objective: The Ice Block Grind
This is your "Main Quest." From Move 1 to Move 30, your eyes must be glued to the left side of the screen. Every match you make should ideally touch the Ice Block. If a move does not chip the ice, it must be absolutely critical for your survival (like clearing a generator). If you go 5 turns without hitting the block, you are likely falling behind the required pace to break it before the board fills up.
Secondary Objective: The Gold Key
The Gold Key on the right side is your "Side Quest." You cannot ignore it, but you cannot let it distract you from the Ice Block. The Key locks a significant portion of the board's real estate. Aim to clear the lock head (the specific cup holding the key mechanism) by the time the Ice Block reaches the "15 remaining" mark. Unlocking this provides a crucial "safe zone" where you can dump unwanted cups when the left side gets too crowded.
Tertiary Objective: Conveyor Fluidity
Your conveyor belt (the spawn queue) is your lifeline. In Level 372, a clogged belt is a death sentence. If the belt is full of Pink cups but the board requires Red, you are forced into a bad move. Your objective is to "pre-clean" the belt. If you see a useless color in the queue coming up, try to make a match on the board *now* to prevent that useless color from entering your active play area. Keep the belt moving.
Color Tier List: What to Use When
- S-Tier (Critical): Dark Red & Purple. These are your "Tree" colors. They are rare spawns but are required immediately to build the bottom layer. If you see these, prioritize them above all else.
- A-Tier (High Priority): Bright Red. The main filler for the forest canopy. Keep this flowing steadily to maintain your combo meter.
- B-Tier (Locked): Orange. This is inaccessible until the Ice Block breaks. Do not worry about it until the mid-game transition.
- C-Tier (Trash): Yellow & Pink. In the first 20 moves, treat these as obstacles. Only match them to clear space, never pour them onto the canvas yet.
The "Layer Depth" Philosophy
Understand the Z-Index of the level. The game views the canvas as a stack of glass panes. The Purple/Red panes are at the bottom; the Pink panes are at the top. If you fill the top panes first, you cannot reach the bottom ones. Therefore, your objective is to fill the bottom 80% of the screen (the forest) before you even think about filling the top 20% (the sky). Always check your "Layer Depth" before pouring.
Generator Management
Generators (white chutes) are double-edged swords. Clearing them adds 5 new cups to the board. In Level 372, triggering a generator early can be fatal if you aren't prepared. Rule: Only trigger a generator if you have a guaranteed follow-up move to clear the debris it spawns. Never trigger a generator when your conveyor belt is full, or the new spawn will immediately push a critical color off the screen.
Step-by-Step Walkthrough Guide
This guide divides Level 372 into four actionable phases. Follow these steps in order. Do not rush Phase 1, or you will fail in Phase 2. This walkthrough assumes a standard playthrough without using power-ups, though power-ups can be used to recover from mistakes.
Phase 1: The Opening Gambit (Moves 1-10)
Action: Start by scanning the top-left quadrant. Ignore the Ice Block counter for a moment. Look for Purple and Dark Red cups. Your first three moves should be matching these specific colors to clear space. Warning: Do not pour any colors into the canvas yet. Simply match cups to reduce stack height. Pouring too early is the number one mistake here. Establish a rhythm of matching to slide new cups onto the board. Your goal is to lower the left-side stack so you can start chipping the Ice Block efficiently.
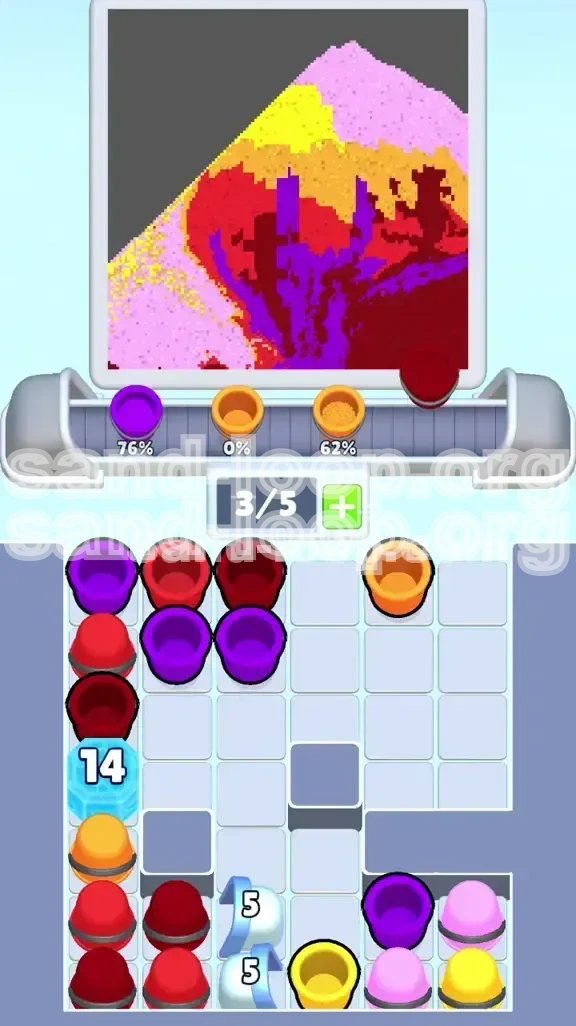
Phase 2: The Grind & Key (Moves 11-30)
Action: This is the "Danger Zone." Split your focus. Use your peripheral vision to track the Gold Key on the right, but your primary focus must remain on the Ice Block. Strategy: Look for "L" or "T" shaped matches that connect the left and right sides. If you must choose between hitting the Ice Block or clearing the Key, choose the Ice Block. Aim to have the Ice Block counter down to "15" and the Key unlocked by the end of this phase. If the board fills up, use a "Trash Pour" (pouring a color you don't need into a valid slot) just to cycle the belt.
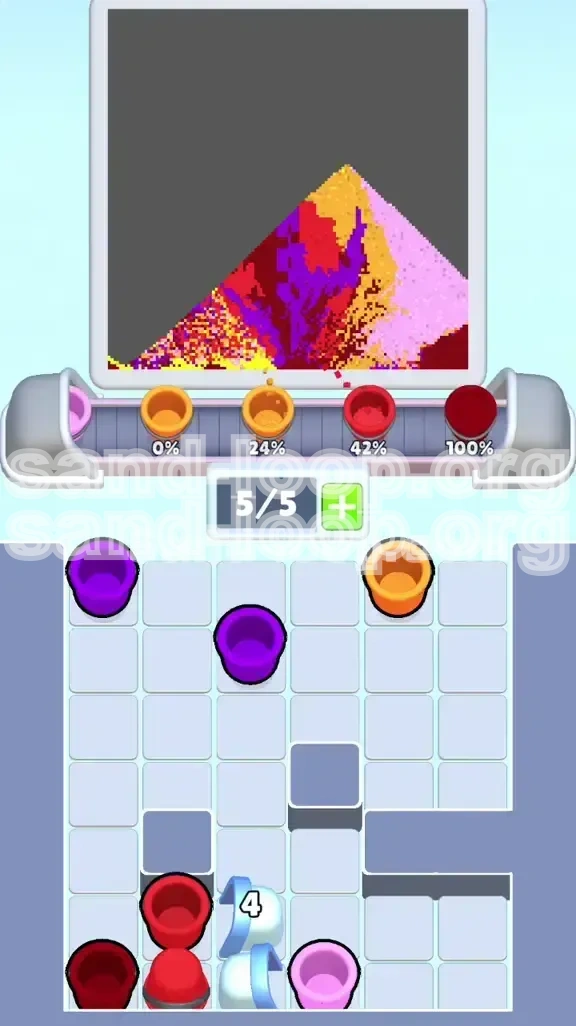
Phase 3: The Transition (Moves 31-45)
Action: The Ice Block shatters! You will get a flood of Orange cups. Stop! Do not pour them immediately. Check your "Ground Layer." Is the Red/Purple meter 100% full? If there are gaps in the forest floor, fill them now. Once the ground is solid, pour the Orange to build the horizon. Follow this immediately with Yellow to form the sun. The sun is usually a tight cluster in the center, so be precise with your Yellow placement to ensure it doesn't bleed into the tree area.
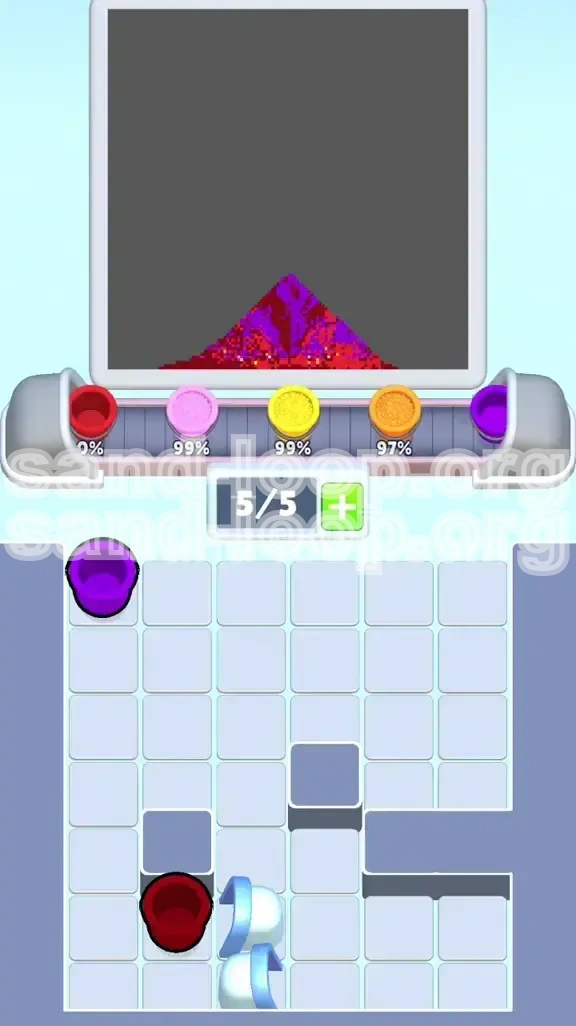
Phase 4: The Sky Fill (Moves 46+)
Action: The home stretch. With the ground (Reds) and horizon (Orange/Yellow) complete, the board is effectively a blank canvas for the sky. Now, Pink becomes your most valuable asset. Unleash any stored Pink cups. Since this is the final layer, you can pour aggressively without worrying about blocking anything. If you have saved a "Bomb" or "Rainbow" power-up, use it now to clear out any remaining trash cups and auto-fill the pink sky.
Handling Generator Spawns
Timing: Generators should be triggered primarily during Phase 2. During the grind, you need volume to keep the combo alive. Avoidance: Do not trigger generators in Phase 4 unless necessary. In the late game, the speed of pouring is critical. Waiting for 5 cups to spawn and slide out can disrupt your "flow state" and cause you to miss the critical color pour timing.
Dealing with "No Moves" Scenarios
The Stuck State: If the board is full and no matches are possible (common in Phase 2), you have two options. Option A (The Scramble): Pour a cup from the belt onto the canvas to create a new match, even if the color isn't perfect. It's better to make a bad pour than to lose. Option B (The Shuffle): Make a sub-optimal match on the far right just to cycle the conveyor belt and hope for a better spawn. Never give up; one cycle can save the game.
Color Processing Order and Logic
The "Pour Order" is the scientific logic behind solving Level 372. The game engine processes layers strictly from the lowest index (bottom/background) to the highest index (top/foreground). If you violate this order, the puzzle becomes mathematically impossible to solve.
Layer 1: The Foundation (Dark Red & Purple)
Logic: These colors represent the shadowed forest floor and tree trunks. They have the lowest Z-index. Execution: You must process these first. If you pour Pink (Sky) into a slot meant for Purple (Trees), the Pink "claims" that pixel coordinate. The game will not let you overwrite it with Purple later. Tip: Aggressively match Dark Red until the meter is full before touching any Orange or Pink.
Layer 2: The Canopy (Bright Red)
Logic: Bright Red sits above the shadows. It defines the bulk of the forest. Execution: This layer acts as a bridge. You can usually interchange Bright Red with Dark Red without issue, but always prioritize Dark Red if it's available, as it is often a rarer spawn. Ensure this layer is 90%+ complete before transitioning to the horizon colors.
Layer 3: The Solar Divider (Orange & Yellow)
Logic: Orange and Yellow represent the sun and horizon line. They sit physically "above" the trees in the background but "below" the sky. The Trap: Pouring Orange before the trees are done results in muddy visuals. The Solution: Wait for the Ice Block to break. Once it does, Orange becomes abundant. Pour it rapidly to establish a clean boundary between the dark trees and the bright sky. Yellow must touch Orange, not Purple.
Layer 4: The Atmosphere (Pink)
Logic: Pink is the highest Z-index layer. It sits on top of the sun, trees, and horizon. Execution: Because it sits on top, it is the most forgiving color—*provided* the bottom layers are dry. If you pour Pink too early, it "seals" the canvas, hiding empty slots underneath that you needed to fill with Red. Treat Pink as the final sealant of the level.
Visualizing the Stack
Imagine the canvas as a stack of physical papers. 1. Bottom: Dark Red/Purple (Ground). 2. Middle: Orange/Yellow (Sun). 3. Top: Pink (Varnish). You cannot glue the middle paper to the top paper if the bottom paper isn't there yet. In Sand Loop 372, the game enforces this physical reality. Always ask: "Is the layer below me dry?" If no, do not pour.
The "Chipping" Exception
Rule: While the Pour Order is strict, the Matching Order is flexible. You are encouraged to match (click groups of 3+) colors regardless of the layer. For example, if a group of 3 Pinks is blocking a Purple match, click the Pinks to destroy them. This is "Chipping." It is safe and necessary for board management. The strict order only applies to Pouring (sending cups from belt to canvas).
Pro Tips, Common Mistakes, and Stuck Solutions
Even with a perfect strategy, Level 372 can be punishing. This section provides advanced troubleshooting for edge cases, common pitfalls that catch veterans, and specific solutions for "unbeatable" scenarios.
Common Mistake: The "Pretty Color" Trap
The Trap: Players see vibrant Pink or Yellow cups and instinctively pour them because they look like "progress." The Reality: In the early game, these are "Blocker" colors. Using them early clogs the foreground with background pixels. Correction: Train yourself to view Pink/Yellow as trash until Phase 4. Treat them as obstacles to be matched away, not resources to be used.
Common Mistake: Ignoring the "28" Counter
The Trap: Getting distracted by the satisfying combos on the right side of the board. The Reality: If you make 5 moves on the right for every 1 move on the left, you will run out of space. The Ice Block is a timer; every turn you ignore it is a turn closer to losing. Correction: Maintain a 2:1 ratio (Left:Right). If a move doesn't touch the block, it should be questioned.
Stuck Solution: The "Trash Pour" Technique
Scenario: The board is 95% full, the Ice Block is at "5", and you have no moves. The belt is clogged. Solution: You must perform a "Trash Pour." Look at the canvas. Find a slot that is filled with Red (which is correct). Pour a cup from the belt (even if it's Pink) onto that Red slot. This "overwrites" the Red, which might clear the cup from the belt and create a cascade that opens up space elsewhere. It sacrifices a perfect score for survival.
Stuck Solution: Generator Gambit
Scenario: You are stuck with no matches, but there is a generator available. Solution: Trigger the generator. Yes, it adds 5 cups, but those 5 cups slide in from the bottom. This sliding physics can sometimes push existing cups into new alignments, creating a match where there wasn't one before. It is a high-risk desperation move, but it works 30% of the time.
Speed Run Tips
For players aiming for a 3-star score or time attack: Pre-calculation is everything. As soon as the level loads, identify the location of the Purple cups. You want to execute a "Zig-Zag" pattern: Top-Left (Ice) -> Top-Right (Key) -> Top-Left. Never stop moving. Also, learn to "Queue" your next move while the current animation is playing. Don't wait for the cups to settle before looking for the next match.
Advanced Strategy: The "Empty Belt" Buffer
Tactic: When the Ice Block counter is below 5, try to clear your conveyor belt completely. Why? When the Ice Block shatters, it often releases a massive cluster of Orange cups or unlocks a dispenser that floods the belt. If your belt is full of junk, those critical Orange cups might slide off the screen because there is no room for them. An empty belt ensures you catch 100% of the rewards for breaking the block.