
Level 403
HARDHow to solve Sand Loop level 403? Get instant solution for Sand Loop 403 with our step by step solution & video walkthrough. Sand Loop 403 tips and guide.
Play Sand Loop Now
Experience the puzzle challenge firsthand
Game Screenshots
Sand Loop Level Guides
Sand Loop Level 403: Complete Walkthrough and Strategy Guide
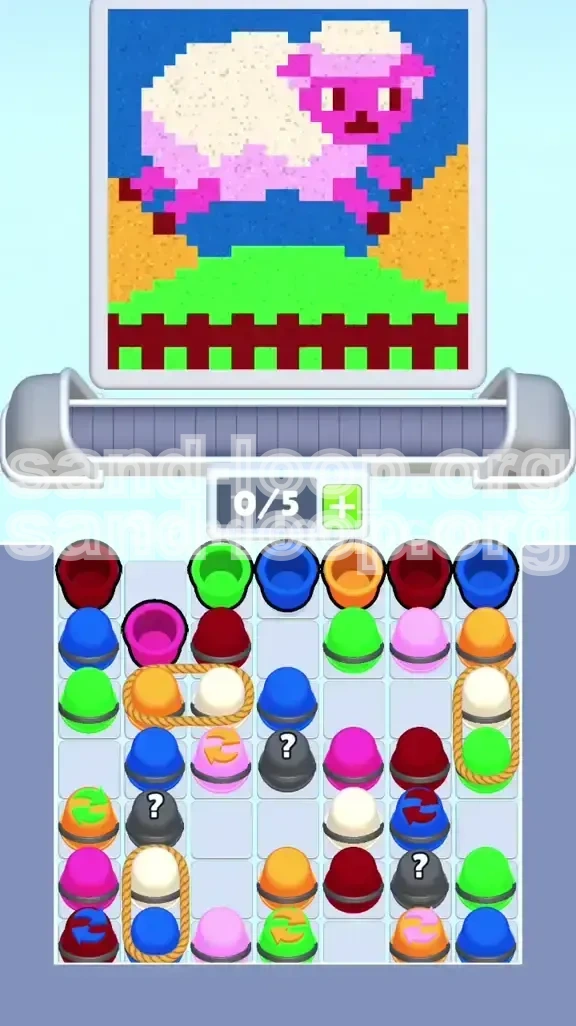
Welcome to the ultimate strategy guide for Sand Loop Level 403. This stage is notorious for causing "deadlock" frustration among players due to its extremely restrictive slot limit and complex roped mechanics. The visual of the Pink Sheep on a green hill is deceptive; this is a high-level logistics puzzle that requires you to manage a 5-slot capacity with absolute precision. One wrong tap can fill your conveyor belt with useless colors, ending your run prematurely.
In this guide, we will break down exactly how to conquer the supply chain, decode the color dependencies, and fill the canvas without getting stuck. We will cover the specific order of operations, how to handle the dangerous Mystery Cups, and advanced techniques to keep your flow moving.
1. Level Overview: Understanding the Pink Sheep Challenge
Before you make a single move, it is vital to understand the constraints of this specific grid. Level 403 is not about speed; it is about inventory management. The game limits your active dispensing capacity to just 5 units at any given time.
The 5-Slot Bottleneck
The primary mechanic limiting your progress is the "Slot Starvation" mechanic. You start with a capacity of 0/5.
- The Limit: You can only have 5 cups actively waiting on the conveyor belt. If you tap a new cup when the belt is full (5/5), the game is effectively over.
- The Risk: Since many cups in this level are linked (roped) together, tapping one pair instantly adds 2 units to your belt. If you are at 4/5 capacity and tap a roped pair, you will crash at 6/5.
- Strategy: You must maintain an "Available Slot" buffer. Never let the belt fill up beyond 4/5 unless you are 100% sure of the next move.
Canvas Composition and Color Zones
The Pink Sheep canvas is divided into distinct color zones that require different strategies. Understanding the "pixel count" or area of each zone helps prioritize where to dump sand.
- High Volume Zones (Safe Dumps): The White Sheep Body and the Lime Green Hill. These areas cover roughly 60% of the canvas. You can pour excess sand here without worrying about spilling over into other zones.
- Low Volume Zones (Danger Zones): The Dark Red Fence, Sheep Hooves, and Facial Details. These are thin lines and small patches. They fill up incredibly fast. Pouring sand here when the zone is 90% full will result in immediate spillage, contaminating adjacent areas.
- The Background: The Blue Sky covers a massive area but is blocked by the supply chain until the late game.
The Roped Cup Mechanics
This level introduces "Roped Cups" to force you to waste slots. You cannot drag one cup without dragging its partner.
- Horizontal Pair (Orange/White): Located in the left-center. Pulling this consumes 2 slots immediately.
- Vertical Pair 1 (White/Blue): Located bottom-left. Crucial for the end-game sky fill.
- Vertical Pair 2 (White/Green): Located far-right. A major bottleneck that blocks access to other cups.
Mystery Cup Variables
Scattered in the lower middle columns are gray cups marked with a "?". These introduce randomness into your strict plan.
- Uncertainty: They can reveal any color needed for the board (Pink, Blue, Red, or Orange).
- Blockage: They often sit physically on top of essential cups, meaning you must clear them to progress downwards.
Flipper Cup Dynamics
Keep an eye on the cups with circular arrows. These change color after dispensing their first load.
- Orange to Green: Essential for topping up the hill later in the game.
- Blue to Red: Useful for the fence details, but dangerous if you don't need Red at that moment.
2. Step-by-Step Instructions: The Early Game
The first phase of the level is about establishing a rhythm and creating "dumping grounds" for excess sand. Your goal here is to clear the top blockers and fill the large white and green zones.
Step 1: Initial Board Assessment and Red Clearance
As soon as the level loads, scan the top row. You need to get the dark red fence out of the way immediately because it is a small zone that acts as a trap if left for later.
- Action: Locate the top-left Dark Red cup.
- Execution: Tap it to send it to the conveyor.
- Reasoning: The fence requires a very specific, small amount of sand. Filling it early removes a "precision" task from your list when the board gets chaotic later.
- Note: Do not queue multiple red cups. One or two is sufficient for the fence details. Overfilling red spills onto the green hill.
Step 2: Filling the "Safe Zones" (White Body)
Before you touch the complicated roped cups, you need to empty your belt. The best place to put sand is the White Sheep Body.
- Action: Identify all single, unattached White cups in the upper-middle section.
- Execution: Tap them aggressively to fill the sheep's body.
- Tip: Since the sheep is the largest object, it is unlikely you will overfill it. Use this as your "trash can" if you accidentally tap a wrong color, provided the white is still incomplete.
Step 3: Managing the Flipper Cups
You will see Flipper Cups (Orange turning to Green). These are your key to the hill.
- Action: Tap the Orange Flipper cup first.
- Execution: Pour the initial Orange load onto the small dirt patches (if available) or just let it cycle if not needed immediately.
- Follow-up: Once it flips to Green, prioritize this new Green cup. The Lime Green Hill is a massive area that needs constant sand input.
- Warning: Do not let the Green sand sit on the belt if the hill is already full. If the hill is done, you must avoid tapping Green cups entirely.
Step 4: The Left-Center Roped Pair (Orange/White)
This is your first major test of slot management. You have a horizontal roped pair (Orange linked to White).
- Prerequisite: Ensure your belt has 3/5 slots or fewer available. Never tap this at 4/5.
- Action: Tap the pair to pull them onto the belt.
- Execution:
- Pour the White cup onto the Sheep Body (your safe zone).
- Pour the Orange cup onto the dirt patches.
- Result: This clears the physical space in the left-center grid, revealing the Mystery Cups underneath.
3. Color Order and Processing Logic
To succeed in Level 403, you cannot simply paint what you see. You must paint in an order that maximizes belt efficiency and minimizes spill risk. This is the optimal processing hierarchy.
Priority 1: Dark Red (The Fence)
Why First? It is the smallest area with the highest risk of spillage.
- Complete the fence and hooves immediately. If you leave Red for the end, you will be forced to tap Red cups when your belt is full of Blue/Green, causing a deadlock.
- Stop Condition: Stop tapping Red cups the second the fence looks solid. Do not try to "perfect" the edges if it risks filling your belt.
Priority 2: White (The Sheep Body)
Why Second? It is the largest area and acts as your buffer.
- Keep the White cups flowing. The sheep body is so large that it absorbs accidental overflows slightly better than the thin fence.
- Strategic Use: If you have a "Mystery Cup" that turns out to be a color you don't need (e.g., Blue when the sky isn't ready), you can sometimes dump it on the white wool if it's not 100% full, though this is risky.
Priority 3: Lime Green (The Hill)
Why Third? It requires volume but is sensitive to the Red fence above it.
- Use the Green sand from the Flippers and the roped pairs.
- Caution: Do not overfill the hill. If Green spills into the Red fence, the level becomes much harder visually to track. Fill the hill to about 95% capacity and stop.
Priority 4: Hot Pink (Face and Details)
Why Fourth? These are medium-sized zones.
- Use the Mystery Cups here. If a Mystery Cup reveals Pink, use it immediately.
- The face and ears are smaller than the body, so monitor the fill level closely. Once the face is pink, stop accepting Pink cups.
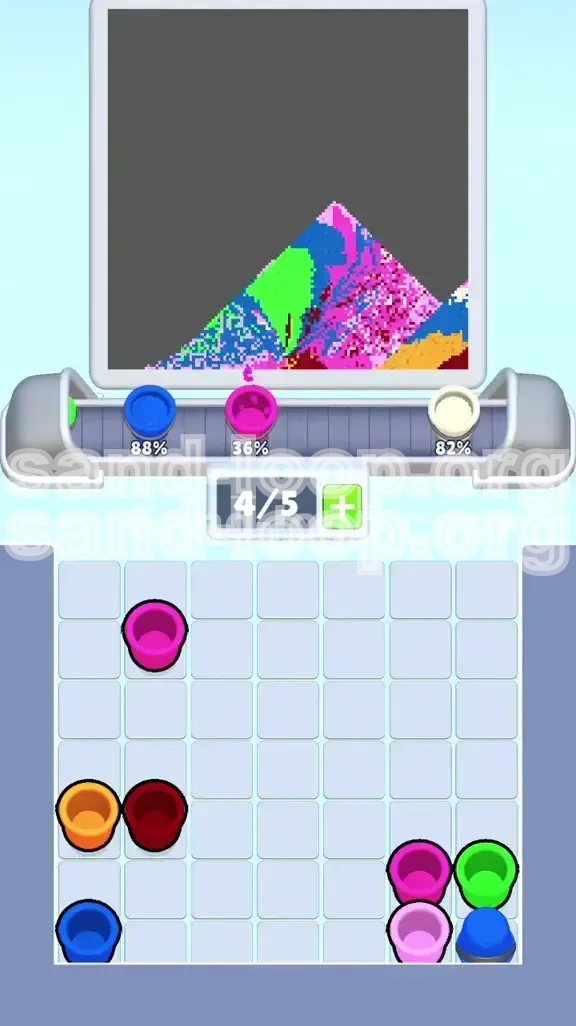
Priority 5: Blue (The Sky)
Why Last? It is the background and covers everything else.
- The "Pyramid" Effect: Sand stacks from the bottom up. If you fill the sky too early, the rising sand line will bury the top of the sheep and the fence, making it impossible to fix mistakes.
- Wait until the Sheep, Hill, and Fence are 100% done. Only then should you unleash the Blue cups.
4. Advanced Tactics: Mystery Cups and Stuck Solutions
The middle section of the game is where most players get stuck. The board becomes cluttered with Mystery Cups and remaining roped pairs. Here is how to navigate the chaos.
Handling the Mystery Cup Trap
The gray cups are a gamble. Treat them with caution.
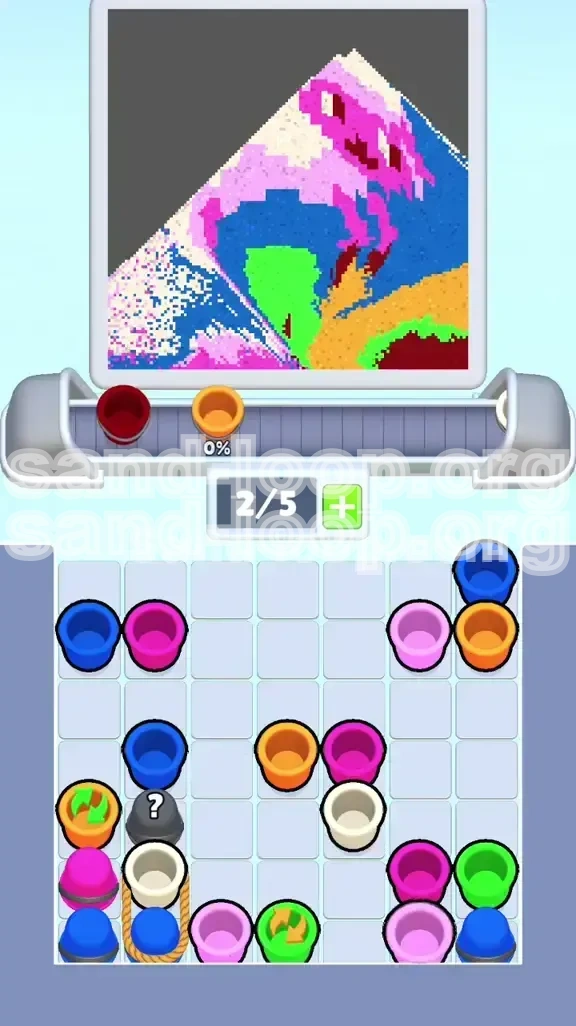
- The "2/5" Rule: Only tap a Mystery Cup when your conveyor belt has 3 empty slots (2/5 full). This guarantees you have space for whatever comes out.
- Outcome A (It's Blue): If you don't need Blue yet, let it ride on the belt. Do not pour it. Use it as a "slot filler" until you need it, but be careful not to let it clog your belt.
- Outcome B (It's Pink/Red/Orange): If it's a color you need immediately (like Pink for the face), pour it instantly to free up the slot.
- Stuck Scenario: If a Mystery Cup is sitting on a color you need (e.g., it's blocking a White cup), and you can't afford to pull it, look for a "Combo Move" (see below).
Dealing with the Vertical Roped Pairs
The bottom-left White/Blue and far-right White/Green pairs are your final hurdles.
- Bottom-Left (White/Blue): This is the "Win Condition" pair. You need the White for the sheep and the Blue for the sky.
- Technique: Wait until the Sheep Body is only about 90% full. Pull the pair.
- Pour the White to finish the sheep.
- Keep the Blue on the belt! Do not pour it yet. Let it sit there as a "saved" cup for the final Sky phase.
- Far-Right (White/Green): This is the "Trap" pair.
- It blocks a Blue cup behind it.
- Only pull this if you absolutely need the White or Green to finish the central details. If you pull it too early, you jam your belt with Green you don't need.
What to Do When Stuck
If you are staring at the board and nothing seems to match:
- Check the Background: Is the Blue Sky actually done? Sometimes you think you need more colors, but the background is just missing a tiny corner.
- Look for 95% Full Zones: Identify a color zone that is almost full. Ignore all cups of that color. Stop trying to "perfect" it.
- The "Last Cup" Scan: Look for single cups hidden in corners that you missed. A single stray Red cup might be the only thing holding up your belt capacity.
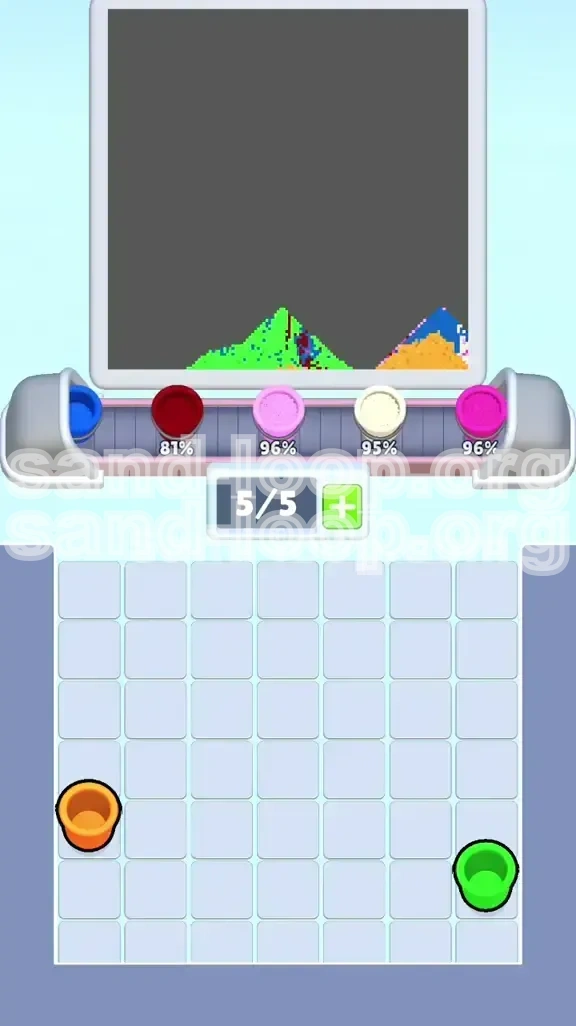
5. The End Game: Filling the Sky and Speed Running
You have painted the sheep, fenced the hill, and managed your inventory. Now it is time to clear the board and secure that 3-star rating.
Executing the Sky Flood
This is the satisfying part of the level, but it requires timing.
- Prerequisites: The Sheep (White), Hill (Green), and Fence (Red) must be visually complete.
- The Blue Reserve: You should have saved Blue cups from the Mystery phase or the Bottom-Left rope.
- Action: Unleash all Blue cups onto the conveyor.
- Pouring Strategy: Pour continuously. The Blue Sky is a "sink"—it can take almost infinite sand until it is full.
- Warning: Watch the bottom of the screen. Ensure the Blue sand rises evenly. Don't pour all in one column, or you might create a physical pyramid that blocks the last of the white/red pixels at the top edges.
Speed Run Tips for Fast Completion
If you are chasing a high score or a time record, follow these shortcuts:
- Pre-Loading: While a cup is pouring, you can tap the next cup in the grid. Do not wait for the animation to finish.
- Ignorance is Bliss: Don't wait for the Flipper Cups to flip if you have other moves. Only go back to them when you need the specific color they turn into.
- Bulk Tapping: In the final "Sky Phase," you can tap 4-5 Blue cups in a row rapidly since the background is the only thing left. You don't need to be precise about spillage here.
Common Mistakes to Avoid
Even advanced players fail Level 403 due to these specific errors:
- The "4/5" Tap: This is the #1 killer. Tapping a Roped Cup when at 4/5 capacity. Always double-check your slot count before clicking a pair.
- Early Sky Fill: Starting the Blue sky while the Sheep or Fence are unfinished. This buries your work under blue sand, making it impossible to fix the details without losing.
- Ignoring the Flipper: Forgetting that the Orange cup turns into Green. If you ignore it, you might run out of Green for the hill and get stuck waiting for it to cycle back around.
Final Victory Check
As the final blue sand pours, watch the "Level Complete" percentage counter.
- Once it hits 100%, the remaining sand on the belt is irrelevant.
- The "Pink Sheep" will be fully realized on the canvas.
- Congratulations! You have solved the logic puzzle of Sand Loop Level 403.