
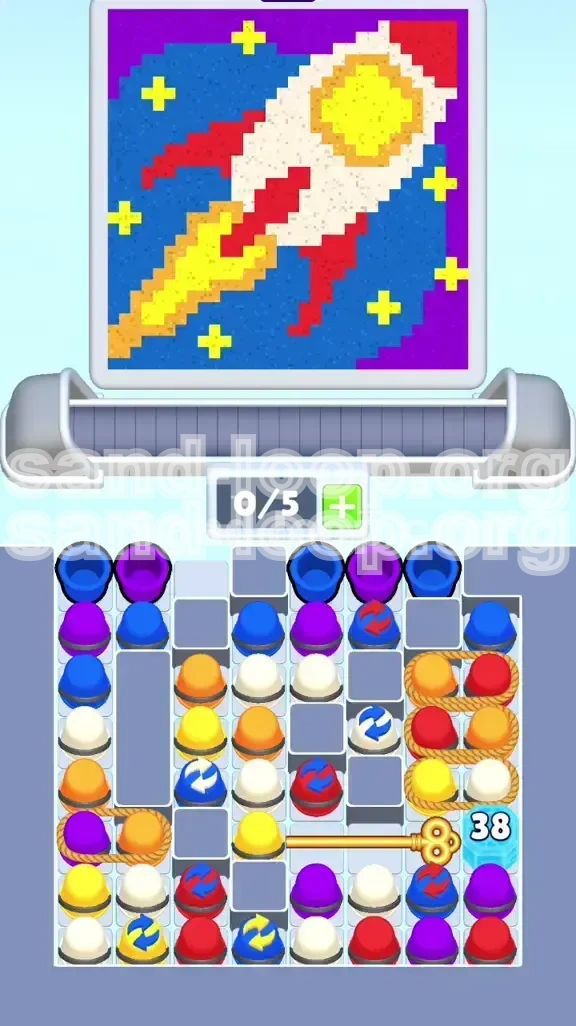
Level 410
HARDHow to solve Sand Loop level 410? Get instant solution for Sand Loop 410 with our step by step solution & video walkthrough. Sand Loop 410 tips and guide.
Play Sand Loop Now
Experience the puzzle challenge firsthand
Game Screenshots
Sand Loop Level Guides
Complete Walkthrough Guide: Sand Loop Level 410 (Pixel Art Rocket)
Level Overview: The "Clog-Risk" Logic Puzzle
Sand Loop Level 410 is not a test of speed; it is a rigorous test of resource management and spatial reasoning. You are tasked with assembling a retro pixel art rocket ship blasting off into a starry night sky. While the visual appeal is high, the gameplay mechanics are designed to trap you in a deadlock if you act impulsively. The level is characterized by a "Dependency Chain," where the colors you need most urgently are often trapped behind physical obstacles like Ice Blocks and Ropes.
Key Challenge: The Ice Block Gatekeeper
The primary bottleneck of this stage is the Ice Block located in the bottom-right corner, which sits directly in front of the Golden Key. This block has a durability counter of 38. Every time you successfully launch a cup from the tray to the conveyor belt, this counter decreases by one. The challenge here is that you cannot simply spam taps to break the ice; you must ensure that every single one of those first 38 cups contributes to filling the rocket, otherwise, your conveyor belt will clog with unusable colors before the key is even revealed.
The 5-Slot Conveyor Belt Limit
Unlike standard levels where you might have room for error, Level 410 operates on a razor-thin margin with a 5-slot limit on your processing belt. Because the background (Blue) requires such a high volume of sand, it is very easy to fill your belt with Blue cups while waiting for specific colors (like Red or Yellow) to become available. If your belt hits 5/5 capacity and the next available dispenser isn't active, the game stalls out immediately.
The Rope Mechanic
On the right side of the tray, you will notice a 2x2 cluster of cups tied together by a thick rope. This creates a vertical dependency stack. You cannot access the cups at the bottom of this stack until you have removed the cups on top. This often means that a crucial color (like Red for the nose cone) is physically inaccessible until you clear the Orange or Yellow cups sitting above it, forcing you to plan your moves in reverse order.
Switching Dynamics
Several cups in this level feature circular arrows, indicating they are "Switch Cups." These oscillate between two colors (e.g., Red/Blue or Yellow/Blue) every few seconds. Using these requires precise timing. If you tap a Switch Cup too early, you might send a Blue cup to a dispenser that is expecting Yellow, contaminating your star pixels and wasting a valuable resource.
Victory Conditions
To achieve 100% completion and three stars, you must complete the pixel art without wasting more than 2-3 cups. The "Par" for this level is effectively zero waste because the volume of sand required for the background exactly matches the number of cups provided once the Golden Key is unlocked. Efficiency is not just a bonus here; it is a requirement for survival.
Primary Objectives and Strategy
Objective 1: The "Top-Down" Fill Priority
Most players instinctively start filling the background first, but in Level 410, this is a fatal error. Your primary objective in the first phase is to fill the rocket ship's fuselage (White) and the engine trail (Orange/Yellow). The reason is logistical: the background colors (Blue and Purple) are trapped behind the Ice Block. By focusing on the rocket first, you utilize the cups that are currently accessible while simultaneously working to break the ice that hides the background colors.
Objective 2: Breaking the Ice Block Efficiently
You need to generate 38 valid moves to shatter the Ice Block. This means that for the first 30-40 seconds of the level, your focus should be entirely on the top half of the screen. Do not worry about the empty blue sky yet. Every tap you make should bring a White, Orange, or Red cup closer to the belt. Treat the counter as a timer; you have 38 moves to stabilize the board before the real floodgates open.
Objective 3: Managing the "Dependency Chain"
You must identify which colors are locked behind ropes and plan your moves to free them. For example, if the Red cup for the nose cone is at the bottom of a rope stack, you must actively clear the top cups first, even if you don't immediately need those top colors. You might have to temporarily use a color you don't need just to unlock the color you do need.
Objective 4: Timing the Switch Cups
You must master the timing of the Switch Cups, particularly those that toggle between Yellow and Blue. Since Yellow is a scarce resource used for small, detailed stars, you cannot afford to accidentally turn a Yellow slot into a Blue one. You must wait for the cup to display the correct color, tap it immediately, and ensure there is an open slot on the belt to receive it.
Objective 5: Background Flood Control
Once the Ice Block shatters and the Golden Key slides away, you will be flooded with Blue and Purple cups. The objective here is not just to fill the background, but to do so without causing a belt jam. This requires you to leave 1-2 slots open at all times to cycle the new cups entering from the tray.
Color Processing and Order Guide
Phase 1 Priority: White (Fuselage)
Usage: 45% of total volume.
Strategy: White is the backbone of the rocket ship. It has the largest surface area to fill. Fortunately, White cups are usually abundant in the early stages. You should prioritize sending White cups to the belt immediately. Do not wait for the perfect alignment; if you see a White cup, tap it. The rocket body acts as a giant sink for this color, so keeping the flow steady is essential.
Phase 1 Priority: Orange (Fire Trail)
Usage: 15% of total volume.
Strategy: Orange is used for the outer engine flames. While it doesn't require as much sand as White, it is often located in tricky spots, sometimes under the ropes. Make sure to clear any Orange cups sitting on top of the rope stacks early, as you will need them to finish the engine before you move on to the background.
Phase 2 Priority: Red (Nose Cone and Fins)
Usage: 10% of total volume.
Strategy: Red is a high-risk color. It is used for the nose cone and the stabilizer fins, which are thin and detailed areas. Over-pouring Red is a common mistake that leads to deadlocks. You should only send Red cups to the belt when you have a clear path to the dispenser. Avoid letting Red cups sit on the belt for long periods, as they take up space that could be used for higher-volume colors.
Phase 2 Priority: Yellow (Stars and Inner Flame)
Usage: 5% of total volume.
Strategy: Yellow is the most scarce color in the level, used for tiny stars and the engine core. Because the targets are so small, the margin for error is minimal. If a Switch Cup turns Yellow, treat it as an emergency priority. Get it to the belt immediately before it switches back to Blue. Do not queue Yellow cups behind other colors, or you risk missing the window to pour them.
Phase 3 Priority: Blue (The Sky)
Usage: 20% of total volume.
Strategy: Blue is the "endgame" color. It dominates the background, but you should largely ignore it until the Golden Key is revealed. Once the key moves, Blue cups will flood the tray. This is the "cleanup phase." You can spam Blue cups more aggressively here because the rocket is already stable.
Phase 3 Priority: Purple (The Ground/Deep Space)
Usage: 5% of total volume.
Strategy: Purple is the final color you will process. It sits at the very bottom of the tray, locked behind the key. Wait until the sky is 80% filled before you start tapping Purple cups. If you tap them too early, they will clog your belt, taking up space needed for the Blue sky cups.
Detailed Step-by-Step Walkthrough
Step 1: The Initial Assessment (0-10 Moves)
As the level loads, do not tap anything immediately. Scan the board. Identify where the Ice Block is (bottom right) and look at the Rope cluster (right side). Locate the White cups. Your immediate goal is to find a path to get White cups onto the belt without touching the locked areas. Ignore the background for now. Tap any White or Orange cups that are freely accessible on the top or left edges.
Step 2: Managing the Rope Cluster (10-20 Moves)
You will likely encounter the Rope cluster around this time. Analyze the stack. If a Red cup is at the bottom, but you need Red for the nose cone, you must clear the top cups first. Check the top of the rope stack. Is it Orange or Yellow? If so, check your dispensers. If the fire trail dispenser is open, tap the top cup to free the stack. Send that top cup to the belt to clear the space. This "unlocks" the cup underneath it.
Step 3: The Switch Cup Timing (20-30 Moves)
About halfway through the Ice Block's life, you will see Switch Cups toggling. Watch them carefully. Do not tap them when they are Blue unless you absolutely need to fill a gap in the belt. Wait for them to turn Yellow or Red. As soon as the color flips, tap it. The moment it hits the belt, check the dispenser. If the dispenser is active, the sand will flow automatically. If the dispenser is busy, you have a few seconds of buffer time, but don't let it sit there too long.
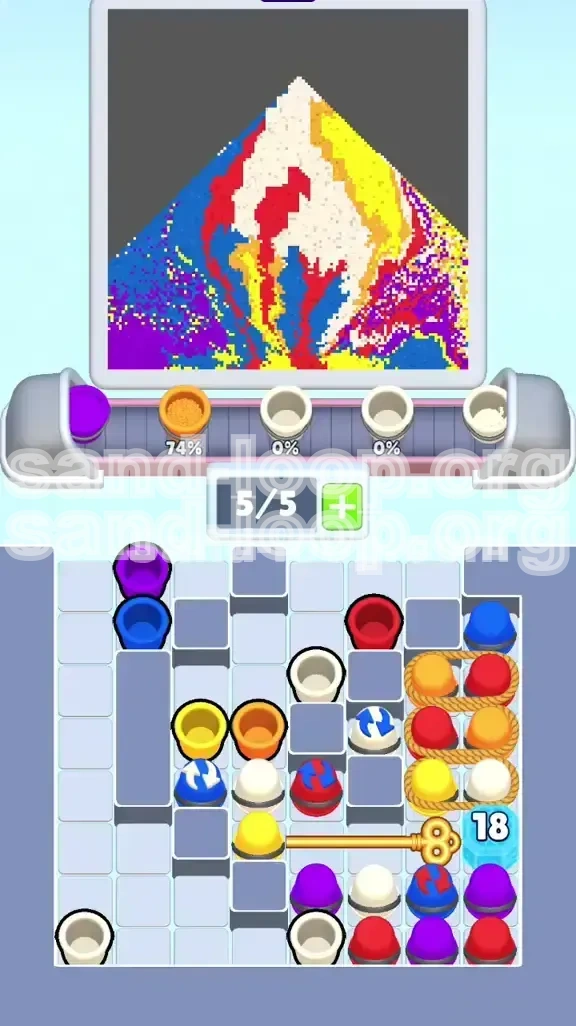
Step 4: Approaching the "Pivot Point" (30-38 Moves)
The Ice Block counter is getting low (10-15 remaining). This is the most dangerous moment. You might be tempted to clear the belt to prepare for the Blue flood. Don't. Instead, fill the belt with the remaining specialty colors (Red/Yellow). You want the belt to be processing these colors the moment the ice breaks. Ensure the rocket fuselage is at least 90% complete before the counter hits zero.
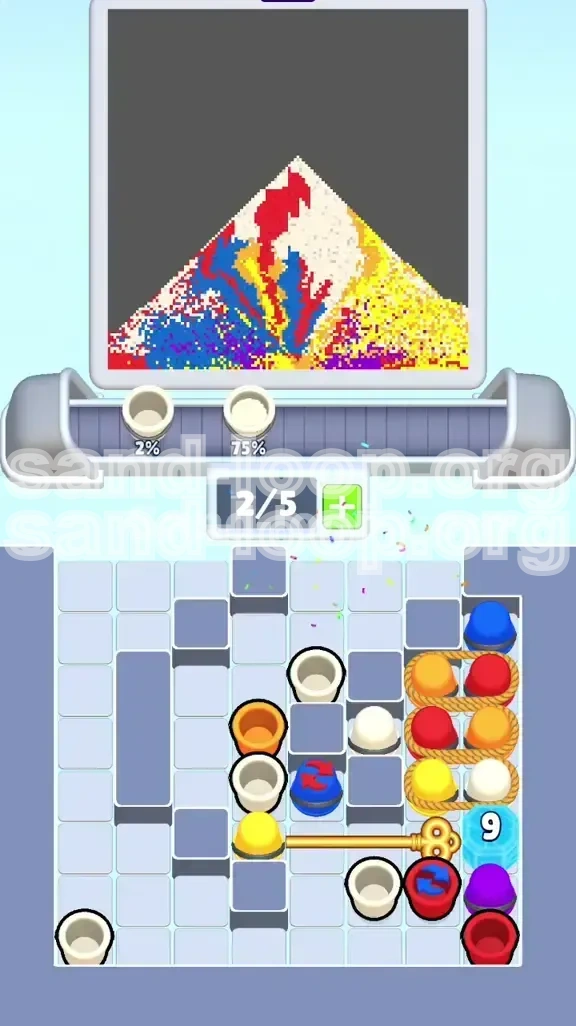
Step 5: The Key Release and Belt Flush
When the counter hits 0, the Ice Block shatters, and the Golden Key slides away. A new row of cups (mostly Blue and Purple) will become visible. Pause for a second. Look at your belt. Is it full of White/Orange? Good. Let them pour. As those cups clear, space will open up. Immediately start filling those open slots with the newly available Blue cups. Do not tap Purple yet.
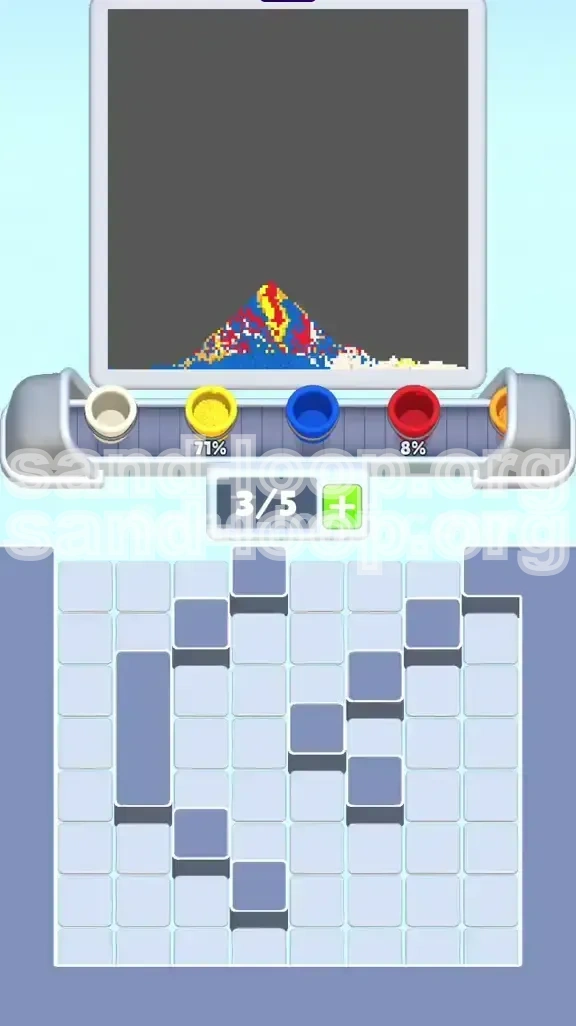
Step 6: The Blue Sky Fill-In
Now you are in the rhythm game phase. Tap Blue cups consistently. The belt should be moving constantly. Since the rocket is already filled, the dispensers for the rocket parts might close, but the Sky dispenser will be wide open. You can tap Blue cups rapidly here. Keep an eye on the Yellow Star slots—if you see a Yellow cup appear, grab it, but otherwise, focus on converting the Blue background from empty to filled.
Step 7: The Final Stretch (Purple)
Once the Blue sky is filled, you will be left with a few empty slots at the bottom. Now you can tap the Purple cups. By this stage, the belt should be relatively empty, and the Purple dispenser should be the only one active. Tap the remaining Purple cups, watch the final pixels fill, and complete the level.
Pro Tips and Common Mistakes
Common Mistake: Premature Background Filling
The #1 reason players fail Level 410 is filling the background too early. If you start tapping Blue cups before the rocket is built, you will clog your belt. The Blue cups will sit on the belt waiting for the Sky dispenser, but you'll be holding Red and White cups in the tray, unable to move them. This creates a deadlock where no new cups can enter the tray because the belt is full of useless Blue sand.
Common Mistake: Ignoring the Rope Stack
Players often see a color they need (like Red) at the bottom of the rope stack and panic, tapping uselessly at it. You cannot interact with the bottom cups. You must clear the top first. If the top cup is a color you don't need (e.g., an extra Orange), you might have to "waste" a move by sending that Orange cup to the belt just to unblock the Red cup you actually need.
Pro Tip: The "One-Slot Reserve" Rule
Throughout the entire level, try to keep at least one slot on your conveyor belt empty. Ideally, keep 2 slots empty until the Ice Block breaks. This buffer allows you to react to Switch Cups changing colors or to quickly move a Rope cup without having to wait for a dispenser to finish pouring. An empty slot is your "emergency brake" for preventing clogs.
Pro Tip: Predicting Dispenser Timings
Watch the dispensers at the top of the screen. They have a set cycle. If you know the Red dispenser is about to close in 3 seconds, don't send a Red cup from the other side of the board. Instead, focus on White or Orange, which might have longer active windows. Syncing your taps with the dispenser cycles saves precious seconds and prevents belt jams.
Pro Tip: Using the Golden Key as a Timer
Don't just watch the Ice Block counter; watch the Key. When the counter hits 10, the game state changes. This is your signal to stop being careful with specialty colors and start "dumping" any remaining non-Blue cups to clear the tray. You need the tray to be clean when the key slides away so you can access the bottom row without obstruction.
Pro Tip: Switch Cup Baiting
If a Switch Cup is toggling between Blue and Yellow, but you really need that Yellow for a star, don't tap it the moment it turns Yellow if your belt is full. Wait for an opening. However, if the belt is full and the cup is about to turn back to Blue, you have a split-second decision: tap it and hope a slot opens, or skip it and hope it cycles back to Yellow later. In Level 410, the risk of skipping is usually higher because Yellow is so rare. Tap it, but be ready to manage the consequences.
Speed Run and Optimization Strategies
Speed Run Tip: The "Pre-Load" Method
Advanced players can shave seconds off their time by "pre-loading" the belt. As soon as the level starts, tap 3 White cups in rapid succession to fill the belt slots. While the first one is pouring, you are already moving the second and third. This constant momentum prevents the Ice Block counter from stalling. The goal is to break the ice in under 45 seconds.
Speed Run Tip: Bundle Tapping
Look for "bundles" of the same color. If there are three White cups stacked vertically on the left side, tap them all in a row (Top, then Middle, then Bottom) as fast as you can. This floods the belt with a single color, allowing you to focus on that one dispenser and clear the board faster than if you were alternating between White, Orange, and Red.
Optimization Strategy: Minimizing Belt Travel
The conveyor belt moves from left to right. Cups on the left reach the dispenser first. Therefore, you should prioritize tapping cups that are on the left side of the tray over cups on the right side. This minimizes the travel time for the sand to reach the dispenser, effectively speeding up the entire loop. This is crucial when dealing with the slow-pouring White or Blue colors.
Optimization Strategy: The "Trash" Tap
Sometimes, speed running requires you to make a "trash" tap. If a Blue cup is blocking a stack of three Red cups you need, and you have an open slot on the belt, tap the Blue cup immediately. Send it to the belt even if you don't need Blue sand yet. This "trashes" the obstacle, freeing the valuable Red cups behind it. This is faster than waiting for the Blue cup to move naturally.
Speed Run Tip: Ignoring Small Stars
If you are strictly going for time completion and not 100% pixel perfection, you can skip filling the smallest Yellow stars in the sky. These take a disproportionate amount of time to fill compared to the background. Focusing only on the main rocket body and the bulk of the sky allows you to finish the level faster, even if the final image is missing a few pixels. However, for three stars, you must fill them.