
Level 417
EXPERTHow to solve Sand Loop level 417? Get instant solution for Sand Loop 417 with our step by step solution & video walkthrough. Sand Loop 417 tips and guide.
Play Sand Loop Now
Experience the puzzle challenge firsthand
Game Screenshots

Sand Loop Level Guides
Sand Loop Level 417: The Pineapple House Master Guide
Welcome to the ultimate walkthrough for Sand Loop Level 417, infamously known as the "Pineapple House" challenge. This stage is a significant difficulty spike, testing not just your reflexes, but your ability to manage conveyor belt logistics and calculate color physics. The objective is to reconstruct a vibrant pixel-art scene featuring a pineapple house under the sea, but the game's restrictive mechanics will fight you at every turn. You are dealing with a strict five-slot conveyor belt and a physics engine that treats sand unpredictably. To succeed, you need to stop treating this like a casual puzzle game and start treating it like a logistical simulation. This guide will dissect every move, color layer, and bottleneck you will face.
Core Mechanics of the Pineapple Stage
Unlike previous levels where you could tap freely, Level 417 introduces a "Slot Economy" system. Your conveyor belt has a maximum capacity of five units. If you fill these slots with the wrong colors, you cannot pick up the cups required to clear obstacles. Furthermore, the "pouring" mechanic has a delay. When you tap a cup, it doesn't instantly vanish; it travels to a pour point, releases its sand, and only then does the slot free up. You must account for this travel time.
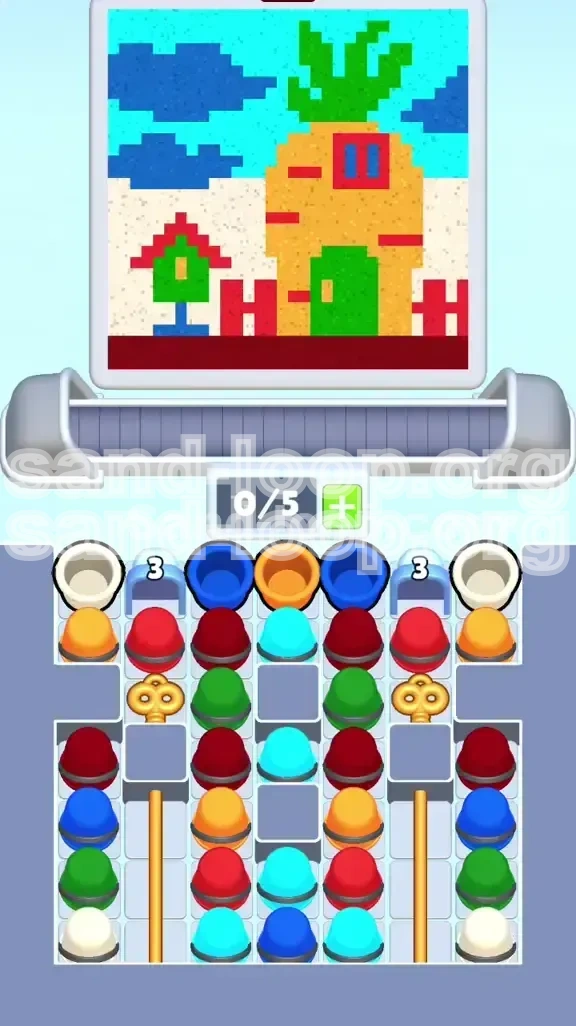
Understanding the Canvas Layout
The target image is divided into distinct horizontal zones. The bottom 15% is a dark red foundation and ground. The middle 50% is the bulky yellow and orange pineapple structure. The upper 35% is a mix of cyan sky and green leaves. The background is white. The challenge lies in the fact that the "background" colors (White and Cyan) are the most abundant, yet they must be poured last to avoid contaminating the smaller foreground details.
The "Lead Time" Concept
This level requires you to think three steps ahead. You are not reacting to the current board state; you are planning for the state that will exist three seconds from now. If you wait until a slot is empty to tap the next cup, you are losing precious seconds. You must tap your next cup while the previous one is still travelling. This rhythm is crucial for maintaining the flow required to beat the clock and the slot limit.
Decoding the Color Dependencies
Not all colors are available immediately. The board is locked by "Numbered Gates" and "Golden Keys." You cannot access the White or Cyan cups until you clear the Red and Blue cups blocking the keys. This creates a strict dependency tree: Red/Blue -> Keys -> Unlocks -> White/Cyan. Attempting to bypass this order will result in a deadlock where your belt is full of unusable cups.
Phase 1: The Gatekeeper Strategy (Opening Moves)
The beginning of the level is a race against your own conveyor belt. The board is caged by two Numbered Gates located in columns two and six. These gates require three hits of a specific color to break. You cannot touch the sides of the board yet. Your entire focus must be on the center columns.
Identifying the Targets
Ignore Columns 1 and 7 entirely. The White and Orange cups on the edges are "trap items." They take up valuable slots without contributing to opening the board. Zoom your vision into Columns 2, 3, 4, 5, and 6. You will see Blue Gates and Red Gates blocking the lower tiers. These are your only objectives for the first 10% of the game.
Executing the Blue Gate Sequence
The Blue Gate, stamped with a "3", is your first bottleneck. You need to collect three Blue Cups. Scan the center cluster. Usually, two Blue Cups are visible in the top rows of Columns 3 and 5. Tap these first. As the board settles, a third Blue Cup will often become trapped or need to be dug out of Column 4. Do not load any other color. If you tap a Green cup now, you have wasted a slot that a Blue cup needs. Be ruthless with color selection.
Cracking the Red Gate
Immediately after the Blue Gate shatters, shift your focus to the Red Gate. It also requires three hits. The Red Cups are often interspersed with Orange cups, which look very similar. Pause and verify the color before tapping. A common mistake here is accidentally tapping an Orange cup, filling your belt with trash while the Red Gate remains active. Clearing this gate exposes the Golden Keys, which are the key to the rest of the level.
Managing Slot Economy During Gates
During this phase, keep your conveyor belt at 3/5 or 4/5 capacity whenever possible. Do not let it hit 5/5 until you are ready to pour. If the belt is full, you are unable to pick up the specific cup you need to break the gate. Keep the rhythm: Tap Blue -> Wait for Pour -> Tap Red -> Wait for Pour. Never let the belt sit idle, but never overfill it.
Phase 2: Unlocking the Board with Golden Keys
Once the Numbered Gates are down, you will see Golden Keys buried in the middle columns. However, they are often blocked by single, annoying cups sitting right on top of them. This phase tests your precision.
The Key Release Mechanism
Locate the Golden Key in Column 2 and Column 6. In most instances, a single Red or Green cup is blocking the key. You must clear this specific cup. Do not perform large combo clears here. A large combo might shift the board unexpectedly and bury the key deeper, making it impossible to reach without wasting moves. Single-tap the blocker, then immediately tap the Key.
Handling the "Column Drop"
When a Golden Key is activated, it triggers a mechanism that drops the vertical yellow bars (or blockers) holding up the upper half of the board. This causes a "Column Drop." Every cup in the top rows will slide down to fill the empty space. This is the most dangerous moment in the level. New types of cups—specifically the White and Cyan ones—will slide into play from the top.
Preparing for the Flood
Before you tap that Golden Key, ensure your conveyor belt is relatively empty (ideally 2/5 full). The moment the column drops, a flood of new cups will enter the playable zone. If your belt is full, you won't be able to pick up the critical White cups that slide down, leading to a bottleneck that is very hard to recover from.
Clearing the Post-Drop Debris
After the column drops, you will likely have a messy mix of Green, Dark Blue, and Red cups scattered near the bottom. Quickly clear these low-value colors to stabilize the board. Don't worry about the Yellow or Orange yet; focus on getting the board flat and organized so you can set up your main structure.
Phase 3: The Foundation and Structure Build
Now that the board is unlocked and the debris has settled, you begin the actual painting of the Pineapple House. This phase requires a specific color order to ensure the sand layers correctly.
Laying the Red Foundation
Start with the Dark Red cups. This color forms the ground floor, the door frame, and the window sills. It is the base of the image. Pouring Red first creates a "floor" for the rest of the sand to land on. If you pour Yellow first, it will spread across the bottom, mixing with the Red areas and creating a dirty, muddy orange brown that fails the level check. Pour 100% of your Red cups now.
Building the Yellow Core
With the Red base established, move to the Yellow cups. This forms the main body of the pineapple. Because the Red base is already there, the Yellow sand will stack up neatly, creating the distinct oval shape of the house. If you have Orange cups, mix them in with the Yellow now to create texture, but prioritize pure Yellow for the bulk of the walls.
Adding the Green Accents
The Green sand is used for the spiky leaves on top of the pineapple and the small birdhouse to the side. These are thin, detailed lines. You must pour Green before the background colors (White/Cyan). If you leave Green for the end, the thick sand of the background will bury the fine details of the leaves. Pour Green while the Yellow body is still fresh to ensure the leaves sit "on top" of the house visually.
The Danger of Dark Blue Clouds
You will notice Dark Blue cups remaining. These are for the small clouds in the sky. Do not pour them yet. They are small, isolated pixels. Pour them now, and the subsequent massive wave of Cyan sky will wash over them, blurring the clouds into a smear. Save Dark Blue for the very final touch-ups.
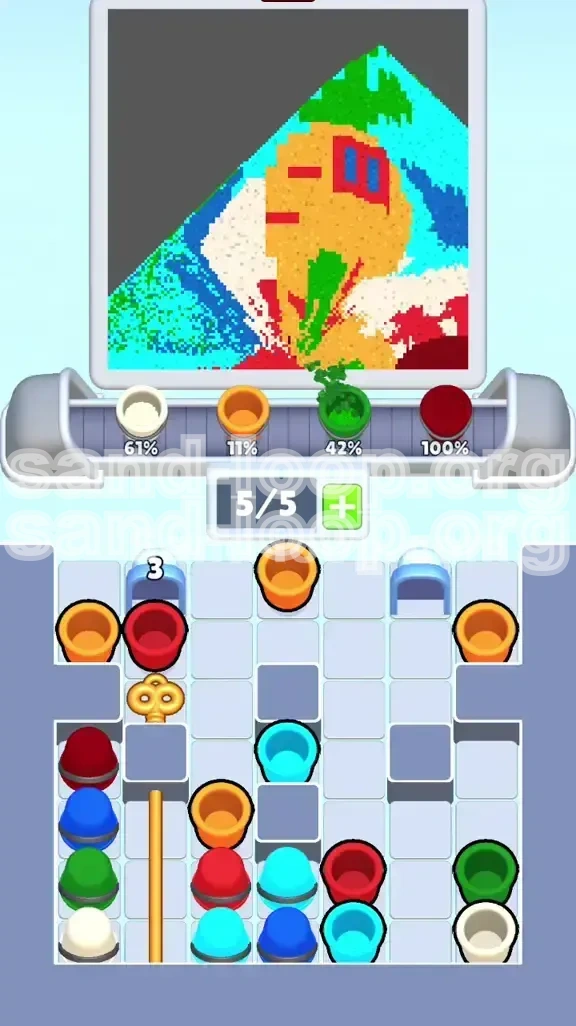
Phase 4: The Background Flood (Endgame)
The structure is built, the leaves are on, and you are left with a conveyor belt full of White and Cyan cups. This is the "Cleanup Phase." It seems easy, but this is where most players get "Unlucky Clear" screens because of mixing.
The White Sand Horizon
Tap all your White cups first. The white sand forms the sandy horizon behind the pineapple. Since the pineapple (Red/Yellow/Green) is already poured and solidified in the game's logic, the White sand should fill in the gaps around the base. Watch the fill percentage bar. You want to get the "White" percentage to near 100% before switching colors. Do not mix Cyan and White on the belt; process one color at a time.
Flooding the Cyan Sky
Once the white is done, flood the belt with Cyan. This is the "top coat." It will fill the upper atmosphere. Because you saved the Dark Blue clouds for last (or rather, you saved the *pouring* of them for last, even if you picked them up earlier), the Cyan will surround them, making the clouds pop. Pouring Cyan last ensures that any stray grains of sand don't ruin the sky line.
Finalizing the Cloud Details
If you held onto your Dark Blue cups, now is the time. Tap them to place the final pixels in the sky. This locks the image in place.
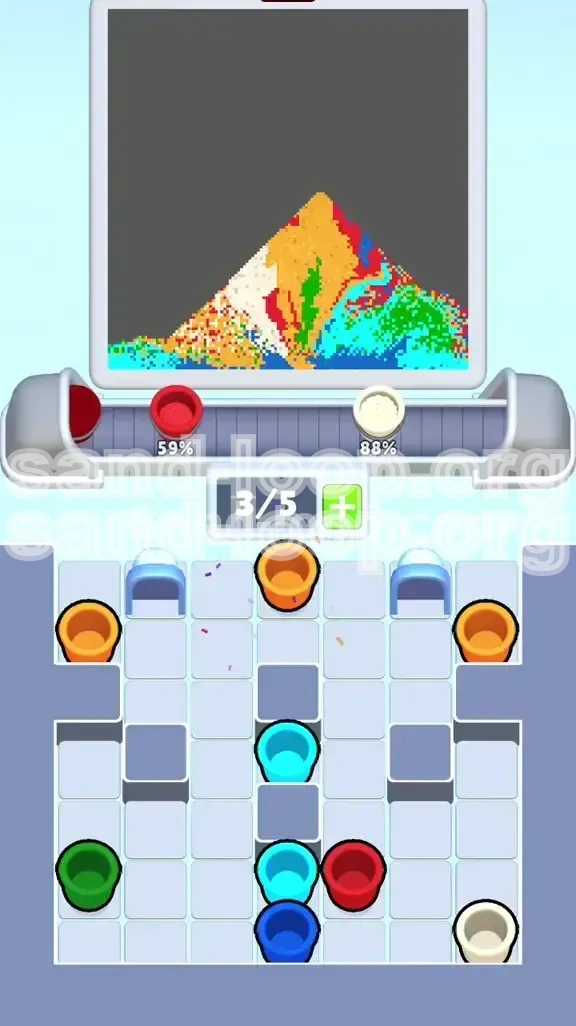
Final Slot Management
In the last 10 seconds, you might have 2-3 slots open and cups tumbling down. Don't stop tapping. Even if the board looks 95% complete, keep the rhythm. The "Game Over" or "Level Complete" check only happens after the physics settle. Keep the belt moving until the victory screen triggers.
Master Tips and Common Pitfalls
To truly master Level 417 and achieve a high score or fast time, you need to understand the hidden mechanics and avoid the traps that ruin runs.
The "0/5" to "5/5" Rhythm
Try to oscillate your belt count between 0 and 5 rapidly. It is better to have the belt empty (0/5) and fill it up quickly than to sit at 4/5 for a long time. An empty belt means you are ready for any opportunity. A full belt means you are reacting to the game, rather than dictating the flow.
Avoiding the "Outer Column" Trap
Throughout the entire guide, we focused on the center. The outer columns (1 and 7) are almost always distractions until the very end. If you find yourself tapping on the edges in the first minute, you are likely off-strategy. Force your eyes to the center. The edges are for cleanup when the center is empty.
Dealing with "Mixed" Sand
If you accidentally pour Cyan too early and it mixes with your Yellow pineapple, don't panic. You can't "un-pour" it. Instead, focus on pouring the *correct* color on top. The game calculates the dominant color in a grid area. Pouring more Yellow on top of a messy Cyan/Yellow mix can sometimes fix the pixel color if the Yellow layer is thick enough.
Speed Run Optimization
For speed runners, the key is pre-loading. While the Red Gate is breaking (animation playing), you should already be tapping the Green cups needed for the leaves. Do not wait for the screen to stop shaking. The game registers taps during animations. Queue up your next move while the current one is resolving. This "queue buffering" shaves seconds off your time.
Recovering from a Deadlock
A deadlock happens when your belt is full of 5 cups that you don't need (e.g., all White, but you need Red to break a gate). There is only one solution: You must pour the useless cups onto an irrelevant part of the board to free up slots. Yes, this messes up the 100% completion slightly, but it frees your slots to get the Red cup you actually need. You can fix the messy pour later. A blocked belt is a game over; a messy board is recoverable.