
Level 419
HARDHow to solve Sand Loop level 419? Get instant solution for Sand Loop 419 with our step by step solution & video walkthrough. Sand Loop 419 tips and guide.
Play Sand Loop Now
Experience the puzzle challenge firsthand
Game Screenshots
Sand Loop Level Guides
Level Overview: The Tropical Monkey Challenge
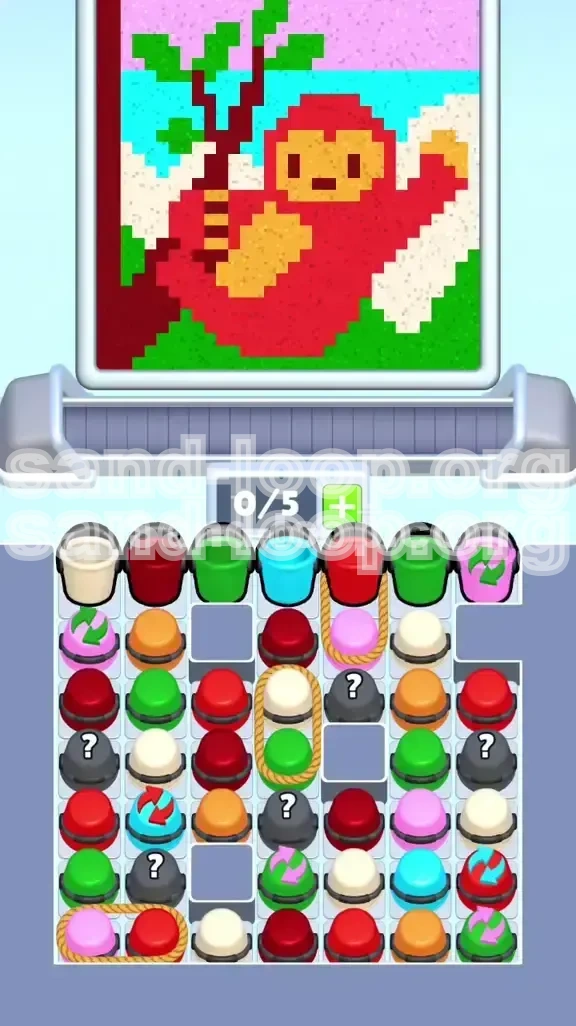
Welcome to the guide for Level 419, often referred to by players as the "Tropical Monkey" stage. This level is a deceptive puzzle that combines a vibrant, pixel-art aesthetic with a grueling logic test on inventory management. Visually, the goal is to assemble a scene featuring a Red Monkey or Gorilla clinging to a branch, set against a beach backdrop with water and sky.
The Core Gameplay Loop
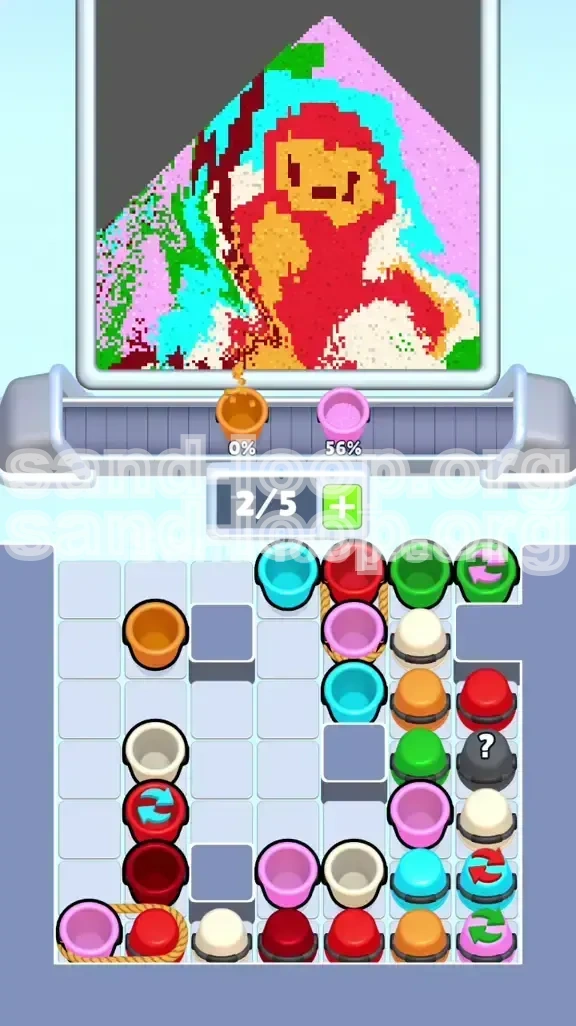
Unlike standard levels where you might rely on quick reflexes, Level 419 is strictly a strategic management challenge. The primary constraint is your conveyor belt capacity. You are limited to only 5 active slots at any given time. If these slots are occupied by colors you cannot immediately use, your progress halts completely. The "Sand Loop" mechanics here are designed to punish impulsive tapping. Every bucket you pull must have a designated destination on the canvas, or else you risk clogging your workflow.
The Visual Complexity
The target image is composed of 7 distinct color zones. The Red Monkey dominates the center, acting as the primary obstruction. The background features horizontal bands of Cyan water and Sandy Beige shores, topped with a layered Pink and White sky. The tree branch on the side introduces thin, difficult-to-fill lines using Brown and Green pixels. This visual density means that pixel-perfect accuracy is required during the pour, as spilling Green sand into the Red body is a common failure point.
The Supply Tray Grid
The bottom tray is not a random pile; it is a structured grid of dependencies. The colors you need most urgently (Red and Beige) are often buried under layers of less critical colors like Pink or White. You cannot simply "dig" to the bottom without processing the top layers first. Understanding the vertical dependencies of the grid is the first step toward formulating a winning strategy.
Difficulty Spike Indicators
This level is considered a difficulty spike for several reasons. First, the introduction of "Roped Pairs" forces you to consume two inventory slots for a single tap action. Second, the "Recycling" buckets introduce a timing variable that can disrupt your rhythm. Finally, the "Mystery" buckets add an element of chance that can devastate a poorly managed belt. Players should expect multiple attempts to master the sequence.
Clear Objectives: Breaking Down the Canvas
To beat Level 419, you cannot simply fill colors at random. You must approach the painting in a specific order to unlock new inventory slots and prevent deadlock. Your primary goal is to minimize the number of "useless" buckets sitting on your conveyor belt.
Phase 1: The Primary Monolith (Red Body)
Your first and most critical objective is to complete the Deep Red body of the monkey. This consumes the largest volume of sand and occupies the majority of the top-layer buckets in your tray. By aggressively filling the red pixels first, you clear the massive stack of red buckets from your supply grid, revealing the essential colors hidden beneath them, such as the Brown for the branch and the Cyan for the water.
Phase 2: The Secondary Layer (Beige Face & Belly)
Once the Red body is established, immediately shift focus to the Sandy Beige areas. This includes the monkey's face, belly, hands, and feet. The Beige buckets are usually located in the middle rows of the tray. Filling these sections serves a dual purpose: it completes the main character sprite and clears the path to the background colors. Do not leave the Beige sections for the end, or you will find yourself stuck with a full belt of background colors with no way to finish the character.
Phase 3: The Environmental Hazards (Branch & Leaves)
The Brown branch and Green leaves present the highest risk of "spillage" errors. Your objective here is precision. You must isolate these colors on your conveyor belt so you can focus entirely on the pour timing. Filling the branch requires narrow, controlled pours. If you attempt to do this while your belt is cluttered with other colors, you will likely rush and make a mistake, ruining your clear percentage.
Phase 4: The Background Wash (Water & Sky)
The final phase involves filling the large, open areas of the Cyan water and the Pink/White sky. These areas are more forgiving of minor spills but require volume. By this stage, your supply tray should be mostly cleared of character-specific colors, allowing you to pull multiple background buckets in a row without worrying about running out of inventory space.
Step-by-Step Instructions: The Execution Strategy
Follow this exact sequence of actions to navigate the supply tray efficiently. This guide assumes you are starting with a fresh board.
Step 1: The Initial Clear
Start by scanning the top row of your supply tray. You will likely see a mix of Red and Beige buckets. Tap the Red buckets first. Do not tap any Roped pairs yet. You want to load 2 or 3 Red buckets onto your 5-slot belt. Pour them carefully into the monkey's torso. Your goal is to create a "hole" in the supply grid. By removing the top layer of Red buckets, you allow the buckets underneath to slide up, becoming accessible for the next phase.
Step 2: Managing the First Roped Pair
As you clear the top rows, you will encounter a White/Green roped pair in the center. This is a major bottleneck. Before you tap this rope, ensure your belt has at least 3 empty slots. Since the rope pulls two buckets at once, tapping it with a full belt will instantly clog your workflow. Pull the pair, but prioritize the Green bucket if the leaves are visible, or set it aside if you are still working on the Red body. Ideally, pull this pair only when you have the space to store the Green bucket while you finish the Red.
Step 3: The Mystery Bucket Reveal
On the left and right flanks of the tray, you will see Mystery Buckets (marked with a "?"). These usually hide the Cyan water or Brown branch colors. You cannot reach them until the buckets above them are moved. Continue to process the Red and Beige colors in the center. As the grid shifts, the Mystery buckets will rise to the top. Once revealed, immediately assess if you need that color. If it's Cyan and you are still on the Monkey's face, do not pull it yet. Let it sit in the tray rather than wasting a belt slot.
Step 4: Timing the Recycling Buckets
Eventually, you will uncover the Recycling Buckets, which cycle between Green and Pink. This is a timing check. If you tap the bucket while it shows Green but the leaves are already full, you have wasted a pull. Watch the animation. Wait for the icon to switch to the color you actually need. Only tap it when the color matches the section of the canvas you are currently working on. This prevents "dead" inventory from occupying your limited slots.
Step 5: The Branch Precision
With the monkey mostly complete, clear your belt entirely. Do not have any active pours happening. Now, pull the Brown buckets. Pour them carefully into the branch. Because the branch is a thin line, you need to be precise. If you have other buckets on the belt, the urge to rush the pour will lead to spilling Brown sand onto the monkey's Red fur. Clear the belt, focus, and pour.
Color Order: Prioritizing Your Palette
Success in Level 419 is dictated by the order in which you process the color spectrum. Processing colors in the wrong order is the number one cause of failure.
Priority 1: Deep Red (The Body)
The Red buckets are the most numerous item in your inventory. They form the foundation of the level. If you do not clear these first, they will pile up on your conveyor belt, leaving no room for the other colors. You must achieve at least 80% completion on the Red body before moving to other colors. This clears the massive stack in the tray and opens up the rest of the grid.
Priority 2: Sandy Beige (The Face & Beach)
Beige is your secondary color. It is often hidden underneath the Red stacks or within the Mystery buckets. Once the Red is thinned out, aggressively hunt for the Beige. Filling the monkey's face and the beach front serves as a bridge. It uses up the mid-tier inventory slots and prepares the canvas for the finer details.
Priority 3: Vibrant Green (The Leaves)
Green is a dangerous color because of its proximity to the Red body. It is often roped to White or hidden in Recycling buckets. Treat Green as a "precision color." Only pull Green buckets when you have the mental bandwidth to focus strictly on the leaves. Do not mix Green pours with Red pours.
Priority 4: Brown (The Branch)
Brown is the "bottleneck" color. It is rare and usually buried deep at the bottom of the tray. You often have to clear almost the entire top half of the grid to reach the Brown buckets. Because it is rare, you cannot afford to waste a single drop of Brown sand. Ensure your aim is true before you pour.
Priority 5: Cyan, Pink, and White (Background)
These are your "cleanup" colors. The Cyan water and Pink/White sky are large, contiguous areas. They are very forgiving and allow for "Continuous Pour" mechanics once the foreground is complete. Leave these for the end. If you try to paint the sky while the monkey is still incomplete, you will run out of belt space for the essential Red and Beige buckets.
Key Tips and Common Mistakes
To achieve a high score and clear the level without frustration, keep these strategic insights in mind.
The "One Empty Slot" Rule
This is the golden rule for Level 419. Never fill all 5 slots on your conveyor belt unless you are 100% sure of your next three moves. Always try to keep at least 1 slot empty. This buffer allows you to tap a Mystery bucket or a Roped pair without causing a game-ending deadlock. If you have 5 full slots and you tap a Roped pair, the game cannot load the buckets, effectively freezing your progress.
Identifying the Danger Zones
The "Danger Zones" are the areas where two colors touch tightly, specifically where the Green leaves overlap the Red monkey body or where the Brown branch meets the sky. When filling these areas, turn off any "Auto Pour" or "Continuous Pour" features. Rely on manual tapping to ensure you don't overshoot and paint the wrong pixel. A single pixel of the wrong color in these tight zones can reduce your completion percentage below the winning threshold.
Common Mistake: Early Background Filling
A very common mistake is filling the Blue water or Pink sky early because the buckets for them are available in the tray. Do not do this. The background colors act as "filler." If you fill the background first, you will have a beautiful picture of a beach with an invisible monkey. When the Red buckets finally arrive, you will have nowhere to put them because your belt is full of background colors you didn't need yet.
Common Mistake: Ignoring Rope Clusters
Players often tap a roped bucket without realizing it's connected to a Recycling bucket. Suddenly, they have two shifting buckets on the belt that they didn't plan for. Always visually trace the rope before tapping. If the rope connects to a Recycling bucket, ensure the cycle is timed correctly before you pull the trigger. Getting a "bad" color from a Recycling bucket is annoying; getting a "bad" color that is also roped to another bucket is a crisis.
Stuck Solutions and Speed Run Tips
If you find yourself in a difficult position or aiming for a record time, these advanced tactics will help you.
Solution: The "Trash" Strategy
If your belt is full and you desperately need a specific color that is buried in the tray, you may need to "trash" a slot. If a Recycling bucket is cycling between a color you need (Green) and a color you don't (Pink), and your belt is full, tap it when it hits the "don't" color (Pink). Pour the Pink into the sky (even if the sky isn't the priority) just to get the bucket off your belt. This clears the slot, allowing you to tap the Recycling bucket again when it cycles back to Green. Sometimes you have to waste a pour to save the game.
Solution: Mystery Bucket Gambling
If you are completely stuck and the only available buckets are Mystery buckets, you have to gamble. However, you can hedge your bets. Look at the surrounding colors in the tray. Usually, Mystery buckets are grouped thematically. A Mystery bucket surrounded by Green and Brown is highly likely to be Green or Brown. Use this context to decide which Mystery bucket to pull first, maximizing your chances of getting a useful color.
Speed Run Tip: Pre-Loading the Belt
For speed runners, efficiency is key. While a pour is active (sand is flowing from the bucket to the canvas), you are not idle. Use this 2-3 second window to scan the tray and tap the next bucket you need. By the time the current pour finishes, the next bucket should already be sliding into position. This "overlap" shaves seconds off your time. Do not wait for the belt to stop moving before planning your next move.
Speed Run Tip: Bulk Background Processing
The fastest way to finish the level is to process the background in bulk. Once the monkey (Red/Beige) and the branch (Brown/Green) are 100% done, do not tap buckets one by one. Look for large clusters of Cyan and Pink in the tray. Tap 3 or 4 buckets at once to fill your belt. Since the background areas are large and undetailed, you can pour rapidly without fear of complex pixel errors. This "bulk processing" at the end prevents the slow drip-feed of individual buckets that plagues slower playthroughs.