
Level 426
EXPERTHow to solve Sand Loop level 426? Get instant solution for Sand Loop 426 with our step by step solution & video walkthrough. Sand Loop 426 tips and guide.
Play Sand Loop Now
Experience the puzzle challenge firsthand
Game Screenshots
Sand Loop Level Guides
Level Overview: The Fuji Canvas Challenge
Sand Loop Level 426, known as "The Fuji Canvas," is a strict test of logistical management rather than artistic speed. Unlike standard levels where rapid clearing is encouraged, this stage demands a disciplined, methodical approach to resource allocation. The visual objective is to paint a serene landscape featuring Mount Fuji, a giant red sun, and cherry blossoms. However, the gameplay reality is a high-stakes battle against congestion and color contamination.
The core difficulty stems from a severe restriction on slot capacity, starting at a maximum of only 5 slots. This creates a "claustrophobic" board state where a single mistake in queue management can lead to an immediate deadlock. Additionally, the board is physically divided by a Lock mechanism, hiding essential Cyan and Dark Blue resources behind a White Cup Blocker. Success in this level depends entirely on your ability to prioritize unlocking the board over painting the picture, managing the queue with perfect rhythm to prevent backups.
The Slot Economy Crisis
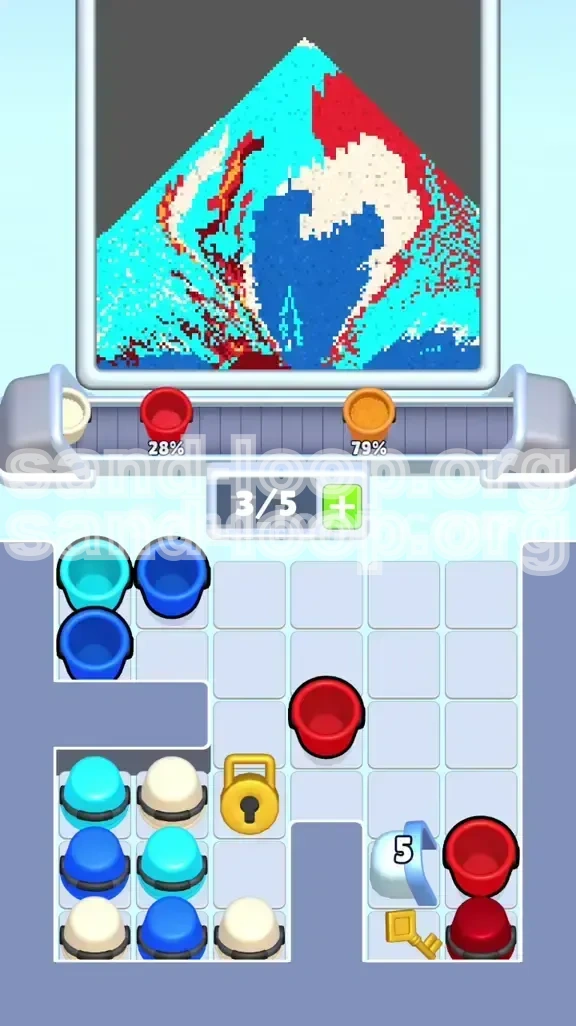
The most critical mechanic in Level 426 is the strict 5-slot limit. In a game where you typically juggle 8 or more items, this limitation forces you to treat every slot like a unit of precious currency. You cannot simply spam taps to clear the board; you must cycle cups with intent.
If you allow the conveyor belt to reach maximum capacity (5/5), the game mechanics jam, leading to a rapid fail. The only way to survive is to maintain a rhythm where for every cup sent up the belt, another is being poured and removed from the queue. This "Send and Release" heartbeat prevents the deadlock that ruins 90% of beginner runs. You must be patient, waiting for slots to open up rather than forcing cups into a full queue.
The Lock-and-Key Dependency
Approximately 40% of the board is inaccessible at the start. A large lock on the mid-left side seals away a massive cache of Cyan and Dark Blue cups required for the background. You cannot access these colors until you solve the White Blocker puzzle.
This creates a significant timing bottleneck. You are forced to work with limited resources (Red, White, and Orange) while ignoring the obvious bulk of Cyan cups that are locked away. Attempting to brute-force this lock is impossible; the game is scripted to only open the path once the specific Golden Key is dropped, which in turn requires processing specific White cups first.
The Color Palette Risks
The palette consists of Cyan, Dark Blue, White, Red, and Orange. The primary risk lies in color contrast and placement. The Cyan sky and water cover roughly 60% of the canvas. The Dark Blue mountain and White snow caps require clean lines.
However, the Red sun (top right) and the Orange tree branches (far left and bottom reflections) act as potential contaminants. If a single drop of Orange spills into the Cyan sky, or if White pours over the Dark Blue mountain prematurely, the visual integrity fails. You must sequence the colors so that broad strokes are completed before delicate details are added to avoid muddy mixtures.
The White Blocker Mechanic
Unique to this stage is a "White 5 Blocker." This is a special cup that sits directly on top of the Golden Key. It acts as a shield that requires 5 White cups to be processed before it vanishes. This is the gatekeeping mechanism of the level.
You cannot reach the Golden Key to unlock the left side of the board until you have found and poured exactly five White cups. The challenge is that these White cups are scattered and often buried under other colors. You must hunt them down aggressively in the early game while ignoring the temptation to work on the Red sun or other easier targets.
Visual Layout Analysis
The canvas is divided into three distinct zones: the Sky, the Mountain, and the Foreground. The Sky is Cyan and occupies the top half. The Mountain is Dark Blue with White caps, sitting in the center-left. The Sun is a massive Red circle in the top right. The Foreground features tricky Orange tree branches on the left and water reflections at the bottom.
Understanding this geography is vital because it dictates your pouring order. You cannot paint the tree branches (Orange) while you are working on the Sky (Cyan), or the belt will mix the colors, turning your clear blue sky into a muddy brown mess.
Primary Objectives for Victory
To conquer Level 426, you need a clear set of goals that prioritize unlocking the board over painting the picture. Rushing the art will lead to a deadlock. Your mindset must be "Logistics First, Art Second." The level is won or lost in the first 30 seconds based on how you handle the slot queue and the White Blocker.
Objective 1: Clear the White Blocker
This is your immediate and only priority for the first phase of the level. You must scan the top layers of the cup grid for White cups. Every White cup you tap reduces the counter on the White 5 Blocker by 1. Your goal is to reduce this counter from 5 to 0 as fast as possible.
Ignore the Red cups for the sun. Ignore the Cyan cups (most are locked anyway). Focus purely on extracting and sending White cups up the conveyor. Once the fifth White cup is processed, the blocker breaks, dropping the Golden Key and changing the board state entirely.
Objective 2: Retrieve the Golden Key
The moment the White Blocker shatters, the Golden Key is exposed at the bottom right of the grid. This is a critical moment. You must immediately tap the Golden Key to send it up the conveyor.
This action triggers the unlocking of the massive Lock on the left side of the board. Failing to tap the key immediately leaves your resources stranded, prolonging the level and increasing the risk of a slot jam. Once the key is processed, the board "opens up," releasing the flood of Cyan and Dark Blue cups you need for the background.
Objective 3: Manage Slot Throughput
Throughout the entire level, you must maintain a rhythm of "Send and Release." Never let your slots sit idle, but never let them fill up. A good rule of thumb is to stop tapping if your slot count hits 4/5. Wait for the leading cup to pour and clear a slot before tapping the next cup.
This "heartbeat" rhythm is the only way to handle the massive volume of cups that arrive once the left side of the board is unlocked. If you panic and tap too fast, the game ends. Managing this flow is more important than any individual color placement.
Objective 4: Background Layer Completion
After unlocking the board, your goal shifts to filling the broad areas. The Cyan sky and the Dark Blue mountain base are your targets. These colors have the largest surface area to cover.
You want to dedicate the middle section of the run to aggressively feeding Cyan and Dark Blue cups. This clears the bulk of the cups from the board and stabilizes your slot count, leaving you with a manageable number of cups for the final phase. Do not focus on details until the broad strokes are complete.
Objective 5: Precision Detailing
The final objective is to place the small, high-risk details without contaminating the existing work. This involves the Orange tree branches and the final White touches on the snow caps.
At this stage, the board should be relatively empty. You must isolate the Orange cups. Send an Orange cup only when the conveyor is clear of other colors to prevent cross-contamination. This requires a slow, deliberate finish rather than a frantic sprint.
Step-by-Step Walkthrough Guide
This section provides the exact sequence of actions required to beat Level 426. Follow these steps in order. Do not deviate from the logic of "Unlock first, Paint later."
Phase 1: The White Hunt (Start)
As soon as the level loads, do not tap the large stack of Red cups on the right. Instead, look at the top row and the upper-middle section of the grid. You are hunting for White cups.
- Scan the Top Row: Identify the White cup in the top row (usually positioned among Cyan and Dark Blue).
- Tap the White Cup: Send it up the conveyor. The White Blocker counter drops to 4.
- Excavate Middle Whites: Look for White cups buried in the middle layers. You may need to tap a Cyan or Dark Blue cup just to expose the White cup underneath.
- Ignore the Red Sun: Do not be tempted by the stack of Red cups on the far right. Tapping them now fills your slots with Red, which you cannot use until the end. Keep your slots free for White cups.
- Process the 5th White: Once you find and tap the fifth available White cup, watch the bottom right of the grid. The White Blocker will shatter.
Phase 2: The Key and the Unlock
The shattering of the blocker exposes the Golden Key. This is the transition point of the level.
- Tap the Golden Key: Immediately tap the Golden Key cup. It moves to the conveyor.
- Wait for the Unlock: As the Key pours, the Lock mechanism on the left side of the screen will animate and vanish.
- Observe the Cup Shift: A massive pile of Cyan and Dark Blue cups will slide down, filling the available spaces on the grid.
- Stop Tapping: For a brief moment, stop tapping. Let the Key clear the conveyor. You need empty slots to handle the incoming wave of new colors.
Phase 3: The Cyan Flood
With the board unlocked, you now have access to the Cyan cups needed for the sky. This is the most dangerous part of the level for slot management.
- Alternate Colors: Start sending Cyan cups. However, do not send 5 Cyans in a row. Alternate between Cyan and Dark Blue.
- Monitor the 4/5 Limit: Keep a close eye on your slot counter. If it hits 4, wait. The last thing you want is a jam while the sky is only half-painted.
- Fill the Sky: The Cyan cups will fill the top portion of the canvas rapidly. Ensure the conveyor isn't clogged so the sand flows smoothly.
- Prepare for Dark Blue: Once the sky is largely Cyan, shift your focus to the Dark Blue cups for the mountain base.
Phase 4: The Mountain Base
With the sky done, the mountain is the next broad stroke.
- Target Dark Blue: Tap the Dark Blue cups that were previously locked. These are now plentiful.
- Build the Base: These cups will fill the center-left of the canvas.
- Check for Leftover Whites: You might have residual White cups from the unlock phase. Send them now to top off the snow peaks, but only if you have slot space.
Phase 5: The Red Sun Finale
Now that the background is set, you can finally clear the Red cups you ignored in Phase 1.
- Clear the Right Column: The far right column is still stacked with Red. Tap them now.
- Fill the Sun: The Red sand will fill the top-right circle.
- Slot Easing: By this point, the total cup count on the grid is low. You have more freedom to tap multiple Reds in succession since the risk of jamming is lower.
Advanced Strategy: Color Ordering
Knowing the correct order to process colors is the difference between a clean win and a messy failure. The logic here is based on preventing color bleeding and managing slot economy.
The Cyan Priority
Cyan must be your primary color after the unlock. Why? Because it covers the largest area (the sky). If you save Cyan for last, you risk having the conveyor contaminated by earlier colors.
Furthermore, Cyan cups are the most numerous once the lock is opened. You need to pour them early to reduce the physical clutter on your grid. By clearing Cyan early, you open up the grid layout, making it easier to spot the tricky Orange cups later.
The Dark Blue Buffer
Dark Blue serves as a buffer between Cyan and White. You should alternate Cyan and Dark Blue to keep the slot economy balanced. If you pour all Cyan then all Dark Blue, you might find yourself with a full queue of one color, waiting for the canvas to accept it.
Alternating keeps the flow dynamic. The Dark Blue mountain also sits directly below the Cyan sky, so pouring them in sequence helps the visual blending on the canvas.
The Late-Game Red
Red is strictly last for two reasons. First, the Red Sun is isolated in the top right, away from the delicate Cyan and White areas. Second, Red cups are conveniently stacked in a column on the far right of the supply tray.
They are out of the way. If you process Red too early, you waste slots that could have been used for unlocking the board or painting the sky. There is no downside to leaving the Red cups sitting on the grid until the very end.
The Orange Isolation Rule
Orange is the highest risk color. It is used for tiny details (branches and reflections) that are surrounded by Cyan (water) and White (snow). You must process Orange when the board is quiet.
The correct order is: Orange goes only after Cyan is 100% finished and Dark Blue is 90% finished. Never send an Orange cup if there is a Cyan cup immediately behind it on the conveyor. The gap between them must be large enough to ensure no overlap occurs.
The White Cleanup
White is a split responsibility. You use it early to break the Blocker, and you use it late to fix the snow caps. Do not pour "excess" White during the early phase just because you have it.
Only pour the exact 5 cups needed for the blocker. Save the rest of the White cups for the end when you are refining the mountain peaks. This prevents the White sand from being overrun by the heavy flow of Cyan or Dark Blue in the mid-game.
Common Mistakes to Avoid
Players often fail Level 426 because of impatience. Understanding these common pitfalls will help you stay calm.
The "Red Cup" Distraction
The biggest mistake new players make is tapping the Red cups immediately. The right column is full of Red, and it looks like an easy target. However, tapping Red fills your slots with a color you cannot use yet.
This blocks you from tapping the necessary White cups to unlock the board. You get stuck with a full queue of Red, watching the timer run out while you wait for them to clear. Rule: Ignore the Red column until the mountain is painted.
The Slot Deadlock
Tapping 5 cups in rapid succession is the fastest way to fail. When you hit 5/5 slots, the conveyor stops moving. The cups align perfectly, but the game logic freezes the input. You cannot undo this. You have to restart.
Rule: If your slots are at 4/5, take your finger off the screen. Wait for the "splash" sound of a cup emptying before tapping the next one.
Premature Unlocking
Some players try to tap the Lock mechanism or the Golden Key before the White Blocker is gone. This is impossible. The Key is physically blocked by the White cup.
Trying to tap in that area just wastes time or mis-taps adjacent colors. Focus purely on the White cups. The Key will reveal itself when the conditions are met.
Color Bleeding
This happens when you pour a delicate color (like Orange) while a heavy color (like Cyan) is pouring right before it. The sand streams mix, and the Orange lands on the Cyan sky. It looks like a mistake and counts against your final score.
Rule: Always ensure the color before your delicate pour is finished and cleared before sending the next one.
Ignoring the Top Row
Because the grid is deep, players often stare at the bottom or middle where the cups are piling up. However, the crucial first White cup is often in the top row.
If you don't clear the top row debris (Cyan/Dark Blue), you can't see or reach the White cup behind it. Always scan from top to bottom.