
Level 467
HARDHow to solve Sand Loop level 467? Get instant solution for Sand Loop 467 with our step by step solution & video walkthrough. Sand Loop 467 tips and guide.
Play Sand Loop Now
Experience the puzzle challenge firsthand
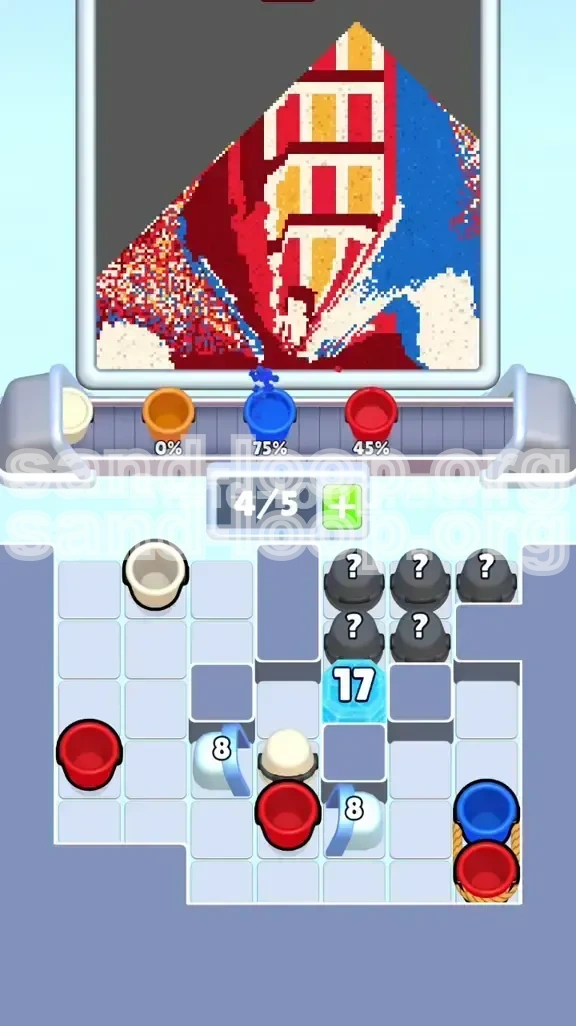
Game Screenshots
Sand Loop Level Guides
Level Overview: The Red Telephone Booth Challenge
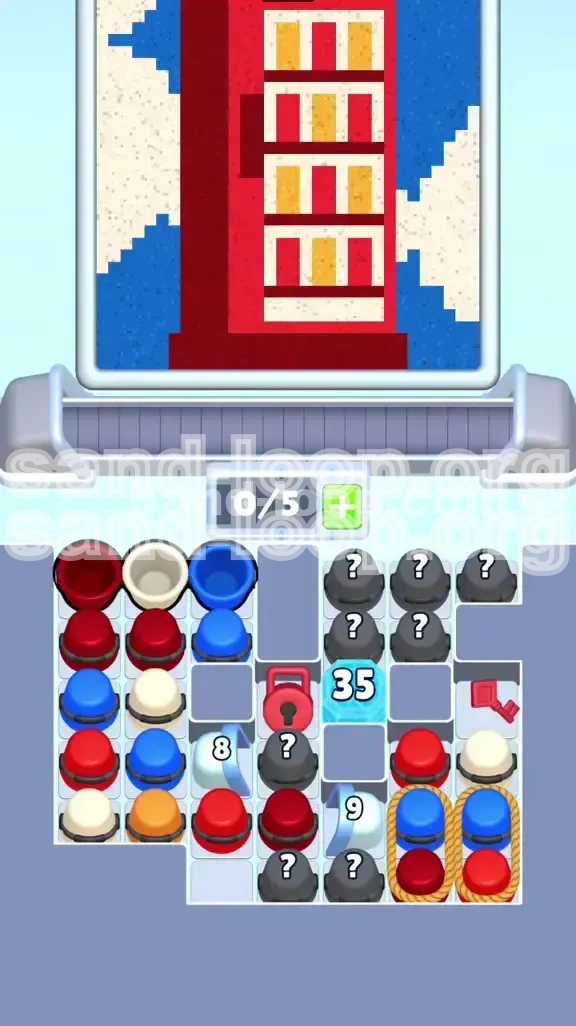
Sand Loop Level 467, infamously known as the "Red Telephone Booth" stage, is a masterclass in resource management and spatial reasoning. Unlike previous levels where you could afford to play loosely, this stage demands a strict adherence to logic and order. The visual objective is to paint a vintage British phone booth set against a diagonal blue backdrop. However, the true challenge lies in the "Slot Economy." You begin with a conveyor belt that is effectively clogged, and the board is split by a massive Red Lock and a daunting 35-hit Ice Block.
The Slot Economy Crisis
The most defining feature of Level 467 is the extreme scarcity of inventory space. With only 5 available slots on your tray and a constant stream of new cups arriving, you cannot afford to hold onto "hope" cups. Every cup you pull from the tray must have an immediate destination—either matched on the board to clear an obstacle or sent to the conveyor to fill the canvas. If you pull a cup you cannot use immediately, you risk a "Soft Lock," where your tray is full of unusable colors, and no valid moves remain on the board.
The Layered Canvas System
The game enforces a strict parent-child layering system on the canvas. You cannot simply paint any color you want at any time. The Crimson Red body of the booth acts as the "Parent" layer. The Off-White window frames are the "Child" layer, and the Mustard Yellow window panes are the "Grandchild" layer. If you attempt to process Yellow before Red is at 100% and White is established, the game will physically reject the sand, causing the cups to bounce back into your tray and clog your slots.
The Ice Block Timer
Located on the right side of the board is a massive Ice Block requiring 35 adjacent hits to clear. This is not just an obstacle; it is a move timer. Every turn you spend not hitting this block is a wasted opportunity. If you ignore the Ice Block to focus only on the canvas, you will reach the late game with the block still intact, blocking access to the essential Red Key and the final Yellow sand reserves. You must chip away at this constantly throughout the first half of the level.
The Red Lock Barrier
Dead center of the board sits the Red Lock, effectively severing the board in two. This lock prevents access to the bottom tier, where the high-value numbered Glass Cups (8s and 9s) and Mystery Cups reside. You cannot win the level until this lock is removed. The lock itself is guarded by Roped Cups and the Ice Block, requiring a coordinated effort to clear the path to the Red Key.
Resource Distribution
Understanding the volume of each color is crucial for planning your strategy. Crimson Red makes up approximately 45% of the canvas. Deep Blue accounts for roughly 30% as the background. Off-White is about 15%, used for structural frames. Mustard Yellow is the smallest portion at 10%, reserved for the tiny window panes. This distribution dictates that Red must be your primary focus for the majority of the game, while Yellow is a late-game luxury.
Clear Objectives: Your Roadmap to Victory
To conquer Level 467, you must shift your mindset from "clearing cups" to "managing flow." Success is not measured by how many cups you pop, but by maintaining the correct sequence of operations. Below are the specific milestones you must hit to guarantee a win.
Primary Goal: 100% Red Foundation
Your non-negotiable first objective is to achieve 100% completion on the Crimson Red body of the booth. Do not concern yourself with Blue background stripes or White window frames until the Red structure is solid. The game's logic gate prevents significant progress on other colors until this red anchor is set. If your Red meter is below 80%, ignore everything else and hunt for red cups.
Secondary Goal: Neutralize the Ice Block
You must reduce the 35-hit Ice Block count to zero before you unlock the Red Lock. Ideally, this should be accomplished simultaneously with your Red collection. If you unlock the bottom half of the board while the Ice Block is still active, the flood of new cups from the bottom will bury the Ice Block area, making it nearly impossible to clear later without wasting precious moves.
Tertiary Goal: Retrieve and Activate the Key
The Red Key is buried on the right side of the board, obscured by Roped Cups. Locating and retrieving this key is a critical milestone. Only once the Red Lock is removed do you gain access to the "Bank"—the area containing the Glass Cups that hold the necessary Yellow and White sand. Do not attempt to force the lock early; wait until the path is clear.
Quaternary Goal: Establish White Frameworks
Once the Red Lock is open and the body is painted, your focus shifts to Off-White. You must construct the window frames completely before processing any Yellow sand. Trying to force Yellow into the panes before the white frames are drawn will result in rejections. Treat the White frames as containers that must be built before they can be filled.
Final Goal: Controlled Yellow Release
The final 10% of the level is the most dangerous. You must pop the Mystery Cups and Glass Cups to release the Yellow sand. This must be done in a controlled burst. Do not pop all available cups at once. Release one batch of Yellow, process it into the panes, ensure your tray is clear, and then pop the next batch.
Step-by-Step Walkthrough: Phase by Phase
The game is divided into three distinct phases: The Harvest (Early Game), The Breach (Mid Game), and The Fill (Late Game). Follow this linear path to navigate the chaos of Level 467.
Phase 1: The Harvest (Moves 1-15)
Start by focusing entirely on the left side of the board. This area contains loose Red, Blue, and White cups. Your goal here is not just to match, but to harvest specific colors to clear the bottom rows. Pull cups to create vertical matches on the far left. This clears space and gives you room to maneuver. Do not touch the center or right columns yet. Avoid sending Blue to the conveyor unless Red is completely unavailable.
Phase 2: The Key Hunt (Moves 15-25)
Shift your attention to the right column. You will see a vertical stack of Roped Cups anchoring the Red Key. Identify the color of these ropes (usually Blue or Red). Use the cups you harvested from the left side to feed into this column. Create vertical matches here to cut the ropes. As you clear the ropes, you will inevitably hit the Ice Block adjacent to them. This is the perfect time to start chipping away at the 35-hit count.
Phase 3: The Ice Block Assault (Moves 25-35)
By now, the Ice Block should be your primary concern. Ignore the canvas percentage if the block is still above 15 hits. Look for matches that sit directly next to the Ice Block. Every move that does not reduce the Ice Block count is a wasted move. If you have a Hammer power-up, this is the time to use it. If not, prioritize creating matches on the right side to whittle it down to zero.
Phase 4: The Breach (Moves 35-40)
Once the Ice Block is gone and the Roped Cups are cleared, tap the Red Key. This will destroy the Red Lock in the center. Stop immediately. Do not tap anything else for a moment. Assess your tray. The Lock's removal triggers a drop of new Glass Cups and Mystery Cups from the top. You need to ensure you have at least 2 empty slots to handle this influx. If your tray is full, make a quick match on the board to free up space before proceeding.
Phase 5: The Controlled Pop (Moves 40-50)
Now that the bottom is open, you will see numbered Glass Cups (8 and 9) and black Mystery Cups. Do not pop them all. Tap one 8-glass cup to break it. It will release sand (likely Yellow or White). Send that sand to the conveyor. Check your tray. If it's clear, tap the one. If it's filling up, stop and clear the board. You want to slowly drain these reserves, not flood your tray.
Phase 6: The Final Fill (Moves 50+)
At this stage, Red should be 100%. Your White frames should be mostly complete. Now you can aggressively pop the remaining Mystery Cups to release the final Yellow sand. Since the White frames are ready, the Yellow will flow freely into the panes without bouncing. Use the remaining moves to top off the Blue background diagonals and finish any remaining percentages.
The Winning Color Order: Hierarchy of Processing
This section cannot be overstated. The order in which you send sand to the conveyor is the single most important factor in beating Level 467. Follow this hierarchy strictly.
Priority 1: Crimson Red (The Anchor)
Red is always your first choice. From the very first move, if you see a Red cup in your tray and an open slot on the conveyor belt, send it up. Do not save it for a "better match." The game treats the Red booth body as the foundation. If you delay Red to process Blue or White, you will starve the canvas of its primary color, leading to a deadlock later.
Priority 2: Deep Blue (The Obstacle Clearer)
Blue is primarily a tool for clearing the board, specifically the Roped Cups on the right. Process Blue only when Red is not immediately available, or when you need to pull a Blue cup into your tray to make a match on the board. Do not flood the conveyor with Blue; the background can wait. Focus on using Blue cups to create matches that free up the grid.
Priority 3: Off-White (The Framework)
Only start processing White once the Red body is visually complete on the canvas (100%). The White window struts cannot be filled effectively until the Red walls are established. If you try to force White early, it often bounces or sits unused, wasting valuable conveyor space that should be reserved for Red.
Priority 4: Mustard Yellow (The Finisher)
Yellow is last. It is the smallest area and the most volatile. Treat Yellow sand as a hazardous material until the very end. Do not pull Yellow cups into your tray unless the White window frames are fully drawn and the Red body is finished. Releasing Yellow early is the fastest way to fill your tray with unusable junk.
The 70/30 Rule
As a general rule of thumb, for the first half of the level, 70% of your conveyor moves should be Red, and 30% should be Blue/White (for board management). If you find yourself sending Yellow or White while Red is below 50%, you are deviating from the winning strategy. Stop, reset your focus, and hunt for Red cups.
Key Tips, Common Mistakes, and Stuck Solutions
Even with a perfect strategy, the randomness of the game can throw you curveballs. Here are the pro tips to handle edge cases and avoid the traps that ruin 90% of runs.
Common Mistake: The Premature Yellow Rush
The most common error players make is getting excited when they see a Yellow cup pop out of a Mystery Cup. They tap it immediately. If the White frames aren't ready, that Yellow cup hits the canvas, bounces off, and returns to the tray. Now you have a tray full of Yellow cups that you cannot use. You lose. Solution: Ignore Yellow completely until the canvas is ready.
Key Tip: Tray Management (Keep 2 Slots Open)
Never let your tray fill up to 5/5 cups unless you are 100% sure you can use all of them instantly. Try to keep at least 2 slots open at all times. This buffer allows you to pull cups for board matching without causing an overflow. If you hit 5/5, you are no longer playing the game; the game is playing you.
Stuck Solution: The Conveyor Cycle Trick
If you are stuck with a tray full of useless colors (e.g., you have 4 Yellow cups but need Red), look at the conveyor belt. Is there a specific section of the canvas that is low on Blue? Sometimes, deliberately sending a Blue cup up can shift the physics of the board or cycle the RNG enough to drop a needed Red cup into your tray. It’s a gamble, but sometimes better than doing nothing.
Speed Run Tip: The Left-to-Right Swipe
For experienced players looking to optimize time, do not tap individual cups on the left. The board setup allows for a "L-shape" clear. Swipe the bottom left loose pile to clear the initial base, then immediately transition to the right column to dig the key. Speed running this level is less about tap speed and more about zero hesitation between moves.
Advanced Tip: Managing the Numbered Glass
The 8 and 9 glass cups are not puzzles; they are time bombs. Do not leave them until the very end. If you have 5 moves left and two 9-glass cups remaining, you cannot win. Start chipping these down as soon as the Red Lock is open. Ensure you get at least one hit on them every few turns. You want them to be at 3-4 hits remaining by the time you enter the final filling phase.
The "Mystery Cup" Gamble
The black Mystery Cups are a double-edged sword. They can give you the exact color you need, or the one you fear most. If you have 2 empty slots, you can afford to pop one. If you have 4 full slots, popping a Mystery Cup is suicide. As a rule of thumb, only pop Mystery Cups when your Canvas is ready to accept any color (i.e., when Red and White are done, and you are just looking for Blue or Yellow to finish).