
Level 478
HARDHow to solve Sand Loop level 478? Get instant solution for Sand Loop 478 with our step by step solution & video walkthrough. Sand Loop 478 tips and guide.
Play Sand Loop Now
Experience the puzzle challenge firsthand
Game Screenshots
Sand Loop Level Guides
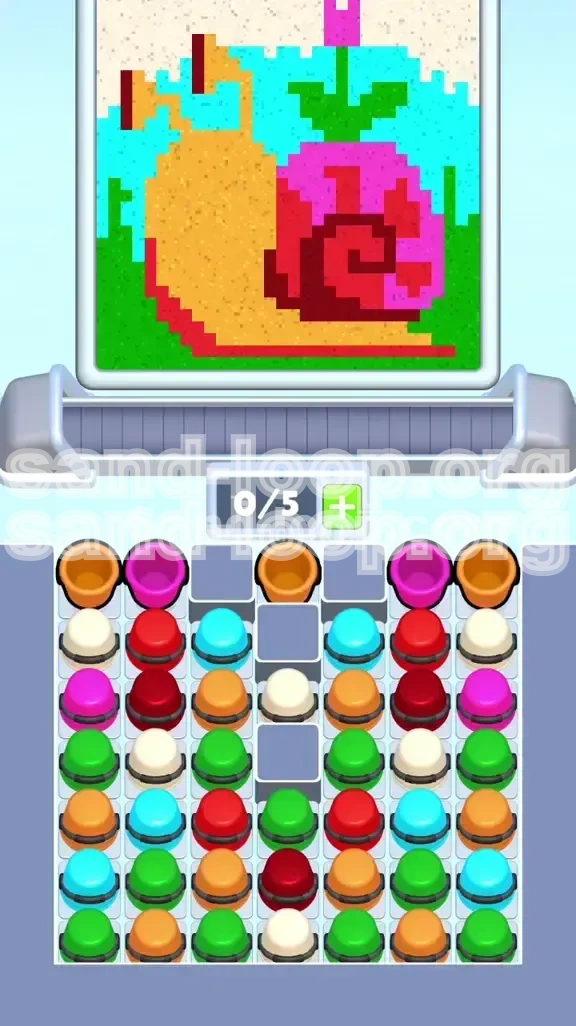
Level Overview: The Snail Garden Bottleneck
Sand Loop Level 478, famously known as "The Snail Garden," is a masterclass in resource management and logistical prioritization. While the visual aesthetic—a charming pixel-art snail winding through a vibrant garden—might suggest a relaxing experience, the underlying mechanics are strictly enforced and unforgiving. This level marks a distinct shift in gameplay from reflex-based pouring to strategy-based queue management. The primary difficulty stems not from the complexity of the shapes, but from the severe restriction on your inventory space combined with a supply tray that is intentionally clogged with obstacles.
The defining feature of this level is the "Grey Blocker" crisis. These static barriers occupy the critical central columns of your 7x7 supply tray, effectively choking off the natural circulation of sand cups. This forces you into a bottleneck where you must aggressively manage the outer columns to maintain a flow of essential materials. If you approach this level with a "load everything" mentality, you will fill your limited conveyor belt slots with low-priority colors (like Cyan or Cream), leading to an unavoidable deadlock where the necessary colors (Tan and Magenta) remain trapped behind obstacles on the tray.
Grid Layout and Obstacles
The supply tray is not an open field; it is a minefield. The Grey Blockers are positioned specifically to block the center columns where your highest-volume colors are initially generated. Understanding the grid geometry is essential: you will be forced to treat columns 1, 2, 6, and 7 as your primary "loading docks," while columns 3, 4, and 5 will require constant cycling to unblock the inner cups.
Conveyor Belt Constraints
Your belt capacity is limited to a maximum of 5 units. In a level featuring 6 distinct active colors, this leaves you with a margin of error of essentially zero. Every slot on your belt represents a tactical decision. A belt filled with the wrong colors is indistinguishable from a game over screen, as you will be unable to load the critical colors needed to progress.
The Volume Imbalance
Not all colors are created equal in Level 478. The distribution is heavily skewed. The "Snail" (Tan/Magenta) and "Flora" (Green) account for nearly 80% of the sand volume, while the "Sky" (Cyan/Cream) accounts for the remaining 20%. The visual temptation is to fill the background first, but the logical requirement is to prioritize the foreground objects. Failing to respect this volume imbalance is the leading cause of failure.
The Dependency Trap
This level introduces hard dependencies. You cannot effectively paint the Maroon spiral until the Magenta shell is substantially built, or the Maroon sand will bleed into the background. Similarly, you cannot access the Maroon cups until you have cleared the Green cups acting as a "plug" in the upper-middle tray rows. Recognizing these dependencies turns a chaotic experience into a linear sequence of solvable problems.
Why Strategy Beats Speed
In previous levels, fast tapping could overcome minor inefficiencies. In Level 478, speed is often a trap. Rapid tapping loads whatever is available immediately, usually cluttering your belt with Cyan. Success here requires "active patience"—the discipline to leave the tray alone or make placeholder moves until the specific colors you need appear in accessible slots.
Clear Objectives: Prioritizing the Palette
To navigate the Snail Garden successfully, you must abandon the instinct to "fill what you see" and adopt a production-line mindset. Your goal is to keep the belt flowing with only the immediately necessary materials. You are not just painting a picture; you are optimizing a supply chain.
Your primary directive is to establish the "Foundation" of the image before worrying about the details. The snail's body and shell are the structural core of the level. If these are not filled first, the intricate details (the spiral, the stem) become impossible to place accurately. Furthermore, you must actively avoid the "Convenience Trap"—loading colors just because they are easy to reach. Convenience leads to a clogged belt.
Primary Objective: The Tan Foundation (Phase 1)
Your immediate goal is to secure the Tan sand for the snail's body. This is the highest volume color (approx. 30% of total sand). You must clear a path to Tan cups in the tray and load them exclusively. No other color should be on your belt during this phase unless it is a temporary "blocker" cup you are immediately disposing of.
Secondary Objective: The Magenta Shell (Phase 2)
Once the body is established, you must shift to Magenta. The shell is large and requires a continuous feed. However, you must balance this with the remaining Tan needs. The objective is not to finish Magenta completely, but to build up the "walls" of the shell so that the Maroon spiral can eventually be contained.
Logistical Objective: The Green Clearance (Phase 3)
This is a counter-intuitive objective. You must process the Green flora not just to complete the picture, but to mechanically unclog the tray. Green cups are often sitting directly on top of the Maroon cups you need later. Pouring Green is effectively a "mining" operation to dig down to the deeper tray layers.
Detail Objective: The Maroon Precision (Phase 4)
With the Green cleared and the Magenta base laid, you must execute the spiral. This requires a clear belt and high focus. The objective here is precision over speed. You must pour the Maroon only when the shell is ready to receive it, avoiding bleeding into the background.
Cleanup Objective: The Background Flood (Phase 5)
The final objective is the cleanup of Cyan and Cream. These are "garbage time" colors. They should only be loaded when the complex, high-stakes elements are finished. At this stage, your goal changes from management to pure volume processing.
Step-by-Step Instructions: The Critical Path
Follow this exact sequence to navigate the level. Do not deviate from the order until the specific percentage milestones are reached. This path is designed to minimize the friction between your needs and the tray's limited availability.
Phase 1: The "Tan" Rush (0% - 25% Progress)
Strategy: Ignore the background. Ignore the flower. Look only for Tan cups in the tray. If they are blocked by Grey Blockers or other colors, tap the obstructing cups onto the belt and immediately pour them into a corner (sacrifice the sand) just to move them. Your belt should ideally hold 2 Tan cups max to keep slots open for new finds. Fill the main body of the snail completely.
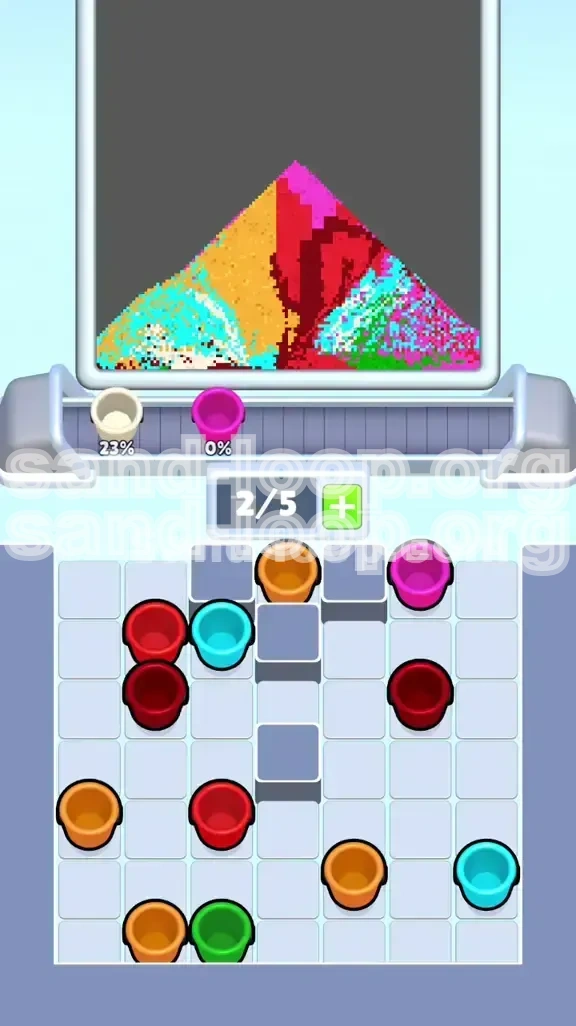
Phase 2: The "Magenta" Load (25% - 45% Progress)
Strategy: Begin loading Magenta to form the shell structure. Alternate your loading: if you have a Tan cup, load it. If not, load Magenta. Do not let the belt fill up with 5 Magenta cups, or you will be unable to top up the Tan if it appears. Pour the Magenta to create the base of the shell, but stop just short of the spiral center.
Phase 3: The "Green" Clearance (45% - 60% Progress)
Strategy: Now, look for Green. You are likely seeing Green cups in the top rows. Load them. Pour the stem using short taps (to prevent overflow) and the grass using standard pours. As you remove Green cups from the tray, watch the columns shift—this is the key to revealing the buried Maroon cups.
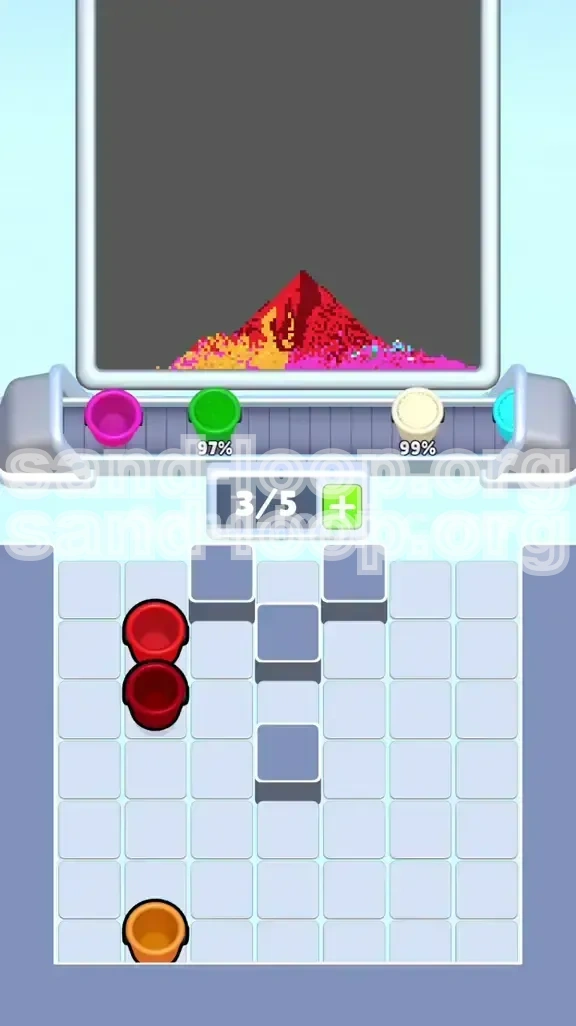
Phase 4: The "Maroon" Precision (60% - 80% Progress)
Strategy: With Green gone, Maroon should be accessible. Load ONE Maroon cup at a time. The spiral is a tight space. Ensure your Magenta shell is thick enough to act as a buffer. Pour the Maroon carefully down the center of the shell. Do not load another Maroon until the previous one is placed, to avoid accidents.
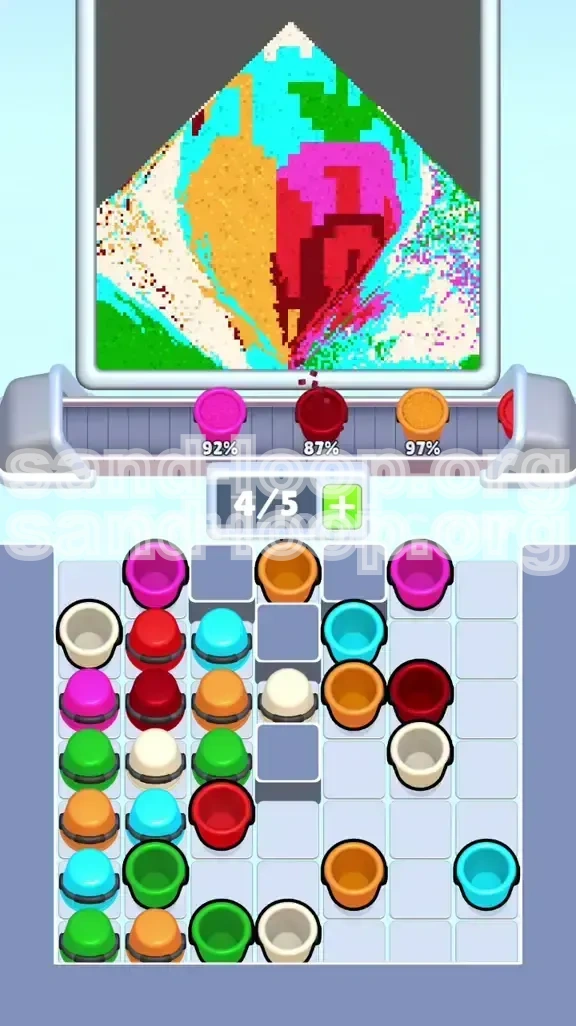
Phase 5: The "Cyan" Flood (80% - 95% Progress)
Strategy: The snail is done. The danger is over. Now you can spam the tray. Load all the Cyan cups you can find. Fill the sky background. You can let your belt fill to capacity here (5/5) since there are no more complex maneuvers required.
Phase 6: The "Cream" Finish (95% - 100% Progress)
Strategy: Scan the tray for the remaining Cream cups. There are usually very few. Fill the top border strip. If you run out of Cream and are stuck at 99%, check the corners of the canvas for tiny unfilled pixels.
Color Order: The Logic Sequence
Processing colors in the wrong order is the fatal flaw for most players. The game presents you with a full palette, but the logical order of operations is strictly dictated by volume and tray physics. Adhering to this hierarchy is non-negotiable for Level 478.
1. Tan (The Anchor)
Volume: High (30%)
Priority: Critical
Reasoning: Tan is the foundation of the largest object in the game. It is also the color most likely to be blocked by Grey Blockers in the early game. You must secure Tan immediately or you will have no space to put the other 70% of the sand.
2. Magenta (The Structure)
Volume: High (35%)
Priority: High
Reasoning: The shell requires a massive amount of sand. Pouring this alongside Tan ensures you are always working on the main subject. It must be done before Maroon to create a "containment field" for the spiral.
3. Green (The Key)
Volume: Medium (15%)
Priority: Medium
Reasoning: While visually secondary, Green is mechanically vital. It physically blocks the Maroon cups in the grid. You must process Green not to finish the level, but to unlock the next phase of the tray.
4. Maroon (The Detail)
Volume: Low (10%)
Priority: High Precision
Reasoning: This is the "Danger Zone." Maroon is dark and tends to bleed if the underlying Magenta isn't full. It is done mid-late game to ensure the structure is ready to receive it.
5. Cyan (The Filler)
Volume: Medium (8%)
Priority: Low
Reasoning: Cyan is the "belt clogger." It is tempting because it is often available, but it serves no structural purpose. It is the background and must wait until the foreground is impenetrable.
6. Cream (The Cleanup)
Volume: Low (2%)
Priority: Lowest
Reasoning: A tiny accent color used for the border. Loading this early is a waste of a belt slot. It is the absolute last thing you should touch.
Key Tips and Common Mistakes
Success in Level 478 comes down to avoiding the "Cup Trap." Every cup you load is a commitment of time and space. These tips highlight the difference between a smooth run and a frustrating restart.
Common Mistake: The "Cream" Trap
Many players load Cream early because it appears in the accessible corners. This is a mistake. Cream is only 2% of the level. Loading it early occupies 20% of your belt capacity (1 of 5 slots) for a color you won't use for 20 minutes. Always decline Cream cups until the end.
Common Mistake: The "Full Belt" Syndrome
Allowing your belt to reach 5/5 capacity in the first half of the level is a death sentence. If your belt is full, you lose the ability to "grab and go" when a Tan or Magenta cup finally appears in the tray. Keep 2 slots open as a buffer for opportunistic loading.
Common Mistake: Spiral Bleeding
Trying to pour the Maroon spiral before the Magenta shell is thick enough causes the dark sand to spread into the Cyan background. This looks messy and can trigger pixel-perfect fail states. Always ensure the Magenta "walls" are high before introducing the Maroon center.
Pro Tip: The "Shake" Technique
If the critical columns (3, 4, 5) are blocked and you can't see Tan, do not just wait. Tap a random accessible cup (like Cyan), load it, and pour it immediately into a trash corner. This forces the grid to "refill" or shift, potentially bringing a Tan cup within reach.
Pro Tip: Pre-Loading Transition
Do not wait until Tan is 100% gone to look for Magenta. When Tan is at ~90% completion, start loading Magenta onto your idle belt slots. This creates a seamless transition between phases and keeps your pour rate constant.
Pro Tip: Stem Control
The Green stem is a narrow passage. Holding your finger down to pour will cause an overflow. Use a "Tap-Tap-Tap" method (rhythmic tapping) to fill the stem precisely without bleeding into the snail's body.
Stuck Solutions and Speed Run Tips
If you find yourself at a standstill or just want to optimize your time, these advanced strategies will help you break through the bottleneck.
Solution: Breaking the Deadlock
If you are stuck with a belt full of Cyan and need Tan, you must sacrifice. Look for any small gap in the Cyan background to dump the sand. If the background is full, you may have to deliberately pour Cyan onto an already full area (wasting the cup) just to clear the slot. Clearing the slot is more important than conserving the sand.
Solution: Unblocking the Grid
If columns 3, 4, and 5 are totally stuck behind Grey Blockers, focus your tapping efforts on columns 2 and 6. These are the "support columns." Clearing cups here often triggers a horizontal shift or refill in the adjacent blocked columns, freeing your target colors.
Speed Run Tip: Two-Finger Tray Management
For advanced players on mobile/tablet: Use one finger to pour and the other to tap the tray. While you are pouring Tan, use your spare thumb to tap around the tray, scouting for Magenta or Green. This allows you to queue up your next color while still working on the current one.
Speed Run Tip: Ignore Perfection
Going for a pixel-perfect score on the snail shell is slow. For a speed run, accept "Good Enough." As long as the color zone is filled to ~95%, the game will register it as complete. Don't waste time trying to perfect the jagged edges of the shell.
Speed Run Tip: Visual Confirmation Over Progress Bar
Don't stare at the percentage counter. It lags. Watch the canvas. The moment the visual structure of the snail looks solid, switch colors immediately. Trusting your eyes over the UI saves seconds on every transition.