
Level 483
HARDHow to solve Sand Loop level 483? Get instant solution for Sand Loop 483 with our step by step solution & video walkthrough. Sand Loop 483 tips and guide.
Play Sand Loop Now
Experience the puzzle challenge firsthand
Game Screenshots

Sand Loop Level Guides
Sand Loop Level 483 Strategy: Mastering the Moonlit Forest
Welcome to Level 483, a stage that disguises a complex logistical puzzle behind a beautiful, serene pixel art landscape. At first glance, the "Moonlit Forest" appears to be a simple artistic challenge involving evergreen trees and a glowing moon. However, players quickly realize that the level is actually a rigorous test of resource management and conveyor-belt logic. The primary difficulty here does not come from the physics of the sand, but from the rigid supply chain enforced by Orange Chests and Rope mechanics. This guide is designed to help you navigate these logistical nightmares, ensuring you clear the obstacles efficiently without getting stuck with a clogged tray.
Level Overview and Core Mechanics
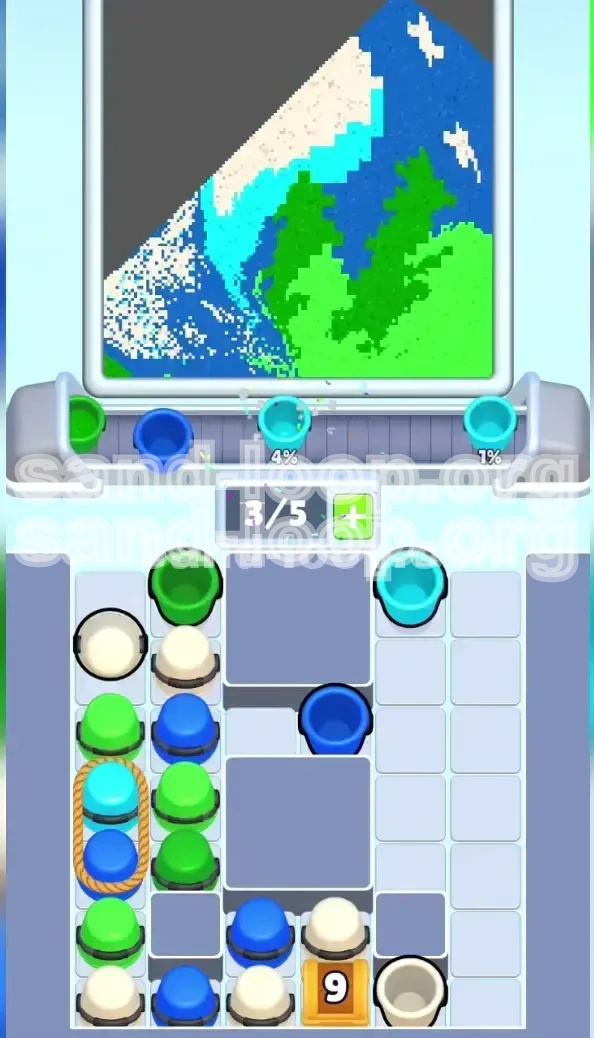
Level 483 is set against a dark blue night sky populated by scattered white stars and a large, luminous moon featuring a cyan outer ring and a white core. The foreground consists of jagged evergreen trees. While the visual composition is static, the underlying game mechanics are highly dynamic. You are dealing with a supply tray that is heavily rigged to stall your progress. The level introduces two specific types of blockers: Orange Chests that require a specific volume of sand to unlock, and Ropes that tether two cups together, forcing you to waste one color to get another. Understanding the interplay between these blockers is the key to success.
Primary Objectives for Victory
To achieve a three-star finish and avoid restarting, you must adhere to a strict set of goals that prioritize tray management over simple coloring:
- Clear the 6-Chest Early: Your first major hurdle is the Orange Chest labeled '6' located in the upper-middle section. This blocks access to crucial middle-row colors.
- Manage the Rope Pairs: You will encounter tethered cups (Cyan-Green and Green-Cyan). You must plan your moves to ensure you don't end up with useless colors clogging your limited conveyor slots.
- Preserve White Sand: The White cups are buried deep and are essential for the moon and stars. Avoid the temptation to dig for them until the path is clear.
- Efficient Star Filling: The stars are single-pixel targets. You must complete the level with minimal sand spillage into the surrounding sky.
The Color Palette Strategy
The level utilizes a tight, four-color palette where mixing is not an option, but order is everything. Here is the strategic hierarchy of colors for Level 483:
- Priority 1: Lime Green (Trees): This is your workhorse color. It occupies the largest area and is used to feed the initial chests. Clearing this early frees up your mental load and conveyor space.
- Priority 2: Dark Blue (Sky): Once the trees are done, the sky is your safest dumping ground for excess cups while you wait for chests to clear.
- Priority 3: Cyan (Moon Glow): This is a precision color. The area is thin and unforgiving. It must be handled after the sky is partially filled to avoid overflow.
- Priority 4: White (Moon Core & Stars): The most precious resource. These cups are locked behind the 9-Chest and must be treated as gold. Do not waste a single granule.
Analyzing the Obstacles: Chests and Ropes
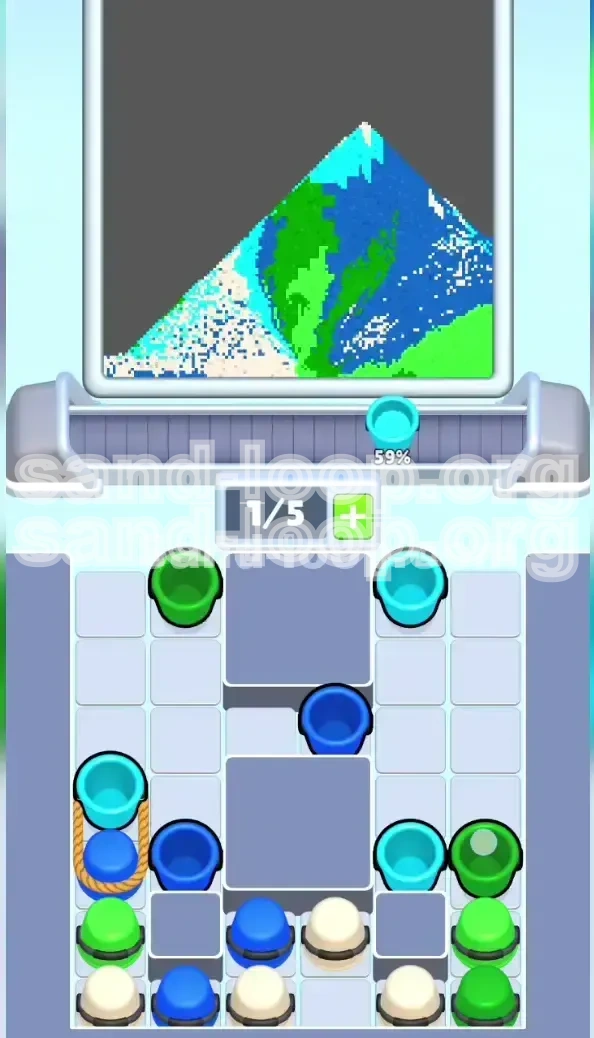
The unique challenge of Level 483 lies in its blockers. The Orange Chests (labeled 6 and 9) act as gatekeepers. The '6' Chest sits in the middle row, essentially cutting off your supply line until you feed it 6 units of any color. The '9' Chest sits at the bottom, trapping the White cups. This means you must cycle through 15 cups of "sacrifice" colors before you can even access the level's final objective. The Rope mechanic further complicates this by pairing a Cyan cup with a Green cup on the left, and a Green cup with a Cyan cup on the right. This forces you to take colors you might not need immediately, potentially leading to a deadlock if your conveyor is full.
Step-by-Step Walkthrough: Phase 1 - The Tree Clear
The first phase of the level is the most critical. If you mishandle the opening moves, you will run out of conveyor space and lose the game. Your focus here is 100% on the Lime Green trees and clearing the initial obstacles.
Initial Tray Assessment
When the level loads, take a second to look at your supply tray. You will likely see Green cups available in the top corners. Do not touch the center column yet, as it is blocked by the '6' Chest. Your immediate goal is to generate space in your tray. If you see any Green cups in the top two rows, tap them immediately to get them onto your conveyor belt. You need a healthy flow of Green to start the level.
Feeding the 6-Chest
The '6' Chest is your first boss fight. It requires exactly 6 cups to be destroyed. Since you cannot access the middle row until this is gone, you should aggressively feed it using the Green cups you just collected. Pour the Green sand into the chest until it bursts. Important: Do not try to be precise with the trees yet. You are simply trying to clear the board. Once the chest is gone, you will unlock the Dark Blue cups located in the middle row, which are essential for the next phase.
Blocking and Filling the Trees
With the chest gone, continue processing Green cups. Start filling the bottom-most branches of the evergreen trees first. Physics in Sand Loop dictates that sand piles from the bottom up. By focusing on the base of the trees, you ensure that the sand stacks naturally towards the tips. Use short, controlled taps. If you pour too aggressively, the sand will spill over the jagged edges into the "Sky" zone, which you want to keep blue for now. Aim to get the trees about 60-70% full during this phase.
Managing the First Rope Pair
As you deplete the initial Green supply, you will encounter the first Rope obstacle on the left side: a Cyan cup tethered to a Green cup. You need the Green cup at the bottom to finish the trees, but the Rope mechanic forces you to take the Cyan cup first. Tap the top Cyan cup. It will move to your conveyor. Do not pour this Cyan yet. It is too early. Just tap it to clear the Rope so the Green cup underneath becomes available. Immediately tap that Green cup and use it to continue filling the trees. This "tap and hold" strategy prevents you from accidentally spilling Cyan into the unfinished tree areas.
Trash Management Strategy
By the time the trees are nearly full, you might find yourself with leftover Green cups and a conveyor that is filling up. You must avoid "Conveyor Stalemate." If the '9' Chest is still active (it likely is), use your excess Green cups to feed it. Every cup of Green you dump into the chest brings you closer to the White sand. Never hold onto a Green cup once the trees are 100% complete. Treat the chest as your trash can for obsolete colors.
Step-by-Step Walkthrough: Phase 2 - Sky and Chests
With the forest mostly finished, the visual focus shifts to the background. This phase is about clearing the massive volume of Dark Blue sand while simultaneously chipping away at the second major obstacle.
Unlocking the Dark Blue Flow
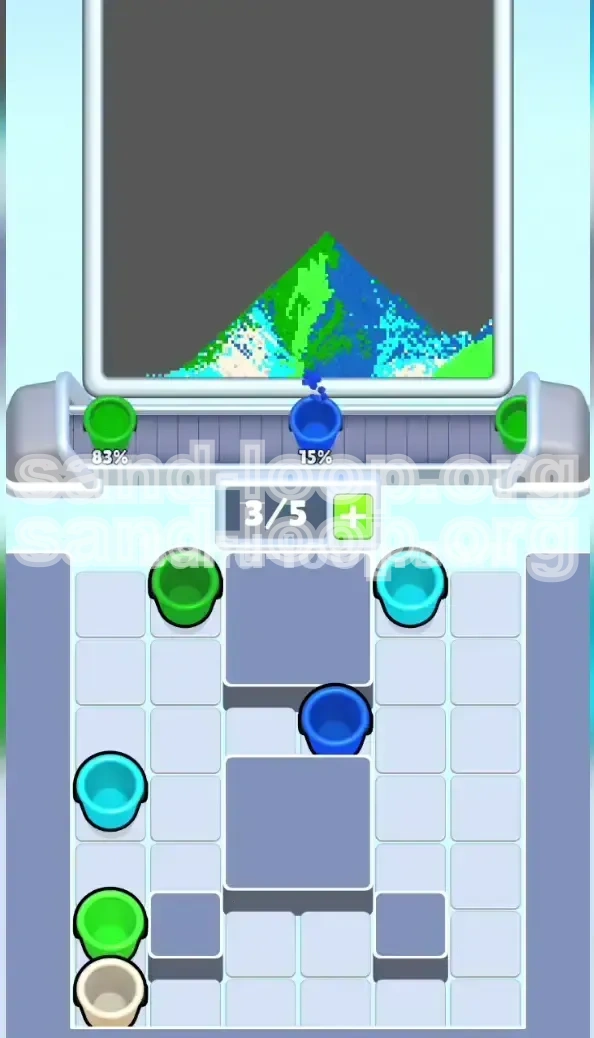
Now that the '6' Chest is gone, the middle row should be pumping out Dark Blue cups. Switch your focus entirely to this color. The night sky is the largest single area in the level, so it is the perfect place to dump a large volume of sand quickly. Start pouring Dark Blue into the top corners of the canvas and let it rain down. This is a low-precision task, so you can pour relatively fast to keep your conveyor moving.
The Right-Side Rope Maneuver
Similar to the left side, the right side features a Rope trap, but the order is reversed: Green is on top, Cyan is on the bottom. If you still have tree work to do, tap the Green to finish it. If the trees are done, you have to tap the Green simply to get it out of the way so you can access the Cyan underneath. Once the Green is cleared (and dumped into the chest), tap the Cyan. You now have two Cyan cups on your conveyor (one from the left, one from the right). Hold these. We are preparing for the moon phase.
Aggressive Chest Feeding
The '9' Chest is the final lock. It sits on top of the White cups. During this phase, you should be cycling through Dark Blue cups for the sky and dumping any excess into the '9' Chest. You want to bring this chest to the brink of bursting (around 8 or 9 hits) before you move to the final phase. Pro Tip: Do not fully destroy the '9' Chest until you have the sky 90% filled and your Cyan cups ready. If you pop the chest too early, the White cups will spawn and clog your conveyor while you are still trying to finish the sky.
Sky Volume Control
Be careful not to overfill the sky. You need to leave a thin buffer zone around the moon for the Cyan glow. If the Dark Blue sand is touching the moon's outline, your Cyan layer will look muddy. Aim to stop the Blue sand about 10-15 pixels away from the moon's edge. This precision ensures a crisp, clean separation between the sky and the atmospheric glow.
Step-by-Step Walkthrough: Phase 3 - The Moon and Stars
This is the precision phase. The broad strokes are done, and now we are dealing with small areas and unforgiving hitboxes. Patience is your greatest asset here.
Popping the 9-Chest
Once the sky is full and you have your Cyan cups locked and loaded, finish off the last hit on the '9' Chest. This will clear the bottom row of the supply tray. Finally, the White cups will begin to spawn. This changes the dynamic of the game completely. You now have three colors to manage (Blue, Cyan, White) and very little room for error.
Applying the Cyan Glow
Retrieve the Cyan cups you saved from the Rope phase. The moon has a specific atmospheric ring that requires Cyan. This is a narrow channel. Technique: Use a "pulsing" pour method. Tap, release, tap, release. Do not hold the pour. Gravity will pull the sand down, but the pulsing action prevents it from piling up and spilling into the white center or the blue sky. If you spill Cyan into the sky, the level looks messy; if you spill into the center, you ruin the moon's core. Take your time.
Filling the White Core
With the Cyan ring established, tap the newly available White cups. The center of the moon is large and forgiving compared to the stars. Pour the White sand into the center of the moon until it is full. This area is a "safe zone"—it is hard to miss. However, watch your pile height. If you pile the sand too high in the center, it will overflow over the Cyan ring, ruining the crisp boundary. Stop pouring when the level is flat with the top of the moon circle.
The Star Challenge (Pixel Precision)
This is the hardest part of Level 483. The stars are tiny, single-pixel targets scattered in the blue sky. You cannot "pour" to fill them; you must "drip" into them.
- Wait for a White cup to align perfectly with the vertical axis of a star.
- Give the smallest possible tap. A single granule should fall.
- If you miss and the sand hits the blue sky, stop immediately. Let the conveyor rotate to the next cup.
- Do not try to "fix" a miss by pouring more. You will just turn the sky gray.
- There is no timer pressure here. Wait for the perfect alignment.
Final Cleanup
Once all stars are lit and the moon is glowing, check your tray. You might have a few leftover White or Blue cups. The level usually ends as soon as the last star is filled, but if you have leftovers, look for any small gaps in the corners of the moon or sky. If everything is full, the level will trigger the victory sequence automatically.
Key Tips and Common Mistakes
Even with a strategy, the specific mechanics of Sand Loop can trip you up. These tips address the most common failure points observed in Level 483.
The "Deadlock" Prevention
The most common way to fail Level 483 is by filling all 5 slots of your conveyor with colors you cannot use. For example, if you tap 5 Green cups while the 6-Chest is full and the trees are already done, you have no moves. The Rule: Always keep at least one slot open on your conveyor. If you have 4 items and the next one isn't immediately useful, wait. Do not tap a new cup until you have poured or destroyed an existing one.
The "Rope" Timing Trap
Players often waste time trying to use the top cup of a rope immediately. Remember, Ropes are about unlocking access, not just using color. If you get a Cyan cup from a Rope but the trees aren't done, just let the Cyan sit on the conveyor (or use it to feed a chest if you are desperate). Do not pour Cyan into the Green trees just to clear the slot. Mixing colors makes the level visually unclear and can mess up hitboxes.
Chest Priority Over Aesthetics
It is tempting to try and make the picture look "perfect" as you go. However, in Level 483, function beats fashion. If you have a choice between filling a small gap in a tree branch or feeding the 6-Chest to unlock the Blue sky, always choose the chest. Aesthetic gaps can be fixed later; a locked tray ends the run. Progression is always more important than precision in the first two phases.
Star Filling Precision
The stars are hit-scanned, meaning the game checks if the sand touches the pixel. Many players fail by pouring too hard, causing the sand to "slide" off the star pixel and into the sky. Tip: Try to drop the sand from a higher point. Let the sand accelerate slightly so it sticks into the star pixel, rather than gently pouring it so it accumulates on the edge.
Handling the "9" Chest bottleneck
The transition from Phase 2 to Phase 3 is where most players get stuck. They fill the sky, pop the chest, and get overwhelmed by the sudden influx of White cups while they still have Blue cups on the belt. Solution: Before you pop the 9-Chest, pour out as much Blue as possible to clear your tray. Have an empty tray (or 1-2 items max) before you deliver the final blow to the chest. This gives you the flexibility to handle the White cups immediately.
Speed Run and Optimization Guide
For players looking to achieve a high score or a fast time, efficiency is paramount. You must minimize the time spent waiting for the conveyor to rotate.
The "Parallel Processing" Trick
Don't wait for one color to finish before starting the next. While the Dark Blue sand is settling into the sky, immediately switch your focus to tapping the next set of Green cups or managing the Ropes. The game's physics engine runs in the background while you manage the UI. Keep your fingers moving constantly. If you are watching sand fall, you are losing time.
Pre-loading the Conveyor
At the very start of the level, tap the Green cups in the top corners before you even pour the first drop. This gets them moving toward the play area. By the time you finish your first pour on the tree, the second cup is already arriving. This pipeline management shaves seconds off your time.
Chest Combo Moves
When feeding the Orange Chests, try to combine the end of one pour with the start of another. If you have a Green cup and a Blue cup ready, pour the Green until it's almost empty, then slide immediately to the Blue without lifting your finger (if on touch) or clicking. This maintains the flow of sand into the chest, clearing it faster than individual taps.
Ignoring Perfection
For a speed run, 100% completion is not required to pass the level, though it is for three stars. If you are just trying to beat the clock, skip the "fine detail" on the trees. A slightly messy tree branch that passes the threshold is acceptable. Focus 90% of your effort on the Chests and the Moon. The trees just need to be "filled enough" to pass the color check.
The "Perfect Rotation" for Stars
Memorize the rotation speed of the conveyor. The stars appear at fixed intervals. Instead of reacting to the star, predict when the conveyor will bring the White cup into alignment. Start your tap motion a fraction of a second before alignment. This "anticipation gaming" prevents the delay of reacting to the visual cue, significantly speeding up the final phase of the level.