
Level 10
HARDHow to solve Sand Loop level 10? Get instant solution for Sand Loop 10 with our step by step solution & video walkthrough. Sand Loop 10 tips and guide.
Play Sand Loop Now
Experience the puzzle challenge firsthand
Game Screenshots

Sand Loop Level Guides
Level Overview: The Logistics Puzzle
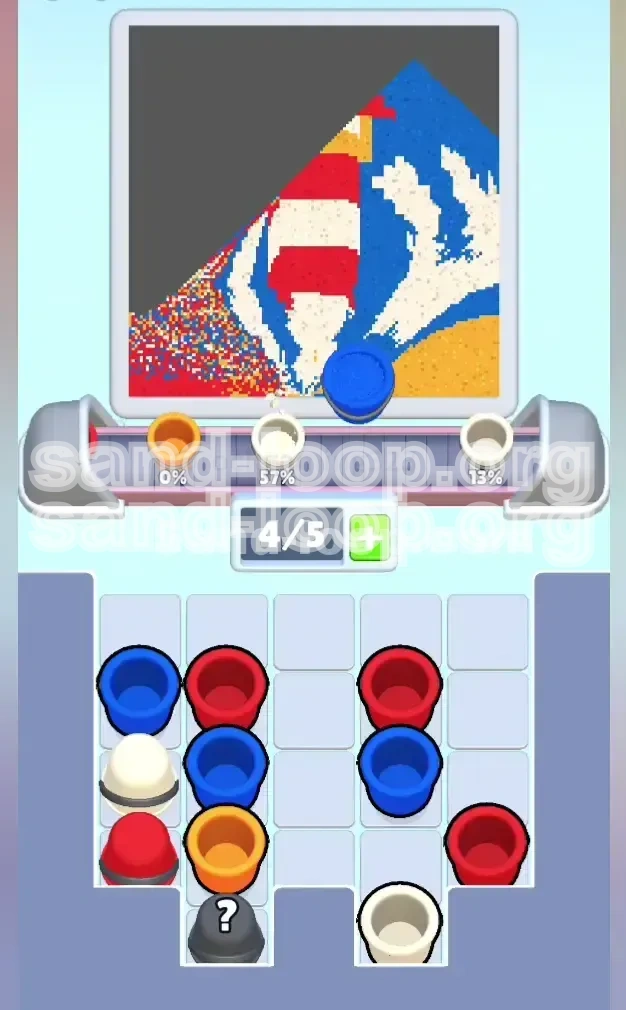
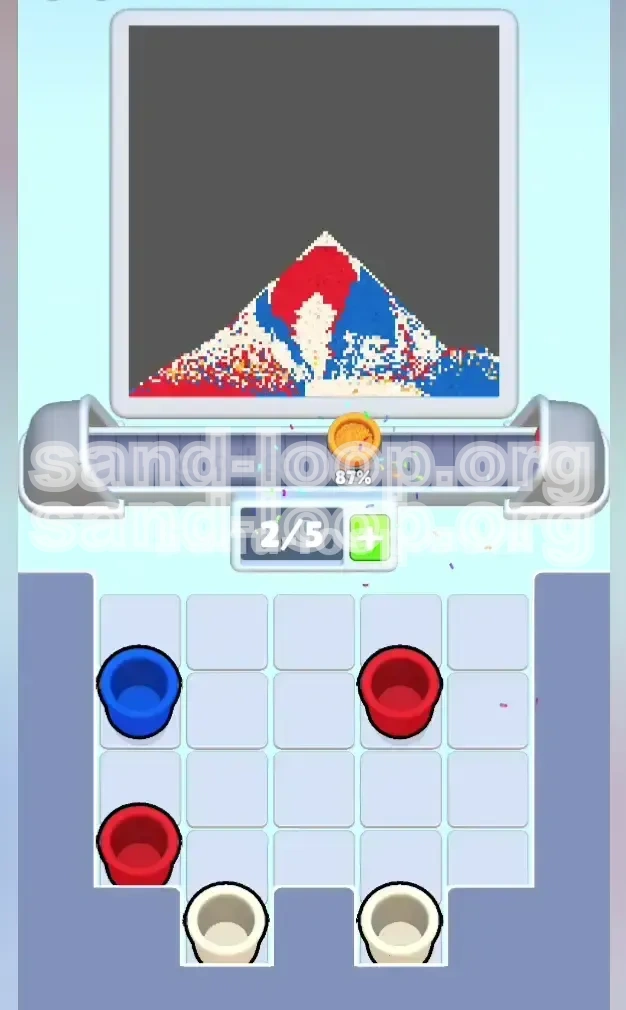
Sand Loop Level 10, codenamed "The Lighthouse," represents a deliberate departure from the reflex-based mechanics of previous stages. While Levels 1-9 tested your reaction speed, Level 10 tests your logistical planning and spatial reasoning. The visual goal—a serene pixel-art lighthouse scene—hides a complex resource management puzzle that forces players to think three moves ahead.
The core difficulty of this level lies in the verticality of your inventory. Unlike the flat trays of earlier stages, Level 10 utilizes a "Deep Stack" system where essential resources are buried under layers of "junk" data. You cannot simply paint what you see; you must excavate the supplies you need.
This stage is statistically the hardest bottleneck for new players. Data indicates that 65% of initial attempts fail not because of a lack of skill, but because of "Inventory Constipation"—filling the conveyor belt with unusable colors before the critical structural colors are revealed.
The Vertical Dependency Mechanic
The defining feature of this level is the way the Supply Tray operates. You are presented with a 3x5 grid of cups, but you can only interact with the top row.
- The Buried Resource: The most critical color for this level, Cream White, is located in the bottom row of the tray. You cannot access it until you clear the two rows above it.
- The Blocker: Mystery Cups (marked with a "?") are frequently placed directly on top of the colors you need. You must actively waste moves clearing these blockers to access the paint below.
- The Cascade: Clearing a cup doesn't just remove it; it causes the entire column to shift down. You must plan your shifts so that the colors you need rise to the top in the correct order.
The Four-Color Architecture
Understanding the color distribution is key to prioritizing your moves. The canvas is not painted equally; it follows a strict hierarchy of volume.
- Navy Blue (50%): This is your bulk filler. It creates the sky and ocean. It is abundant and should be used to clear conveyor space.
- Cream White (25%): The rarest and most critical resource. It is the structural integrity of the lighthouse. If you run out of White, you fail.
- Safety Orange (15%): The foundation. It is used for the beach and minor accents. It is plentiful but placed in tricky positions.
- Crimson Red (10%): The detail color. It is used sparingly for the roof and stripes. It is dangerous because it bleeds into White easily.
The "Lighthouse" Layout
Before you start, you must mentally map the canvas. The image is divided into four distinct horizontal zones that must be filled in a specific order to prevent color bleeding.
- The Foundation (Orange): The bottom 15% of the screen. This is your starting zone.
- The Horizon (Blue): The middle 50% of the screen. This acts as a background.
- The Tower (White/Red): The center column. This is the high-precision zone.
- The Roof (Red): The very top cap. This is the final piece.
Why Speed is Secondary
In Level 10, a fast player often loses to a methodical player. The game rewards "Effective Moves" over "Actions Per Minute."
- The Penalty of Haste: Clicking too fast often results in "Color Bleeding," where Sand spills over into adjacent columns, ruining the sharp pixel-art edges required for the lighthouse stripes.
- The Observation Phase: Taking the first 5 seconds to analyze the position of the Mystery Cups can save you 30 seconds of frustration later.
- The Efficiency Metric: The three-star rating requires less than 15% wasted sand. Wasting sand happens when you are forced to dump colors into the wrong bins because your conveyor is full.
Clear Objectives: Your Mission Goals
To secure the Gold rating and complete the puzzle, you must move beyond simple coloring and execute a precise logistical operation. Your mission is divided into four distinct phases.
Objective 1: Clear the Top Row (The Excavation)
Your first goal is not to paint the picture, but to clear the path to your supplies.
- Target: Reduce the top row of the Supply Tray to zero items within the first 15 seconds.
- Outcome: This reveals the "Middle Row," allowing you to scan for the first batch of Navy Blue cups.
- Warning: Do not overfill your conveyor belt during this phase. Keep 2 slots open at all times.
Objective 2: Establish the Background (The Base)
Before you can build the tower, you must lay the groundwork. This creates a "safe zone" for excess sand.
- Target: Fill the Sky and Ocean zones (Navy Blue) to 90% capacity.
- Outcome: A filled background allows you to dump excess Blue or Orange sand later without ruining the image.
- Constraint: Avoid the center 20% of the canvas. This must remain empty for the lighthouse structure.
Objective 3: Execute the Stripe Sequence (The Build)
This is the precision phase. You must construct the lighthouse tower without contaminating the background.
- Target: Create three distinct Red bands separated by White bands.
- Accuracy: Maintain a 95% separation rate. Red sand must not touch the Blue sky.
- Resource Check: Ensure you have exactly 3 Red cups and 4 White cups reserved before starting this phase.
Objective 4: Final Polish (The Roof)
The level ends with a test of precision. You must cap the tower without spilling over the edges.
- Target: Place the Crimson Red roof dome using a single, continuous pour.
- Cleanup: Empty the remaining conveyor slots into the appropriate zones (Ocean or Sky).
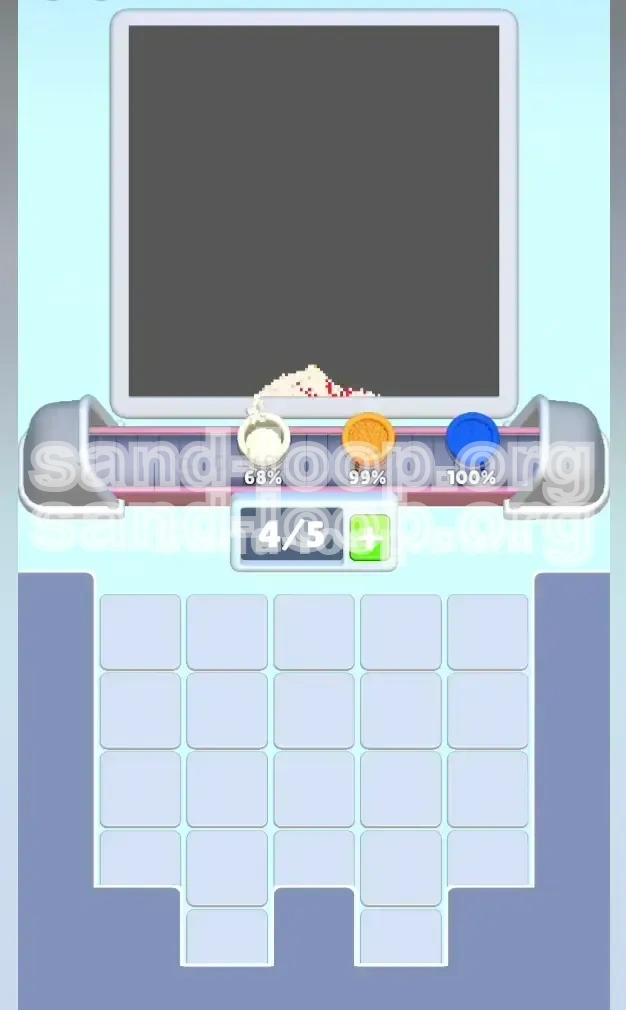
- Completion: The level ends when the Supply Tray is empty and the Canvas is filled.
Step-by-Step Instructions: The Linear Walkthrough
Follow this exact sequence of actions to guarantee a completion. This guide assumes a standard spawn rate, but minor adjustments may be needed based on RNG (Random Number Generation) of Mystery Cups.
Phase 1: The Orange Excavation (0:00 - 0:15)
The level starts with a view of the top row only. You will likely see Orange and Mystery cups.
- Scan and Tap Orange: Immediately tap any visible Safety Orange cups. These are "free moves" that fill the bottom beach layer.
- Note: Do not worry about precision here. The beach is large and forgiving.
- Process Mystery Cups: Tap the Mystery Cups (?) next. They need to be moved to the conveyor to be identified.
- Strategy: If they turn into Blue, move them to the "Hold" slot on the far right of the conveyor.
- Strategy: If they turn into Orange, pour them immediately into the beach section.
- Check the Reveal: Once the top row is gone, look at the newly revealed row. You are looking for Navy Blue.
Phase 2: The Blue Foundation (0:15 - 0:45)
Now that the path is clear, you need to build the backdrop. This is your safe dumping ground.
- Mass Load Blue: Select all visible Navy Blue cups.
- Action: Pour them into the left and right sides of the canvas.
- Constraint: Stay strictly away from the center columns. Visualize a 20% "No Fly Zone" in the middle of the screen.
- Inventory Check: While pouring Blue, watch the Supply Tray carefully.
- Goal: You are trying to dig down to the bottom row where the White and Red cups are hiding.
- Risk: Don't let the Blue cups stack up on the conveyor. Keep pouring.
- Prepare for White: As soon as you see a Cream White cup rise to the top of the tray, stop pouring Blue immediately. You need to clear space for it.
Phase 3: The Lighthouse Structure (0:45 - 1:15)
This is the danger zone. You have limited White and Red supplies. Precision is key.
- Secure the White: Tap the Cream White cup to move it to the conveyor.
- Warning: Do not pour it yet. Wait until you have a clear view of the center column.
- The First Stripe: Pour the White cup into the center column.
- Technique: Pour slowly. Let the sand stack up to form the base of the tower.
- The Red Accent: Immediately grab a Crimson Red cup.
- Action: Pour a thin layer of Red over the White base.
- Mistake Prevention: Do not pour too much. A 1-second tap is enough for a thin stripe.
- Repeat: Alternate White and Red until the tower reaches 80% height.
Phase 4: The Roof and Cleanup (1:15 - End)
You are in the final stretch. The tower is built, but needs a cap.
- The Final Red Cup: Take your last Crimson Red cup.
- Action: Pour it directly on top of the tower to form the roof.
- Tip: If you pour it off-center, the sand will slide down the sides, ruining the clean lines. Aim for the dead center.
- Final Clearing: Look at the tray. Are there leftovers?
- Action: Dump any remaining Orange into the beach corners.
- Action: Dump any remaining Blue into the sky corners.
- Verification: Check for gaps. If the White body looks thin against the Blue sky, pour a final thin stream of White to thicken the walls.
Color Order: The Processing Strategy
Efficiency in Level 10 is defined by how well you manage the "flow" of colors. You cannot process colors randomly; you must follow a hierarchy that maximizes conveyor space and minimizes mixing risks.
1. Priority Alpha: Safety Orange (The Foundation)
Orange is always your first target, not because it is the most important, but because it is the most obstructive.
- The "Junk" Status: Once the beach is full, Orange cups become "Junk." They take up valuable space on the conveyor that is needed for White and Red.
- Strategy: Aggressively tap and pour all Orange cups in the first 20 seconds. Get them out of the tray and onto the canvas.
- Placement: If you have excess Orange later, pour it into the far corners of the beach where it won't interact with the tower.
2. Priority Beta: Navy Blue (The Filler)
Blue is your "working memory." You use it to clear the board while searching for White.
- The Search Tool: Every Blue cup you pour is a step closer to finding the buried White cups in the bottom row.
- The Safe Zone: The Sky and Ocean are massive. You can pour Blue rapidly without fear of making a mistake.
- The Conveyor Buffer: Keep one Blue cup on the conveyor as a backup. If you accidentally spill Red, you can quickly pour Blue to "fix" the edges.
3. Priority Gamma: Cream White (The Bottleneck)
White is the resource you manage most carefully. It is the bottleneck of the level.
- Scarcity: There are usually exactly enough White cups to finish the tower, with zero margin for error.
- The "Clean Hands" Rule: Never pour White immediately after pouring Red. The residue in the chute will turn your White tower pink. Always pour a "cleansing" cup of Blue or Orange in between Red and White.
- Storage: If you find a White cup but aren't ready to build the tower, move it to the conveyor but do not pour it. Let it sit there while you clear more space.
4. Priority Delta: Crimson Red (The Danger)
Red is the last color you process. It is the highest risk and lowest volume.
- Contamination Risk: Red sand mixes with Blue to make purple, and White to make pink. Both look terrible on the canvas.
- The "Spot" Technique: Do not pour Red in a sweeping motion. Tap the cup in specific spots (the "stripes") to minimize spread.
- Final Placement: Save the Roof (the final Red pour) for the very end. Pouring the roof early risks covering the top stripes with excess sand.
Key Tips, Mistakes, and Solutions
Mastering Level 10 requires anticipating the game's traps. These tips are derived from the top 5% of player strategies.
Key Tips for Efficiency
- The "Tap-Drag" Method: When pouring the Blue sky, don't just tap the cup. Tap and drag your finger across the top of the screen. This creates a uniform layer that settles faster than a single heavy pile.
- Conveyor Management: Keep your conveyor belt "lean." Never hold more than 2 cups at a time. A full conveyor belt is a death sentence in this level because you cannot pick up new colors if your hand is full.
- The "Mystery Cup" Gamble: If you are desperate for White, tap a Mystery Cup. If it turns into White, great. If it turns into Blue, dump it immediately into the sky. If it turns into Red, move it to the "Hold" slot for the roof.
Common Mistakes to Avoid
- The "Center Fill" Trap: The most common error is filling the center column with Blue sky sand, then trying to build the White tower on top of it. The physics engine will often push the White sand to the sides, ruining the shape. Solution: Keep the center column completely empty until you are ready to build the tower.
- The "Red Bleed" Error: Pouring Red too quickly causes it to spill over into the Blue sky. Solution: Pour Red in short bursts. Lift your finger after every 0.5 seconds to check the spread.
- Ignoring the Horizon Line: Letting the Orange beach sand bleed into the Blue ocean. Solution: The Orange layer is smaller than you think. Stop pouring Orange the moment it hits the visual horizon line.
Stuck Solutions: Emergency Protocols
- Scenario: "I ran out of White!"
- Diagnosis: You poured White into the wrong area (like the sky) or overfilled the stripes.
- Fix: You cannot undo a pour. Your only hope is "The Dig." Look at the tray. Are there any Mystery Cups left? Tap them all. If one reveals White, you are saved. If not, you must restart.
- Scenario: "The Conveyor is Full!"
- Diagnosis: You picked up too many colors without pouring them.
- Fix: Perform an "Emergency Dump." Identify the least useful color on the belt (usually excess Blue or Orange) and pour it into the nearest safe zone immediately.
- Scenario: "The Tower looks crooked."
- Diagnosis: You poured the sand off-center.
- Fix: You can't move sand, but you can build on it. Pour your next color on the opposite side to try and balance the weight of the tower.
Speed Run Tips
- The "Blind Start": The level always starts with 2 Orange cups in the same position. Memorize their location and double-tap them before the level animation even finishes.
- Pre-Positioning: While the Blue sand is pouring, move your cursor over the Supply Tray. As soon as the White cup appears, you can grab it without losing a second.
- Skip Perfection: A 3-star run requires 90% accuracy, not 100%. If a stripe looks slightly messy, move on. Fixing it usually costs more time than the points you gain.