
Level 15
HARDHow to solve Sand Loop level 15? Get instant solution for Sand Loop 15 with our step by step solution & video walkthrough. Sand Loop 15 tips and guide.
Play Sand Loop Now
Experience the puzzle challenge firsthand
Game Screenshots

Sand Loop Level Guides
Level Overview: The Vibrant Seascape Challenge
Visual Breakdown of the Canvas
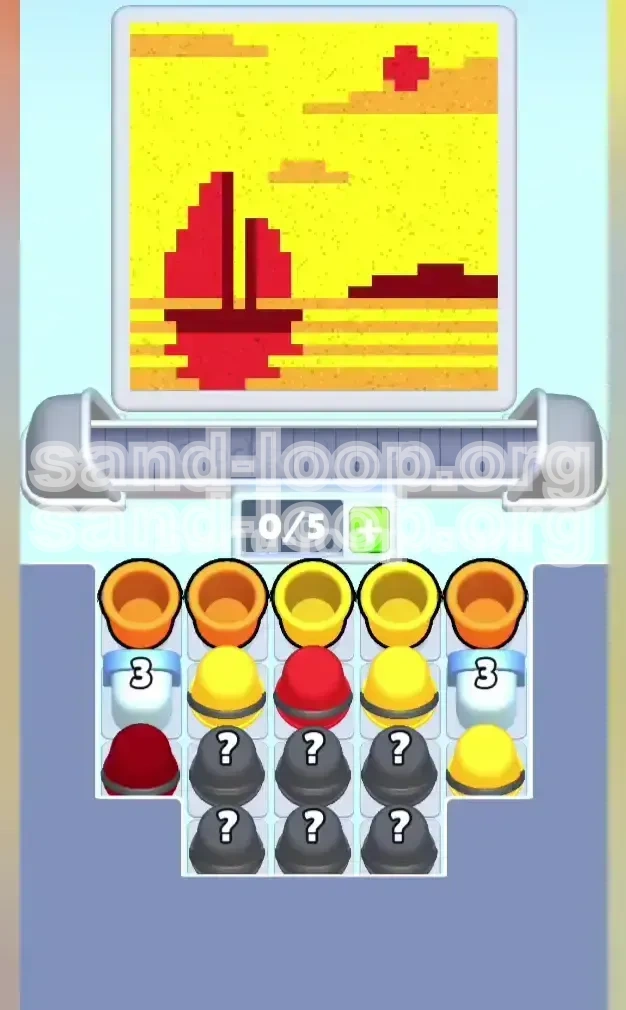
Level 15 presents a deceptively complex pixel art masterpiece titled "Vibrant Seascape." The canvas is dominated by a large, fiery yellow background representing a sunset, accounting for approximately 60% of the total area. In the foreground, a detailed red sailboat and ship structures require precise filling. The remaining 15% consists of scattered orange patches and horizontal accent bands. The primary challenge here is containment; the yellow is aggressive and wants to spread, while the orange and red require surgical precision to define the image details without bleeding into each other.
Conveyor Layout and Initial State
Your starting setup is deceptive. While it appears you have space, the tray is effectively clogged. You begin with 5 cups already occupying the belt slots: two Yellow cups, two Orange cups (flanking the sides), and one Red cup in the center. Crucially, your tray is at maximum capacity (0 free slots out of 3), with "mystery" cups buried underneath the visible ones. This means you cannot simply pull new colors as you please; you must process the existing cups to free up tray space. The belt moves at a medium pace, but the "Lead Time" (the delay between tapping a cup and it reaching the pour point) is your biggest enemy here.
The Core Mechanic: Lead Time vs. Slot Economy
This level is a lesson in logistics. Unlike previous levels where you could tap rapidly, Level 15 requires you to respect the "Travel Time." It takes roughly 1.5 to 2 seconds for a cup to move from the tap point to the dispenser. If you tap a new cup before the previous one has poured, you risk misalignment. Furthermore, the "Slot Economy" is tight. You must maintain at least 1 or 2 empty slots on the belt at all times. If you fill all 8 slots, the belt jams, the timer stops, and you lose your rhythm. You are balancing the speed of the belt against the speed of your decision-making.
Win Conditions and Targets
To secure the win, you must fill three distinct color meters to 100%.
- Yellow Target: High volume (approx. 60-65% of canvas).
- Red Target: Medium volume (approx. 20-25% of canvas).
- Orange Target: Low volume (approx. 10-15% of canvas).
The "Game Over" conditions are strict: contaminating a color region (e.g., pouring Red into a Yellow zone) or completely jamming the belt with no moves left. You have a margin of error of about 5% overfill, but exceeding this will trigger a failure state. Precision is the key to unlocking the next stage.
Step-by-Step Instructions: The Opening Sequence
Phase 1: The "Red Anchor" Strategy (0% - 15%)
Do not start with Yellow, despite its abundance. Begin with the Red Cup that is already pre-loaded on the belt. Tap it immediately. As it travels toward the pour point (approx. 2 seconds), use this downtime to tap one of the Yellow Cups in the tray. Do not tap the second one yet.
- Action 1: Tap the initial Red cup.
- Action 2: Wait for the Red cup to pass the midpoint, then tap one Yellow cup onto the belt.
This staggered approach ensures that by the time the Red cup has poured and vacated the belt, your Yellow cup is just arriving at the start, keeping the flow moving without creating a traffic jam.
Phase 2: Managing the Yellow Bulk (15% - 40%)
Once the first Red pour is complete, your Yellow cup is next in line. Let it pour. While it is pouring, assess your tray. You likely have 1 free slot now. Pull the second Yellow Cup immediately.
- Critical Move: Let the first Yellow pour finish. Do not tap it again.
- Follow-up: As the first Yellow cup leaves the belt, your second Yellow cup should be sliding into position.
- Tip: Do not overload the belt with more cups yet. You want to keep the belt count around 4 or 5 cups to maintain fluid movement. This phase establishes the background foundation required for the sailboat details later.
Phase 3: The Orange Reveal (40% - 55%)
With the background yellows now laid down, you need to address the tray blockage. The mystery cups underneath are likely essential for later details, but you can't reach them yet. Focus on the Orange Cups visible on the flanks.
- Action: Pull one Orange cup onto the belt.
- Execution: Time this pour carefully. You want to hit the horizontal accent bands. Since Orange is a smaller percentage target (only ~10-15%), you generally only need to process 2 to 3 Orange cups total for the entire level. Do not chain them. Pour one, let it leave, then check your meters.
Phase 4: Unlocking the Tray (55% - 70%)
By now, you have cycled through the initial cups. You should see the question-mark cups shifting to the top of the tray. You need to create a "Breathing Room" slot to pull them.
- Tactical Pause: Stop loading new cups for 3-4 seconds. Let the existing cups on the belt flow through the dispenser.
- The Swap: Once a cup pours and drops off, you will see a slot open. Immediately pull a mystery cup. These are usually darker shades or specific colors needed for the ship's hull details. Getting these onto the belt is critical for the mid-game transition.
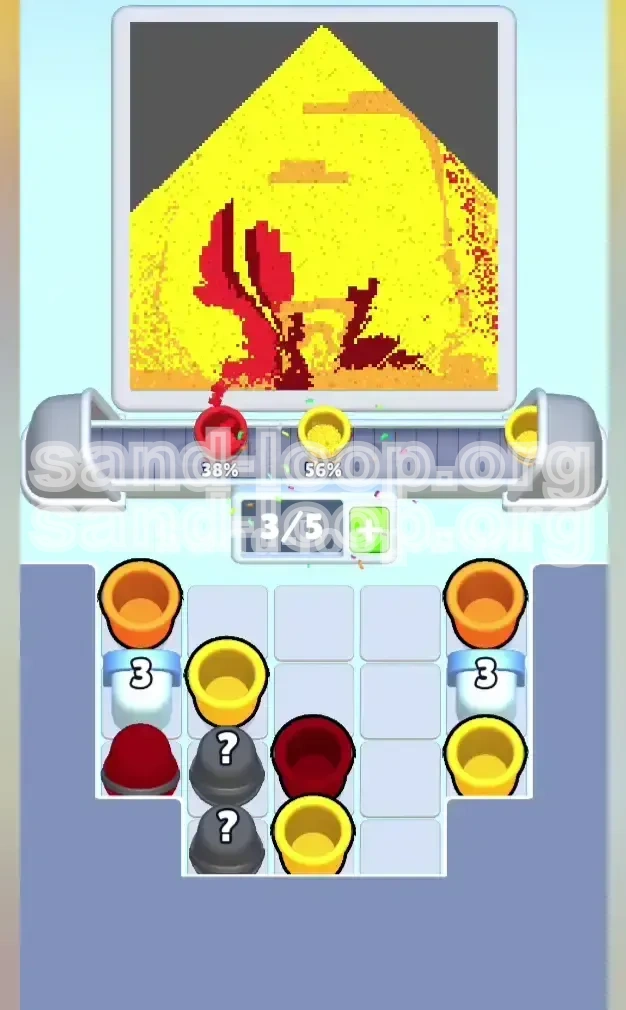
Phase 5: The Mid-Game Transition (70% - 85%)
You are now in the danger zone. The Yellow meter is likely near 80-90%, and Red is around 60%.
- Strategy: Switch focus entirely to Red. You need to finish the sailboat structure.
- Warning: Do NOT pour more Yellow unless the meter is strictly below 90%. If you pour Yellow at 95%, you will lose.
- Rhythm: Pour Red -> Wait for travel -> Pull next cup. This slow, deliberate pace prevents the "overflow" mistake that plagues most players at this stage.
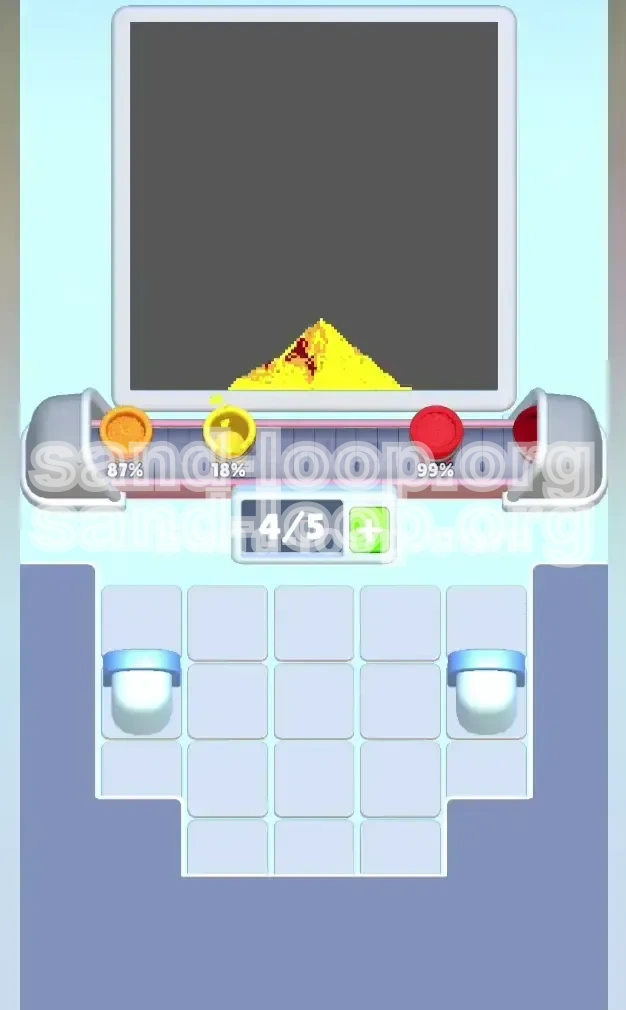
Phase 6: The Final Polish (85% - 100%)
In the last 15%, the game becomes about pixel-perfect placement.
- Action: You are likely looking for the final 5% of Orange or Red.
- Technique: If a cup is moving too fast and you are afraid of missing the pour zone, simply let it pass. It is better to wait for it to come around on the belt loop (if applicable) or to pull a different cup than to risk a mis-pour on a nearly finished canvas. Patience wins here.
Color Order and Processing Logic
The Priority Hierarchy: Red > Yellow > Orange
While Yellow is the most voluminous color, it is not the most urgent. Red defines the focal point (the boat) and acts as the anchor for your eye. If you save Red for the very end, you often find yourself with no room to maneuver the cup into the tight spots required. Yellow is your "filler" and should be used to occupy the belt while you wait for other slots to open. Orange is your "currency"—use it sparingly to bridge gaps.
Understanding the "Question Mark" Probability
The mystery cups in Level 15 are not random; they are weighted based on what you have already poured. Since you started with Red and Yellow, the game algorithm often buries the secondary colors (like Dark Red or more Orange) or duplicate primary colors you are running low on. Do not ignore them. If you see a mystery cup, prioritize pulling it over a standard cup, as it likely contains a specific shade required to finish a detail that standard cups can't fill.
The "Buffer Zone" Concept
Always maintain a 20% buffer on your color meters. Never try to fill a color from 80% to 100% in a single tap unless you are 100% sure of the pour volume. It is safer to fill from 80% to 90%, pause, assess the canvas, and then do the final 10%. This prevents the accidental "overshoot" which results in a contaminated color mix.
Timing the Conveyor Cycle
The conveyor belt in Level 15 operates on a loop logic. Cups that do not get poured will eventually cycle back to the tray if they fall off the end of the belt (depending on specific game mechanics) or simply recycle. However, the most efficient path is "One and Done." Aim to pour every cup you load. Loading a cup and letting it pass without pouring wastes valuable time and slot space.
Key Tips for Precision and Flow
Tip #1: The "One Mississippi" Rule
To master the Lead Time, use a counting rule. After you tap a cup to load it onto the belt, count "One Mississippi, Two Mississippi" before you tap the next action. This ensures the first cup has cleared the intake chute. This simple rhythm eliminates 90% of "jamming" errors caused by tapping too fast.
Tip #2: Watch the Pour Arc, Not the Cup
It is a common mistake to watch the cup sliding on the belt. You should be watching the Canvas. Look at the sand coming out of the dispenser. If you see the color hitting the wrong part of the sailboat, stop tapping immediately. Correcting a bad pour is impossible; preventing it requires looking at the result, not the cause.
Tip #3: The 3-Slot Safety Net
Never let the belt fill up more than 5/8 slots. If you see 6 cups on the belt, stop loading. Wait for 2 cups to pour and vacate before you pull from the tray again. Keeping 3 empty slots in the total system (Belt + Tray) gives you the flexibility to shuffle colors if a surprise "mystery" cup appears.
Tip #4: Isolate the Sailboat
When working on the red sailboat, mentally isolate that section of the screen. Ignore the yellow background. If you focus on the whole canvas, you might get anxious about the empty yellow space. Focus only on the boat until the Red meter is full. Then switch your focus entirely to the background. This "tunnel vision" prevents accidental crossover pours.
Stuck Solutions and Troubleshooting
Problem: The "Frozen Belt" Syndrome
Symptom: You have cups on the belt, but the tray won't let you pull new ones, and the belt isn't moving.
Solution: You have overfilled the input buffer. You likely have 8 cups on the belt or the tray is full.
- Fix: Stop tapping the tray entirely. Watch the belt. Wait for the current leading cup to pour and drop off. Once that slot frees up, the machine should unstick. If it doesn't, you may need to restart the level, as the logic jam is permanent.
Problem: "Color Bleed" on the Sail
Symptom: You poured Red, but it bled into the Yellow sky, making the sail look blurry.
Solution: This usually happens when the canvas is already saturated with wet paint.
- Fix: In future runs, try to do the Red detailing before the Yellow background is 100% finished. Doing the detail work on a slightly emptier canvas gives you cleaner lines. If this happens late in the game, you have no choice but to restart, as you cannot "erase" the bleed.
Problem: Mystery Cup Spam
Symptom: You keep pulling question mark cups, and they are all colors you don't need (e.g., getting Orange when you need Red).
Solution: The game RNG is fighting you.
- Fix: You must "burn" the unwanted cups. Load them onto the belt and let them pour into a "disposable" area (like a corner you plan to overwrite later) or simply let them pass if the game allows non-pour cycling. You need to cycle these unwanted cups out of the tray to get to the useful cups underneath.
Problem: 98% Stuck
Symptom: You are at 98% completion, missing 2% of one color, but no cups of that color are available.
Solution: You are a victim of "Leftover Paint."
- Fix: Check the very bottom of the tray stack. You might have missed a cup because the tray looked full. You may need to strategically waste a cup from the belt to force the tray to shift and reveal the last needed cup.
Speed Run Strategies and Shortcuts
The "Quick Start" Optimization
For speed runners, the first 5 seconds are crucial. Do not wait for the first cup to reach the middle before tapping the next.
- Shortcut: Tap the initial Red cup. Immediately tap the first Yellow cup (0.5s delay). Immediately tap the second Yellow cup (1.0s delay).
- Result: This queues up 3 cups in a snake line. As long as they are different colors, the rapid fire queue works because the pour points for the boat and sky are distinct. This shaves 10 seconds off your time immediately.
Batch Processing Colors
Instead of alternating Red-Yellow-Red-Yellow, try batching.
- Strategy: Load all required Red cups first (e.g., 3 in a row), then switch to Yellow.
- Why: This reduces the cognitive load of switching targets. You can focus purely on the boat for 30 seconds, then purely on the sky. However, this requires extreme confidence that you won't jam the belt with 3 Reds in a row.
Ignoring the "Perfect" Pour
In a speed run, 95% accuracy is faster than 100% accuracy.
- Risk: If a splash of Yellow goes slightly outside the lines but doesn't trigger a "Fail" state, keep going. Do not stop to correct minor imperfections. The level completion trigger is based on color meter percentages, not artistic perfection. If the meter hits 100%, the level ends, even if the edges are messy.
Pre-Loading the Tray
As you finish the last 10% of a color, start looking at the tray for the next color you need.
- Technique: If you are finishing Red, start pulling Yellow cups into the tray slots while the final Red pour is happening. This "Pre-Loading" ensures zero downtime between color phases.