
Level 21
HARDHow to solve Sand Loop level 21? Get instant solution for Sand Loop 21 with our step by step solution & video walkthrough. Sand Loop 21 tips and guide.
Play Sand Loop Now
Experience the puzzle challenge firsthand
Game Screenshots
Sand Loop Level Guides
Level Overview: The "Pixel Banana" Strategy Guide
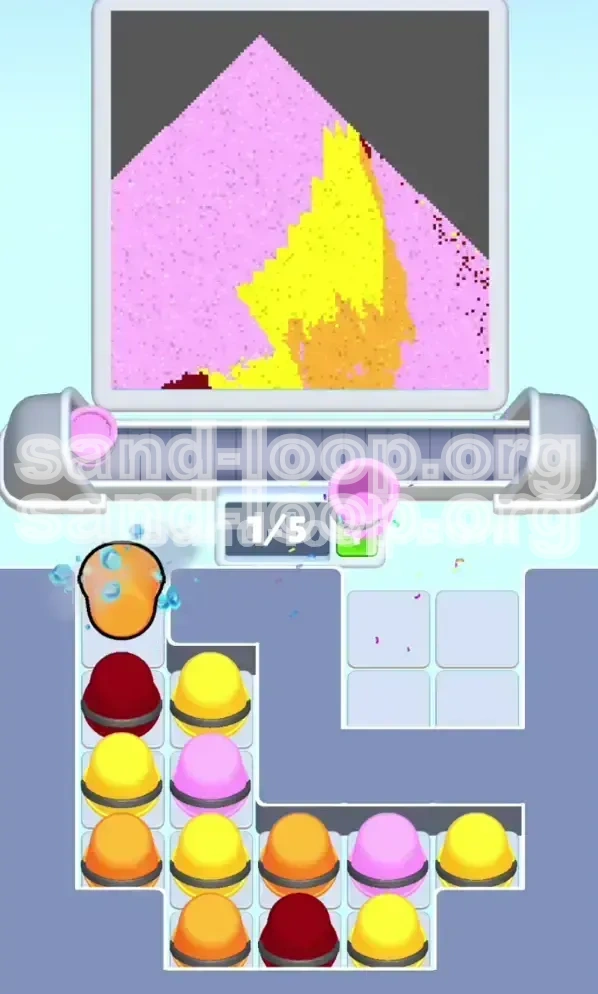
Welcome to the definitive walkthrough for Level 21, known to players as the "Pixel Banana" challenge. This stage is a deceptive difficulty spike in the Sand Loop progression curve. While the image on the top screen—a cheerful banana against a pink backdrop—looks harmless, the underlying mechanics are purely mathematical. You are dealing with a "Resource Lock" scenario where 40% of your required playing pieces (the Pink background cups) are inaccessible behind a "4-Hit Ice Block."
The primary difficulty in this level is not the color matching itself, but the Conveyor Belt Management. You have a limited queue size (usually 5 slots). If you panic and flood your belt with the wrong colors early, you will create a "soft lock" where no legal moves are possible, and the timer will run out. This guide breaks down the precise rhythm needed to crack the ice, layer the fruit, and flood the background without running out of moves.
The "Ice Lock" Mechanic
The defining feature of this level is the Ice Block located in the top-left quadrant of the supply tray. It is a blue block marked with a "4." This block covers a deep stack of Pink cups. You cannot access the Pink background until this block is destroyed.
The game mechanics dictate that you must clear cups adjacent to the ice block to damage it. This forces you to play specific colors (Maroon and Yellow) from that specific column first, rather than picking the easiest colors. Ignoring this block is the fastest way to fail; you will run out of moves while the background remains 0% complete.
The "Banana" Architecture
Visually, the banana consists of three distinct pixel layers that must be built in order:
- The Core (Yellow): Takes up the central 50% of the fruit mass.
- The Shadow (Orange): A 3-4 pixel wide curve on the right side.
- The Tips (Dark Red/Maroon): Small accents at the stem and bottom tip.
Understanding this layering is crucial. If you try to paint the Yellow core *after* the shadow, the physics engine will often bury the orange pixels under the yellow sand, resulting in a failed validation check. You must build the shadow *into* the core.
Resource Distribution Analysis
Let's look at the numbers. The tray contains approximately:
- 45% Yellow Cups: These are abundant. You do not need to worry about running out.
- 30% Pink Cups: These are the majority, but trapped. They represent the background.
- 15% Orange Cups: Limited supply. Critical for the shadow curve.
- 10% Maroon Cups: Very rare. Used only for the stem and tip.
The challenge is managing that 15% Orange and 10% Maroon while waiting to unlock the 30% Pink.
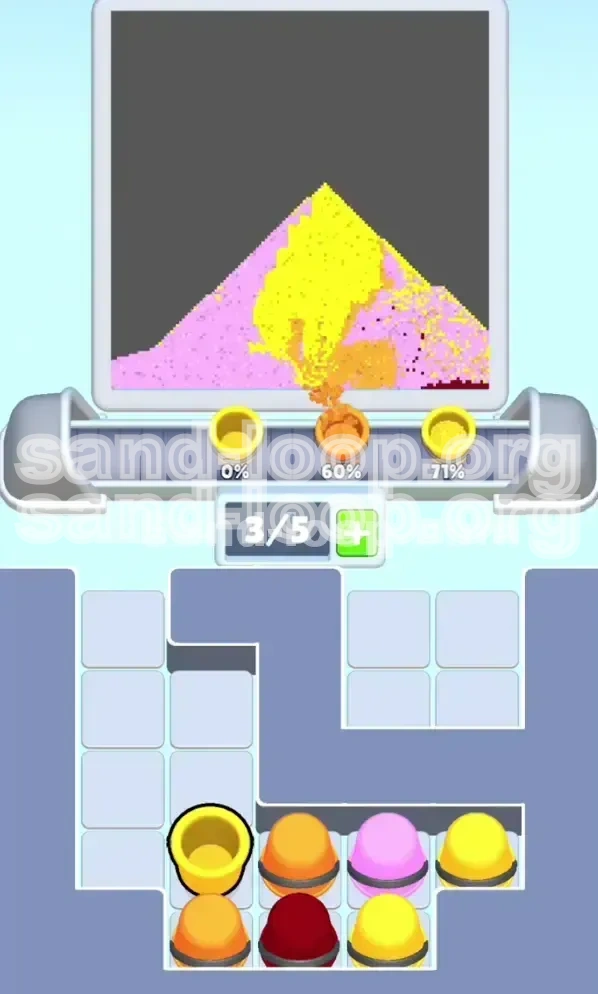
Winning Condition Validation
To achieve 3 stars or simply pass the level, the game checks for pixel accuracy. You need approximately:
- 95% coverage of the Pink background.
- 100% shape definition of the Banana (Yellow + Orange).
- Specific placement of the Maroon tips (floating on top, not buried).
The game's physics engine is forgiving with sand spillover, but strict with layer order. If the Pink background touches the banana before the banana is "solid," the colors will mix into a muddy peach color, leading to a "Failed" result.
Primary Objectives: How to Beat Level 21
Your goal is not just to "clear the board," but to execute a specific sequence of events. We have broken the victory conditions down into three actionable objectives. Focus on these one at a time.
Objective 1: Breach the Ice Block
Priority HIGH. You cannot start the main level until the blue Ice Block in the top left is shattered. This block has 4 HP (Hit Points).
Your immediate task is to identify and clear the cups adjacent to this block. Specifically, there is a stack of Maroon and Yellow cups pressing against the ice. Every time you clear one of these specific cups from the board, the ice takes damage. Your first 4-5 moves should be dedicated entirely to damaging this block, ignoring the rest of the screen if necessary.
Objective 2: Construct the Perfect Fruit
Priority MEDIUM. Once the ice is cracked, you have access to your full toolkit. However, you must construct the banana carefully.
You must achieve the "Yellow-Orange Sandwich." This means pouring Yellow, then a streak of Orange, then Yellow again. This sandwiches the orange shadow between the yellow flesh, ensuring it remains visible on the right side of the curve. If you just pour Yellow then Orange, the Orange will sit on top of the Yellow, which is incorrect for this art style.
Objective 3: The Great Pink Flood
Priority LATE GAME. The Pink cups are your finisher. Do not touch them until the banana looks like a finished object.
Once the banana is formed, you must rapidly unload the Pink cups. The physics of Sand Loop means sand piles up. If you pour the Pink background too early, it will hit the banana and stop, leaving the corners of the screen empty. You need the Pink sand to be voluminous enough to flow *around* the banana and fill the voids.
Objective 4: Conveyor Slot Management
Priority CONSTANT. You have 5 slots on your conveyor belt.
Never let the belt get full. If you have 5 items and none can be played, you lose. Always keep at least 1 slot open. This means if you are waiting for a specific color to appear (like the last Maroon cup), you must cycle other colors through quickly to prevent a jam.
Objective 5: Placement Accuracy
Priority PRECISION. The Maroon tips must be placed last.
The Dark Red/Maroon cups are the "cherry on top." If you drop them into the mixer early, they will be buried under tons of Yellow sand and disappear. You must save them. They need to land on the *surface* of the yellow pile to be counted.
Step-by-Step Walkthrough: The Action Plan
This section provides the exact rhythm to follow. Read these steps carefully before you tap the screen.
Phase 1: The Ice Breaker (Moves 1-10)
- Scan the Tray: Look immediately at the top left. Identify the column touching the Ice Block.
- Spot the Maroon: You will see a Dark Red/Maroon cup touching the ice. This is your starting key.
- Deploy Maroon #1: Send this cup to the conveyor. This is your first "hit" on the ice and starts the bottom tip of the banana.
- Target Adjacent Yellows: As the stack shifts, Yellow cups will move next to the ice.
- Deploy Yellow #1 & #2: Send these to the conveyor immediately. Do not save them. Using them damages the ice further.
- Watch the Shatter: By the time you have cleared the initial cluster around the block, the Ice Block should reach 0 HP and shatter.
- The Pink Reveal: A massive stack of Pink cups is now uncovered. RESIST THE URGE to click them. Ignore them for now.
Phase 2: The Shadow Weave (Moves 11-25)
Now that the ice is gone, focus on the center of the tray. You need to build the banana body.
- Establish the Base: Send 3-4 Yellow cups to the conveyor to build the foundation of the fruit in the center of the canvas.
- The Orange Insert: Look for the Orange/Light Brown cups. They are usually located on the right side or bottom center of the tray.
- The "2-1" Rhythm: Adopt a rhythm of sending Two Yellows, then One Orange.
- Why? Sending 2 Yellows builds the flesh. Sending 1 Orange adds the shadow layer on top. Repeating this creates the striped effect needed for the curve.
- Avoid Clumping: Never send more than 2 Orange cups in a row. If you do, the shadow becomes too wide and spills into the background area.
Phase 3: The Final Assembly (Moves 26-35)
You are running low on Yellow and Orange. It's time to finalize the fruit shape.
- Check the Canvas: Does your banana look like a crescent? Is the right side darker (Orange)?
- Drain the Yellows: Use up your remaining Yellow cups to solidify the shape. The banana should look like a solid, tall pyramid at this point.
- Locate Maroon #2: Find the final Dark Red cup (the stem).
- Save the Stem: Do NOT send it yet. Keep it in the tray or on the belt if there is space, but do not pour it. We need it for the very last second.
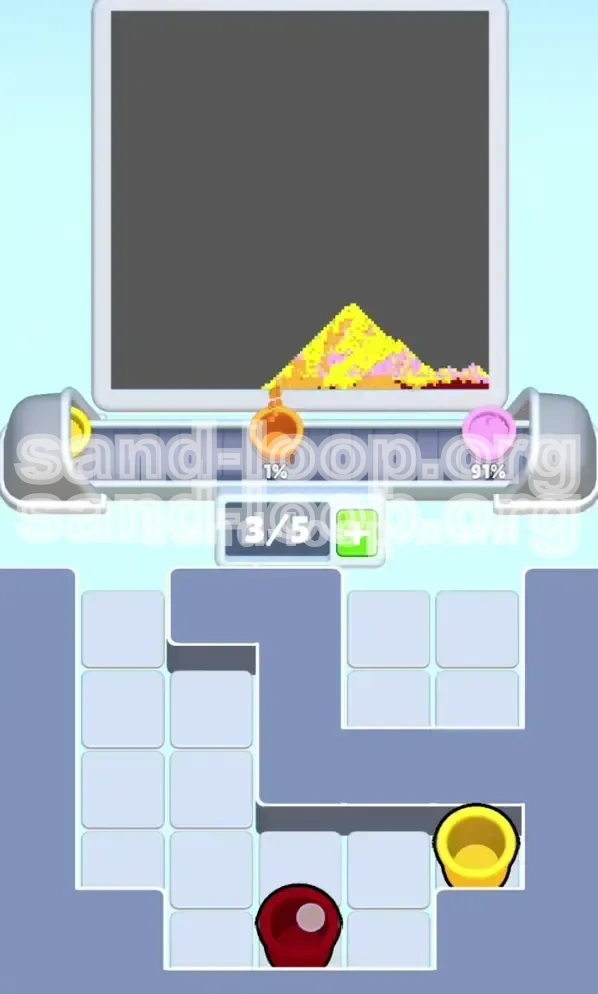
Phase 4: The Background Flood (Moves 36-45)
The banana is built. Now we paint the room.
- Unleash the Pink: Go to the top-left stack where the ice was. Start spamming the Pink cups into the conveyor.
- Fill the Corners: Watch the sand fall. The Pink sand will hit the Yellow banana and slide off to the sides.
- The Gap Check: Ensure the sand is filling the bottom-left and bottom-right corners of the screen. If there are gaps, you need more Pink volume.
- Conveyor Flow: Keep the belt moving. 3 Pinks in, wait for pour, 3 more in.
Phase 5: The Stem Drop (Final Moves)
The finale. This is the moment that makes or breaks the 100% score.
- Assess the Pile: The Pink background should be covering the bottom 30% of the screen. The Yellow/Orange banana is rising out of it.
- Place the Stem: Send that final Maroon cup you saved.
- Precision Landing: It needs to land on the very top tip of the yellow pile.
- Victory: Once the stem lands, the level completes.
Color Order Guide: The Processing Sequence
Processing colors in the wrong order is the cause of 90% of failures in Level 21. Sand is physics-based; heavier volumes displace smaller ones. Here is the strict hierarchy you must follow.
Priority 1: Dark Red (Maroon)
Status: Critical / Limited
You have exactly 2 (sometimes 3) of these. They represent the specific details of the fruit. Because they are details, they must be placed First (to establish the bottom base) or Last (to sit on top of the pile).
The Rule: Never mix Maroon in the middle. If you pour Maroon, then Yellow, then Orange, the Maroon gets lost in the mix. It must be the foundation or the roof.
Priority 2: Yellow (The Core)
Status: High Volume / Structural
This is your "meat." This color builds the height required for the puzzle. It creates the slope that the Orange will stick to, and later creates the dam that the Pink sand will flow around.
The Rule: Maintain a steady stream. Do not pause the flow of Yellow unless you are inserting an Orange cup. Stopping the Yellow flow causes the pile to settle flat, making it harder to layer shadows later.
Priority 3: Orange (The Shadow)
Status: Medium Volume / Texture
This is your texture. It cannot exist alone; it needs the Yellow to support it.
The Rule: Think of Orange as a coating. You are dipping the banana in shadow. If you pour Orange too early, it hits the bottom of the screen and gets buried. If you pour it too late, it rolls off the steep sides of the Yellow pile and contaminates the Pink background. The "Sandwich" method (Yellow-Orange-Yellow) is the only safe way.
Priority 4: Pink (The Background)
Status: High Volume / Flood
This is the ocean. It must come last to wash around the structure you have built.
The Rule: Volume is key here. A trickle of Pink will not work; it will just get stuck in the crevices of the Yellow banana. You need a "Flood" event—a massive, rapid deployment of Pink cups—to ensure the water level rises high enough to cover the background corners without drowning the fruit details.
The "Contamination" Risk
Be aware of "Color Bleed." In Sand Loop physics, if you pour a cup of Orange on top of a wet pile of Pink, they don't just sit there—they mix.
- Yellow + Pink = Pale Peach (Failure).
- Orange + Pink = Dusty Rose (Failure).
To keep the colors pure and vibrant, you must let the Yellow pile semi-dry/settle before you unleash the Pink flood.
Key Tips & Mistakes to Avoid
Even experienced players can trip up on Level 21. Here is a checklist of what NOT to do, followed by some pro-tips.
Common Mistake #1: The Ice Ignorance
The Mistake: Seeing the Ice Block and deciding to work on the right side of the board first because it looks easier.
The Consequence: You play 20 moves, clear the right side, and then realize you have NO moves left on the left. The Ice Block hasn't moved. You have 0 Pink cups. The game is over.
The Fix: Make the Ice Block your personal obsession for the first 10 seconds of the level. It is the only thing that matters initially.
Common Mistake #2: The Orange Avalanche
The Mistake: Seeing a stack of 5 Orange cups and sending them all at once because "it matches."
The Consequence: The right side of your banana turns into a solid orange block. You run out of Yellow to cover it up. The validation fails because the shadow is too big.
The Fix: Discipline. Only send Orange cups one at a time, spaced out by 2 Yellow cups.
Common Mistake #3: Premature Pinkination
The Mistake: Breaking the ice and immediately sending the Pink cups because "they are available now."
The Consequence: The Pink sand covers the bottom of the screen. You then have to build the banana on top of the Pink. But since Pink and Yellow are similar in density, they don't stack well—the Yellow mixes into the Pink, creating a muddy mess.
The Fix: Treat the Pink cups as if they are still locked. Pretend the ice is there until the banana is 90% done.
Pro Tip: The "Conveyor Refresh" Trick
If your conveyor belt is full of junk you don't need (e.g., full of Pinks but you want Yellows), look for a move on the board that uses a color you don't have on the belt. This sometimes triggers a shuffle or allows you to clear a space. Keep the belt fluid. A static belt is a death sentence.
Pro Tip: Save the Stem
This is worth repeating. The Dark Red stem cup is your "Get Out of Jail Free" card. If you mess up the body of the banana slightly, a perfectly placed stem on top can sometimes hide minor imperfections in the yellow pile. Save it for the absolute final click.
Solutions When You Get Stuck
Feeling trapped? The conveyor is full, the board is a mess, and the timer is ticking. Don't panic. Use these emergency protocols.
Scenario: "I have no legal moves!"
The Diagnosis: Your conveyor is likely loaded with 5 colors that aren't on the board, or the board is full of single isolated pixels.
The Fix: Look for the "Big Pile." Find the tallest stack of sand on the screen (usually the Yellow body). Pour whatever color you have onto it. Even if it's not a perfect match, adding volume to the pile might shift the sand enough to create a new match or clear a bottleneck. It's better to make a "bad" pour that unblocks the board than to sit and wait for the timer.
Scenario: "The Ice won't break!"
The Diagnosis: You have cleared the visible cups, but the ice has 1 HP left.
The Fix: Look UNDER the stacks. Sometimes a cup is partially hidden by a perspective shift. Click around the base of the ice block. You might have a Maroon cup tucked away in a corner that you missed. Also, check if you have a "Power-up" or special cup that can clear a whole area.
Scenario: "The Banana is flat."
The Diagnosis: You ran out of height. The banana looks like a pancake.
The Fix: Stop pouring shadows (Orange). Switch to 100% Yellow. You need to build verticality. Ignore the sides for a moment. Just dump Yellow in the center until you get a steep peak. Then you can worry about the edges.
Scenario: "I ran out of Pink for the corners."
The Diagnosis: You used the Pink cups too early and they got stuck behind the banana.
The Fix: This is tough. You need to make the Pink sand "flow." Pour your remaining Yellow or Orange cups on the top center of the banana. This might push the existing sand outward, forcing the trapped Pink sand to slide down into the empty corners. Use gravity to your advantage.
Speed Run & High Score Tips
Want to finish Level 21 in under 60 seconds or achieve the maximum score multiplier? Here is how the pros do it.
The Speed Run Route
Speed running is all about "Input Buffering"—knowing your next 3 moves before your current cup hits the ground.
- The Instant Break: Before the level even fully loads, have your cursor hovering over the top-left Maroon cup. Click it the millisecond the game starts.
- The Stream: Don't watch the sand fall. Watch the TRAY. While the sand is falling, immediately find your next target cup in the tray.
- Grouping: Don't click one-by-one. If you need 3 Yellows, try to click the tray in rapid succession (Triple click) to queue them up fast.
Combo Multipliers
Sand Loop rewards speed. The faster you clear cups, the higher your score multiplier (1.5x, 2.0x, etc.).
Strategy: The "Yellow-Orange" sandwich is actually a speed strategy. By alternating quickly, you prevent the game from slowing down the physics engine. Constant motion keeps the multiplier high.
Shortcut: The "Soft Lock" Prevention
The biggest time-waster is staring at the screen waiting for a specific color to appear.
The Shortcut: If you are waiting for a specific Orange cup to appear to finish the shadow, don't wait. Start the Pink flood early (but aim carefully). If you pour the Pink down the sides while you are waiting for the Orange, you can multitask. You are finishing the background while your brain waits for the shadow color to spawn. This shaves 10-15 seconds off your time.