
Level 20
HARDHow to solve Sand Loop level 20? Get instant solution for Sand Loop 20 with our step by step solution & video walkthrough. Sand Loop 20 tips and guide.
Play Sand Loop Now
Experience the puzzle challenge firsthand
Game Screenshots
Sand Loop Level Guides
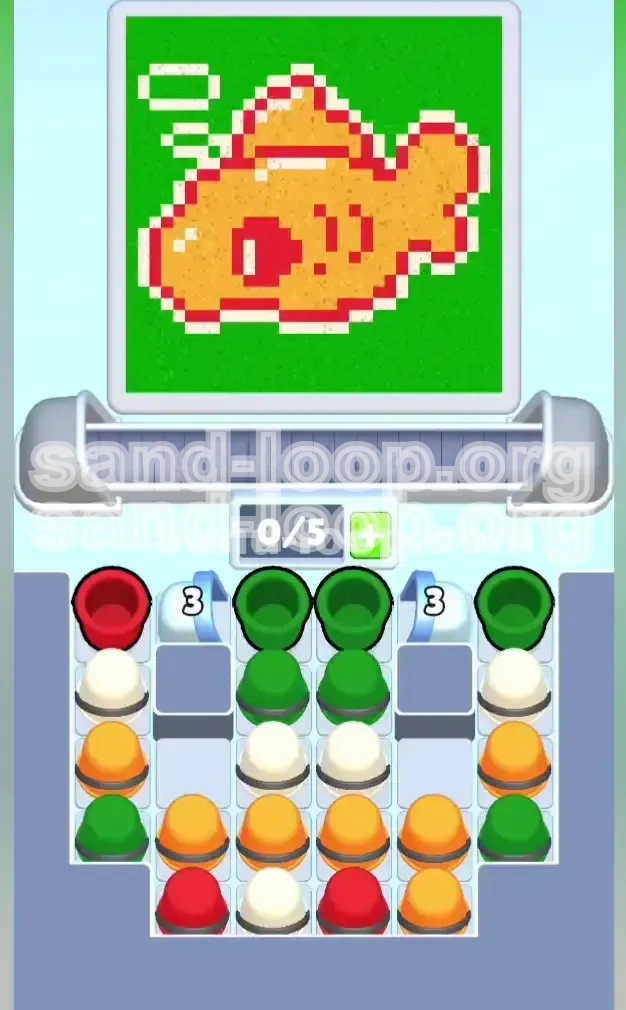
Level Overview: The Goldfish Pixel Art Challenge
Welcome to Level 20, widely known by the community as the "Goldfish Challenge." This level represents a significant difficulty spike in Sand Loop, shifting the focus from fluid mechanics to strict pixel-art logic. In this stage, you are tasked with painting a vibrant, fat goldfish swimming in a bright green pond. The challenge here is not the volume of sand, but the precision of the layering. Unlike previous levels where you could flood the screen with one color, Level 20 demands that you respect the intricate outlines of the subject. The canvas is divided into two distinct zones: the "Subject" (the fish) and the "Environment" (the water). If you confuse the order of operations, you will find yourself trying to fix white pixels on a green background, which is nearly impossible.
The Core Mechanics: Layering Over Flow
The fundamental mechanic of this level is "Layering." You must understand that the background color (Green) acts as a flood-fill that will overwrite anything it touches. To succeed, you must treat the fish as a separate object floating on top of this background. Think of it like painting a wall; you paint the trim (the fish) before you paint the wall (the water). If you do it in reverse, the paint bleeds over, and the edges become muddy. This level forces you to slow down and visualize the final image before you even pour the first cup.
The Space Constraint: 5-Slot Economy
Your conveyor belt has a strict limit of 5 active slots. This creates a tight resource management puzzle. You cannot simply hoard colors. You must pull a cup and immediately decide whether to pour it or let it sit. If you pull 5 cups and none of them match the current needs of the canvas, the game locks up, and you are forced to use a slot-clearing ability or restart. This limitation makes prioritizing the "3-Count" locks even more critical, as they are the only way to free up space and access the necessary side colors.
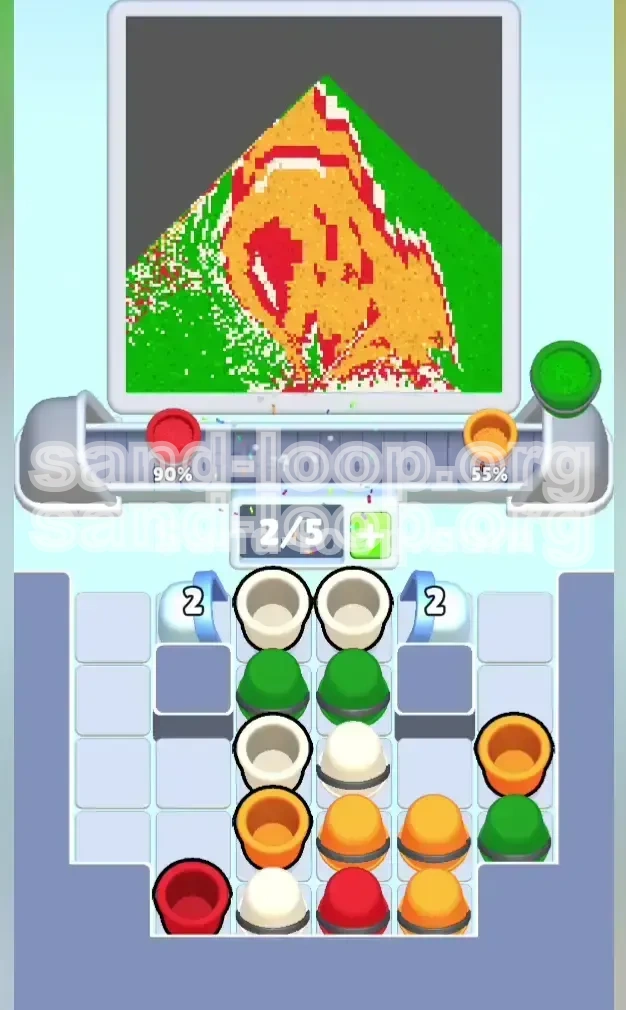
The "3-Count" Lock System
Level 20 introduces two specific "Count-Down" locks located in the upper corners of the tray. These are not color-specific; they are volume-specific. The lock breaks only after you have cleared exactly three cups in the columns adjacent to them. This design forces you to play the center columns first. You cannot simply skip to the easy colors on the sides; you must earn access to them by clearing the central clutter. This mechanic acts as a gatekeeper, ensuring you have enough space in your inventory to handle the complex color requirements of the fish's details.
The Visual Breakdown of the Canvas
Let's dissect the target image. The goldfish consists of four distinct color regions. First, the Orange Body, which takes up about 60% of the subject's area. Second, the Red Outline, which defines the tail, the eye, and the gills. Third, the White Details, which include a shine on the back, a belly line, and three detached bubbles floating above. Finally, the Green Background, which fills the remaining void. Understanding this breakdown is crucial because the Red and White elements are non-contiguous—they are scattered. If you fill the background first, you lose the "negative space" required to place these small white bubbles accurately.
Why This Level Fails Most Players
The failure rate on Level 20 is high because of impatience. Players see a large block of Green cups and instinctively want to pour them to clear space. This is a trap. The Green background is the "Cleanup" step. Pouring it early is like trying to frost a cake before you bake it. The sand physics will fill the lowest points first (the fish's belly), effectively merging the fish with the water. To avoid this, you must suppress the urge to clear the easy Green cups and focus entirely on the fiddly, difficult White and Red placements first.
Clear Objectives: Your Mission Checklist
Before you make your first move, you need a clear plan. Your primary goal is to isolate the fish from the background. This means completing the orange body, the red outlines, and the white accents before you even think about touching the green water. This section outlines the specific milestones you need to hit to ensure a successful run.
Objective 1: Unlock the Side Columns
Your immediate, short-term goal is to shatter the "3-Count" locks. This is not optional. The side columns contain the bulk of your White and Red cups, which are essential for the details. You must clear three cups from the center columns as fast as possible. Do not worry about where the sand lands initially; your priority is purely mechanical—break the locks to open the inventory. Until these locks are gone, you are playing with one hand tied behind your back.
Objective 2: Secure the White Pixels
The White color is the most dangerous variable in this level. The three white bubbles are floating high in the canvas, detached from the main fish body. If the background is filled (Green), these bubbles become invisible or impossible to place. Your objective is to pour exactly enough White sand to form the belly shine, the back highlight, and the three bubbles. You must secure these pixels before the green floodgates open. Once White is placed, do not touch it again.
Objective 3: Establish the Red Framework
Red acts as the "ink" for this drawing. It defines the shape. You need to pour Red to create the eye, the gill, and the tail fin. The Red sand often sits underneath Green or Orange cups in the tray. You must navigate the tray to liberate these Red cups. The outline must be crisp. If you pour Orange over Red, it blurs the edge. If you pour Green over Red, the line disappears. The Red framework must be the second-to-last thing you paint (right before the final Green fill or right after the initial Orange fill, depending on the flow).
Objective 4: The Orange Body Mass
This is the easiest part but also the most tempting to mess up. You will have a large surplus of Orange cups. Your objective here is efficiency. You want to chain-pour Orange cups to fill the main body of the fish. However, you must be careful not to overfill into the areas reserved for the eye or the tail. The Orange sand needs to be contained within the invisible "box" of the fish's shape. Think of it as filling a coloring book; stay within the conceptual lines.
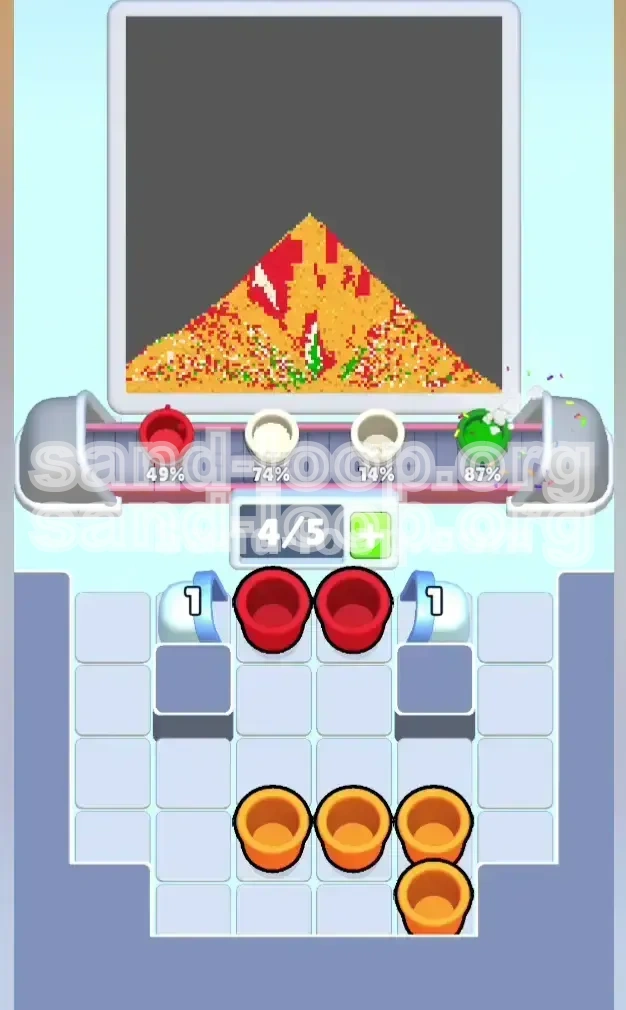
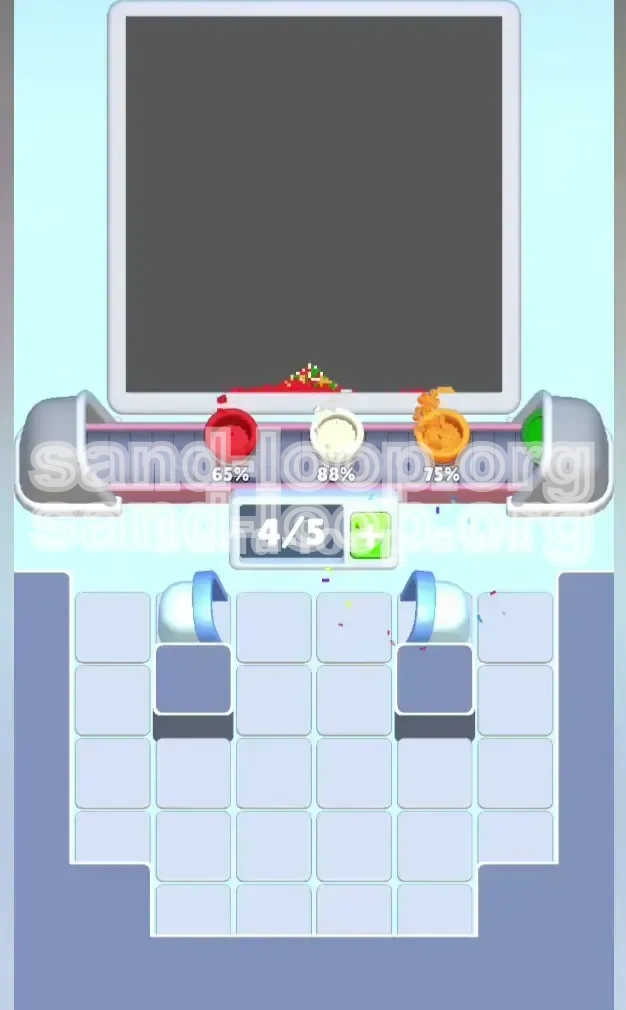
Objective 5: The Green Flood (Final Step)
The final objective is the background removal. Once the fish is fully colored in Orange, Red, and White, the only remaining space on the canvas is the water. Your goal here is to pour every single remaining Green cup in rapid succession. This will flood the screen, wrapping around the fish and completing the level. The key indicator for this step is visual confirmation: check the canvas. If you see the white bubbles and the red eye clearly defined, you are ready for the Green Flood.
Step-by-Step Instructions: The Action Plan
This is the core of your walkthrough. Follow these steps in the exact order presented. Deviating from this sequence usually results in a jammed conveyor or a ruined canvas. We have broken this down into phases based on the state of the board.
Phase 1: The Center Break (Moves 1-5)
Focus: Unlocking the board.
Action: Ignore the colors on the far left and right for now. Look at the two center columns. You will see a stack of cups, likely starting with Green or Orange. Tap the top cup of the center column. The game logic will prioritize the center of the canvas. Let the sand pour out completely. Do not tap the next cup until the current one is empty. Repeat this until you have cleared 3 cups total from the center area. You will hear a "shatter" sound. The locks on the sides are now broken.
Phase 2: The Bubble Rescue (Moves 6-10)
Focus: White placement.
Action: Now that the side columns are accessible, look for White cups. They are often buried in the left or right stacks. You need to pull a White cup immediately. The reason for this urgency is the "bubbles" in the top-left corner of the canvas. These are high-altitude pixels. If you pour Green or Orange, they will fill the bottom first. You need to pour White *now* so that the white sand hits the top of the pile or lands in the upper layers of the canvas. Send the White cup up. If the canvas isn't ready for the bubbles yet (e.g., no background to contrast against), you might hold, but usually, getting White out early is safer than burying it under a pile of Green.
Phase 3: Red Detailing (Moves 11-15)
Focus: Defining the fish.
Action: Scan the newly available side columns for Red cups. You will often find a Red cup at the top of the left or right stack. Pull this Red cup and pour it. This red sand will likely start forming the eye or the outline of the tail. It is crucial to get the red sand down before the massive Orange flood. If you pour Orange first, the Red will sit on top of it, making the outline look puffy and wrong. The Red needs to be the "foundation" or the "boundary" for the Orange.
Phase 4: The Orange Chain (Moves 16-25)
Focus: Filling the volume.
Action: Now you can relax slightly. You should have a series of Orange cups available in the center or bottom rows. You can now "Chain Pour." This means tapping the next Orange cup while the previous one is still pouring. Since the fish body is the largest contiguous area, the sand will stack neatly. Keep pouring Orange until the fish body is 90% full. Do not worry if you cover a tiny bit of the Red outline; as long as the main shape is there, you are good.
Phase 5: The Final Sweep (Moves 26+)
Focus: Completion.
Action: Assess your tray. You should have mostly Green cups left, maybe one or two corrective colors. Pour any remaining detail colors (Red/White) to fix any missing parts of the eye or bubbles. Once the fish looks perfect, execute the "Green Flush." Tap all remaining Green cups in quick succession. The screen will fill with green, framing your goldfish. The level will complete as soon as the canvas reaches 100% fill.
Color Order Theory: Why Sequence Matters
In Sand Loop, the physics engine simulates real-world layering. Understanding the "Weight" and "Spread" of each color type is the secret to mastering Level 20. This section explains the logic behind the recommended order.
The "Subject vs. Background" Rule
Golden Rule of Level 20: Foreground First, Background Last. The fish is the foreground; the water is the background. In pixel art logic, the background color usually defines the "empty" space. If you fill the empty space first, you lose the boundaries of your object. By filling the Orange, Red, and White first, you are effectively carving a statue out of the sand. The Green background is just the plaster you pour around the statue to hold it in place. Reversing this order creates a "negative image" where you have to dig the fish out of the water, which is impossible given the tools available.
The Physics of White Sand
White sand in this game acts as a "high-light." It is often programmed to sit on top of other pixels or fill specific small crevices. However, in Level 20, the White bubbles are in the top-left. If you pour Green first, the Green acts as a heavy liquid, filling the bottom of the canvas (the fish's belly) and rising up. It will consume the coordinates where the bubbles are supposed to go. If you try to pour White *after* Green, the White sand will just sit on top of the Green water, looking like snow on a lake, rather than bubbles in the air. Therefore, White must be poured early to "reserve" those pixel coordinates for the air bubbles.
The Structural Role of Red
Why Red before Orange? It's about contrast. Red is the darkest tone of the fish palette (excluding the outline). If you pour Orange first, the bright orange sand creates a "hill." Pouring Red on top of that hill might result in the red sand sliding down the sides or mixing with the orange to create a muddy brown/orange blur. By pouring Red first, you create the "ditches" and the "walls." When you subsequently pour Orange, the orange sand fills the area *inside* the red walls, maintaining the sharp distinction between the fish's body and its fins.
The Volume Dominance of Green
Green represents roughly 50-60% of the canvas's pixel count. It is a "Flood" color. Flood colors are dangerous because they are irreversible. Once an area is Green, it is very hard to make it Not-Green without completely obscuring it. You can paint a small detail over a large background, but you cannot easily paint a large background over a small detail without burying the detail. This is why Green is last. It serves as the "sealant" for the puzzle. It locks all your previous work in place.
The "Sandwich" Technique
The optimal strategy for Level 20 is a "Sandwich." You have the "Bread" (White and Red details) on top, the "Meat" (Orange Body) in the middle, and the "Bread" (Green Background) on the bottom (conceptually). Or rather, you paint the details, flood the body, and seal the background. This sequence ensures that no color ever has to "fight" for space. Each color has its own designated territory, defined by the colors that came before it.
Key Tips & Common Mistakes
Even with a plan, things can go wrong. This section highlights the specific pitfalls of Level 20 and how to navigate them. Learn these warnings to avoid frustration.
Common Mistake: The "Early Green" Trap
The most common error is tapping the Green cups in the center column too early. They are right there in front of you, and clearing them feels productive. Don't do it. If you pour Green into the center of the canvas, you are filling the fish's belly and the water simultaneously. You will lose the separation between the two. You will end up with a green blob with an orange tail, instead of a distinct fish. Force yourself to tap the sides or wait for the locks to break before you touch the Green.
Common Mistake: Ignoring the Conveyor Jam
Players often get "tunnel vision," staring only at the canvas and ignoring the tray at the bottom. If you pull 5 cups (e.g., Orange, Orange, Green, Red, White) and the canvas isn't ready for any of them, you are stuck. You have no moves. Key Tip: Always keep an eye on the "Next Up" queue. If you see a problematic cup coming, try to clear space in your current tray or use a move that frees up a slot, even if it's not the perfect color for the canvas moment. A less-than-perfect move is better than a Game Over.
Key Tip: The "Pause and Verify" Method
Before you execute the final Green Flood, take your finger off the screen. Pause for 5 seconds. Zoom in (if possible) or scrutinize the canvas. Are the white bubbles there? Is the red eye visible? Is the bottom white line present? It is very common to miss the tiny white belly line because it's small and low on the screen. If you miss it and pour Green, you can't fix it. Verify your details before you seal the level.
Common Mistake: Rushing the White Bubbles
Conversely to the "Early Green" trap, some players panic about the White bubbles and pour them immediately on an empty canvas. This can also be an issue. If you pour White on an empty canvas, the white sand spreads out thinly. It might not form the distinct "bubble" shape you need. Tip: Try to pour White *after* some Orange or Red has established a base, or aim carefully so the white sand piles up in the specific corner required, rather than spreading flat across the bottom.
Key Tip: Using the "3-Count" to Your Advantage
Remember that the "3-Count" lock counts *any* clear. You don't have to clear the "correct" colors to break it. If you are stuck and the only cups available are Green, but you don't want to pour Green yet... check the lock count. If the lock is at "2/3" and you have a Green cup, sometimes it is worth pouring that Green cup just to break the lock and access the Red/White cups behind it. You might sacrifice a tiny bit of canvas clarity to gain access to the tools you need to fix it. It's a tactical trade-off.
Stuck Solutions & Speed Run Tips
So, you followed the guide, but something went wrong, or you are just looking to optimize your time. This section covers troubleshooting and advanced techniques.
Stuck Solution: Canvas is Half-Green, Fish is Ruined
Problem: You poured Green too early. The fish is merging with the background.
Solution: There is no "Undo" button, but there is a "Fix." You must rely on the "Cover-up" method. If the Green has eaten the fish's bottom edge, you need to pour *more* Orange or Red to redefine the shape. You essentially have to make the fish slightly bigger or lower to cover the green mistake. Pour Red thickly to create a new "ground" for the fish to stand on, then pour Orange on top of that. It won't be pixel-perfect, but it might be enough to pass the level.
Stuck Solution: Out of Slots, No Colors Match
Problem: You have 5 full slots. The canvas needs White, but you have 3 Greens and 2 Oranges.
Solution: This is a deadlock. You have to make a "sacrifice pour." Pick a color that does the least damage. Usually, this is Orange. Pour a bit of Orange into a safe area (like the center of the fish body) to free up a slot. This might overfill a specific spot, but since Orange is the primary color, a slight overfill is less visible than a stray Green or Red splash. Free the slot, then pull the White cup you need.
Speed Run Tip: Pre-Loading the Tap
For experienced runners, speed is everything. You can save seconds by "Pre-Loading." As soon as the previous cup is 90% empty, tap the next cup. Don't wait for the "Plus" sign to stop animating. The game allows for a tiny overlap in the pour logic. This keeps the sand flow continuous. This is especially effective during the "Orange Chain" phase. You can pour 4 Orange cups in about 3 seconds using this technique.
Speed Run Tip: The "Ignore Bubbles" Strategy
Advanced players know that the detection algorithm for "Level Complete" is sometimes lenient with the white bubbles if the rest of the image is 100% perfect. In a speed run, if you are 100% sure of the fish shape, you can *risk* skipping the detailed placement of the three bubbles and go straight for the Green Flood. Warning: This is a high-risk strategy. It works about 70% of the time. If the game checks for the bubbles, you fail. But if you are desperate for a time record, this is the shortcut to take.
Stuck Solution: The "Eye" Won't Fill
Problem: You keep pouring Red, but the fish's eye stays incomplete.
Solution: This is a "physics stack" issue. The sand from the body is pushing the eye sand out. Stop pouring Red. Instead, pour a contrasting color (like White or Green) somewhere else to change the flow dynamics of the canvas. Then, go back to Red. Sometimes, creating a "dam" of sand elsewhere redirects the flow into the stubborn pixel you are trying to fill. Alternatively, try tapping the cup rapidly instead of holding it, to drop small "pellets" of sand rather than a stream.