
Level 117
HARDHow to solve Sand Loop level 117? Get instant solution for Sand Loop 117 with our step by step solution & video walkthrough. Sand Loop 117 tips and guide.
Play Sand Loop Now
Experience the puzzle challenge firsthand
Game Screenshots
Sand Loop Level Guides
Level Overview: The Retro-Future Skyline
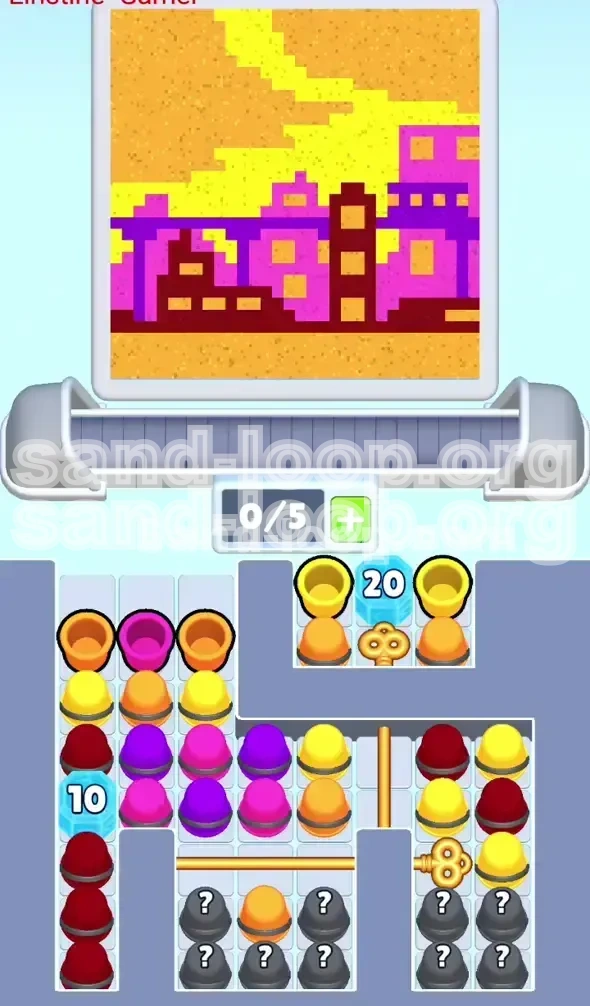
Welcome to the synthwave-inspired nightmare of Level 117, "The Neon City." This stage is a visual masterpiece that features a vibrant sunset skyline, but don't let the retro aesthetics fool you. This is arguably one of the most logic-dependent levels in the game. The challenge here isn't just about emptying cups; it is about strict resource management and respecting the vertical laws of physics within the game engine. You are presented with a canvas divided into three distinct horizontal zones: the ground, the city, and the sky. The primary difficulty stems from the fact that the colors you need first are buried at the bottom of the cup stacks, while the colors you need last are temptingly placed at the very top.
This level is designed to punish impulsive players. If you treat this like a standard speed run and simply tap the top cup to clear it, you will fail. The sand mechanics dictate that the first color you pour becomes the permanent bottom layer of your painting. Pouring "Sky" colors before "Ground" colors makes the level mathematically impossible to finish. Furthermore, the board is cluttered with two massive Ice Blocks that act as timers, restricting access to essential colors until you have cleared a significant portion of the board.
The Vertical Layout Strategy
Before you make a single move, you must visualize the target image as a stack of horizontal layers. The game forces you to build from the bottom up. The bottom 25% of the screen is the "Ground" layer. The middle 50% is the "City" layer. The top 25% is the "Sky" layer. You cannot paint the sky before the city exists, and you cannot build the city without the ground. This vertical dependency is the core logic puzzle of the stage.
The Timer Mechanics
Two Ice Blocks dictate the pace of this level: a "10" block on the left and a "20" block on the right. These are not just obstacles; they are locking mechanisms for essential resources. The "10" block guards your primary building materials (Dark Reds), while the "20" block guards the win condition (The Gold Key). Understanding that these blocks are solved by *volume* of play, not specific moves, is crucial to reducing anxiety.
The Trap of the "Easy" Pour
The game designers have placed Yellow and Orange cups (Sky colors) at the very top of the stacks on the left and right flanks. This is a psychological trap. New players will instinctively clear these top cups first. This is a fatal error. If you pour Yellow sand into the bottom receptor, it displaces the space needed for Dark Red. You must leave these top cups alone until the very end of the game.
Color Distribution Analysis
- Dark Red (15%): Critical scarcity. This color is only found in specific pockets, mostly trapped under the "10" Ice Block. It forms the foundation.
- Purple & Pink (45%): The bulk of the level. These are plentiful and act as the filler for the city skyline. Safe to pour once the base is laid.
- Yellow & Orange (30%): Abundant but dangerous. These are "late-game" colors that must be stockpiled or ignored initially.
- Mystery Colors (10%): Random fillers that usually resolve to Purple or Pink, useful for padding the city layer.
Clear Objectives: The Path to Completion
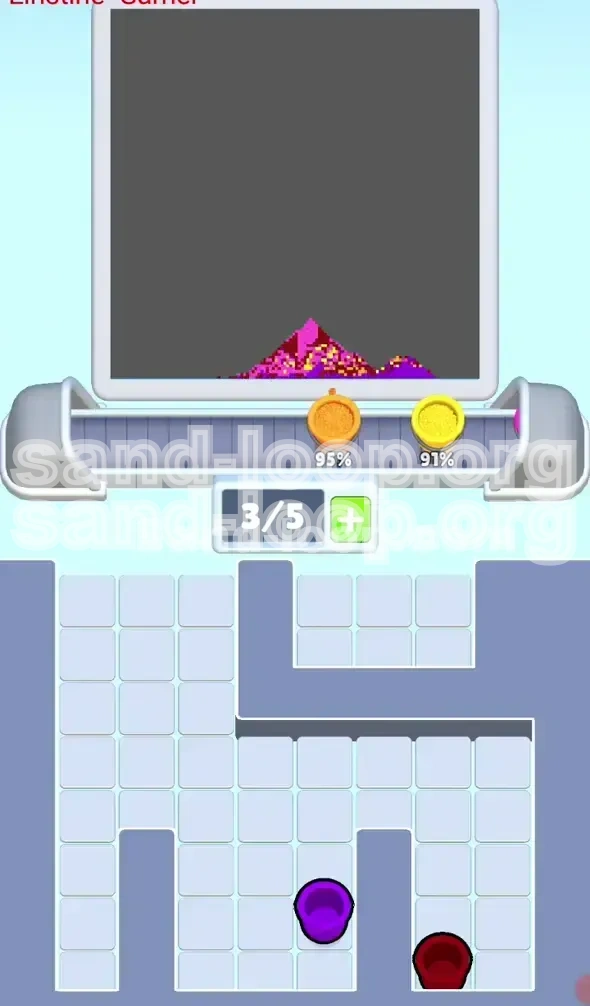
To successfully conquer Level 117, you need to shift your mindset from "clearing cups" to "claiming territory." Your objective is to fill the bottom meter without contaminating it with sky colors. You are essentially terraforming the image in reverse order of how it appears.
Objective 1: Establish the Bedrock
Your immediate goal is to secure and pour approximately 15-20 cups of Dark Red. This color represents the ground and the base of the buildings. Without a solid strip of red at the bottom of the canvas, the subsequent building layers will float, ruining the perspective. You must prioritize clearing the Ice Blocks to access these hidden Red reserves.
Objective 2: Construct the Skyline
Once the red base is roughly 30% filled, your next objective is to build the vertical structures. This involves pouring the Purple and Pink cups. You need to create enough volume in the middle of the screen to act as a buffer. The city layer needs to be dense and uniform, pushing the previous red layer down and locking it into place.
Objective 3: Manage the Ice Counters
You must methodically clear cups from the center of the board to chip away at the Ice Block counters. Every cup poured counts toward the "10" and "20" thresholds. Your objective here is efficiency: do not waste moves on non-essential colors. Focus on clearing the stacks that block the Ice Blocks to unlock the rest of the board.
Objective 4: Unlock the Gold Key
The "20" Ice Block on the top right is the gatekeeper of the final phase. You cannot force this open. Your objective is to play naturally until the counter hits zero. Once the block shatters, the Gold Key falls. You must then catch this key to unlock the bottom-center gate, which releases the final batch of Yellow cups needed to top off the sky.
Objective 5: The Sunset Finale
The final objective is atmospheric. With the ground and city complete, you must pour the remaining Yellow and Orange cups. These act as the finishing touch, filling the negative space at the top of the canvas. The challenge here is ensuring you didn't accidentally use up your Sky colors earlier in the game.
Step-by-Step Walkthrough: Precision Execution
This section provides a turn-by-turn strategy for navigating the board. Follow this sequence to avoid the common bottlenecks that force a restart.
Phase 1: The Right-Side Excavation
Start your campaign on the far right column of the board. This is the only safe starting zone.
- Step 1: Locate the tall stack on the far right (above the bottom-right key). You will see a Dark Red cup accessible at the bottom or middle of the stack. Tap this first.
- Step 2: Immediately above or below it, you will encounter a Yellow cup. STOP. Do not pour this Yellow into the center. Instead, look for an opening at the far edge of the canvas (where the sky meets the ground) to dump this "waste" color, or simply tap it and accept a tiny margin of error if necessary, but prioritize getting to the next Red.
- Step 3: Tap the next Dark Red cup. This begins your foundation.
- Step 4: Ignore the top stacks on the right for now. They are mostly Orange/Yellow and are traps.
Phase 2: Breaking the "10" Barrier
Shift your focus to the left side. Here sits the "10" Ice Block hovering over critical Dark Red cups.
- Step 1: Identify the stack directly beneath the "10" Ice Block. It is topped with Orange, Pink, and Yellow.
- Step 2: You need to clear these cups to lower the counter. Since these are Pink/Orange, try to pour them only when your nozzle is hovering over the middle section of the canvas (the "Building Zone"). Do not pour them when the nozzle is at the bottom.
- Step 3: Clear 5-6 cups from this area. The "10" block will shatter.
- Step 4: Critical Action: Once the ice breaks, three Dark Red cups will be revealed. Tap these immediately. Do not clear the remaining trash colors above them yet; get the Reds on the board first.
Phase 3: The City Expansion (Mid-Game)
With the Red base started, you can relax slightly. Now you build the skyline.
- Step 1: Move to the center columns. These are rich in Purple and Mystery (?) cups.
- Step 2: Pour the Purple and Pink cups rapidly. These are safe. They will build the "skyscrapers" on top of your red foundation.
- Step 3: Keep an eye on the bottom-center Mystery Cups. As the pile rises, these will become accessible. Tap them; they usually yield more Purple or Pink, which helps maintain the building layer.
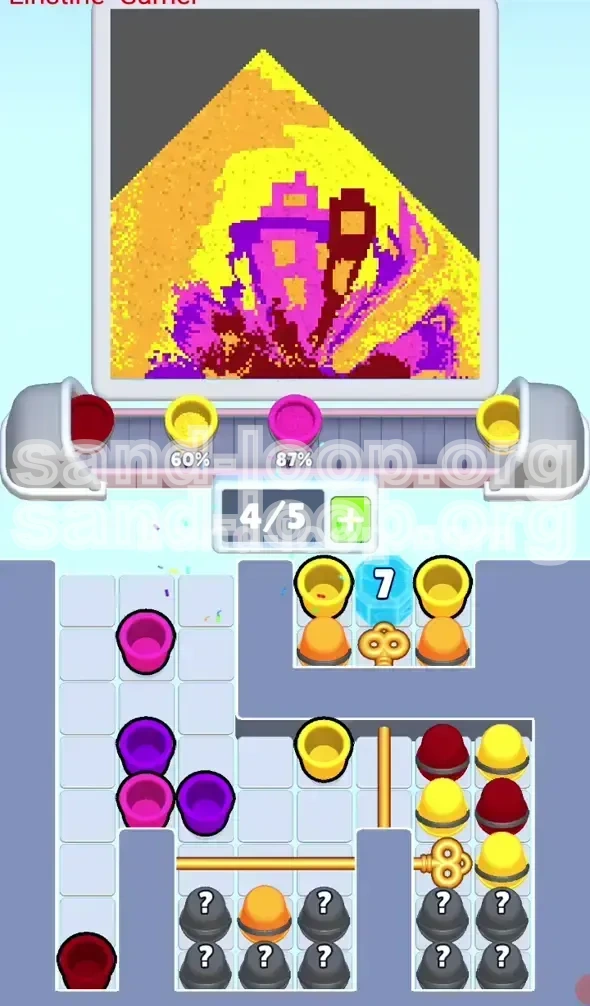
- Step 4: By this point, you should have cleared roughly 15-18 cups total. The "20" Ice Block on the top right should be visibly cracking or close to breaking.
Phase 4: The "20" Block and Key Drop
This is the transition point to the endgame.
- Step 1: Continue pouring Purple/Pink from the center and right stacks. Do not hunt for the Reds anymore; focus on volume.
- Step 2: Once the counter hits 20, the Ice Block on the top right shatters.
- Step 3: A Gold Key will drop from this location. It will slide down and likely land near the bottom-center gate.
- Step 4: The Gold Bar gate (usually located at the bottom center) will unlock, revealing a new cluster of cups. This usually contains the final reserve of Yellow/Orange.
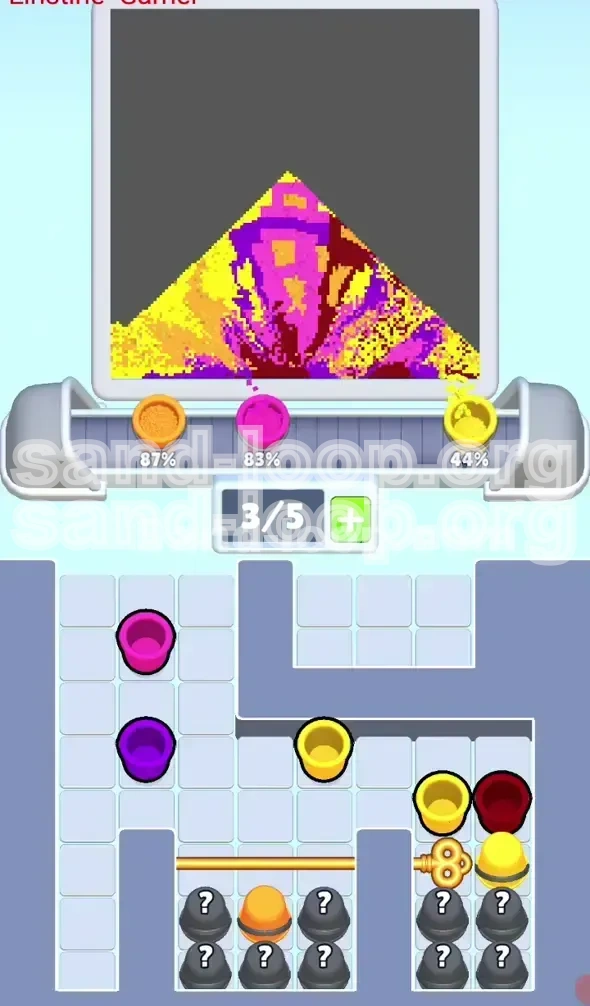
Phase 5: The Sunset Fill
The final cleanup. The hard logic is done; now you just paint.
- Step 1: Now that the bottom and middle are packed with Red and Purple, your nozzle should be hovering naturally over the top "Sky" zone.
- Step 2: Go back to the "waste" cups you ignored earlier. Tap all the remaining Yellow and Orange cups on the top left and top right.
- Step 3: Pour the contents of the Gold Gate reserve.
- Step 4: Fill the remaining 10-15% of the canvas with the bright sunset colors. The level is complete.
Color Order: The Vertical Logic Protocol
Understanding the correct order of operations is vital. This isn't just about colors; it's about physics. The sand engine fills the canvas from the bottom up. If you introduce "Layer 3" colors before "Layer 1," you create a permanent stain that ruins the image.
The Priority Tier List
Treat colors as a hierarchy of needs. You must satisfy the lowest tier before moving up.
- Tier 1: Dark Red (The Foundation). Non-negotiable. This must be the first sand to hit the bottom of the glass. If you pour Purple first, the Dark Red will sit on top of it later, making the ground look like it's floating. You need about 20% of your total sand volume to be this specific shade of red.
- Tier 2: Purple and Pink (The Structure). Once the bottom 15% of the screen is red, you can switch to Purple. This forms the bulk of the image. It is safe to pour this over the red. It acts as the transition between ground and sky.
- Tier 3: Mystery Colors (The Buffer). These are usually wildcards. Treat them as Tier 2 (Purple/Pink). Pour them when the canvas is between 30% and 60% full. They help add texture to the buildings without messing up the color grading.
- Tier 4: Yellow and Orange (The Atmosphere). Strictly last. These colors are for the negative space at the top. Do not pour these until the Red and Purple layers have pushed the fill line up to the 70% mark. If you pour them early, they will bury your foundation.
The "Bottom-Up" Rule
Always ask yourself: "Will this sand land at the bottom or the top?" If the current fill level is low (empty), every cup you pour lands at the bottom. Therefore, you must only pour colors that belong at the bottom. If you pour a Sky color while the canvas is empty, you have failed. Wait until the canvas is 60% full before you ever touch a Yellow cup.
Dealing with "Waste" Colors
Sometimes, you are forced to pour a color you don't want (like a Yellow cup blocking a Red one).
- Strategy: If you absolutely must tap a "waste" color, try to wait until the nozzle has swung to the side, or until the pile is high enough that the waste sand lands on top of the "Building" layer rather than the "Ground" layer.
- Calculation: A single misplaced Yellow cup is forgivable. Two or three is a restart. Be meticulous.
Visualizing the Target Layers
Constantly reference the preview image at the top of the screen.
- 0-20% Height: This zone is exclusively Dark Red. No exceptions.
- 20-70% Height: This is the domain of Purple, Pink, and Mystery. This is where your buildings go.
- 70-100% Height: This is the domain of Yellow and Orange. The sun and clouds live here.
Key Tips & Common Mistakes
Even with a walkthrough, Level 117 can trip you up. Here are the professional insights to keep your run smooth.
Common Mistake: The "Speed Clear" Instinct
The most common error is treating the Ice Blocks as enemies to be attacked immediately. Players see the "20" block and panic, trying to clear random cups as fast as possible.
- Why it fails: You end up tapping the top-row Yellows and Oranges just to lower the counter. This floods your base with sky colors.
- The Fix: Ignore the counter. Focus on the location of the cups. Only clear cups that give you access to the colors you actually need (Reds and Purples). The counter will break on its own as you play correctly.
Common Mistake: Ignoring the Nozzle Position
The sand nozzle moves back and forth. Many players tap without looking at where the sand will fall.
- The Risk: If you are pouring a "waste" color and the nozzle is at the bottom-center, you ruin your foundation.
- The Tip: Watch the nozzle sweep. If you have to tap a bad cup, time it for the moment the nozzle swings to the far left or right edge (where buildings meet sky), or wait until the pile is higher.
Key Tip: The "10" Block is the Pivot Point
The "10" block on the left is more important than the "20" block. The "20" block just gives you more cups, but the "10" block gives you essential Reds.
- Strategic Focus: Direct all your early efforts toward the stacks beneath the "10" block. Clearing this is the only way to get enough Red to finish the bottom.
Key Tip: Resource Hoarding
Don't clear a cup just because it's clickable. If you have a Purple cup available and a Yellow cup available, tap the Purple. Even if the Purple is harder to reach. Saving the Yellow for last ensures you don't run out of "building" material halfway through.
Stuck Solutions: What to Do If You Can't Win
Sometimes, despite your best efforts, you might end up in a state where victory seems impossible.
- Situation 1: The Foundation is Ruined. If you accidentally poured Yellow into the base and the red strip looks broken, it is mathematically impossible to fix it. Restart immediately. Do not waste time trying to "cover" it with Red; the physics won't allow the Red to go underneath.
- Situation 2: Out of Reds. If you've cleared the whole board and the bottom still isn't red enough, you likely poured some Reds into the "Building" zone or "Sky" zone by mistake. Next time, be more aggressive about clearing the "10" block early.
- Situation 3: Key Didn't Drop. The "20" block is on a timer. If it hasn't broken, you haven't cleared enough cups. Check the edges of the board for single-tap leftovers you might have missed.
Speed Run Tips & Optimization
Once you have mastered the logic, you might want to improve your time. Level 117 can be completed quickly if you chain your inputs correctly.
The "Right-First" Shortcut
Don't scan the whole board. Start every run by tapping the Dark Red on the far right. Do this instantly on level load. While that sand is pouring, scan the left side. This saves 2-3 seconds of reaction time.
Batch Processing
Instead of tapping one cup, waiting for the pour, then finding the next, try to queue your inputs. Identify three Dark Red cups in a row. Tap them all in quick succession (Triple Tap). The game will queue the pours. This is much faster than waiting for the animation to finish before the next tap.
Pre-Calculating the "20" Block
You know the "20" block needs 20 cups. You can roughly calculate how many stacks you need to clear to hit this number. Clearing the two main center columns usually yields about 12-15 cups. Add the right-side Reds (3-4 cups), and you are at the threshold. You don't need to clear the top corners until the very end. Skip them entirely to save time.
The "Mystery" Gamble
Speed runners often ignore Mystery cups (?) until the end because the reveal animation takes a split second. However, if you are stuck, prioritize them. They often contain large amounts of Purple, which can help fill the middle section rapidly without needing to hunt for specific colors.