
Level 120
HARDHow to solve Sand Loop level 120? Get instant solution for Sand Loop 120 with our step by step solution & video walkthrough. Sand Loop 120 tips and guide.
Play Sand Loop Now
Experience the puzzle challenge firsthand
Game Screenshots

Sand Loop Level 120 Screenshot 1
Sand Loop Level 120 Screenshot 2
Sand Loop Level 120 Screenshot 3

Sand Loop Level 120 Screenshot 4
Sand Loop Level Guides
Level Overview: The Pixel House Challenge
Visual Breakdown of the Canvas
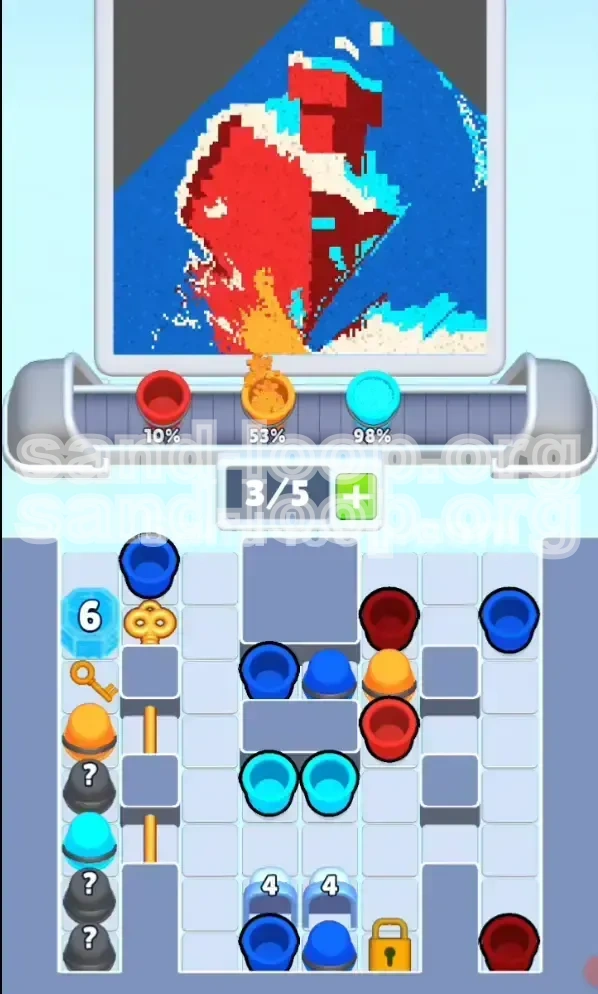
Sand Loop Level 120 presents a deceptively simple pixel-art house set against a deep blue night sky. The canvas is divided into five distinct color zones that require precise filling: a large Deep Blue background, a Vibrant Red house structure, Cyan window accents, Cream-colored walls, and a Golden door detail. The challenge lies not in the variety of colors, but in the strict capacity limits of your conveyor system relative to the size of these zones.The Core Mechanic: Conveyor Management
Unlike earlier levels where you could focus on one color at a time, Level 120 forces you to juggle multiple streams simultaneously. You have a conveyor belt capacity of 5 slots. This means you can queue up five cups, but once the belt is full, you cannot add new colors until one is delivered. This restriction is the primary cause of failure for most players.The "Hidden" Difficulty: Supply Tray Layering
The supply tray at the bottom of the screen is not a flat list; it is a stacked pile. Often, the Cyan or Cream cups you need immediately are buried under layers of Golden or Orange cups. You cannot simply "pick" the color you want; you must clear the obstructing cups first. This layering mechanic turns the level into a logic puzzle rather than just a reflex game.Win Condition Specifics
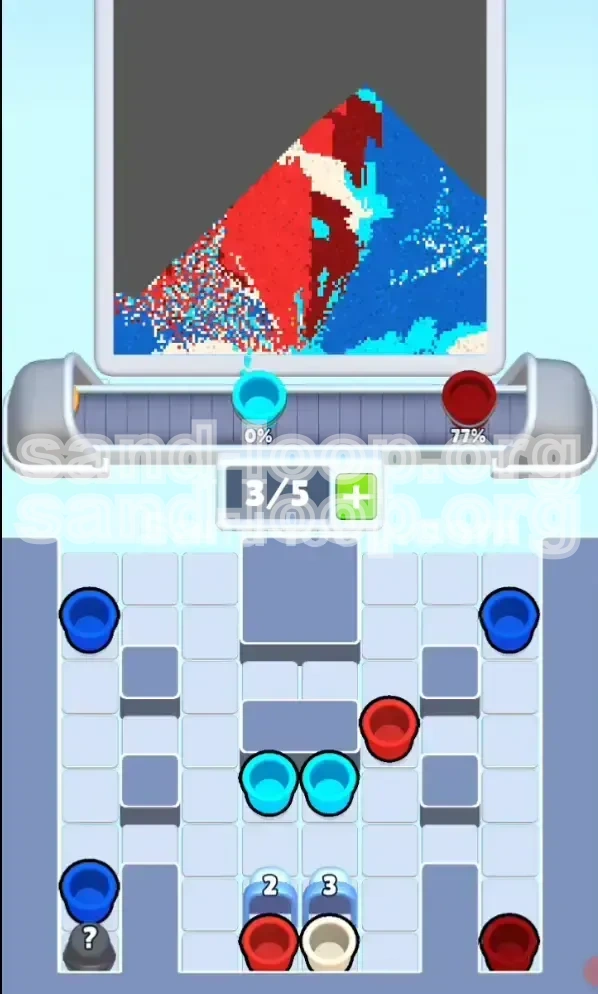
To secure victory, you must fill all five color progress bars to 100%. The meter tracks your progress from 0/5 to 5/5 colors completed. The game allows for minor overfilling, but excessive waste on a single color will lock that slot, preventing you from delivering other necessary colors. You must aim for precision, treating every slot on your conveyor belt as a valuable resource.Clear Objectives: Your Mission Goals
Primary Goal: Five-Color Completion
Your main objective is to deliver the correct mixture of Red, Cyan, Cream, Golden, and Blue paints to the canvas. You win only when all five individual meters are full. There is no partial victory here; leaving the Blue background at 90% while the rest are full still results in a loss. You must balance the delivery to ensure all colors cross the finish line together.Secondary Goal: Maintain Slot Fluidity
You must aim to keep at least one slot on your conveyor belt open at all times. This "fluidity" allows you to react to the supply tray. If your belt is permanently full (5/5), you lose the ability to unblock new colors from the tray, leading to a deadlock where you are forced to waste paint.Tertiary Goal: Strategic Unblocking
You must identify which colors in the supply tray are "locked" behind others. Your objective is to plan a sequence of moves that clears the unwanted blocking cups (like Orange or excess Golden cups) without ruining your color ratios. This involves using "waste pours" strategically to unlock the colors you actually need.Efficiency Goal: Minimize "Waste" Slots
Every slot occupied by a color you don't need (e.g., an Orange cup when the Orange zone is already full) is a wasted opportunity. Your goal is to minimize these instances. Ideally, 90% of the cups you load should directly contribute to filling the five target zones.Step-by-Step Instructions: The Winning Walkthrough
Phase 1: The "Golden" Start (Moves 1-5)
Begin by assessing the top layer of your supply tray. Ignore the mystery cups for now. You will likely see Golden (Yellow) and Dark Red cups accessible. Step 1: Load one Golden cup immediately. This targets the door/ground details. Step 2: Load one Dark Red cup immediately after. This targets the main house body. Step 3: Look at the tray. Is Cyan visible? If yes, load it. If it is buried under a stack of Orange cups, load one Orange cup to "dig" for the Cyan. Step 4: Do not fill your belt to capacity yet. Keep 2 slots empty to maintain flexibility. Step 5: Allow the first two cups to pour. Watch the progress meters. You want Red and Golden to be at roughly 15-20%.Phase 2: The Cyan & Cream Unlock (Moves 6-15)
As the first wave of paint pours, your supply tray will shift. Step 6: Prioritize unlocking Cyan. Cyan is often the most scarce color in this level. If you have to waste a pour on an unwanted color to get to the Cyan cup, do it now while your other meters are low. Step 7: Load Cyan the moment it is available. Step 8: Scan for Cream (White). This is often buried deep. Step 9: Establish a rhythm: Load -> Wait for Pour -> Load. Do not spam clicks. Step 10: By now, your Red meter should be rising. If Red exceeds 40%, stop loading Red cups immediately, even if they are available. You need to save belt space for the harder-to-find Cyan and Cream.Phase 3: Mid-Game Balancing Act (Moves 16-30)
This is the most dangerous part of the level. The Blue background zone is huge, and it is tempting to fill it. Step 11: Resist the urge to load multiple Blue cups. Treat Blue as "filler" to be used only when no other critical color is available. Step 12: Keep your precision colors (Red, Cyan, Cream) as close to each other in percentage as possible. Step 13: If your conveyor belt has 3 empty slots, use this time to clear the bottom of the supply tray. Load those blocking cups. Step 14: Monitor the "Mystery" cups (marked ?). If you have a stable lead, load ONE mystery cup to identify it. If it’s a useful color, great. If not, you know to avoid it later.Phase 4: The Final Push (Moves 31+)
You are now in the endgame. Most colors should be between 70% and 90%. Step 15: Switch to "Sniper Mode." Stop looking at the tray layout and focus purely on the progress bars. Step 16: Whichever color is lowest (usually Cyan or Cream) is your only priority. Step 17: Load only the cups that correspond to your lowest color. Step 18: It is acceptable to let the conveyor belt run empty (0/5) for a few seconds while you wait for the specific cup you need to become available in the tray. Step 19: Do not worry about overfilling by 2-3%. The game has a small buffer. Focus on getting that final 5% for every color.Color Order: Processing Priority
The "Sandwich" Method
The optimal processing order for Level 120 is not chronological, but structural. Think of the image as a sandwich. The Bread is the Blue Background (filling but plain), and the Meat is the Red/Cyan/Cream (essential but small). You must alternate between them.- Priority 1: Cyan (The Critical Bottleneck) – This is the scarcest resource. Every time you see a Cyan cup, load it. Do not wait.
- Priority 2: Red (The Structural Base) – Red is plentiful but necessary. Keep a steady stream flowing, but don't let it dominate your belt.
- Priority 3: Cream (The Detail) – Treat this with the same urgency as Cyan. It is often hidden.
- Priority 4: Golden (The Accent) – Useful for filling gaps in the conveyor belt while you wait for other colors to unlock.
- Priority 5: Deep Blue (The Filler) – Only process this when you have absolutely no other options, or in the final 10% of the game.