Level Overview: The Canvas of Confusion
Stage 119 Architecture: The "Five-Color Jigsaw"
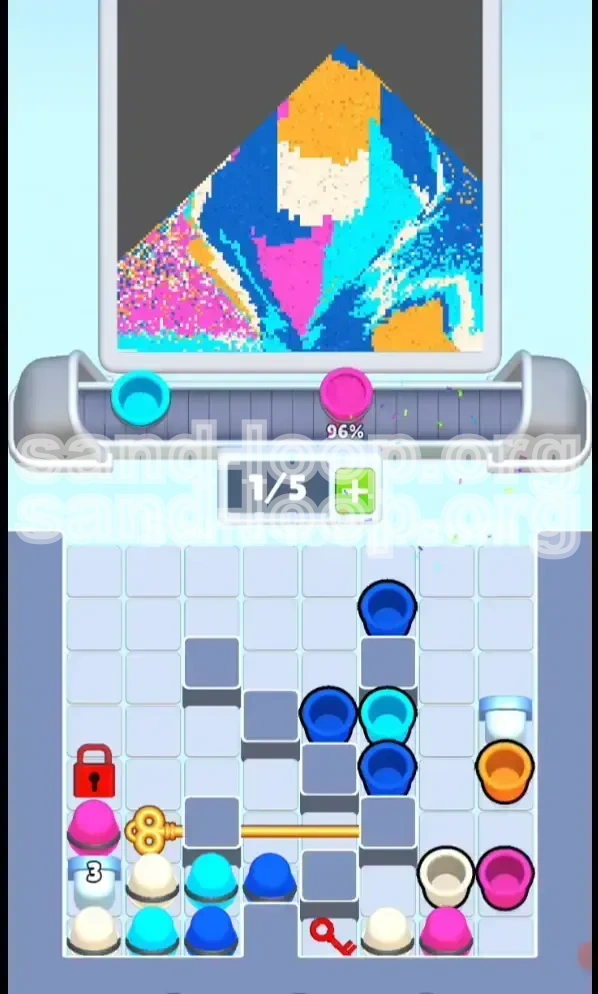
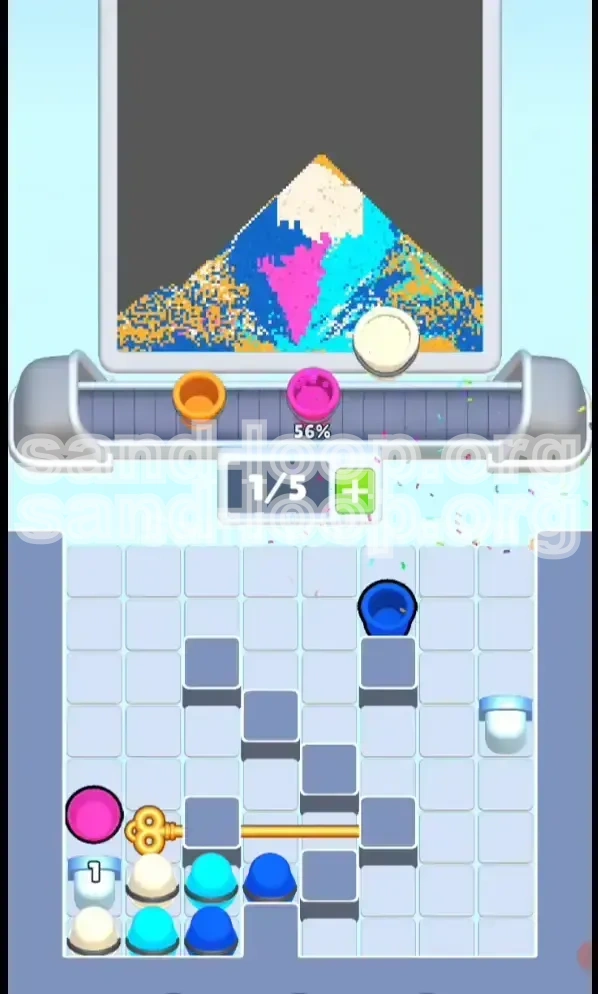
Sand Loop Level 119 is not a standard linear level; it is a complex spatial puzzle defined by a "Five-Color Jigsaw" layout. Unlike standard levels where colors might be grouped in neat stripes or large blocks, Stage 119 features interlocking, irregular polygons. You will be dealing with five distinct hues: Cyan, Dark Blue, Orange, Magenta, and Cream. The visual complexity is high because these regions are scattered across the canvas, often resembling a stained glass window rather than a simple painting. This layout forces you to be precise with your aiming, as "spillover" from one section to another is minimal and often impossible due to the irregular boundaries.
The Capacity Dilemma: 0/5 vs. Resource Abundance
One of the defining features of this level is the contrast between your empty conveyor belt and your packed supply tray. You start with a 0/5 conveyor ceiling, which feels like a luxury at first. However, the supply tray below is congested with stacked cups. You will see Orange and Cyan stacked on top of each other, with vital Cream and Magenta cups buried deep underneath. This congestion is the primary physical constraint of the level. You cannot simply grab what you want; you must play a game of "Tetris" with your supply tray to unlock the specific colors required for the smaller, harder-to-reach regions of the canvas.
The "Cream" Bottleneck
The most critical challenge in Level 119 is the Cream color zones. They are not only small in number but also physically tiny and scattered in isolated pockets across the map. While Blue and Cyan cover large areas and are forgiving to fill, the Cream sections require pixel-perfect timing. If you miss a Cream pour or waste it on a neighboring Blue zone, you will likely fail the level because recovering the lost Cream percentage is incredibly difficult given the slow regeneration of those specific cups in the tray.
Meter Dynamics: The 100% Balancing Act
The victory condition for Level 119 is strictly tied to the progress meters at the top of the screen. This is not a "fill the board" level; it is a "match the target" level. The meters require a near-perfect balance: approximately 30% Cyan, 25% Dark Blue, 20% Orange, 15% Magenta, and 10% Cream. The game punishes overfilling. If you hit 100% on Blue but your Magenta is only at 40%, the game does not let you win just because you filled the board. You must hit all targets simultaneously. This means you must actively stop pouring Blue at around 90% to preserve space and opportunities for the rarer colors.
The Conveyor Latency Factor
A subtle but deadly feature of this level is the specific latency of the conveyor belt. The belt is long, and the travel time from the "tap" point to the "pour" point is roughly 2.5 seconds. In Level 119, this delay is significant. Many players fail because they tap a cup, see nothing happen immediately, and tap again, inadvertently loading two of the same color. Understanding this delay is crucial for maintaining the rhythm needed to clear the supply tray congestion without causing a jam.
Strategic Objectives: How to Approach 119
Objective 1: Unlock the Tray Layers
Your immediate first goal is not to fill the canvas, but to reorganize the supply tray. You cannot win if you cannot access your colors. Your primary objective in the first 10% of the game is to "unblock" the buried Cream and Magenta cups. This requires intentionally loading and using cups you might not strictly need yet (like excess Blue) just to clear the vertical space in the tray. If you start the game pouring only what you see on top, you will hit a wall around the 40% mark where your tray is full of useless colors and your needed colors are trapped.
Objective 2: Establish Slot Flow
You must maintain a "Slot Flow" state where your conveyor never exceeds 3/5 capacity. Keeping two slots open at all times is a strategic necessity, not just a suggestion. This buffer allows you to absorb the random drops from the supply tray without causing a deadlock. If you fill the conveyor to 5/5, you lose the ability to cycle the tray, effectively freezing your options and guaranteeing a loss. The objective is to treat the empty slots as "inventory space" for your future moves.
Objective 3: Precise Color Targeting
You need to adopt a "Sniper" mentality rather than a "Shotgun" mentality. Do not just pour sand randomly. You must identify the specific irregular zones for each color. For example, the Orange zones are often located on the periphery of the main Blue clusters. Your objective is to maneuver your pouring stream to hit these specific pockets without contaminating the neighbors. This requires you to stop the conveyor precisely when the cup is aligned with the target zone.
Objective 4: The "Stop" Threshold
You must set mental "Stop Thresholds" for your dominant colors. For Cyan and Dark Blue, you should aim to stop pouring when your meter hits 85-90%. Do not wait for 100%. By stopping early, you ensure that you don't accidentally overfill while you are busy hunting for the last few Cream cups. The final 10% of these colors should be filled only as a cleanup step after the rare colors are done.
Objective 5: Prevent Contamination
The final objective is zero cross-contamination. Because the zones are irregular and tightly packed (jigsaw style), it is very easy to pour Magenta into a Blue zone. Contamination ruins the purity of the color meter and wastes precious sand. You must ensure that every granule lands in its intended target. If you can't clearly see the target zone, don't pour.
Step-by-Step Walkthrough: The Winning Path
Phase 1: The Setup (0-15% Completion)
Start the level and observe the supply tray. You will likely see Orange or Cyan at the top. Do not load them immediately if the tray is chaotic. Instead, wait for the conveyor to align. Load one Orange cup (as it is usually the safest starting color) and send it down the belt. While it is traveling, look at the tray again. You need to identify where the Cream cups are. They are usually buried under the Blue stacks. Your goal here is to perform a "clearing move"—load a Blue cup even if you don't need it, just to remove it from the stack and reveal the Cream below. Pour the Blue into a large Blue zone. Now you have access to the Cream.
Phase 2: The Mid-Game Balance (15-60% Completion)
Now you should have Orange, Cyan, and Cream accessible. Establish a rhythm: Pour one Orange, then one Cyan, then look for Cream. Do not queue up multiple cups of the same color. Keep the conveyor moving. If you load a Cream cup, you must be ready to pour it immediately into one of the tiny Cream pockets. Do not let it sit on the belt. During this phase, your Dark Blue meter will likely lag behind. That is acceptable. Focus on keeping the three main colors (Orange, Cyan, Magenta) rising at roughly the same rate. If you see Magenta is low, prioritize unlocking it from the tray by using sacrificial pours of other colors.
Phase 3: The End-Game Precision (60-90% Completion)
At this stage, your conveyor should be mostly empty (1-2 cups max) and your tray should be cycling through the remaining colors. You will likely notice that Cream is the bottleneck. Slow down completely. Do not tap rapidly. Load one Cream cup, wait for it to arrive at the pour point, and carefully fill a specific pocket. Watch the meter. Did it go up? If yes, find the next pocket. If no, you missed or contaminated a zone. This is the "surgical" phase. Ignore the large Blue zones entirely unless they are critically low. Your focus is 100% on the small zones now.
Phase 4: The Cleanup Sweep (90-100% Completion)
You are now at the finish line. You likely have Cyan and Blue at around 90%, and Cream/Magenta at 95%. You need to finish them off. The danger here is accidentally overfilling a color that is already at 98%. Load the color that is lowest. Pour a tiny amount. Stop. Check the meter. If it hits 100%, immediately switch to the next lowest color. Do not rely on the flow; tap and release to do "micro-pours." This prevents the overflow that causes so many failed attempts at 99%.
Optimal Color Order and Processing Logic
Why Order Matters in Level 119
In this level, processing colors in the wrong order is the number one cause of failure. The game's physics engine and cup generation logic are designed to reward specific sequences. If you process the "easy" colors first (Blue/Cyan), you will fill your tray with the "hard" colors (Cream/Magenta) later, leading to a deadlock where you have no slots to maneuver. The optimal order is designed to clear the tray congestion early.
Recommended Sequence: Orange -> Cyan -> Magenta -> Cream -> Blue
While Blue is the most abundant color, it should be one of the last you fully complete. The recommended processing order is:
1. Orange: Start here to clear the top of the tray.
2. Cyan: Switch to this to clear the middle layer.
3. Magenta: Tackle this while you have slots, as it is often blocked.
4. Cream: The hardest color; needs your full attention.
5. Blue: Fill this last. It is abundant and easy to catch up on.
The "Cream Priority" Rule
Even though Cream is only about 10% of the canvas, it should command 30% of your attention. Whenever a Cream cup becomes available in the tray, you should prioritize loading it over almost anything else, provided you have a slot. Why? Because Cream cups appear less frequently in the tray cycle. If you skip a Cream cup to grab a Blue one, you might not see another Cream cup for 15-20 seconds. In a speed-run context, skipping Cream is a death sentence. Always grab Cream when you see it.
Managing the "Blue Block"
Dark Blue cups are heavy and numerous. They tend to cluster in the tray and block other cups from spawning or moving up. You must actively "break up" the Blue block by loading Blue cups even when you don't strictly need them, just to get them out of the way. Treat Blue cups as "trash" that needs to be removed to find the treasure underneath. This is a counter-intuitive strategy but is essential for keeping the supply tray fluid.
Handling Magenta Traffic
Magenta usually sits in the middle of the difficulty curve. It's not as rare as Cream, but not as common as Cyan. The rule for Magenta is "maintain the rhythm." Do not pour two Magentas in a row unless you are sure the zones are large enough. Usually, Magenta zones are medium-sized. Pouring one Magenta, then one Cyan, then one Magenta is a safer alternating pattern that prevents overfilling the Magenta zones.
Key Tips, Common Mistakes, and Stuck Solutions
Common Mistake 1: The "Full Conveyor" Syndrome
The most common error players make is filling the conveyor belt to 5/5 early in the level. This feels productive because you are "loading up," but it actually removes your ability to react. If you have 5 cups loaded and you realize you need a specific Cream cup that is currently buried, you are stuck. You have to wait for cups to pour and clear, wasting valuable seconds.
The Fix: Play with 2-3 cups max. Keep empty slots as "buffer space" for your strategy.
Common Mistake 2: Ignoring the Belt Delay
Players often tap a cup, don't see immediate movement, and tap again. This doubles the load of that color. With a 2.5-second delay, this creates a "traffic jam" on the belt where two identical cups arrive back-to-back. This inevitably leads to overfilling that specific color zone.
The Fix: Adopt a "Tap and Wait" policy. Tap once, count to three, then assess. Never double-tap unless you are 100% sure the first tap didn't register.
Stuck Solution: The "Soft Lock" Recovery
Have you ever found yourself in a situation where your conveyor is full of cups you don't need (e.g., three Blue cups) and the color you do need (Cream) is buried under them in the tray? This is a "Soft Lock."
The Fix: You must sacrifice. You have to accept that you will overfill Blue slightly. Pour the Blue cups immediately into the Blue zones to get them off the belt. This will free up your slots to finally dig down and retrieve the Cream cup from the tray. It is better to be at 110% Blue (which the game caps at 100% anyway) than to be stuck with no Cream.
Stuck Solution: Meter Imbalance
If you are at 90% completion but one specific color (like Magenta) is stuck at 40%, you are in a dangerous spot. You cannot pour more of the other colors.
The Fix: Stop everything else. Look at the tray. You need to force the game to give you Magenta cups. This means you must aggressively clear out the other colors from the tray. Load and discard (pour into safe zones) other colors just to cycle the tray until the Magenta cups bubble up to the top.
Tip: The "Flick" Technique
For the tiny Cream zones, a standard pour might be too much, causing spillage into adjacent Blue zones.
The Fix: Use the "Flick" technique. As the cup is pouring, quickly flick your input or drag it away as soon as the zone looks full. This cuts the stream short and prevents overflow. This requires precise timing but saves the run from contamination.
Tip: Visualizing the "Jigsaw" Edges
Since the canvas is a jigsaw, it can be hard to tell where one color ends and another begins.
The Fix: Don't look at the center of the zones; look at the edges. Trace the boundary line with your eyes before you start pouring. If you can identify the "shape" of the Cream zone, you can aim your pour to land in the center of that shape, maximizing absorption and minimizing runoff.