
Level 122
HARDHow to solve Sand Loop level 122? Get instant solution for Sand Loop 122 with our step by step solution & video walkthrough. Sand Loop 122 tips and guide.
Play Sand Loop Now
Experience the puzzle challenge firsthand
Game Screenshots

Sand Loop Level Guides
Sand Loop Level 122 Walkthrough: Mastering the Forest Landscape
1. Introduction to the Forest Challenge
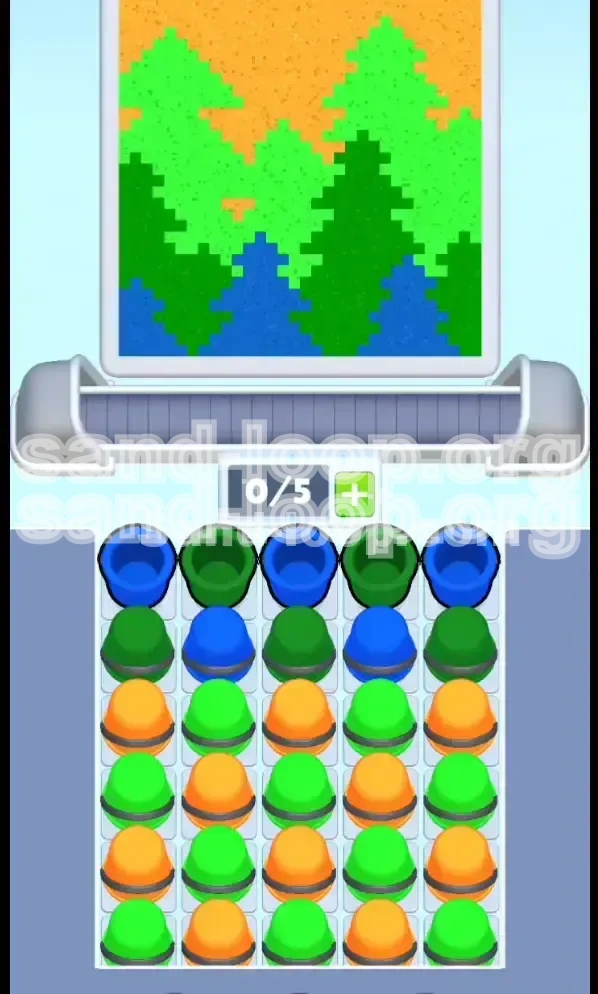
Welcome to Level 122 of Sand Loop. This level is a significant shift in pace from the frantic "Ice Breaker" stages. You are presented with a serene yet complex "Forest Landscape" image featuring a dense cluster of pine trees against a vibrant orange sunset.
2. The Core Difficulty: Depth Perception
The primary obstacle in this level is not speed, but rather Color Logic. The image is composed of multiple layers that must be filled from the back to the front. If you attempt to color the foreground trees before the background sky, you will create permanent gaps that are impossible to fix later.
3. Visual Analysis of the Canvas
Let's break down the image structure. The canvas is divided into three distinct depth layers:
- Background: A solid block of Sunset Orange occupying the upper 40% of the screen.
- Mid-ground: jagged outlines of Lime Green trees sitting directly on top of the orange sky.
- Foreground: Dark Forest Green trees that frame the edges and bottom.
4. Why the Supply Tray is the Enemy
In most levels, you can simply pick the color you need. In Level 122, the game employs an "Alternating Column Layout" in your supply tray. The colors you need first (Orange) are buried at the bottom, while the colors you need last (Dark Green and Blue) are blocking the top. This forces you to use a "Dig and Burn" strategy to access the necessary tools.
5. Victory Conditions
To achieve a three-star rating on this level, you must complete the painting without overflowing any single cup. Overflowing happens when a cup passes under a dispenser that is matching a color already inside it. Given the chaotic layout of the supply tray, preventing overflows while digging for specific colors is the ultimate test of your management skills.
Step-by-Step Walkthrough: Phase 1 - The Sky Setup
1. Assessing the Grid Lock
When the level begins, do not tap anything immediately. Look at your supply tray (the columns where cups pop up). You will notice a pattern:
- Columns 1, 3, and 5 have Royal Blue cups on top.
- Columns 2 and 4 have Dark Green cups on top.
- The Sunset Orange cups (critical for the sky) are buried under 3 layers of other colors.
2. Executing the "Blue Dump"
Your first action is to clear the board. You cannot reach the Orange cups with the tray full. Tap the Royal Blue cups in Columns 1, 3, and 5 first.
Why? Blue is used for the very bottom shadow pixels. By releasing these cups early, you send them on a long loop around the conveyor belt. They will likely return just in time for the final phase of the level. This clears the vertical space in the tray, allowing new cups to rise from the bottom.
3. Burning the Dark Green
Immediately after the Blues are moving, tap the Dark Green cups in Columns 2 and 4. Do not worry about filling them with sand yet. Just get them onto the belt.
Pro Tip: Since the dispenser is currently pouring Sunset Orange (Sky), these Dark Green cups will pass under the orange nozzle. If they are empty, they won't fill up with orange (because the color doesn't match), which keeps them "light" and fast on the belt, preventing congestion.
4. The Great Dig for Orange
With the top layer gone, you will see the second layer of cups. Look closely at the center columns (2 and 4). You should see Sunset Orange cups rising to the surface.
Tap these Orange cups immediately. Your goal is to create a "train" of 3-4 Orange cups traveling together on the conveyor belt.
5. Timing the Sky Pour
Watch the dispenser nozzle at the top of the loop. It will be flashing Orange. Ensure your train of Orange cups arrives at the nozzle simultaneously.
Warning: If there is a gap between your cups, the dispenser might switch to the next color before the second cup arrives. Group them tightly to maximize the fill rate for the sky.
6. Handling Overflow Risks
Keep an eye on the percentage bar. The sky usually takes up about 35-40% of the total canvas. Once the sky is roughly 90% filled, stop adding Orange cups to the belt. You need to save the remaining Orange capacity for the tiny gaps between the tree branches later. Overfilling the sky now will waste precious sand needed for the trees.
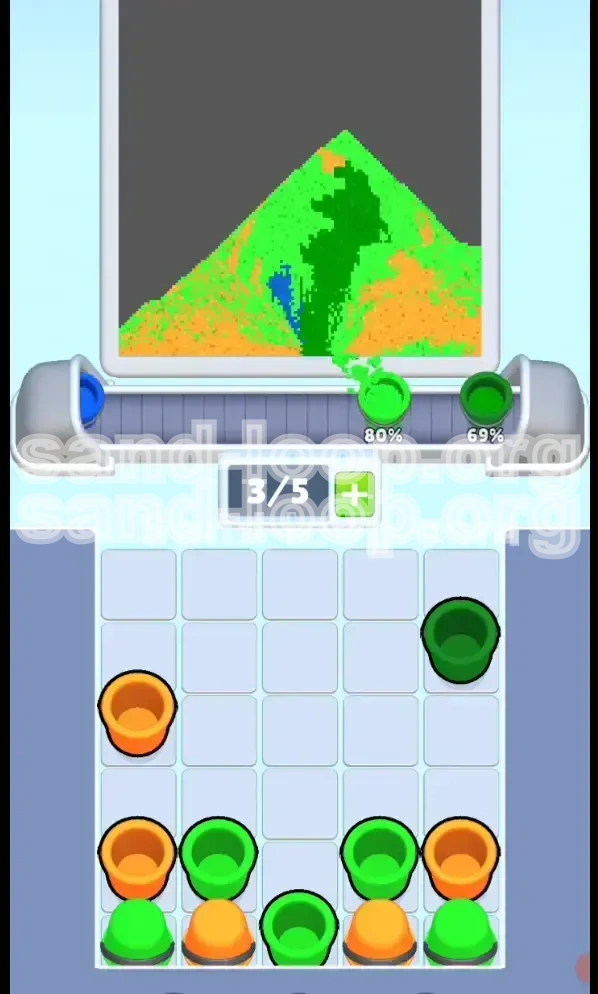
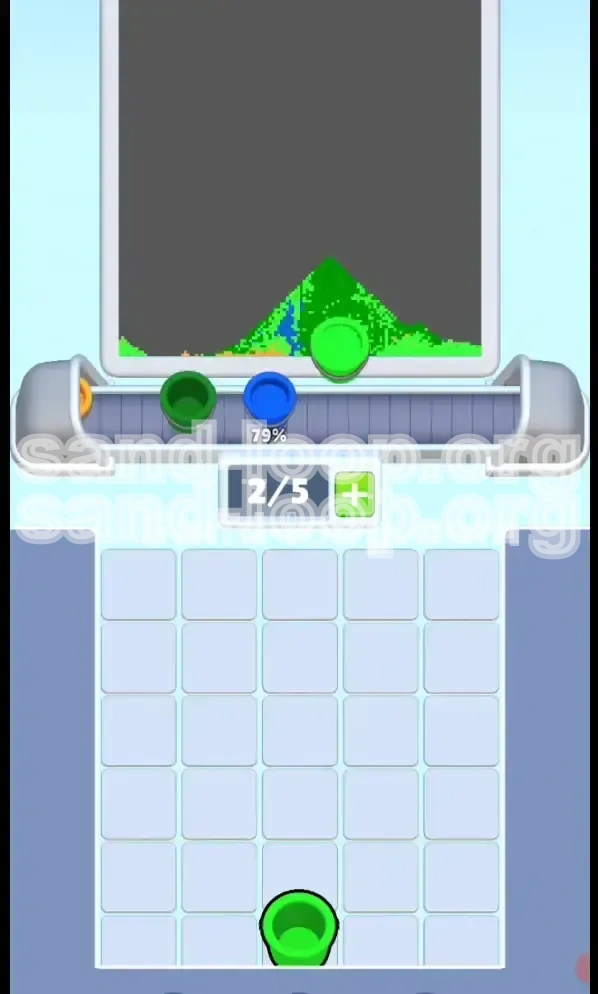
Step-by-Step Walkthrough: Phase 2 - The Mid-Ground Trees
1. Identifying the Target Color
Once the sky is established, the nozzle logic will shift. The dispenser will now aim for the Lime Green sections. This represents the mid-ground forest layer.
Look at your tray again. You likely have some residual Dark Green cups blocking the new Lime Green cups rising from the bottom.
2. Strategic Tray Shuffling
You need to free up the Lime Green cups. If a Dark Green cup is sitting on top of a Lime Green cup, tap the Dark Green cup again.
Note: This "Recycling" sends the Dark Green cup for another loop. Since the dispenser is currently pouring Green, this Dark Green cup might accidentally catch some green sand. This is actually beneficial—it acts as a "dummy" cup to absorb excess flow while you wait for the correct Lime Green cups to appear.
3. The Center-Stage Focus
The Lime Green trees are located in the center of the image. When placing your cups on the belt, try to position them so they pass under the dispenser when the nozzle is aligned with the center of the canvas.
If you send a cup too early (while the nozzle is on the left), it might miss the center trees entirely and waste the sand.
4. The "Mixing" Danger Zone
This is the most critical moment for failure. The boundary between the Orange Sky and Lime Green trees is jagged.
If you send a Lime Green cup while the nozzle is still dripping Orange, or vice versa, you risk "contaminating" the cup. A cup with mixed colors becomes useless for precise filling.
Action: Wait for the visual "click" or color switch on the nozzle before committing your next batch of cups to the belt.
5. Filling the Gaps
The Lime Green layer is porous. You will see small orange dots (sky) showing through the green trees. Do not try to fill these with Orange now. Leave them.
In Level 122, the "back-painting" logic means you paint the larger area (Green) over the smaller area (Orange gaps), and then rely on the foreground layers to hide the imperfections. Trying to fix every pixel now will drain your sand supply.
6. Monitoring the Percentage
The Lime Green phase typically fills another 30% of the canvas. You should be sitting at around 65-70% completion before you move to the final phase. If you are lower than 60%, you may have missed large sections of the trees.
Step-by-Step Walkthrough: Phase 3 - The Foreground & Finish
1. The Recall of the Blues
Remember those Blue cups you sent looping at the very start of the level? They are about to become your best friends.
The dispenser will now switch to the Royal Blue flow. Your initial Blue cups should be arriving at the nozzle just as the color switches. This is perfect timing. These cups will fill the deep shadows at the very bottom of the forest.
2. The Heavy Lifting with Forest Green
The final color is Forest Green (Dark). This is the "Ink" of the level. It covers the largest area of the foreground but has the most complex shape.
You will likely have a backlog of Dark Green cups on your tray that you were "shuffling" earlier. Now is the time to unleash them.
3. Managing the "Double Fill"
Because the foreground trees overlap both the Sky and the Mid-ground trees, you need to be careful about overfilling.
If a Dark Green cup is 80% full and passes under the dispenser again, it will overflow. Overflow in this stage is disastrous because it dumps black sand on the conveyor belt, potentially dirtying other cups.
Tactic: If a cup is near full, let it loop around the belt one extra time (burn a cycle) before bringing it back to the dispenser. This buys time for the sand to settle or for the dispenser to move to a clean spot.
4. The "Pixel Hunting" Endgame
When you reach 90% completion, the game becomes a test of patience. You will likely have isolated pixels remaining in three colors:
- Orange dots in the sky (hidden behind tree branches).
- Green patches on the mid-ground.
- Blue shadows in the roots.
5. Finalizing the Image
Do not spam cups. Send one cup at a time for each remaining color.
Watch the dispenser preview. If the dispenser is about to pour Blue, and you need Orange, wait. Let the dispenser cycle through its logic. Sending an Orange cup into a Blue stream will fill it with the wrong color, rendering it useless.
6. The 100% Push
The last 2% of this level is notoriously difficult. It often requires a specific "corner shot."
If you are stuck at 98%, look for the intersection of the Blue ground and the Dark Green trees. Often, a single pixel of Blue is hiding under a layer of Dark Green. You may need to sacrifice a Dark Green cup (let it overflow) to clean the belt, allowing a clean Blue cup to pass through and grab that final pixel.
Speed Run Tips & Tricks
1. The "Start-Game" Mashing
The most time-efficient way to start Level 122 is to tap the top layer of cups (Blue and Dark Green) before the animation even finishes loading. You want these "trash" cups on the belt immediately. Every second they sit on the tray is a second wasted.
2. Belt Management Mathematics
The conveyor belt has 5 visible slots. To speed run, you must keep these slots rotating.
Think of the belt as a queue. If you have 5 cups moving and they are all "wrong" colors (e.g., Blue cups when you need Orange), you have stalled. Always keep 1 or 2 slots empty or filled with "neutral" cups that you don't care about, ensuring you can quickly tap the correct color when it rises from the tray.
3. The "Dummy Cup" Technique
Advanced players use a "Dummy Cup" to absorb dispenser time.
If the dispenser is pouring Green, but you are waiting for an Orange cup to rise from the tray, send a full, unwanted Blue cup onto the belt. The dispenser will pour Green into the Blue cup, ruining it, but it keeps the dispenser active. When your Orange cup finally pops up, tap it immediately. The dispenser switches to Orange, and your timing hasn't lost a beat.
4. Predictive Color Switching
Memorize the dispenser cycle. In Level 122, the cycle usually goes: Orange -> Lime Green -> Royal Blue -> Forest Green.
If you are currently filling Lime Green, you know that Royal Blue is coming next. Don't wait for the nozzle to switch. Start digging for your Royal Blue cups in the tray while the Lime Green pour is still happening. This proactive "Digging" saves about 5-10 seconds per cycle.
5. Overflow Exploits
Normally, overflow is bad. However, in a speed run, a controlled overflow can be useful.
If you have a Dark Green cup that is 95% full, and you need to clear the tray, intentionally overflow it onto the belt. This clears the cup from the tray instantly. While you usually have to clean the mess, if you are about to win (100% reached), the game ends before the mess matters. Use this only when you are seconds away from the finish line.
6. Optimal Cup Placement
Do not just tap cups randomly. Place them on the belt based on where the dispenser will be, not where it is.
Since the belt moves left and the dispenser moves right, calculate the intercept point. Tapping a cup when the dispenser is on the far right usually means the cup will arrive just as the dispenser swings back to the center. Use this rhythm to sync your cups with the center of the image where the trees are densest.