
Level 136
HARDHow to solve Sand Loop level 136? Get instant solution for Sand Loop 136 with our step by step solution & video walkthrough. Sand Loop 136 tips and guide.
Play Sand Loop Now
Experience the puzzle challenge firsthand
Game Screenshots
Sand Loop Level Guides
Level Overview: The Beach Horizon Challenge
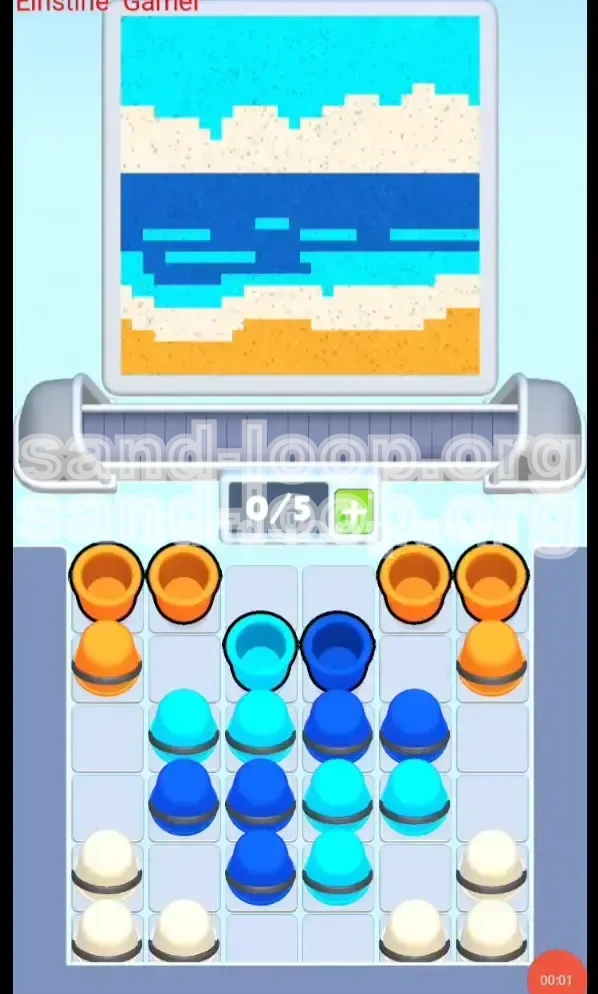
Welcome to the Sand Loop Level 136 guide. In this stage, titled "The Beach Horizon," players are presented with a deceptively complex puzzle disguised as a simple landscape painting. Unlike previous levels that focused on breaking barriers or navigating mazes, this level is a pure exercise in color discipline and inventory management. The screen is divided into four distinct horizontal bands, and your success depends entirely on your ability to recognize the "Gravity vs. Dispenser" conflict.
The core difficulty lies in the specific color mixing required for the ocean section. You are not merely filling a container; you are creating a layered masterpiece where timing is everything. If you pour colors too quickly, you risk contaminating the white foam with the orange sand or burying the cyan sky highlights under the dark ocean water. This guide will break down the exact sequence to achieve a 100% clear rate without getting stuck.
The Four-Layer Structure
The visual composition of Level 136 is strictly segregated into horizontal stripes. Understanding this geography is crucial because the game’s physics engine treats these layers as separate physical entities. The bottom layer is heavy sand, while the top layers are lighter liquids. The challenge is managing the 5-slot conveyor belt capacity to ensure these lighter liquids don't get trapped behind heavier solids waiting to be poured.
Inventory Capacity Constraints
You are limited to a maximum of 0/5 slots on your loading tray. This tight capacity is the primary bottleneck. You cannot hoard colors. You must adopt a "just-in-time" pouring strategy, pulling cups only when you have immediate space for them. Filling your tray too early with the wrong color will lock you out of the necessary colors needed for the middle sections, forcing a restart.
The "Core Blocker" Mechanic
The central column of the supply tray presents a specific obstacle known as the "Core Blocker." The Dark Blue and Cyan cups required for the ocean are sandwiched between the initial Orange cups and the inaccessible White cups at the bottom. You must clear the exterior Orange cups to relieve the pressure on the center column before you can even think about accessing the water colors.
Visualizing the Target Image
The target is a serene beach scene: Orange sand at the bottom, followed by a thin strip of White foam, a large band of Dark Blue water with Cyan wave highlights, and finally, a Cyan sky at the very top. Keeping this image in mind helps you understand why pouring order matters—you are building the picture from the bottom up, but you must gather supplies from the outside in.
Why Speed Kills Logic
While Sand Loop often rewards speed, Level 136 punishes "spam tapping." If you tap cups rapidly to clear the board, you will mix the White foam into the Orange sand, turning the beach into a muddy brown. You must pause between pours to allow the sand layers to settle physically in the glass before adding the next color on top.
Clear Objectives for Success
To secure a three-star rating and complete the level without using a "Undo" potion, you must adhere to three primary objectives. This level is less about reflex and more about sequence adherence.
Objective 1: Establish the Foundation
Your first goal is to secure the bottom 20% of the painting. This involves isolating the Orange cups and pouring them effectively without clogging your tray. You must clear the "wing" cups (left and right extremes) to unlock the inner columns. If you fail to clear the outer wings first, you will create a bottleneck that prevents you from reaching the vital Blue and Cyan cups in the center.
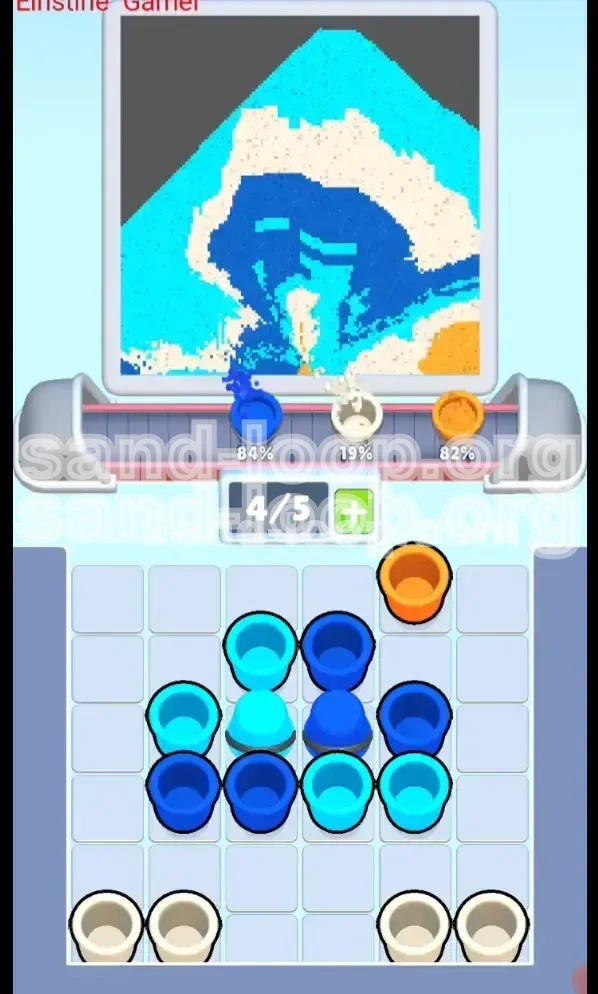
Objective 2: Execute the Ocean Weave
The most critical objective is the "Ocean Weave." This requires alternating Dark Blue and Cyan pours to create the wave texture. You cannot pour all the Blue at once; doing so would submerge the Cyan highlights, making them invisible. You must intersperse the Cyan cups while the Blue is still flowing to ensure the colors layer correctly within the water band.
Objective 3: The Foam Layer Precision
The White cups represent the beach foam. This layer is extremely thin and sits right on top of the Orange sand. Your objective here is precision placement. You must pour the White cups only after the Orange sand has settled completely. If you pour White too early, it will sink into the Orange and disappear, causing a failed percentage check.
Objective 4: Sky Completion
The final objective is topping off the canvas with the Cyan sky. These are the last cups remaining in the center column after you have cleared the blockers. The challenge here is ensuring you haven't accidentally used these specific Cyan cups during the "Ocean Weave" phase.
Objective 5: Tray Management
Throughout the level, you must maintain a "2-3 Slot Rule." Never let your tray fill up to 4 or 5 slots unless you are absolutely certain of the next three moves. Keeping 2 slots open gives you the flexibility to grab the White cups as soon as they become accessible, preventing them from being buried behind new falling cups.
Step-by-Step Walkthrough Instructions
Follow these steps in exact order. Do not skip ahead, and do not try to combine steps unless you are confident in your ability to micromanage the physics.
Phase 1: The Orange Clearing (Wings)
Begin by ignoring the center of the board. Look at the far left and far right edges of the cup tray. You will see pairs of Orange cups. Tap the top-left Orange cup and the top-right Orange cup. Wait one second. Tap the next Orange cup on the left and right. Do this until the top layer of Orange is gone. This clears the "roof" of the structure, allowing the inner Blue and Cyan cups to slide upward.
Phase 2: Unlocking the Center
Once the top Orange wings are cleared, you will see the "Core Blocker" formation. You will see Dark Blue and Cyan cups stacked in the middle. Do not tap them yet. Instead, look for the next layer of Orange cups that are now exposed underneath the cleared wings. Tap these Orange cups next. Your goal is to create a steady stream of Orange sand at the bottom of the glass.
Phase 3: The Ocean Weave (The Mix)
Now that the tray is moving, look at the center column. You likely have a Dark Blue cup accessible. Tap it. Immediately look for a Cyan cup. Tap it. The Dark Blue represents the deep water, and the Cyan represents the wave tips. By pouring Dark Blue then immediately Cyan, the Cyan floats on top of the Blue within the glass, creating the wave effect. Repeat this pattern: Blue -> Cyan -> Blue -> Cyan. Do not drain all the Blue; leave about 20% of the Blue cups for the next phase.
Phase 4: Excavating the Foam (White)
As you alternate Blue and Cyan, you will eventually clear enough columns to reveal the White cups at the very bottom of the tray (usually in the bottom-left and bottom-right corners). These are the hardest to reach. Stop pouring Blue/Cyan for a moment. Tap the White cups. You want to pour these directly onto the Orange sand you laid in Phase 2. This creates the distinct separation between the beach and the water.
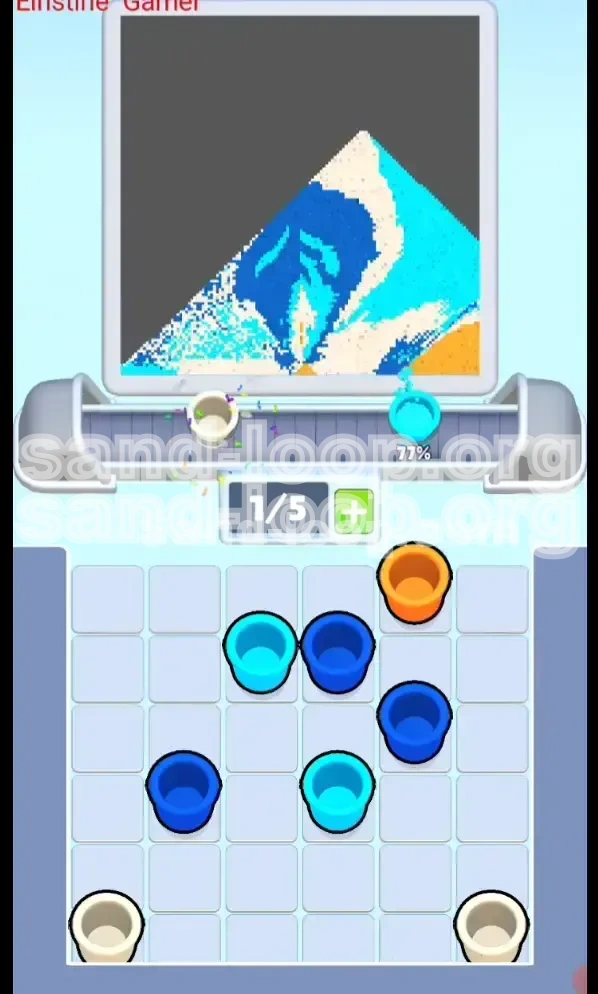
Phase 5: Closing with the Sky
After the White foam is poured, your tray should contain the remaining stragglers: the last of the Dark Blue and the final Cyan cups. Pour the remaining Dark Blue to finish the water depth. Finally, pour the last of the Cyan cups. This final Cyan layer will sit on the very top of the glass, representing the sky, unblemished by the sand or water below.
Phase 6: Final Settling
Once the last cup is poured, do not immediately hit "Next." Watch the glass for 3-5 seconds. Sometimes the physics engine needs a moment to settle the Cyan highlights perfectly into the Blue band. If the percentage stops at 99%, wait a moment to see if the colors blend into the final pixel. If it stays at 99%, check if you missed a small Cyan cup hidden behind a large Blue one in the tray.
Color Order Analysis
This section analyzes the physics logic behind the color order. Understanding *why* this order works will help you if you make a minor mistake and need to recover.
The Weight Hierarchy
The game engine simulates density. Orange (Sand) > Dark Blue (Water) > Cyan (Light Water/Sky) > White (Foam/Air). Heavier materials sink; lighter materials float. This is why you must pour Orange first. If you pour Cyan first, the heavy Orange sand poured later will punch right through the Cyan, dragging it down to the bottom and ruining the sky layer.
The "Mixing" Danger Zone
Why is the middle section so hard? It's because you are trying to defy the physics engine slightly. You want Dark Blue and Cyan to exist side-by-side, not purely stacked. By pouring them in rapid succession (Blue then Cyan), you force the game to render the Cyan as "floating" on the Blue surface. If you wait too long between pours, the Blue settles, and the Cyan spreads out too thinly, failing to cover the percentage requirement for the wave details.
White as a Separator
The White color acts as a physical barrier between the heavy Orange and the liquid Blue. Because White foam is lighter than Blue but visually distinct, pouring it *after* the Orange settles ensures it sits "sandwiched" correctly. If you pour White *before* Orange, the heavy sand will crush the foam layer into a thin, invisible line.
Sky Layer Isolation
The final Cyan pour (Sky) must be pure. It cannot touch the Orange at all. This is why we reserve specific Cyan cups for the end. If you use all your Cyan in the "Ocean Weave" phase, you won't have enough left to form a solid band of color at the top, resulting in a patchy, failed sky.
Contamination Prevention
Contamination occurs when a color touches another color it shouldn't. The most common error is Blue touching Orange. This happens if you pour Blue before you have finished the Orange base. The Blue will seep into the cracks of the Orange sand, creating a dirty greenish-brown mixture that the game reads as "incorrect placement." Always finish the heavy bottom layers before moving to liquids.
Key Tips and Notes
These tips are gathered from high-level playthroughs and common successful strategies. Keep these in mind while playing.
The "Beat" Method
Don't tap rhythmically like a metronome. Use a "Boom-tap-boom" rhythm. Tap a cup (Boom), wait for the pour animation to start (Tap), wait for it to hit the glass (Boom). This slight delay prevents the loading tray from jamming. If you tap too fast, the game's logic might glitch and fail to register a cup removal, leaving you with a full tray and nowhere to put the next color.
Spotting the "Hidden" Cyan
Often, a Cyan cup needed for the sky will be tucked behind a Dark Blue cup in the tray. It might look like you only have Blue left. Tilt your phone or look closely at the stack edges. If you see a sliver of light blue, you must tap the blocking Blue cup first to free it. Do not assume you have enough Cyan until you have verified the back rows of the tray.
Use the "Undo" Button Wisely
If you are playing the version of the game with unlimited Undo, use it as a tool to learn. If you pour a color and it lands slightly off-center or mixes poorly, hit Undo immediately. Do not try to "fix" it by pouring another color on top; that almost always makes it worse. Undo and retry the specific pour to get the layers flat.
Optimal Tray Layout
Try to keep your tray symmetrical. If you pull two cups from the left, try to pull two from the right next. This keeps the center of gravity in the tray balanced and ensures that cups fall evenly into the "pickup zone" at the bottom of the tray. If you only pull from one side, you might end up with a lopsided stack that hides critical colors.
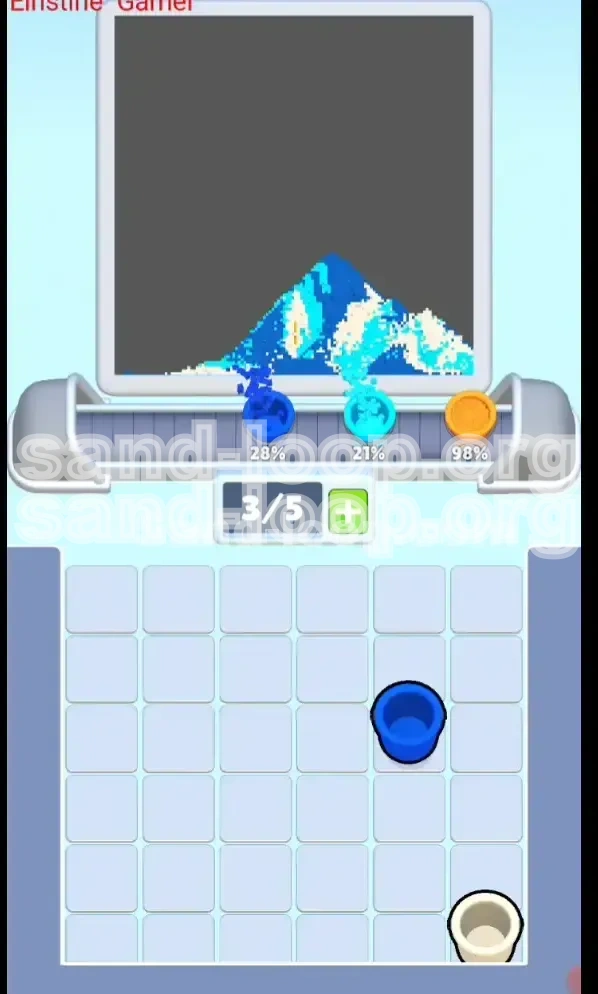
Watch the Percentage Counter
Keep one eye on the completion percentage in the top corner. If you finish the Orange layer and the percentage jumps from 0% to 25%, you know you are on track. If you finish the Orange and are only at 15%, you likely missed some Orange cups or didn't fill the corners of the glass properly. Low percentages early on are a sign to restart immediately rather than finishing a flawed run.
Common Mistakes to Avoid
Learning what *not* to do is just as important as learning what to do. Avoid these pitfalls to save your sanity.
The "Premature White" Mistake
This is the number one error. Players get eager to clear the bottom corners and tap the White cups as soon as they see them. However, if the Orange sand above them hasn't been fully cleared from the tray, you might have to pour more Orange later. If you pour White, then pour Orange on top of it, the Orange sinks and destroys the White layer. Rule of Thumb: Do not touch White until you are 100% sure you will never pour Orange again.
The "Blue Flood" Error
It feels satisfying to drain all the Dark Blue cups at once because it fills the glass quickly. However, this creates a "monolith" of Blue. The game requires texture. If you flood the glass with Blue, you leave no room for the Cyan wave highlights. You will end up with a finished glass that looks like a solid block of ink, failing the percentage check because the "Wave" pixels aren't painted.
Tray Bottlenecking
Don't fill your 5 slots with 3 Oranges, a Blue, and a Cyan if you don't have a plan. If you fill up, you lose the ability to manipulate the board. You need at least 1 open slot to pull a cup to get to the cup behind it. A full tray is a dead tray.
Ignoring the Settle Physics
Sometimes a cup looks like it's empty, but a few grains are still falling. If you pour the next color too fast, the new color mixes with the tail end of the previous color. This is most common when switching from Dark Blue to White. The last drops of Blue will stain the White foam brown. Wait for the stream to break completely before tapping the next color.
Misidentifying the Sky Color
The top of the glass is Cyan, but the *highlights* in the water are also Cyan. It is easy to accidentally use your "Sky Cyan" cups for the water highlights. If you do this, you will reach the end of the level with no cups left to paint the sky, leaving the top 10% of the glass empty. Always mentally reserve at least 2-3 Cyan cups for the very end.
Stuck Solutions and Recovery
If you find yourself mid-level with a messy glass or a stuck tray, use these recovery strategies before restarting.
Recovering from Mixed Colors
If you accidentally poured White and it mixed with the Orange (making a peach color), all is not lost. You can sometimes recover by pouring *more* Orange. The heavy Orange sand will push the lighter Orange/White mix up, potentially restoring the bottom layer color. However, this usually ruins the White percentage, so it is a Hail Mary pass.
Unsticking the Tray
If the cups in the tray stop falling and seem stuck (jammed physics), try tapping the cup at the very bottom of the screen (the one currently selected/unselected) rapidly. Sometimes this "shakes" the logic and forces the game to update the stack positions, allowing the next cup to slide into place.
The "Leftover Cup" Scenario
Did you finish the glass, but have one lonely Cyan cup left on the tray? This usually means you missed a pixel in the sky area. Look closely at the very top rim of the glass in the front layer (the part closest to you). There is often a small pixel there that needs to be filled. Pour that last cup carefully; if the glass is full, it might just top off the level.
Dealing with 99% Completion
The dreaded 99%. If the level ends and you are at 99%, check the "corners" of the layers. Did the Dark Blue touch the glass edge on the left? Did the White foam reach all the way to the right? Usually, the error is a gap between the layers. Ensure you pour enough volume in each step so the colors touch the glass walls completely.
When to Just Restart
If you have poured 3 colors and the glass looks like a mess (swirly mess of colors), restart. Trying to fix a physics simulation that has gone chaotic is nearly impossible. It is faster to force-quit the level (if needed) and start fresh with a clear mind than to try to engineer a recovery from a broken foundation.
Speed Run Tips
Once you have mastered the logic, you might want to improve your time. Here is how the pros do it.
The Pre-Load Method
As the level intro animation is playing, you can often tap the screen *before* the level fully loads to queue up your first tap. If you time it right, you can pop the first Orange cup the millisecond the game starts, shaving 0.5 seconds off your time.
Batching the Wings
Instead of Left-Right-Left-Right, speedrunners often tap the two top-left cups, then the two top-right cups in rapid succession. The tray can handle 2 cups falling from the same side if you tap them fast enough. This clears the "roof" faster, giving you access to the center column milliseconds sooner.
Merging the Pour Animations
If you are confident, you can tap the next cup while the previous cup is *still* pouring but almost finished. This queues the next action. If you time it perfectly, the next cup snatches the dispenser the moment the previous one leaves, creating a continuous, unbroken flow of sand into the glass.
Memorizing the Center Pattern
The center column is always the same. Memorize the sequence: Dark Blue, Cyan, Dark Blue, Cyan. If you don't have to look at the screen to know what color comes next, you can tap purely based on rhythm. Look at the tray, identify the pattern, and close your eyes—tap the beat.
Skip the Settle Wait
At the end of the level, you don't need to wait for the sand to settle to hit the "Next" button (if the level allows it). As soon as the "Success" popup appears, you can usually tap it. However, if the level is at 99% and thinking, you must wait. But if you hit 100% immediately, tap "Next" instantly to save the settling animation time.