
Level 138
HARDHow to solve Sand Loop level 138? Get instant solution for Sand Loop 138 with our step by step solution & video walkthrough. Sand Loop 138 tips and guide.
Play Sand Loop Now
Experience the puzzle challenge firsthand
Game Screenshots
Sand Loop Level Guides
Sand Loop Level 138 Walkthrough: Mastering the Sunset Landscape
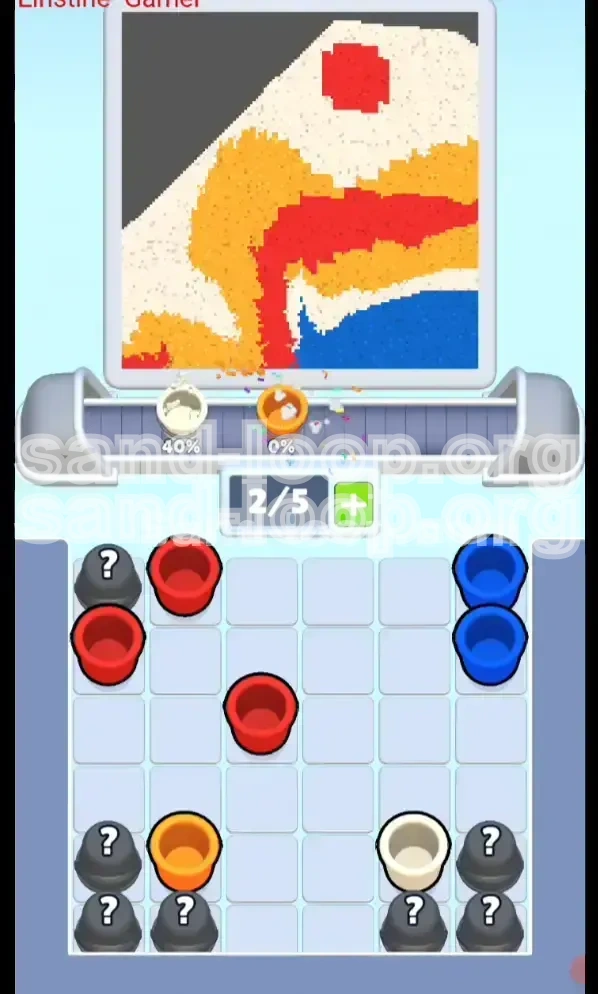
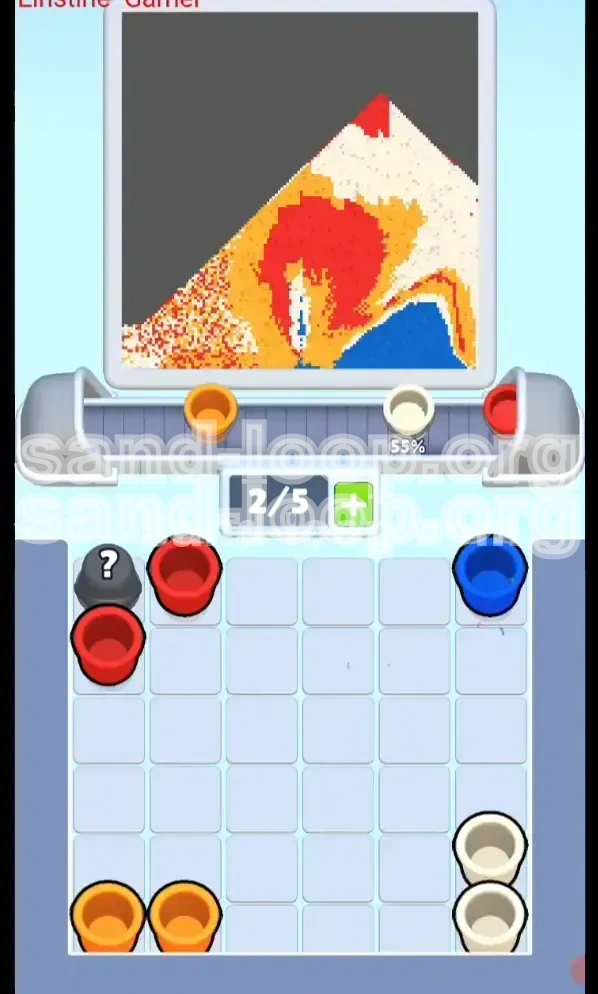
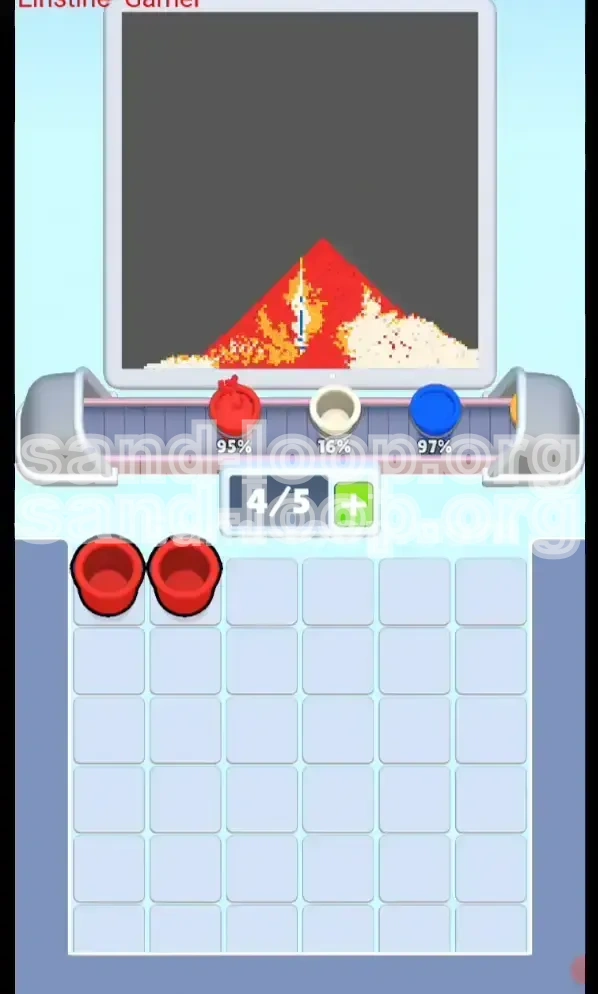
Welcome to the ultimate guide for Sand Loop Level 138, officially known as the "Sunset Landscape" challenge. This stage is a significant departure from the frantic ice-breaking or speed-pouring levels you may have encountered previously. Level 138 is a test of patience, vertical logic, and resource management. The visual aesthetic is stunning—a minimalist composition featuring a vibrant red sun hovering over orange desert dunes, all set against a deep blue ocean—but do not let the beauty distract you. The tray setup is designed to deceive you into pouring the wrong colors first. Success in this level depends entirely on your ability to ignore immediate impulses and follow a strict layering order, utilizing the hidden "?" blocks effectively.
Understanding the Vertical Layering System
The core mechanic of this level is vertical stacking. Unlike wider levels where you can fill sections left-to-right, the "Sunset Landscape" is composed of tight, vertical columns. The game physics engine processes sand from the bottom up. If you attempt to draw the sun (top layer) before the ocean (bottom layer), you will inevitably create "voids" that cannot be filled later without messing up your lines. You must visualize the painting as a 3D model being constructed slice by slice from the ground up.
Decoding the Question Mark Perimeter
The most intimidating feature of this level is the perimeter of gray "?" cups surrounding the central play area. These represent your reserve ammunition. A common mistake is treating these as bonus items; in reality, they are essential requirements. The "?" cups unlock only when you clear the specific colored cups adjacent to them. This creates a dependency chain: if you don't clear the initial Blue cups, the Blue reserves remain locked, leading to a deadlock.
Conveyor Belt Management Basics
Your conveyor belt has a 5-slot capacity. While this feels generous compared to tighter levels, it is a trap. In Level 138, overfilling the belt leads to "color bleed," where the sensor switches too slowly between a Blue cup and an Orange cup, resulting in a muddy brown mix on your horizon line. We recommend keeping only 3 to 4 cups active on the belt at any given time to allow the machine to calibrate between pours.
Visualizing the Color Block-out
Before you tap a single cup, analyze the canvas. It is divided into four distinct horizontal zones:
1. **Zone 1 (Bottom 20%)**: Deep Blue Water.
2. **Zone 2 (Lower Middle 40%)**: Orange Dunes (irregular shapes).
3. **Zone 3 (Upper Middle 10%)**: Red Horizon Strip.
4. **Zone 4 (Top 30%)**: White Sky with a floating Red Sun.
Understanding these zones prevents you from pouring Red (Zone 4) when you should be focusing on Blue (Zone 1).
The Dependency Trap Explained
The level places high-demand colors (Red and Orange) in easy-to-reach spots in the center, while the essential foundation color (Blue) is slightly offset. This psychology tricks new players into grabbing the bright Red cups first. However, grabbing Red first clogs your belt and leaves you with no Blue to build the water. Once your belt is full of Red, you cannot pick up the Blue cups to unlock the Blue reserves, causing an immediate soft-lock.
Primary Objectives and Success Criteria
To achieve a 3-star rating and complete Level 138 without running out of moves or sand, you must adhere to the following objectives. This level is not about speed; it is about efficiency.
Establishing the Blue Foundation First
Your first and most critical objective is to secure and pour 100% of the available Blue sand before any other color touches the conveyor belt. The water layer acts as the container for the rest of the image. If the ocean is incomplete, the dunes will not have a solid base to rest upon, causing them to fall into the "void" and creating jagged, unfixable pixels at the bottom of the screen.
Constructing the Middle Layer Dunes
Once the water is set, your objective shifts to the Orange dunes. The challenge here is the irregular shape. You must pour enough Orange to build the dunes up to the horizon line without spilling over into the sky area. This requires a roughly 60% fill of the canvas volume, leaving the top 30% empty for the sky.
Isolating the Red Sun Element
This is the hardest objective. You have two distinct Red elements: a thin horizon line and a large sun. You must complete the horizon line using the initial Red cups, but you must strictly *avoid* pouring the sun until the sky is partially filled. A floating sun in a white void is easy to mess up; a sun placed into an existing white field is precise.
Unlocking the Mystery Reserve
You must aim to clear the entire central cluster of visible cups within the first two minutes of the round. Clearing these specific cups triggers the game logic to flip the "?" cups on the edges. If you fail to clear the center fast enough, you will run out of the initial colors and be forced to watch the conveyor belt cycle empty while you wait for unlocks.
Maintaining Clean Lines
The "Sunset Landscape" fails if colors bleed into one another. You are penalized in the scoring system for mixed pixels. Your objective is to maintain a sharp transition between the Blue water and Orange sand, and a crisp line for the Red sun. This requires timing your pours so the machine fully switches mechanisms.
Resource Management (No Overflows)
Finally, you must manage the waste bin. Overfilling the bin is an instant fail condition in many modes. Because you will be using the "?" cups (which sometimes produce excess sand), you must ensure you are pouring accurately. Spilling sand into the wrong zone fills the bin faster. Precision pouring keeps your bin capacity below 80% throughout the level.
Step-by-Step Walkthrough Instructions
Follow this exact sequence to guarantee a clear. Do not deviate from the order, as each step unlocks the resources required for the next.
Step 1: The Blue Protocol (0-15% Progress)
As soon as the level starts, ignore the Red cups in the dead center. Scan the tray for the Blue cups. They are usually located in the center-right or bottom-center of the initial cluster.
1. Tap **both** visible Blue cups immediately.
2. Place them on the belt with a 1-second gap between them.
3. Watch the pour. Ensure the bottom "Water" zone turns completely solid blue.
4. *Crucial*: As these Blue cups clear, check the left and right edges of the tray. The adjacent "?" cups should transform into extra Blue cups. Tap these new Blue cups immediately to finish the water layer.
Step 2: The Orange Horizon Expansion (15-45% Progress)
With the water solidified, the "dependency" for Orange is unlocked.
1. Locate the Orange cups in the central diamond shape.
2. Tap the Orange cups to load them onto the conveyor.
3. Allow the machine to pour the Orange sand over the Blue. You will see the dunes forming.
4. Do not fill the dunes to the top yet. Stop when the dunes reach roughly the halfway point of the canvas. You need to save some Orange volume for later adjustments.
5. This action will clear the central Orange cups, unlocking more "?" Orange cups on the flanks.
Step 3: The White Sky Foundation (45-60% Progress)
This is the step most players miss. Do not touch the Red cups yet.
1. Look for White cups. These are often hidden under the colored cups or revealed on the top row after clearing the center.
2. Load the White cups onto the belt.
3. Pour the White sand to fill the top 30% of the canvas.
4. *Why?* You need a "canvas" for the sun. If you pour the Red sun now, it has no boundary. By filling White first, you create the negative space that defines the sun's shape.
Step 4: The Red Horizon Line (60-75% Progress)
Now that the sky is white and the dunes are orange, you are ready for the first phase of Red.
1. Take **one** Red cup from the center.
2. Pour it to create the thin strip separating the dunes from the sky.
3. Be very careful here. If you pour too much, the red will bleed up into the white sky or down into the orange dunes. A quick tap is often better than a hold.
4. If you have extra Red, hold it. Do not pour the sun yet.
Step 5: The Sun Isolation Technique (75-90% Progress)
This is the advanced maneuver.
1. Observe the White Sky area. You need to create a circle of Red in the upper center.
2. Instead of pouring Red continuously, use a "pulse" method if your game allows, or sandwich the Red cup between two White cups on the belt (White -> Red -> White).
3. The first White cup prepares the sky; the Red cup drops the sun; the trailing White cup immediately surrounds the sun, sharpening its edges.
Step 6: The Cleanup Phase (90-100% Progress)
You should have mostly "?" cups remaining.
1. Use these remaining cups to fix any "holes" in the Orange dunes or Blue water.
2. The "?" cups are "smart"—they often provide the color you are currently missing the most. If you see a hole in the Blue water, tap a "?" cup, and it will likely yield Blue sand.
3. Fill the final pixel gaps to trigger the victory animation.
Color Processing and Order Analysis
The logic behind the "Sunset Landscape" is strict. Here is the detailed breakdown of why colors must be processed in this specific hierarchy and the risks associated with deviating.
The Priority of Blue (The Base Layer)
Blue is priority number one because it occupies the lowest coordinate on the Y-axis. In the game's physics, sand stacks. If you pour Orange first, the Blue sand you pour later will slide *under* the Orange, potentially pushing it up and ruining the alignment of the dunes. Furthermore, the Blue water has the largest surface area. It requires the most volume of sand. Starting with Blue ensures you have the maximum amount of belt space available to manage this heavy load without interruption.
The Complexity of Orange (The Middle Layer)
Orange is second because it is a "support" layer. It sits on top of Blue but supports Red and White. The challenge with Orange in this level is its irregular shape—it is not a straight line. You are creating jagged peaks. This requires you to pause and check the canvas frequently. If you process Orange after White, you risk splashing sand into the white sky, which creates a pollution effect that is very difficult to erase without overflowing the bin.
The Precision of Red (The Danger Layer)
Red is processed last (in two phases: horizon, then sun) because it is the "contaminant." Red is visually dominant; even a few grains of red sand in the white sky or blue ocean stand out like a sore thumb. By saving Red for the end, you ensure that the Blue and Orange zones are already 100% full and "locked," meaning any stray red grains are less likely to roll down into them (or if they do, they stop at the top layer).
The Role of White (The Buffer)
White acts as a buffer or eraser. Processing White mid-way through the level (Step 3) is strategic. It allows you to "over-pour" slightly without penalty because the top of the canvas is usually empty space. If you pour White and it goes a bit high, it just looks like more sky. If you pour Red and it goes high, it looks like a red blob in space.
Visual Contrast Management
The game engine handles contrast checks. Blue and Orange are complementary colors (analogous in some wheels, distinct in others), providing good separation. Red and White provide high contrast. If you mix the order—pouring Red before Blue—the contrast check fails, and the image looks muddy. The order (Blue -> Orange -> White -> Red) is specifically designed to keep dark colors at the bottom and light colors at the top, mimicking natural lighting for a sunset.
Volume Estimation by Color
Breaking down the canvas by volume percentages helps understand the order:
- **Blue (35%)**: Needs the most time and attention.
- **Orange (40%)**: Needs the most precision for shaping.
- **White (15%)**: Needs timing for the sky.
- **Red (10%)**: Needs the highest caution.
Allocating your focus based on these percentages prevents you from spending too long on the small sun and ignoring the massive ocean.
Advanced Strategies and Speed Run Tips
Once you have mastered the standard walkthrough, use these advanced tips to improve your time and efficiency for a 3-star clear.
The "?-Block" Prediction Trick
Experienced players can predict what is inside a "?" block by looking at the adjacent cup. In Sand Loop Level 138, the color of the cup *inside* the tray (next to the ?) dictates the unlock. If you clear a Blue cup, the ? next to it *always* turns into a Blue cup. Use this knowledge to plan your belt. If you need Blue but don't see any, scan the edges for a ? next to a Blue cup and clear that Blue cup immediately to farm the resource.
The "Tap and Hold" vs. "Tap and Release" Method
For the **Blue and Orange** layers: Use "Tap and Hold." You want to flood these zones quickly to establish the base.
For the **Red Sun**: Use "Tap and Release." Tapping the button rapidly allows you to drip-feed sand into the specific circular shape of the sun. If you hold the button for the sun, the pour will become too wide, and you will have to clean up the edges with White, wasting precious time.
Optimizing Belt Space for Speed
To speed run this level, you must keep the conveyor belt moving at 100% capacity (4-5 cups) *after* the initial Blue phase.
1. Start with Blue (2 cups).
2. As the first Blue is pouring, queue up Orange.
3. As the first Orange is pouring, queue up White.
By "pre-loading" your next color while the current one is pouring, you shave off seconds of idle time. The only time you must slow down is the transition between Orange and Red.
Managing the Overflow Bin
Speed running often leads to overfilling the bin because you are moving fast. To mitigate this, stop pouring immediately when the "density" meter on the canvas hits 100% for a specific color. Even if there are tiny gaps, leave them. Do not over-pour. Over-pouring fills the waste bin. Fixing tiny pixel gaps is faster than resetting the level because of a bin overflow.
Dealing with "Deadlock" Scenarios
If you find yourself in a deadlock where no cups are moving and you can't pick anything up:
1. You likely have a single cup left in a color that doesn't match any open spots.
2. Look at the canvas. Find the smallest hole corresponding to that color.
3. If the hole is too small to pour into normally, try "splashing" the sand by tapping the pour button quickly right at the lip of the existing pile. This trick can fill micro-gaps without requiring a full cup activation.
Perfect Score Strategy
To get a perfect score (often based on "Accuracy" or "Efficiency"), you must avoid mixing. The most dangerous mix is Orange and Red. When you finish the Orange dunes and start the Red horizon, wait for the conveyor belt sensor to fully reset. You will see the nozzle move or the sound change. Do not pour the Red until the machine is fully calibrated for the new color. This 1-second pause saves you from a 5% accuracy penalty.