
Level 149
HARDHow to solve Sand Loop level 149? Get instant solution for Sand Loop 149 with our step by step solution & video walkthrough. Sand Loop 149 tips and guide.
Play Sand Loop Now
Experience the puzzle challenge firsthand
Game Screenshots
Sand Loop Level Guides
Level 149: The Seaside Pier - Complete Strategy Guide
Introduction to the Logic Challenge
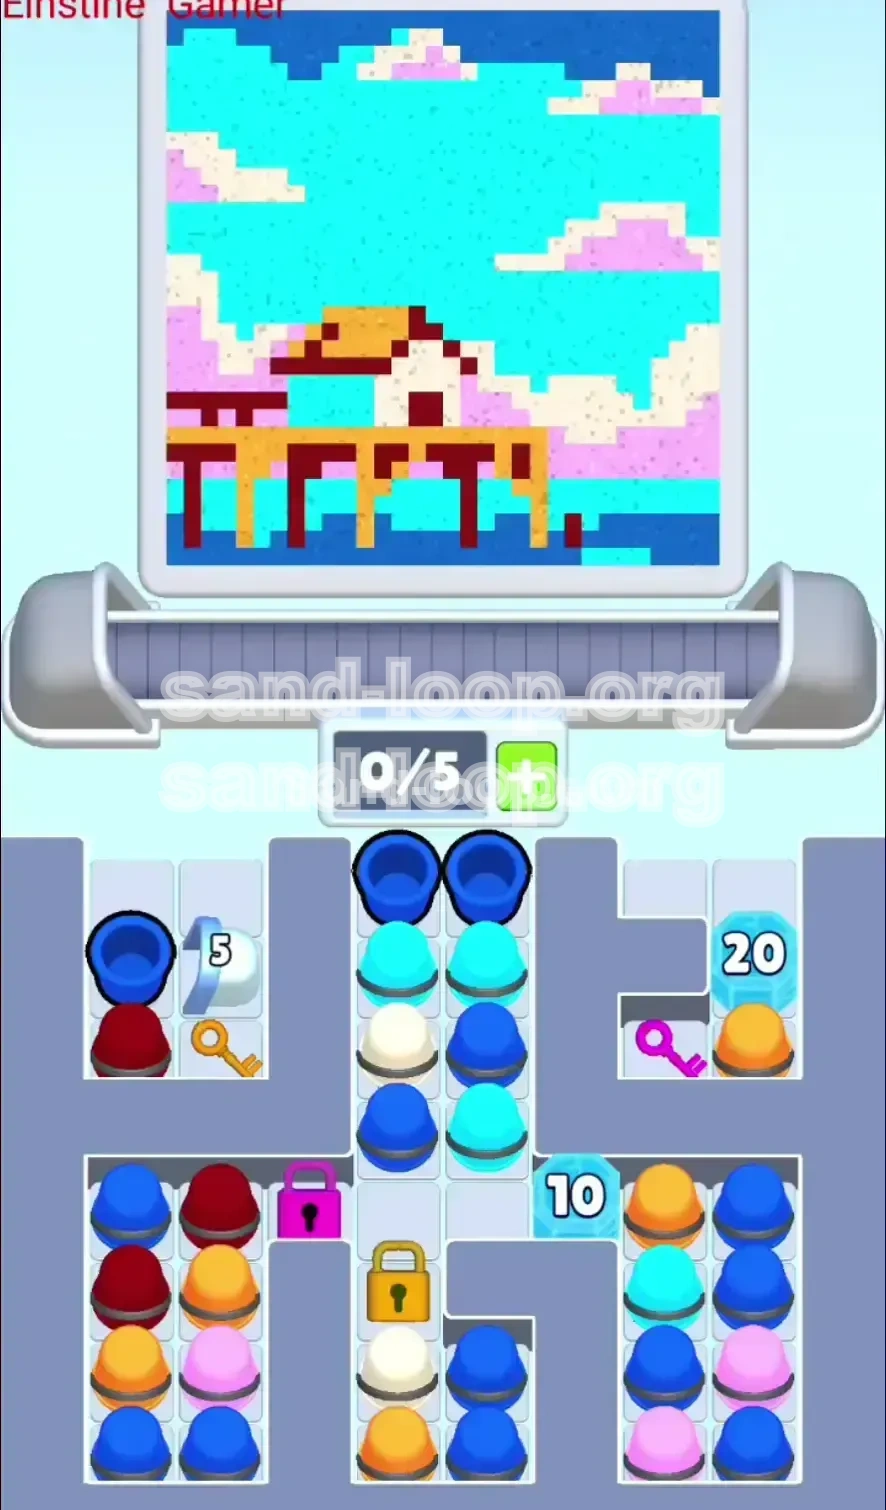
Welcome to Level 149, often referred to as "The Seaside Pier." While the visual aesthetic presents a calming pixel art scene featuring a cottage, a pier, and a vast ocean, do not be deceived by the tranquil atmosphere. This level is a rigorous test of logic and inventory management rather than reflexes. You are immediately restricted by a "Tri-stage Ice Defense" system that locks essential colors behind three separate numerical counters. In this stage, sequence is absolute; if you prioritize the wrong color spectrum or pour the sky colors before the foundation is laid, you will soft-lock the board, rendering the level impossible to complete. This guide is designed to navigate you through the precise dependency chain required to clear the canvas.
Victory Conditions and Objectives
To achieve a three-star rating and complete Level 149, players must satisfy three primary objectives:
- Unlock the Tri-stage Ice Blocks: You must systematically break the 5-Ice, 10-Ice, and 20-Ice barriers in the correct order to access the necessary inventory.
- Separate Color Spectrums: You must successfully paint the bottom half (Dark Blue, Deep Red, Orange) before initiating the top half (Cyan, White, Pink) to prevent color contamination.
- Manage Conveyor Capacity: You must maintain a clear slot buffer (keeping at least 2 of 5 slots empty) to prevent deadlocks when new waves of cups are released.
Analyzing the Canvas: The Top-Down Strategy
Deconstructing the Image Layers
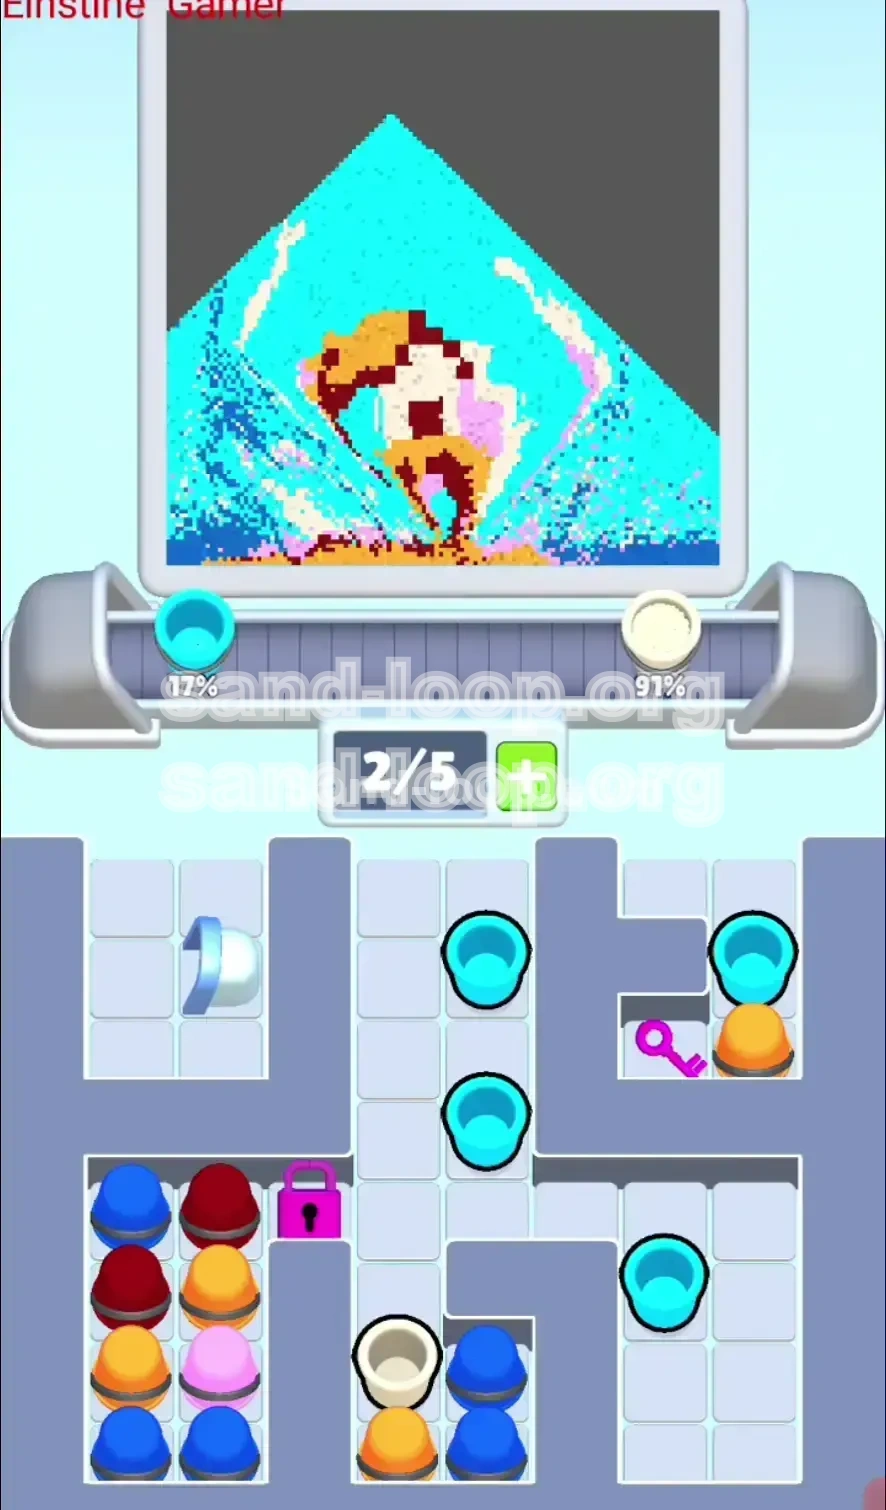
Before you tap a single cup, you must understand the geography of your target image. The canvas is distinctly split into a "Heavy Zone" and a "Light Zone." The Heavy Zone comprises the bottom 40% of the screen, consisting of the ocean (Dark Blue), the wooden pier (Orange/Gold), and structural elements (Deep Red). The Light Zone comprises the top 60%, featuring the sky (Cyan), clouds (White), and sunset accents (Pink). Physics dictates that sand poured from the top will fall until it hits an obstacle or another color. Therefore, if you pour Light Zone colors first, they will sink to the bottom, burying the ocean and pier under a layer of incorrect white and cyan sand.
The "Center Stack Trap" Explained
Approximately 70% of failed attempts on Level 149 happen within the first 10 seconds due to the Center Stack Trap. The game immediately offers you Cyan and White cups in the center column. These are the most accessible colors, but they are also the most dangerous. If you pour these, they settle at the bottom. Once the bottom pixels are filled with Cyan/White, you cannot place the Dark Blue water or the Red pier posts underneath without first clearing the canvas, which wastes critical moves and time. You must ignore the easy center stacks and force your focus on the locked corners.
The Tri-Stage Ice Defense System
Your primary obstacles are three Ice Blocks located in different sectors of the tray. Each has a specific counter and a specific reward:
- 5-Ice Block (Top Left): The lowest barrier. Breaking this grants the Gold Key, which is essential for accessing the mid-game inventory.
- 10-Ice Block (Middle Right): The secondary barrier. This guards a stash of Orange and Dark Blue cups required for the pier and water.
- 20-Ice Block (Top Right): The "Boss Block." This requires the highest volume of moves to break and guards the Pink Key, necessary for the final sky accents.
Dependency Chain Logic
This level operates on a strict dependency chain. You cannot access the Pink Key (Sky) until you break the 20-Ice. You cannot effectively break the 20-Ice until you have cleared board space using the bottom-tier colors. You cannot clear board space until you have the water and pier colors. Therefore, the logic dictates: Bottom Colors > Gold Key > Ice Break > Top Colors. Deviating from this chain creates a "Kingmaker Error" where you possess the keys to unlock the sky but have no physical space on the canvas to pour them.
Step-by-Step Walkthrough: The Foundation Phase
Phase 1: Ignoring the Center (Moves 1-10)
Start the timer. Your conveyor belt will begin moving. You will see Cyan and White cups in the center. Do not tap them. Even if your conveyor belt fills up, let the cups expire or trash them if necessary (though trashing is rarely needed if you manage slots correctly). Your eyes must be locked on the Top Left and Bottom Left/Right corners. We need to trigger the "Heavy Colors" to begin chipping away at the ice.
Phase 2: Triggering the 5-Ice Block
The Top Left corner is held by the 5-Ice block. To break this, you need to cycle specific color matches:
- Action: Tap the Dark Blue cup located at the top left (if visible) or from the bottom stack.
- Action: Tap the Deep Red cups from the bottom left stack.
- Action: Tap the Orange cups from the bottom right stack.
By matching these "Earth and Water" tones, you reduce the 5-Ice counter. These colors fill the bottom of the canvas (the ocean and pier pilings), which is exactly where you want them. Once this counter hits zero, the Ice Block shatters.
Phase 3: The Gold Key Transition
The moment the 5-Ice breaks, a Gold Key will drop into the tray.
- Action: Immediately tap the Gold Key.
- Result: This unlocks the Gold Padlock located at the bottom center of the screen.
Unlocking this padlock is critical. It releases a new wave of cups, primarily more Orange and Dark Blue. This flood of inventory is your primary resource for the next phase. Do not worry about running out of colors; the unlock provides ample supply to finish the water line and the pier deck.
Step-by-Step Walkthrough: The Construction Phase
Phase 4: Breaking the 10-Ice Block
With the Gold Padlock open, you should have a steady stream of Dark Blue and Orange. Continue pouring these into the canvas.
- Target: Focus on solidifying the Ocean (Dark Blue) and the Pier (Orange).
- Side Effect: As you pour these Heavy Colors, you will naturally chip away at the 10-Ice Block on the middle right.
Because you are using the colors released by the first unlock, the 10-Ice acts as a progress bar for your bottom-half completion. When this shatters, it releases the final batch of heavy construction materials. Use them immediately to finish the pier structure. Ensure the cottage roof (Deep Red) is also established during this phase, but keep it slightly lower than the mid-point to allow room for the sky later.
Phase 5: The "Red Roof" Save Strategy
Here is a pro-tip for the mid-game: The cottage roof sits higher than the pier but lower than the clouds. You might be tempted to use every single Red cup you see to break ice early. Resist this. You need to "save" one or two Red cups in your inventory or the queue for the mid-game transition. If you use all your Red early, you might find the cottage unfinished while the sky colors (which you must avoid) are clogging your belt. Saving a Red cup ensures you can place the roof exactly when the water level is high enough.
Step-by-Step Walkthrough: The Sky Phase & Final Touches
Phase 6: Cracking the 20-Ice Boss Block
By now, your bottom half (Ocean and Pier) should be roughly 80% complete. You will notice the 20-Ice Block in the top right is finally getting low. This block takes the longest because it requires a high volume of total moves to shatter. You do not need to actively target it; just playing efficiently will break it.
- Action: Once the counter hits zero, the Pink Key is revealed.
- Action: Retrieve the Pink Key and unlock the Pink Padlock.
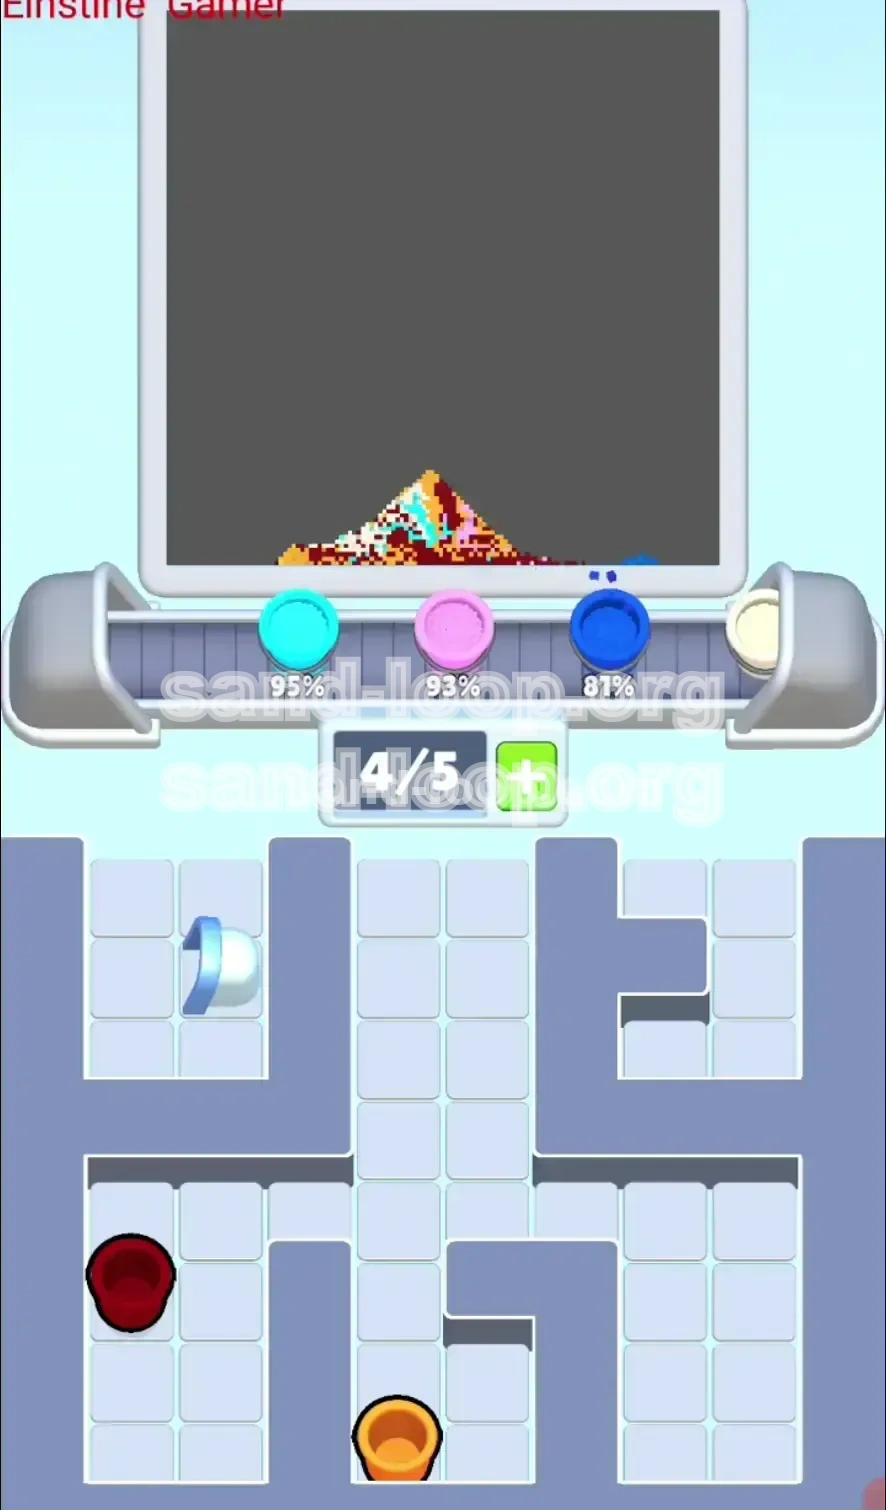
Phase 7: Unleashing the Sky Colors
Unlocking the Pink Padlock triggers the final phase. The game will now flood your conveyor belt with Cyan, White, and Pink cups.
- Safety Check: Look at your canvas. Is the bottom completely filled with Blue/Orange? If yes, proceed. If no, finish the bottom first.
- Action: Begin pouring Cyan (Sky) and White (Clouds).
- Physics: Since the heavy colors are already settled at the bottom, these light sky colors will stack perfectly on top, filling the upper atmosphere without contaminating the water.
Use the Pink sand for the sunset accents on the horizon. Because the bottom is dense, the Pink will sit right at the transition zone between water and sky.
Phase 8: Final Cleanup
In the last 10% of the level, you are mostly managing the "leftovers." You might have a stray Cyan cup when the sky is full, or a single Blue cup needed for a gap in the water.
- Triage: If you have excess light colors, check the top corners of the canvas for gaps.
- Triage: If you have excess heavy colors, check the bottom edges.
Typically, the "Cloud" (White) is the last element to fill completely because it is scattered. Use your final moves to solidify the cloud structures. Once the last pixel is placed, the level will trigger the completion sequence.
Advanced Player Tips & Speed Run Strategy
Inventory Management (The 5-Slot Rule)
A common cause of failure is "Deadlocking" the conveyor belt. You have active slots. If you fill all 5 with cups you cannot use (e.g., holding 3 Sky colors while you still need to build the pier), the belt stops moving, and you lose.
- Rule of Thumb: Always keep 2 slots open for the colors you *actually* need.
- Technique: If you are forced to take a Sky color early to clear the belt, pour it into a corner of the canvas where it can be "buried" later by the correct colors, or pour it into a "trash" area if the level allows (though in Sand Loop, you usually just have to place it carefully).
Speed Running the Breakpoints
For players aiming for the top time leaderboard, efficiency is key. Do not wait for the perfect cup to appear.
- Optimization: You can break the 5-Ice block with as few as 3 moves if you combo Dark Blue and Red correctly.
- Optimization: Pre-position your fingers. As soon as the Gold Key drops, be ready to drag it to the lock. Spending 2 seconds fumbling with the key can cost you a 3-star ranking.
- Optimization: Learn the "Shatter Point." You don't need to wait for the 20-Ice to visually finish breaking to start moving your finger toward the Pink Key. Anticipate the shatter.
Troubleshooting Common Stuck Points
Scenario: "I have the Pink Key, but I can't unlock it because my belt is full of White cups and I still need to finish the Red Roof!"
- Solution: This is the "Inventory Full" crisis. You must pour the White cups into the sky before the roof is done. It is better to have the sky 90% done and fix the roof later, than to have a full belt and no moves left. Pour the White high up, then frantically cycle the belt to find the last Red cup.
Scenario: "My water turned green/teal."
- Cause: You poured Cyan (Sky) too early, and it mixed with the remaining empty pixels at the bottom.
- Fix: There is no fix mid-game. You must restart. This highlights why ignoring the Center Stack is the most important rule.