Sand Loop Level 148: Complete Walkthrough & Strategy Guide
Understanding the Mission: The Fox Mosaic
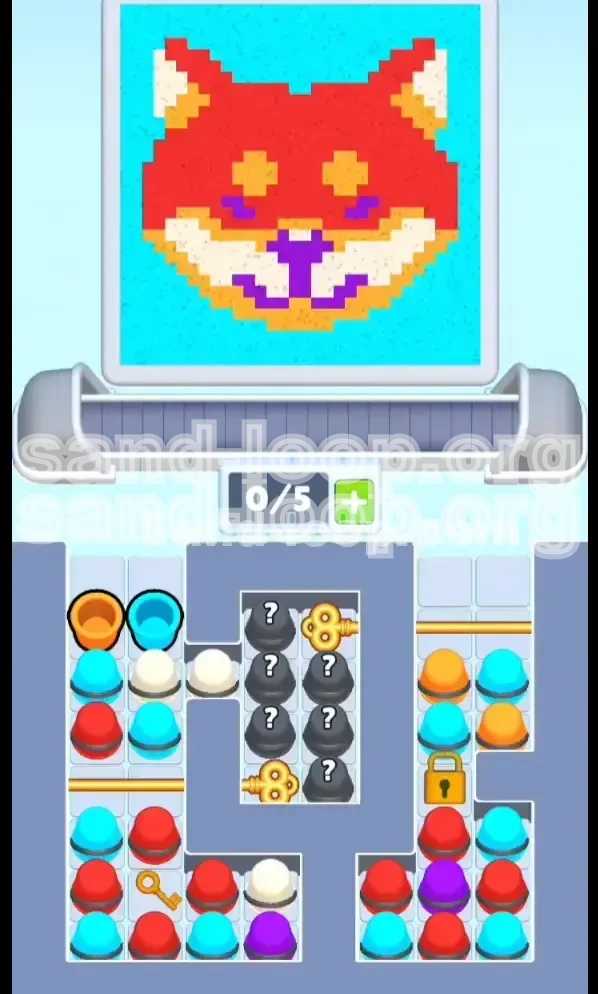
Level 148 presents a unique artistic challenge: painting a vibrant red fox against a bright cyan background. Unlike levels that require filling a single void, this stage demands color separation. You are dealing with five distinct distinct zones: a massive cyan backdrop, the primary red-orange of the fox fur, golden-yellow accents for the eyes/ears, cream-white highlights, and a small but critical purple zone for the nose and mouth details. The difficulty lies not in finding the colors, but in managing the limited conveyor space to execute the painting sequence without cross-contaminating the purple or drowning the canvas in cyan.
Conveyor Mechanics and Slot Management
Your toolset consists of a 5-slot conveyor belt. At the start, the belt is empty (0/5), which is deceptive freedom. The moment you begin pulling cups from the supply tray, you will encounter vertical stacks and question-mark blocks. The core mechanic here is "Slot Economy." You cannot simply load all the colors you need at once because you must keep at least one slot open to prevent the belt from jamming. If you fill all 5 slots, the belt stops moving, and you lose the ability to cycle your cups, resulting in a game over. You must balance the need to have specific colors ready with the necessity of an empty slot to cycle the belt.
The Supply Tray Setup
The supply tray is a logistical puzzle. You have access to Cyan, Orange, Red, Cream, Purple, and Yellow, but they are not presented in neat rows. Key colors like Red and Purple are often buried under "useless" colors for the current moment, or locked behind question mark blocks. To succeed, you must treat the supply tray as a queue. You cannot brute-force your way to a purple cup if it is buried under three heavy stacks; you must clear the top cups first, which consumes valuable slot space on your conveyor. This level requires you to plan 3 moves ahead: "If I take this Cyan cup to unblock the Red, do I have space to pour the Cyan immediately?"
Victory Conditions
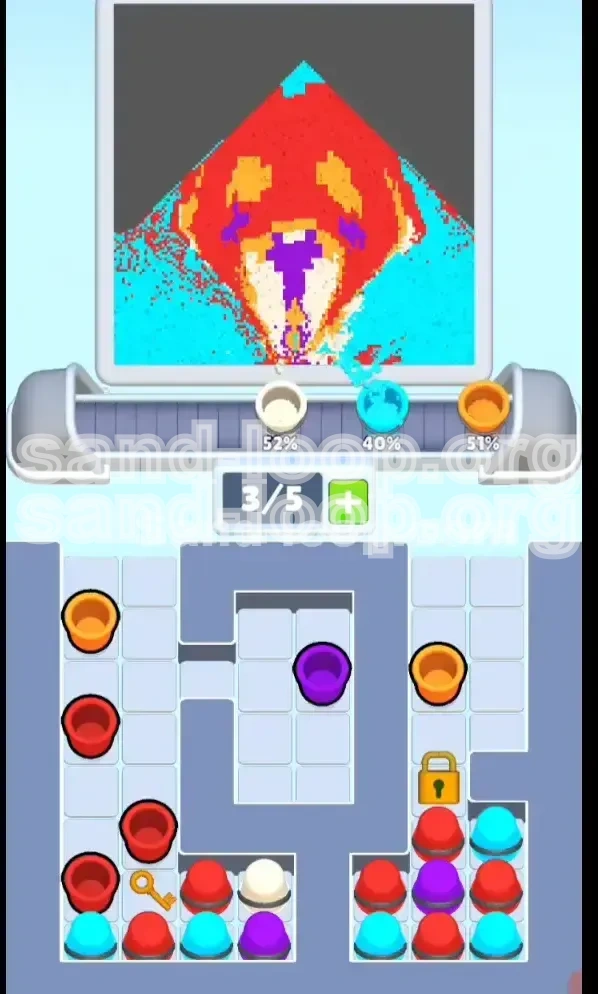
Winning requires hitting the specific percentage targets on all 5 color meters. There is no partial credit. If you overfill the Cyan background (the "Cyan Trap"), you will run out of canvas space to dump the excess, forcing you to waste moves or contaminate other zones. Conversely, the Purple and Cream zones are small; overfilling them by even a second can cause a failure. The win state is achieved only when the "Fox Face" is fully colored with sharp boundaries, the background is solid cyan, and no color meter is in the red (overflow) zone.
Step-by-Step Walkthrough Instructions
Phase 1: The Opening Sequence (0% - 30%)
Start by tapping the supply tray to reveal one question mark block. Ideally, you want to expose a Red or Orange cup. Load **one** Cyan cup and **one** Orange cup onto the conveyor immediately.
* **Step 1:** Move the Cyan cup under the dispenser. Pour a short burst (approx. 1-2 seconds) to start the background. Stop immediately.
* **Step 2:** Move the Orange cup under the dispenser. Pour a medium burst to establish the cheek areas.
* **Step 3:** As the belt cycles, look at the supply tray. Identify which cup is blocking a Red stack. Load that blocker onto the belt.
* **Step 4:** Pour the blocker color into a safe zone (usually the Cyan background if it's not full) to empty the cup, then trash it. This frees up the slot and unblocks the Red.
Phase 2: Establishing the Fur (30% - 60%)
Now you need to build the main body of the fox using Red and Orange.
* **Step 1:** Load two Red cups onto the belt. Keep 3 slots empty for maneuvering.
* **Step 2:** Focus purely on the large red zones of the face. Pour in a rhythmic pattern: Tap, hold for 2 seconds, release. Do not continuous stream.
* **Step 3:** Intersperse Yellow cups here. Load a Yellow cup, pour briefly into the eye/ear zones, then stop.
* **Step 4:** If your belt gets clogged with cups you don't need (e.g., you have a Red cup ready but need to wait for the meter to catch up), pour a tiny amount of that color into the Cyan background to waste it, provided the Cyan meter isn't full. This "controlled waste" is vital for keeping the belt moving.
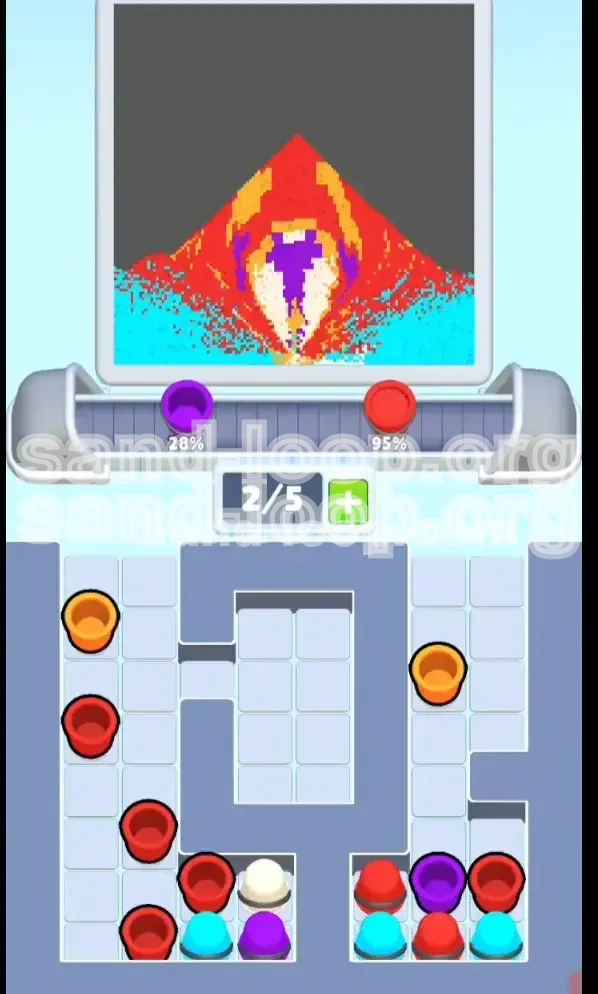
Phase 3: Managing the "Cyan Trap" (60% - 80%)
This is the most dangerous phase. The background will look mostly done, but the meter might be at 90%. The temptation is to finish it.
* **Step 1:** **Stop pouring Cyan completely** unless you have a specific empty slot strategy.
* **Step 2:** Shift focus to the smaller details. Load Cream and Purple cups.
* **Step 3:** Pour Cream into the highlight zones (chin, forehead). These areas are small; use micro-bursts (0.5 seconds).
* **Step 4:** If you accidentally load a Cyan cup during this phase, you must pour it into the background *very* carefully. If the background is full, you are forced to pour it into a "safe" red zone, which muddies the color. Avoid loading Cyan unless the meter is below 90%.
Phase 4: The Endgame (80% - 100%)
Precision is everything now. You are likely filling in the final pixels of the nose (Purple) or balancing the last of the Red.
* **Step 1:** Slow down the belt speed visually in your mind. Don't rush the load.
* **Step 2:** Load one cup at a time. Pour until the meter flashes, then instantly release.
* **Step 3:** If a meter turns red (overfill), do not panic. Simply stop pouring that color and switch to another. You cannot "fix" an overfill, you can only avoid making it worse by adding more.
* **Step 4:** Use the "Empty Slot" buffer. If you are unsure, keep a slot open. It allows you to cycle a cup past the dispenser without pouring if you realize the meter is actually full.
Optimal Color Processing Order
The "Sandwich" Method
Do not process colors one by one (e.g., "All Red, then All Cyan"). Instead, use a sandwich approach to balance the meters.
1. **Base Layer (Cyan/Red):** Start with Cyan to establish the base, then immediately switch to Red to build the structure. Switching back and forth prevents the Red meter from skyrocketing while the Cyan meter is neglected.
2. **Accent Layer (Yellow/Orange):** Once Red and Cyan are at roughly 50%, insert Yellow and Orange. These are "bridge" colors—they fill the gaps.
3. **Detail Layer (Cream/Purple):** These must be last. Because they occupy the smallest surface area, they have the highest risk of overfilling. If you do Purple too early, you might accidentally pour Red over it later when you try to fill the main face.
Prioritizing Unblocking
The order in which you unblock cups in the supply tray dictates your flow.
* **Priority 1:** Unblock Red. It covers the most area.
* **Priority 2:** Unblock Yellow. It's distinct and avoids confusion with Orange.
* **Priority 3:** Unblock Purple. Leave it buried until you are ready for the final 10% of the level. If you unblock Purple too early, it takes up a slot on your belt where a more critical Red cup should be.
The "Question Mark" Strategy
Always tap question mark blocks *before* loading your belt to capacity.
* **The Rule:** Reveal first, load second.
* **Why?** If you reveal a Purple cup when you have a full belt of Red/Cyan, you can't take it without trashing a Red cup, which wastes progress. By revealing early, you can decide if the timing is right to add that color to your rotation.
Pro Tips and Mistakes to Avoid
Mistake #1: The "Slot Jam" Panic
The most common error is filling all 5 slots because you "might need that color later."
* **The Fix:** Treat the 5th slot as a "ghost slot"—it doesn't exist. Operate as if you only have 4 slots. If you find yourself with a full belt and no moves, identify the color you have the most of (usually Cyan or Red), pour a small amount out to create a gap, and let the belt cycle.
Mistake #2: Ignoring the Overflow Warning
When a meter is full, it flashes red. Players often keep pouring because they want to "finish" that color.
* **The Fix:** The moment a meter flashes, lift your finger. Overfilling doesn't just waste that cup; it often contaminates adjacent colors on the canvas, making the visual "pop" less satisfying and risking a level fail condition in stricter modes.
Mistake #3: Contaminating the Purple Zone
The fox's nose and mouth are small. Pouring Red or Orange anywhere near them is risky.
* **The Fix:** Wait until the very end to touch the Purple zone. By then, your hand will be steadier, and the surrounding colors will be filled, giving you a clear boundary to aim for.
Tip: Rhythm Counting
Don't rely on visual estimation alone. Count "One Mississippi" for small zones and "One Mississippi, Two Mississippi" for large zones. This auditory cue helps regulate your pour duration and prevents the "held too long" error.
Speed Run and Advanced Tactics
Advanced Strategy: Pre-Loading
For experienced players looking to clear the level with 30+ seconds remaining:
* **The Move:** While a cup is currently pouring (the sand is flowing), you can tap the supply tray to load the *next* cup onto the belt.
* **The Benefit:** This queues up your next color while the current one is emptying. It saves valuable seconds per cup. Just be careful not to load a color you don't actually need next.
Shortcuts for High Scores
* **Combo Pouring:** If you have two cups of the same color (e.g., two Reds) separated by an empty slot, you can pour the first one, let it pass, and immediately pour the second one. This "combo" keeps the rhythm high and minimizes the time the belt spends idling.
* **Batch Unblocking:** If you have a Hammer or Shovel tool (if available in your version), use it on the stacked question marks in the supply tray immediately at the start. Clearing the debris in the first 5 seconds allows you to load Red and Yellow cups 20 seconds faster than manual clearing.
What to Do When Stuck
* **Situation:** You have 3 slots filled with Cyan, but the Cyan meter is full. You can't pour Cyan. You can't load more cups. You are stuck.
* **Solution:** You must perform a "Sacrifice Pour." Pick the Cyan cup that is closest to the dispenser. Pour the Cyan into the **Red zone**. Yes, this messes up the Red zone slightly. However, it clears the slot. Immediately load a Red cup. Pour the Red over the contaminated area. This "fix" will dilute the Cyan mistake and restore the Red color, unjamming your board. It's better to lose a few points on color purity than to fail the level completely due to a jammed belt.