
Level 151
HARDHow to solve Sand Loop level 151? Get instant solution for Sand Loop 151 with our step by step solution & video walkthrough. Sand Loop 151 tips and guide.
Play Sand Loop Now
Experience the puzzle challenge firsthand
Game Screenshots

Sand Loop Level Guides
Level 151: The Autumn Tree Comprehensive Walkthrough
Visual Mechanics Analysis
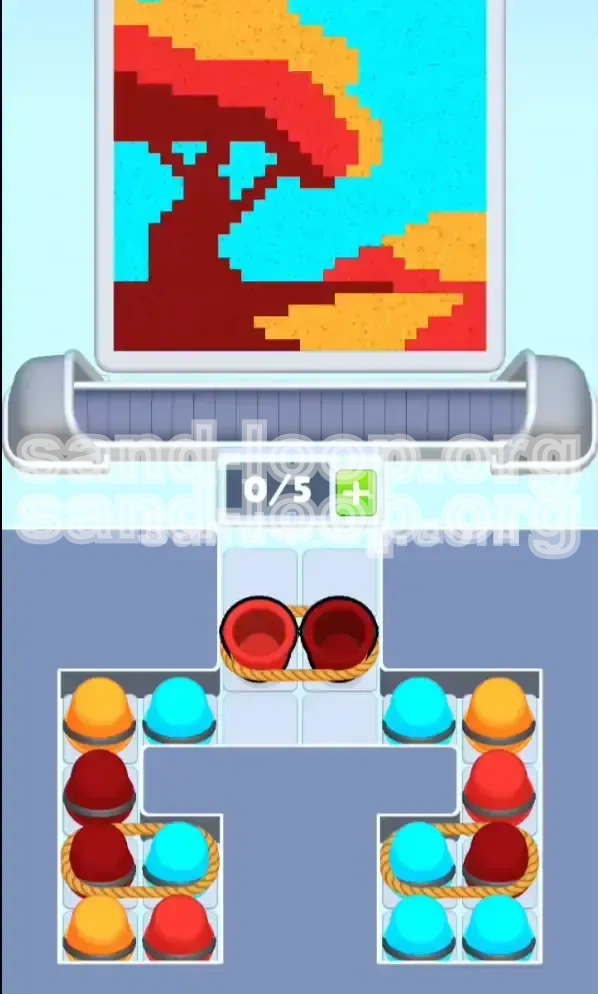
Level 151 presents a deceptive puzzle titled "The Autumn Tree." At first glance, the image appears to be a simple landscape featuring a pixelated tree with warm red and orange leaves set against a bright cyan sky. However, the challenge lies in the specific "Sand Loop" mechanics implemented here. Unlike previous levels where you could pick and choose colors freely, this level restricts your movement through "Rope Bonds." You are dealing with a constrained inventory system where physical space on the conveyor belt is your most valuable resource.
The Core Constraint: Rope Mechanics
The defining feature of this stage is the "Package Deal" mechanic. Approximately 60% of the cups in the supply tray are tied together in pairs using a rustic twine visual. This means you cannot move a single cup; moving one moves its partner. This effectively cuts your maneuverability in half. If you have a belt capacity of 5 slots, and you trigger a rope pair, you instantly consume 40% of your available space (2/5 slots). This forces you to plan moves in advance, rather than reacting to the canvas.
Canvas Composition and Layers
To solve this efficiently, you must deconstruct the image into layers. The canvas consists of three primary layers. The bottom layer is the Cyan Sky, which covers roughly 40% of the background. The middle layer consists of the Tree Trunk and Branches, rendered in Dark Red (Maroon). The top layer is the Foliage, a mix of Bright Red and Orange/Yellow. Understanding that the Sky acts as a "filler" that should be applied last is crucial, as applying it early will prevent the darker tree colors from adhering correctly to the center.
Belt Management Strategy
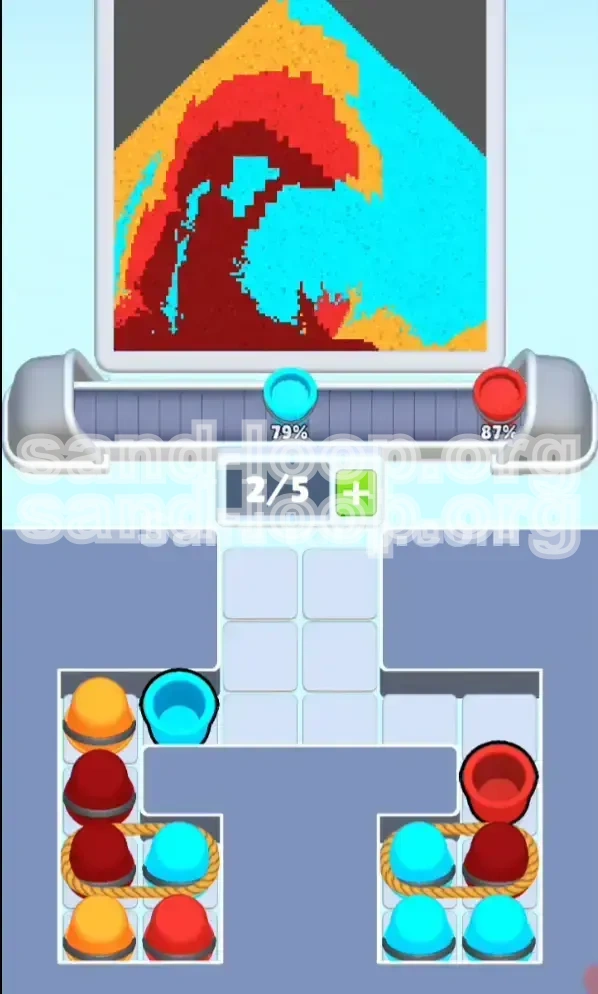
You have a 5-slot capacity, but due to the rope constraints, your effective capacity is often only 2 or 3 moves. The supply tray is shaped like an inverted "T". The central column feeds directly into the belt, while the side columns (left and right) funnel into a central choke point. If this central choke point is blocked by a rope pair you don't need yet, you cannot access the cups behind it. Therefore, maintaining "flow" is just as important as matching colors.
Winning Condition
The level is complete when the pixel art reaches 100% completion. There is no time limit for the individual moves, but inefficient belt management will cause you to fail due to a "clogged" belt where no usable cups can enter the active slot. The key to winning is prioritizing the "Dark Red" color to build the skeleton of the tree before the sky colors flood the board.
Primary Objectives and Strategy
Objective 1: Establish the Structural Base
Your first priority is to clear the central blockage and begin applying the tree's trunk. The game logic prioritizes dark colors for the foreground. If you waste your early moves on Cyan (Sky), you will find yourself unable to place the Dark Red trunk later because the background will have already "claimed" those pixels. You must aim to have the Dark Red and Bright Red active on the belt within the first 3 moves.
Objective 2: Optimize Slot Economy
Do not treat the 5-slot belt as five separate slots. Treat it as two "Group Slots." Because tapping a rope pair adds two cups instantly, you should never tap a pair when your belt is at 3/5 or 4/5 capacity unless you are about to trigger a level clear. You must maintain at least 2 empty slots at all times to accommodate the next inevitable rope pair.
Objective 3: Avoid the "Useless Cup" Trap
You will frequently encounter situations where you need a Dark Red cup, but it is tied to a Cyan cup. If you tap this pair to get the Dark Red, the Cyan cup enters the belt and loops endlessly. It is not "useless," but it is "premature." You must manage these looping cups so they don't crowd out the colors you actually need right now (Orange and Bright Red).
Objective 4: The Sky is the Final Step
Resist the urge to fill the blue empty spaces. In Sand Loop physics, background fills should happen last. Treat the Cyan color as a "cleanup" crew. Only when the tree is fully formed and the red/orange pixels are solid should you allow the Cyan cups to dominate the belt.
Objective 5: Prevent Belt Jams
A belt jam occurs when the entrance to the painting area is blocked by a color you cannot use, and the supply tray exit is blocked by a cup you cannot move. The strategy to avoid this is to always clear the "Throat" (the center top of the supply tray) before dealing with the side columns.
Color Processing Order
Phase 1: The Dark Foundation (Dark Red)
Priority: Highest. This color creates the trunk and branches. It must be poured first to establish the anchor points for the leaves. If you pour this after the sky, the trunk will look transparent or fail to render correctly against the cyan background. Target the center of the canvas.
Phase 2: The Mid-Range Tones (Bright Red)
Priority: High. Once the trunk is visible, Bright Red serves as the bridge between the dark trunk and the bright leaves. It fills out the main body of the tree canopy. This should be processed immediately after or concurrently with Dark Red.
Phase 3: The Highlights (Orange/Yellow)
Priority: Medium. These colors add volume to the tree but do not define the structure. They are usually found in single cups (loose) rather than rope pairs in the early game, making them easier to manage. Use these to flesh out the edges of the canopy.
Phase 4: The Background (Cyan/Blue)
Priority: Low. This is the "danger" color. It is abundant in the supply tray, often tied to the very Dark Red cups you need early on. You must intentionally delay processing this color until the tree is 90% complete. Once activated, it fills the remaining negative space rapidly.
Timing the Transition
The switch from Phase 2 to Phase 4 is the most critical moment. Do not switch until the tree looks "solid." If you see large pixelated gaps in the tree center, you are not ready for the Cyan sky.
Step-by-Step Walkthrough Guide
Step 1: Clearing the Choke Point
Upon starting, do not touch the side columns. Look directly at the top center of the bottom supply tray (the "Throat"). You will see a rope pair connecting a Bright Red cup and a Dark Red cup. These are blocking the exit. You have no choice but to move them.
Action: Tap the center Rope Pair (Bright Red + Dark Red) immediately.
Result: Both cups move to the belt. This clears the path for the side columns to slide inward. The Dark Red will likely start pouring the trunk immediately.
Step 2: Left Column Expansion
Now that the throat is clear, the left and right columns can slide. Look at the Left Column. You will likely see a loose Orange cup at the top and a Dark Red cup in the middle.
Action: Tap the top Orange cup on the left. Then, tap the Dark Red cup below it.
Reasoning: We avoid the Right Column right now because it often contains a Blue cup at the top. If we pull from the right, we introduce a "useless" Cyan cup too early. Stick to the Left for the warm colors.
Step 3: Managing the Mixed Rope Pairs
As you drain the left and right columns, you will eventually be forced to deal with the bottom corners. These usually contain "Mixed Ropes"—a color you need tied to a color you don't.
Scenario: Bottom Right has a Blue cup tied to a Dark Red cup. You need the Dark Red to finish the trunk, but you don't want the Blue.
Action: Check your belt count. Ensure you are at 2/5 capacity or lower. Tap the Bottom Right pair.
Result: The Dark Red pours, strengthening the tree. The Blue cup enters the belt and starts looping. This is unavoidable. Just let it loop; do not try to force-pour the Blue yet.
Step 4: The Belt Juggle
At this stage, your belt might look messy. You might have a looping Blue cup, a loose Orange cup, and a Bright Red cup all waiting.
Action: Prioritize pouring the warm colors (Red/Orange) that are currently on the belt. If a Blue cup is active and pouring, you can tap it to pause it or speed it up, but only if the tree is structurally sound. If the tree looks "thin," prioritize the Reds.
Step 5: Finalizing the Tree Structure
Before you switch to the sky, ensure no "tree" colors remain in the supply tray. Scan the Left and Right columns. Are there any single Orange or Dark Red cups left?
Action: Tap any remaining single cups from the side columns.
Reasoning: Once the Sky starts pouring, it is very difficult to go back and fix the tree pixels because the game logic prefers filling adjacent empty pixels, and the Sky offers the most empty space.
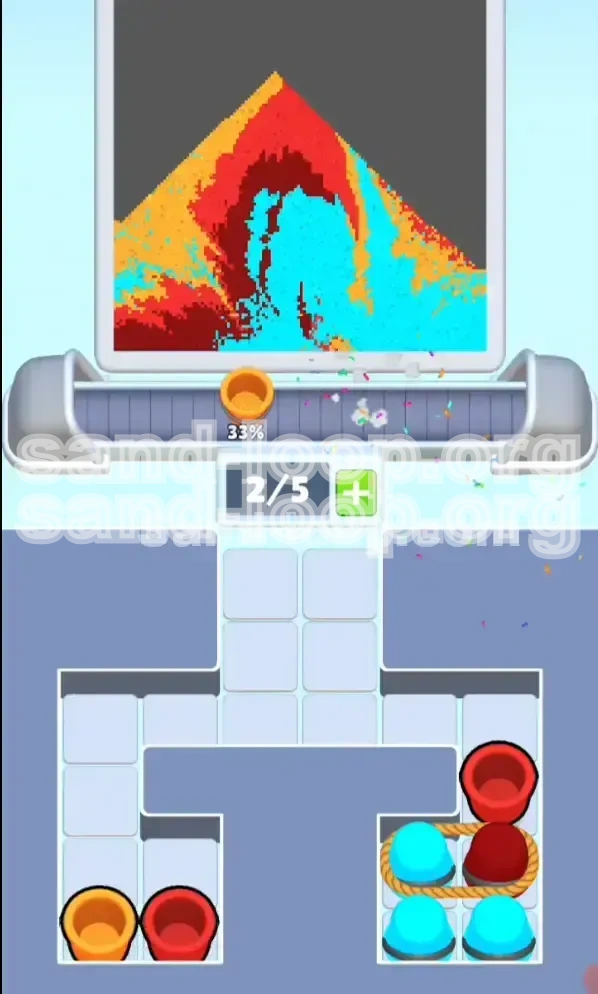
Step 6: The Cyan Flood
Now that the tree is a solid block of Red, Orange, and Dark Maroon, you can finish the level.
Action: Locate the Cyan/Blue cups. Some are likely already looping on your belt from the earlier rope pairs. Tap the remaining Cyan cups in the top right of the supply tray.
Result: The belt will fill with Blue. The game will rapidly fill the background. The level should complete shortly after the sky hits 100% density.
Common Mistakes to Avoid
Mistake 1: The Early Sky Trap
The most common error is tapping the Cyan cups early because the background looks empty. Players see the empty blue sky and instinctively try to fill it. This fills your belt with Blue, leaving no room for the Reds needed to build the tree. Once the belt is clogged with Blue, you have to wait for them to loop, wasting valuable time and potentially getting stuck.
Mistake 2: Ignoring the "Throat" Blockage
Sometimes players try to tap side column cups while the center is still blocked by the initial Red/Red rope pair. The game will not let these cups pass. You must tap the center blockage first, even if you don't "need" those specific colors right that second, to open the flow of the game.
Mistake 3: Overfilling the Belt
Tapping a rope pair when the belt is at 3/5 or 4/5 capacity. This instantly bumps you to 5/5 (Full). If the next cup needed to finish the level is behind the rope pair you just moved, you are now stuck. You have to wait for a cup to empty and recycle, which takes significantly longer than if you had just managed your slots better.
Mistake 4: Misjudging Color Priority
Confusing "Bright Red" with "Dark Red." The tree trunk specifically requires the Dark Red (Maroon) to look correct. If you only use Bright Red, the trunk may blend in too much with the leaves, making the image look muddy. Ensure you prioritize the Dark Red cup from the center pair.
Mistake 5: Panic Tapping
When the belt gets full of useless looping Blue cups, players often start tapping randomly to "clear" space. This usually makes it worse by adding *more* cups. Patience is the solution. Let the cups pour, wait for a slot to open (recycle), then make a calculated move.
Advanced Tips and Speed Run Solutions
Tip 1: Pre-Loading the Belt
If you know a "Mixed Rope" (Dark Red + Cyan) is coming up from the bottom right, try to have your belt at exactly 1/5 or 2/5 capacity. This allows you to dump the pair in, let the Dark Red pour, and have the Cyan sit harmlessly in the queue without blocking the *next* necessary color.
Tip 2: The "Pause" Exploit
While the game is generally automated, timing your taps when a cup is *just* finishing its pour can sometimes shave off milliseconds. If a cup is 95% empty, you can tap the next supply tray cup slightly early to queue it up instantly, minimizing the downtime between pours.
Tip 3: Visualizing the Pixel Grid
Don't look at the "picture." Look at the grid. The Autumn Tree is essentially a large diamond/oval shape in the center. If you visualize the boundaries of the tree, you know exactly when to stop pouring Red and switch to Blue. Once the "central mass" is formed, the rest is sky.
Speed Run Strategy: The Aggressive Center
For a fast time, ignore the side columns entirely for the first 10 seconds. Focus purely on the center "Throat" column. Tap the center rope pair, then immediately tap whatever slides into the center spot next. If it's a warm color, good. If it's a cool color (Blue), tap a side column to offset it. This aggressive center-management keeps the flow high.
Speed Run Strategy: Queue Management
Keep the belt count low (2/5). Low counts mean faster recycling. A belt at 5/5 moves slowly because the physics engine has to render more falling sand particles. Keeping the belt light makes the simulation run faster, allowing you to click the next cup sooner.
Stuck Solution: The Reset
If you have painted yourself into a corner (e.g., the belt is full of Blue, but the tree is only half-done), your only option is to wait. However, if the tree is 90% done and you just can't get that last bit of Red, look for a "single" cup (not a rope pair) in the supply tray. Prioritizing single cups is the only way to add 1 cup without adding a useless partner.