
Level 160
HARDHow to solve Sand Loop level 160? Get instant solution for Sand Loop 160 with our step by step solution & video walkthrough. Sand Loop 160 tips and guide.
Play Sand Loop Now
Experience the puzzle challenge firsthand
Game Screenshots
Sand Loop Level Guides
Level Overview: The Resource Starvation Challenge
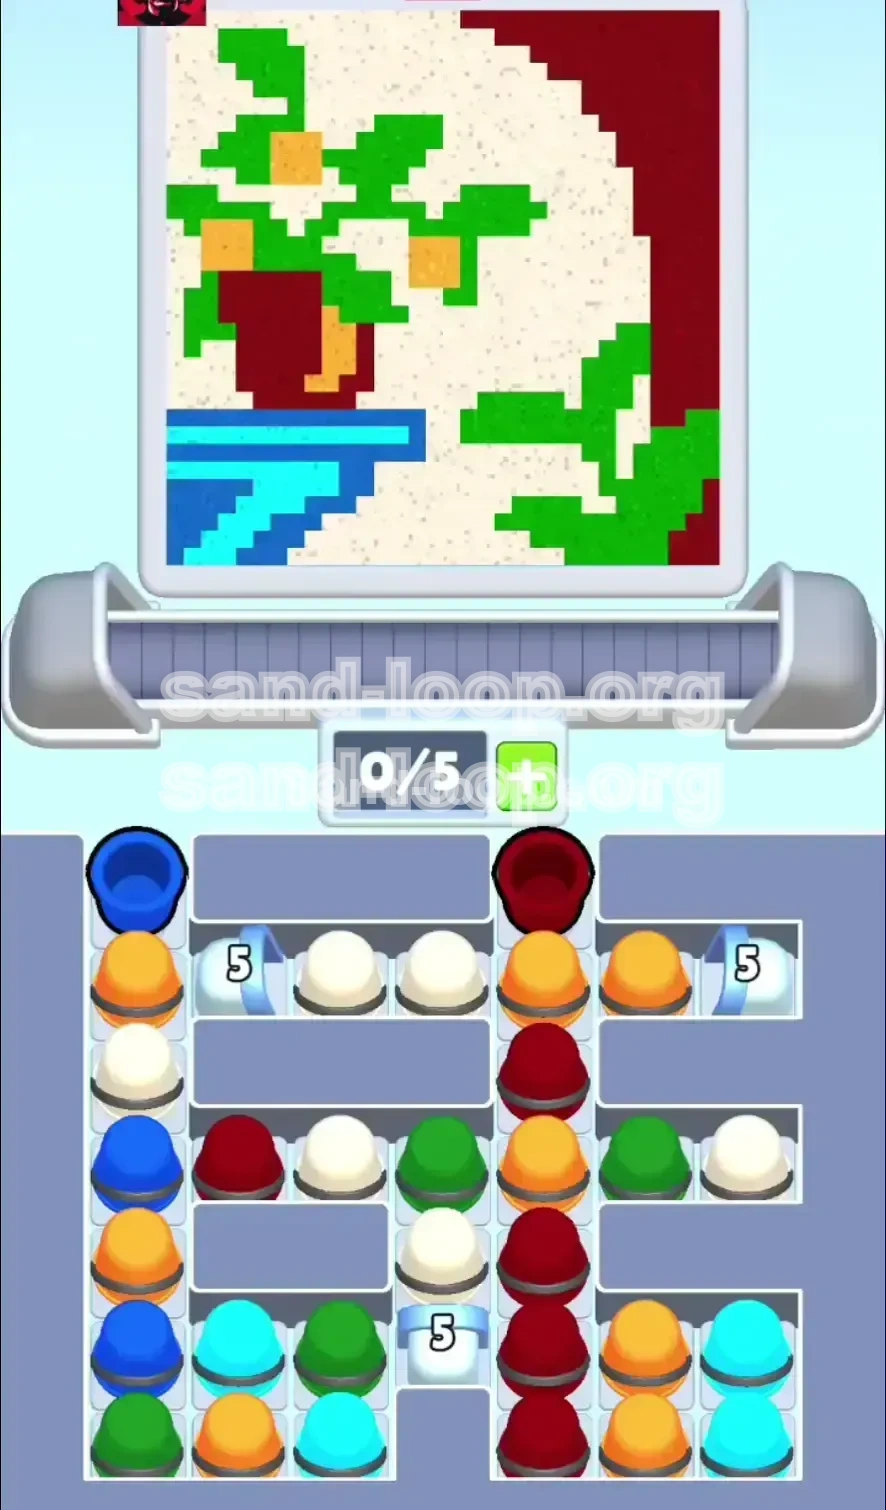
Welcome to Level 160, a stage that shifts the gameplay focus from reflexes to strict resource management. Unlike previous levels where you could simply match colors as they appear, this stage introduces a mechanic known as "Ice Gates." These gates lock away your most critical resource—White sand—behind a numerical counter. The level depicts a vibrant Potted Lemon Tree sitting on a blue table, but achieving this image requires you to defy your instincts. You will be tempted to save space for the White sand, but doing so will cause a deadlock. This guide breaks down exactly how to beat the bottleneck.
The Visual Composition
The target image is a Potted Lemon Tree. It consists of three distinct color zones. The bottom layer is a Blue table (left) and a Dark Red pot base (center). The middle layer features Green leaves with Orange fruit accents. The top and outer layers are a massive Cream/White background. The challenge lies in the fact that the background, which visually covers about 60% of the canvas, is the last resource you are allowed to access.
The "Ice Gate" Mechanic
This is the core gimmick of Level 160. You will see three Ice Blocks labeled with the number "5". These are not physical obstacles to be broken by power-ups; they are countdown timers. Every time you successfully pour a cup of sand from the conveyor belt, the counters decrease by 1. Only when these counters hit zero will the blocks shatter, revealing the White cups hidden beneath.
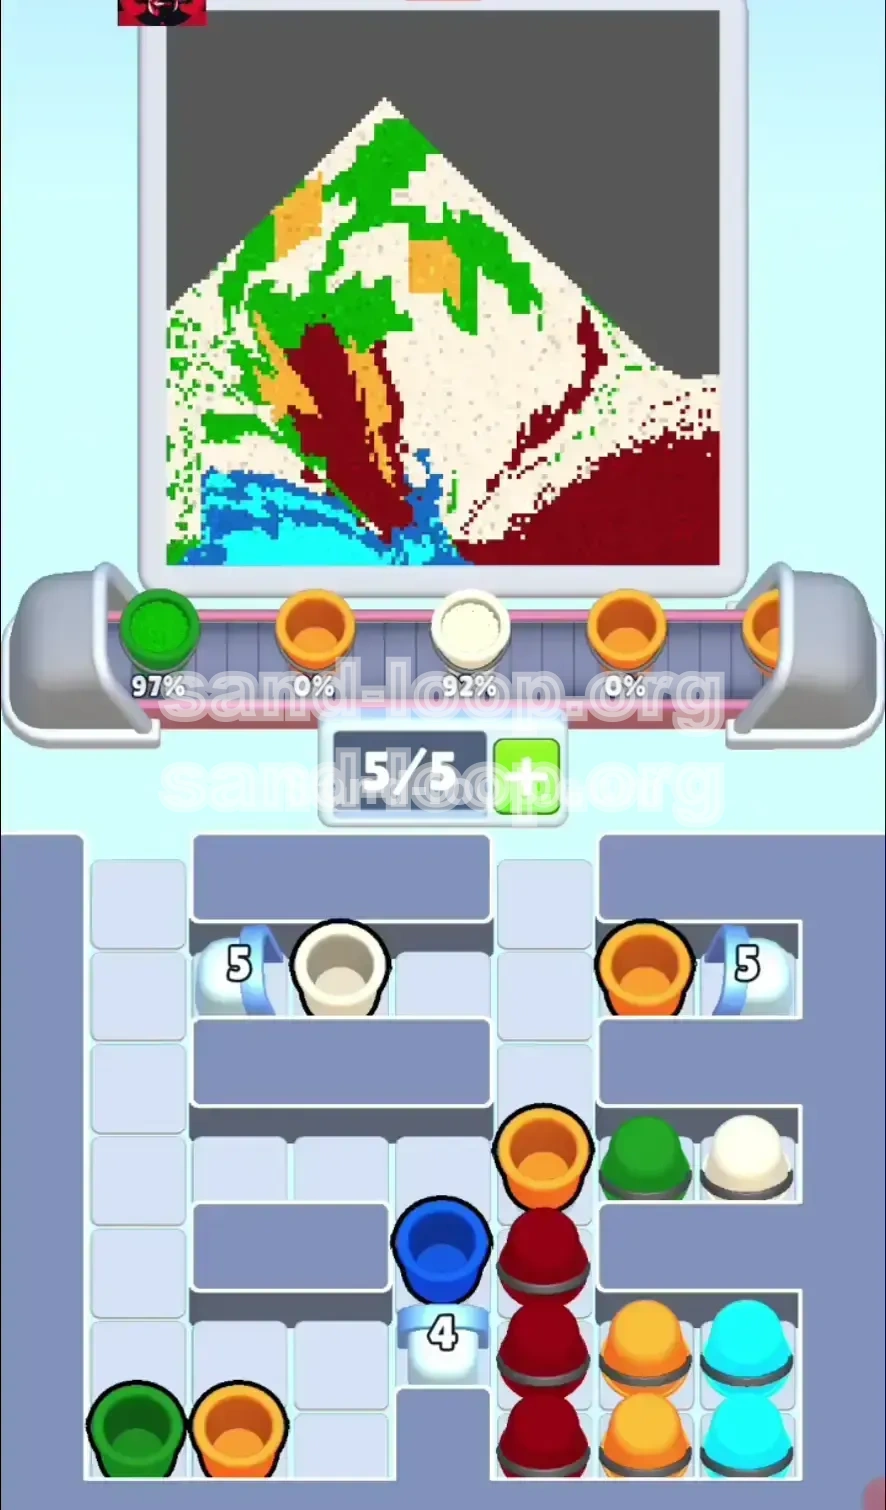
Resource Distribution Analysis
Analyzing the conveyor belt reveals a stark imbalance. Approximately 70% of the cups you need for the background are White, but they are gated. The remaining 30% consists of Blue, Red, Green, and Orange. The game forces a "Foreground First" logic. If you attempt to skip the colored cups to wait for the White ones, your limited 5-slot inventory will fill up, stopping the conveyor belt and freezing your progress entirely.
The Slot Economy Crisis
You only have 5 available slots in your inventory. This creates a high-pressure environment where hoarding is impossible. If you hold onto a Red cup waiting for a Green cup, and the belt keeps moving, you risk filling your slots with unusable colors. You must maintain a constant flow of pours to keep the counters ticking down.
Difficulty Spike Factors
Players often fail here because they try to "save" White slots or because they pour colors in the wrong order, burying the Green leaves under the heavy Red sand. The difficulty comes from the patience required to build the center of the image (the tree) before you can touch the edges (the background).
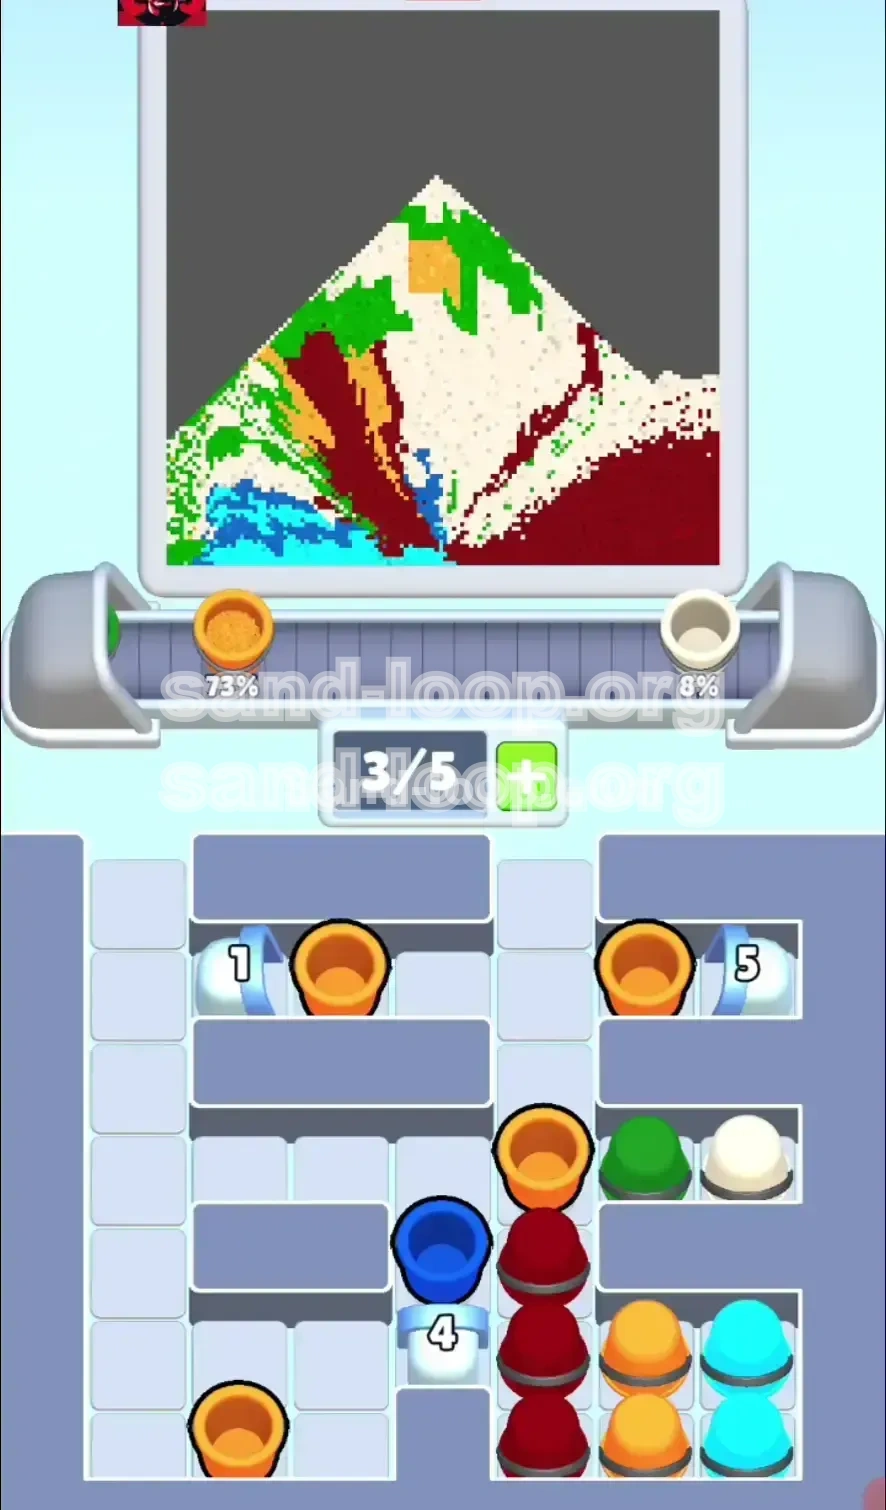
Success Metrics
To clear this level with a high score, you need to aim for an accuracy rate of 95% or higher. Missed pours delay the Ice Gate counters, bringing you closer to a time-out. Furthermore, efficient layering is crucial; placing the Orange fruit before the Green leaves results in the fruit being invisible, costing you precious percentage points.
Clear Objectives: What You Must Achieve
To complete Level 160, you must move beyond simple color matching and execute a specific build order. Your primary goal is not just to fill the canvas, but to manipulate the environment to unlock your resources.
Unlock the White Reserve
Your first and most critical objective is to shatter the three Ice Gates. This requires you to process exactly 5 non-white cups. This is the "tax" you must pay to access the bulk of the level's sand. Until these gates are open, the level is a battle for survival.
Establish the Foundation Layer
Before the background can be painted, the "base" of the art must be secure. You must deposit the Blue table and the Dark Red pot base immediately. These colors are heavy and provide the anchor for the rest of the lighter sands (Green, Orange, White) to sit upon.
Construct the Center Pyramid
Sand physics in this game naturally forms a pyramid. You must build a centralized structure of Green leaves and Red potting material in the middle of the screen. This central mound will act as a dam, allowing the later White sand to flow around it to the sides, filling the background naturally without burying the central art.
Isolate the Accent Colors
You must place the Orange fruits and Green leaves in a specific relationship. Green supports Orange; if Orange is poured too early, it vanishes. You must aim to have the Green cups occupy the lower-middle strata, with the Orange cups perched on top for visibility.
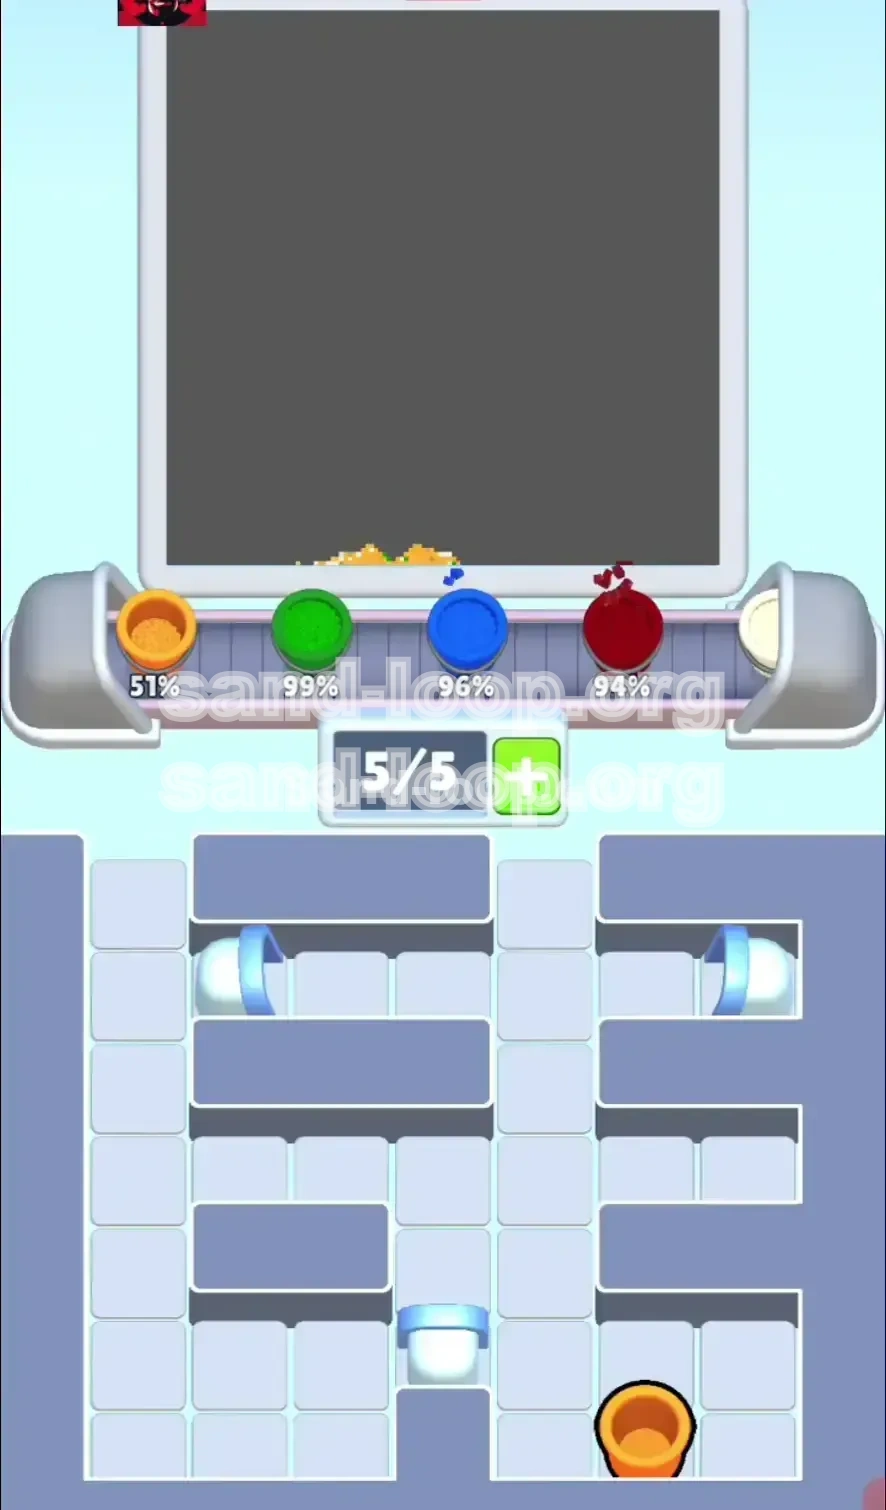
Fill the Negative Space
Once the center is built, the final objective is to flood the remaining void with White sand. This must be done rapidly to cap off the level before the timer runs out, ensuring the edges of the canvas are filled without spilling over the top limit.
Deadlock Avoidance
A constant objective is to prevent "Soft Locks." This happens when your inventory is full of colors you don't need (e.g., holding two Reds and two Blues when the tree requires Green). You must constantly pour to cycle cups, even if it means slightly overfilling a color zone, to keep the game state moving.
Step-by-Step Instructions: The Execution Phase
This section provides the exact sequence of moves required to navigate Level 160 from start to finish. Follow this order to manage the Ice Gates effectively.
Phase 1: The Initial Trigger (Moves 1-5)
The start of the level is the most dangerous. You have no White sand available.
- Step 1: As soon as the level starts, tap the Top Left Blue Cup. Do not wait. This starts the flow for the left table base.
- Step 2: Immediately tap the Top Right Dark Red Cup. This establishes the pot base on the right.
- Step 3: Watch the Ice Gate counters. They should drop from "5" to "3".
- Step 4: If a new Red or Blue cup appears, tap it. Do not hold slots.
- Step 5: Ignore any Green or Orange cups that might appear prematurely if you are still full of Red/Blue, but prioritize clearing your Red/Blue inventory to make room.
Phase 2: The Great Unlocks (Moves 6-10)
You are nearing the threshold. The gates are about to break.
- Step 6: Continue pouring the available primary colors (Red/Blue). Every pour is a tick toward freedom.
- Step 7: The moment the counters hit "0", the Ice Gates will shatter. DO NOT TAP THE WHITE CUPS YET.
- Step 8: Pause for a split second to assess your Green and Orange inventory. You need to build the tree center before the background.
- Step 9: If you have Green cups, tap them now to start the leaf layer.
- Step 10: Only if the center is reasonably tall should you look at the White cups.
Phase 3: Building the Tree Core
With the gates open, you have access to everything, but the order remains strict.
- Step 11: Focus on the "Green Zone". Pour Green cups to build up the height of the leaves. This creates the pyramid peak.
- Step 12: Introduce Orange Cups sparingly. Tap them only when the Green pile is high enough to support them. If you pour Orange too low, it disappears.
- Step 13: Alternate between Green and Orange to create a textured "leafy" look.
- Step 14: Keep the Red flow going on the far right to maintain the pot's structure against the wall.
Phase 4: The Background Flood
Now that the tree exists in the center, you can fill the rest.
- Step 15: Begin spamming the White Cups. Since the center (Green/Red) is tall, the White sand will hit the peak and slide down to the left and right edges.
- Step 16: This "slide" effect perfectly fills the background without covering the tree.
- Step 17: Monitor the left side. Ensure the White sand meets the Blue table seamlessly.
Phase 5: Final Polish
The closing moments are about cleanup and percentage points.
- Step 18: Check for any "holes" in the Green canopy. Fill them with final Green drops.
- Step 19: Use the last of the White cups to top off the canvas height.
- Step 20: Ensure no stray colors are sitting on top of the White background.
Color Order: The Layering Logic
Understanding the physics of how the sand stacks is the secret weapon for this level. The order is not just visual; it is structural.
Layer 1: The Structural Base (Bottom 20%)
Colors: Blue (Left), Dark Red (Right/Center).
This layer must be poured first. It is the heaviest and widest. Attempting to put Green or Orange here will result in them being pushed to the edges or buried. The Blue table must extend to the left edge, and the Red pot must anchor the center.
Layer 2: The Foliage Anchor (Middle 30%)
Color: Green.
Once the pot is formed, Green acts as the bridge. It sits on top of the Red pot but must be poured *before* the mass of the background. If you pour White background sand before the Green leaves, the White will bury the pot base, and when you finally pour Green, it will sit on top of the White, looking like a floating bush rather than a potted plant.
Layer 3: The Highlights (Upper Middle 20%)
Color: Orange.
Orange has the lowest volume of all colors in this level. It is the "frosting" on the cake. It must be placed after the Green is established but before the White background completely covers the canvas. It relies on the Green pile to reach its visual height.
Layer 4: The Negative Space Fill (Top/Outer 30%)
Color: White/Cream.
This is the final step. Because there is so much of it, it will naturally rise up and spill over. Pouring it last ensures it wraps *around* the Green/Red core you built, defining the edges of the tree. If poured first, the tree becomes indistinct blobs in a sea of white.
The "Sand Slide" Principle
When pouring White (Layer 4), aim for the center of the Green pile. The physics engine will cause the White sand to avalanche down the sides of the Green pyramid, effectively filling the background automatically. This saves you from having to carefully aim for the left and right corners.
Key Tips and Strategic Advice
These tips are derived from the mechanics of Level 160. They address the specific frustrations of this stage.
Tip 1: The "Tap-Don't-Hold" Mentality
In the early game (while Ice Gates are active), speed is key. Do not analyze the perfect placement of every grain of Red sand. It is better to pour a cup slightly imperfectly than to hold onto it for 5 seconds. The goal is to get the gates open. You can fix messy edges with the White sand later.
Tip 2: Managing the 5-Slot Limit
Since you cannot buy more slots, treat your inventory like a queue. Always try to have at least one empty slot (or a slot filling up) so the conveyor belt keeps moving. If all 5 slots are full and static, you are not making progress toward unlocking the White sand.
Tip 3: The "Green Island" Strategy
Visualize the Green sand as an island in the center of a Red sea. As you pour Green, try to keep it centralized. If it spreads too wide to the left, it will mix with the Blue table. If it spreads too far right, it loses the shape of the pot. Keep Green tight and vertical.
Tip 4: Orange Timing
Wait until the Green pile is about 50% built before introducing Orange. If you pour Orange and Green at the same time early on, the heavier Green flow will push the Orange off the pile, wasting it. Let Green build a "ledge" for the Orange to sit on.
Tip 5: Using White as an Eraser
If you made a mistake and placed a bit of Green too far to the edge, don't worry. The massive volume of White sand at the end acts as an eraser. It will cover up small placement errors in the foreground, provided you didn't violate the "Heavy before Light" rule.
Common Mistakes to Avoid
Knowing what not to do is just as important as knowing what to do. These are the top reasons players fail Level 160.
Mistake 1: Waiting for White
The biggest error is seeing the Ice Gates and deciding to wait. You cannot wait. If you pause, the timer runs out, and you fail. You must process the colors you do have (Red/Blue) to trigger the unlock.
Mistake 2: Burying the Fruit
Players often love the Orange color and pour it immediately. This causes it to sit at the very bottom of the pot, hidden by the Red base and Green leaves. Always pour Green before Orange to ensure the fruit is visible "on" the tree.
Mistake 3: Ignoring the Blue Table
Focus on the tree often leads to ignoring the left side. If you don't pour enough Blue early on, you will run out of Blue cups later (or they will be buried under White). The table must be established first.
Mistake 4: Overfilling the Pot
If you make the Red pot too wide, it will encroach on the background space. The pot needs to be a vertical structure in the center-right. If it becomes a flat pancake, the background will look messy.
Mistake 5: Panic Pouring
Once the gates open and White cups appear, players often panic and tap all White immediately. This floods the center and buries the Green/Orange structure. Maintain discipline: finish the Green/Orange core, then flood with White.
Stuck Solutions: Troubleshooting Guide
Are you stuck? Is your progress bar not moving? Here is how to fix specific blockages in Level 160.
Problem: Inventory Full, Gates Still Closed
Symptom: You have 5 cups, but none are usable (e.g., 3 Red, 2 Blue), and the Ice Gates are still at "1".
Fix: You must "waste" a pour. Look for the color that is most overfilled (probably Red or Blue). Pour it on top of itself anyway. Even if it doesn't add visual coverage, it clears the slot and ticks the counter down. Progress is mathematical here, not just visual.
Problem: Tree Looks "Flat"
Symptom: The Lemon Tree looks like a 2D cutout rather than a 3D object.
Fix: You likely poured the White background too early. To fix this in the late game, focus your remaining Green and Orange pours into a very tight, high column in the dead center. This creates a "peak" that restores 3D depth against the flat white background.
Problem: Ran Out of Green
Symptom: You have White and Red, but no Green left to finish the leaves.
Fix: Check the conveyor belt carefully. Sometimes Green is hiding behind a large stack of Whites. If you are truly out of Green, you must use the White sand to frame the Red pot as best you can, accepting that you won't 100% the leaf coverage. Prioritize Orange placement to simulate leaves.
Problem: Background Not Filling
Symptom: You are pouring White, but the sides of the screen remain empty.
Fix: Your center pile is too low. Pour your remaining Green/Red/Orange into the center to raise the "peak". Then, pour the White onto that peak. The height will force the sand to slide down the sides to the empty areas.
Speed Run Tips
If you are aiming for a 3-Star time score, efficiency is everything. Here is how to shave seconds off your run.
The "Pre-Load" Tactic
As the level introduction animation is playing, you can mentally map your first three taps. The moment control unlocks, tap Blue (Top Left), Red (Top Right), and the next available cup without hesitation. Hesitation costs 1-2 seconds, which is 5% of a typical speed run.
Batch Processing
Instead of tapping a cup, watching it pour, and then finding the next one, try "batching." Tap two cups of the same color rapidly (e.g., two Greens). This queues them up. While the first is pouring, the second is registering, keeping the flow constant and maximizing the Ice Gate countdown speed.
Ignore Perfection
For a speed run, 85% visual accuracy is often enough to pass. Do not try to place every grain of sand perfectly. If a cup of Green splashes a bit wide, let it go. Fixing it takes time. Only fix errors that threaten to block the Ice Gate counters.
Exploit the Slide
Speed runners build the central mountain (Red/Green) aggressively high, very fast. Then, they spam White. By over-building the center, they ensure the White sand slides to the edges instantly, avoiding the need to aim for the left and right corners separately. This turns a 3-step filling process into a 1-step flood.
Memorize the Gate Break Point
The Ice Gates break exactly after 5 pours. Don't count visually; count by rhythm. Tap-tap-tap-tap-tap (Gates Break). This muscle memory allows you to focus on the screen rather than the UI counters, saving precious mental processing time.