
Level 29
HARDHow to solve Sand Loop level 29? Get instant solution for Sand Loop 29 with our step by step solution & video walkthrough. Sand Loop 29 tips and guide.
Play Sand Loop Now
Experience the puzzle challenge firsthand
Game Screenshots
Sand Loop Level Guides
Level 29 Strategy Guide: The Twin Cherry Challenge
Level Overview: Asymmetric Obstacles
Sand Loop Level 29 introduces a significant difficulty spike through asymmetric map design. While the target image—a pair of pixelated cherries—appears simple and nostalgic, the layout of the supply tray is designed to exploit hesitation. The primary challenge lies in the disparity between the left and right sides of the board. Players face "Ice Block HP" mechanics where standard clear strategies will lead to a deadlock. You are not just painting an image; you are managing a resource crisis where time is your most valuable currency.
Primary Objectives for Victory
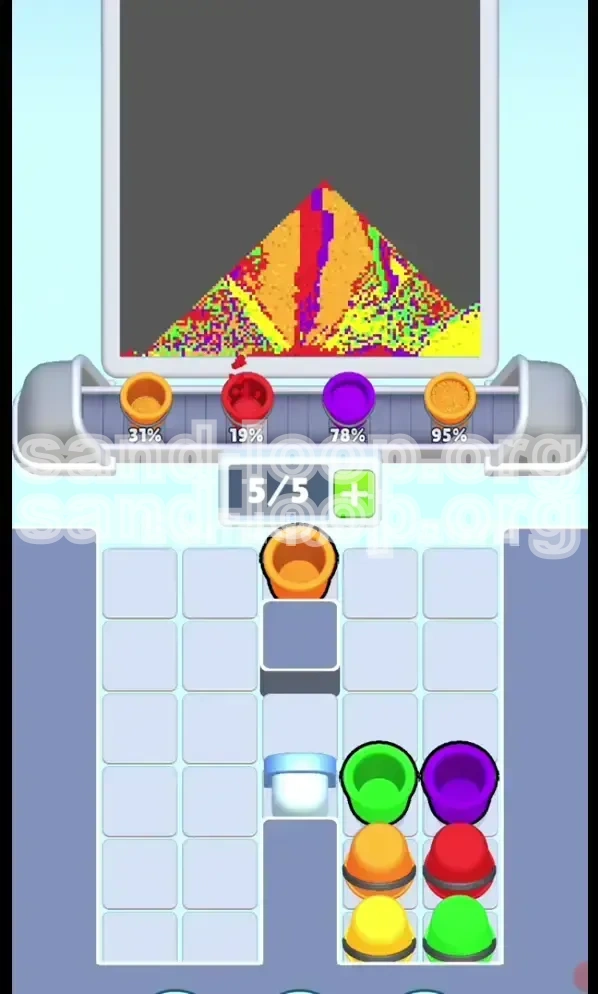
To secure the three-star rating on this level, you must adhere to strict efficiency goals. The primary objective is to maintain a "Continuous Pour" state, ensuring the nozzle never stops dispensing sand because you lack the correct cup color. Secondary objectives include preventing the conveyor belt from reaching capacity (5 cups) with useless inventory, and successfully prioritizing the destruction of high-HP obstacles on the right flank early in the match. If you fail to break the right-side ice by the 50% progress mark, a restart is usually necessary.
The Critical HP Disparity
This level's defining feature is the ice block durability. The left side features standard blocks requiring only 8 actions to clear. In stark contrast, the right side is fortified with massive blocks requiring 20 actions. This means you must direct approximately 60-70% of your early clearing efforts to the right side. Treating the board symmetrically is the most common reason for failure. You must psychologically commit to the "Right-First" strategy from the very first second.
Why This Level Causes Failures
Most players fail Level 29 because they play reactively rather than proactively. They fill the immediate need (e.g., grabbing a Red cup for the cherry body) while ignoring the structural integrity of the board. By the time the nozzle demands the Green stems, the supply is still frozen under the unbroken 20 HP ice. Furthermore, the "White Lock (4)" in the center acts as a gatekeeper; ignoring its countdown timer leaves you starved of mid-game Red cups.
The Color Palette Analysis
Success depends on understanding the specific frequency of each color in the pixel art:
- Purple (15%): Used exclusively for the outer outline. It is critical at the start and for final touch-ups.
- Red (35%): The bulk of the cherry bodies. This is your high-volume color.
- Orange (20%): Used for inner shading/pixel depth.
- Green (10%): The stems. A low-volume, late-game color that acts as a trap if collected too early.
- Yellow (20%): The background. It floods the board at the end but should be ignored initially.
Mastering the Fill Order
The Pour Sequence Logic
The sand nozzle follows a strict topological fill order based on the pixel art layers. It begins at the bottom-most layer (the background/outline) and moves upward. Understanding this flow prevents you from grabbing cups that are "out of phase." If you collect a Yellow cup while the nozzle is pouring the bottom layer, you are wasting a valuable inventory slot that could be used for a necessary Purple or Red cup.
Phase 1: The Foundation
The level opens with the Purple Outline. This is the absolute bottom layer of the image. You must have Purple cups on the conveyor belt before the level starts or within the first 3 seconds. If you miss this window, you cannot paint the bottom pixels, and the sand flow will back up, causing an immediate game over or massive time penalty.
Phase 2: The Core Volume
Once the outline is established, the nozzle switches to Red and Orange. This phase consumes the majority of your resources. The cherry bodies are large, solid blocks of color. You will need a steady stream of Red cups. This is also the most dangerous time for your inventory management, as you must balance collecting Red with clearing the heavy ice blocks.
Phase 3: The Thin Lines
Midway through, the nozzle shifts to the Green Stems. These are thin, 1-pixel wide lines. The nozzle dispenses Green sand very quickly for a short burst. This is a common trap: if you have three Green cups queued, the first one fills, and the other two pass the nozzle unfilled, clogging your belt for the rest of the level.
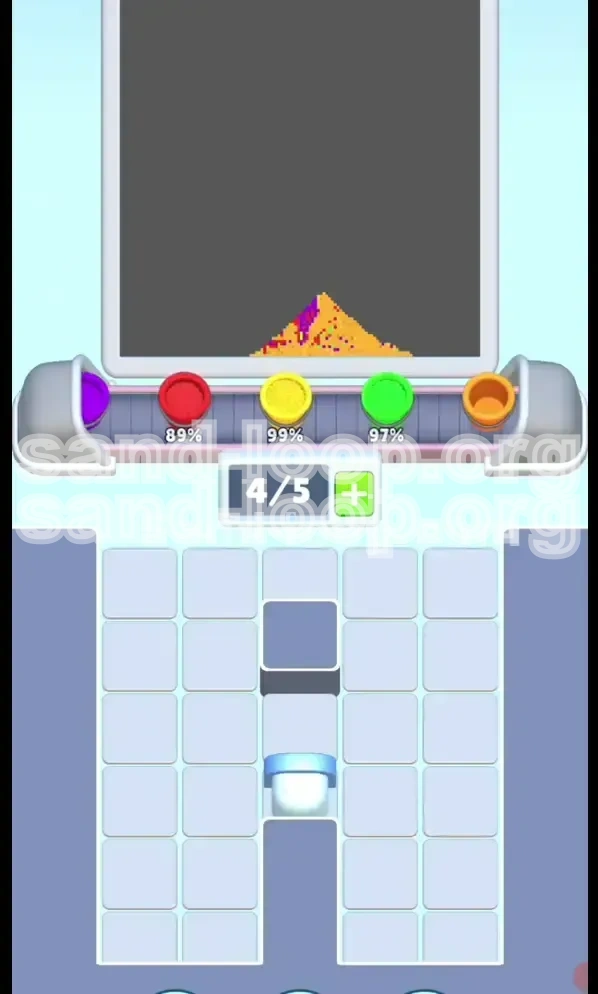
Phase 4: The Background Flood
The final 25% of the level is dominated by Yellow. The background fills in the negative space around the cherries. By this point, you should have cleared most of the ice and have access to the bulk of your supply. This phase allows for rapid-fire clearing, as you can simply dump Yellow cups onto the belt to catch the widespread spray.
Step-by-Step Walkthrough
The Opening Salvo: 0-15 Seconds
As the level loads, immediately scan the top row. You will likely see Yellow, Purple, Orange, Purple, Yellow. Your only move here is to drag the Purple cups to the conveyor. Ignore the Yellow cups entirely. Dragging a Yellow cup now is a fatal error; it takes up a slot that Purple needs, and Yellow won't be poured until the very end of the level. Your goal is to have two Purple cups ready to capture the initial outline flow.
Managing the Center Lock
In the center of the tray, you will notice a Red Cup trapped behind a White Lock (4). This lock is a countdown timer. It decreases by 1 every time you clear a cup adjacent to it. Since Red is your primary color for the cherry bodies, you need this cup unlocked by the 30-second mark. Focus your early clears on the row directly above this lock (Orange and Red cups) to chip away at the counter while simultaneously feeding the machine.
Executing the "Right-Side Grind"
This is the most critical tactical step in the level. Every time you have a choice between making a match on the left side (8 HP Ice) or the right side (20 HP Ice), you must choose the right. Even if the move on the right is less optimal score-wise, the strategic necessity of breaking that ice outweighs everything else. You need to cycle the cups sitting on top of the right-side ice repeatedly. If you neglect this, you will run out of Red cups because your reserves are frozen solid.
The Green Stem Transition
When the progress bar hits roughly 60-70%, the nozzle will switch to Green. At this point, check your tray. If you have been following the guide, the left-side ice (8 HP) should be gone, revealing Green supplies. Do not load multiple Green cups. Load one, let it fill the stem, and then look for the next one. Overloading Green here is the fastest way to turn a win into a loss.
Endgame: Clearing the Backlog
Once the stems are done, the nozzle will switch to Yellow for the background. At this stage, you can finally unleash the Yellow cups you ignored at the start. You can be less precise here. Load 2-3 Yellow cups at a time. The background covers a large area, so the nozzle stays on Yellow for a long duration. Use this time to clear any remaining ice or tricky clusters that survived the earlier phases.
Key Tips for Efficiency
The "Slot Management" Rule
Your conveyor belt only has 5 slots. Treat them like gold. Never fill a slot with a color that isn't being poured right now. The only exception is if you are forced to make a move to prevent a worse deadlock. Ideally, you want 3 slots dedicated to the current color (e.g., Red), and 2 slots kept empty or used for the next immediate color (e.g., transitioning to Orange).
Calculated Sacrifice
Sometimes, you have a cup on the belt that you realize you don't need (e.g., an extra Green cup you grabbed by mistake). Do not let it sit there taking up space. If the nozzle is pouring Red, and that Green cup is approaching the nozzle, you must "sacrifice" it—let it pass unfilled so it goes to the trash/recycle bin. This frees up the slot for a useful cup. It is better to lose one cup than to clog your entire machine.
Visualizing the Layers
Before you make a move, glance at the main image (the cherries). Try to visualize which layer is currently being "painted." If the nozzle is currently painting the bottom-right corner of the image, that's the Purple/Red zone. If it's moving to the top, it's Green/Yellow zone. Anticipating the nozzle's movement by 2-3 seconds gives you the time you need to fetch the correct cups from the ice.
Using the "Preview" Feature
If the game allows it, use the preview or pinch-to-zoom function to inspect the top rows of the supply tray hidden under the ice. Knowing exactly where the Green cups are located (e.g., "They are under the right-side 20 HP block") allows you to plan your clearing path more effectively, rather than just randomly breaking ice and hoping for the best.
Common Mistakes to Avoid
The Symmetry Trap
The human brain naturally wants to clear the board evenly. In Level 29, this is fatal. Clearing the left side first gives you a false sense of security. You have access to cups, you are making matches, but then you hit the right wall. You have no moves, no cups, and the timer is ticking. Always fight your instinct to clear the "easy" side first.
The Yellow Hoarding Mistake
New players often see Yellow cups at the start and think, "I should grab them now so I don't forget later." This creates a "belt jam." Those Yellow cups will sit in your slots, preventing you from picking up the critical Purple or Red cups you need 10 seconds later. Always prioritize the current layer over the future layer.
Ignoring the Lock Counter
The White Lock (4) in the center is easy to ignore because it's not ice; it's just a lock. However, it guards essential Red supplies. If you focus only on the outer ice blocks and fail to clear cups adjacent to the lock, you will find yourself with zero Red cups when the nozzle switches to the Cherry Body phase. Always keep an eye on that countdown number.
Overloading on Low-Volume Colors
As mentioned with the Green stems, loading up on colors that have small "hitboxes" in the artwork is a mistake. The nozzle pours these colors for a very short time. If you have 3 Green cups queued, the nozzle will finish pouring Green after the first cup, and the other two will clog your line. For low-volume colors, adopt a "One-at-a-time" strategy.
Solutions for When You Are Stuck
Scenario: The Right Side is Frozen Solid
Problem: You are 40% through the level, and you realize the right-side 20 HP ice hasn't budged. You are out of moves on the left.
Solution: You are likely in a "dead lock" state. However, if you have a "Hammer" or "Shovel" power-up (if available in your game version), use it immediately on the right block. If no power-ups are available, look for any "Chain Reaction" opportunities. Clearing a cup near the top of the right stack might cause cascading matches that hit the ice. If there are literally no moves on the right, you have no choice but to restart and apply the "Right-First" strategy more aggressively.
Scenario: Wrong Color on the Belt
Problem: You have 3 Yellow cups on the belt, but the nozzle is pouring Purple.
Solution: This is a management crisis. You cannot clear the Yellow cups yet. Your only hope is to "cycle" them. If a Yellow cup is currently under the nozzle, you have to take the penalty for an unfilled cup (let it pass) to get it off the belt. This will temporarily lower your score or pause the flow, but it frees up the slot to grab the Purple cup you actually need. Do not wait for the nozzle to switch to Yellow; it won't happen until the Purple layer is done.
Scenario: Locked Out of Green
Problem: The nozzle is pouring Green stems, but all your Green cups are still trapped under the remaining ice chunks.
Solution: This usually means you didn't clear the center lock fast enough. Look at the cups currently on your belt. Can you make a match that drops a cup onto the lock? If not, check the board for any "floating" Green cups that might be accessible via a side-column clear. If the Green supply is truly inaccessible, you may have to restart. To prevent this, ensure you are clearing the center lock (White Lock 4) during the Red/Orange phase.
Speed Run and Shortcuts
The "Double Tap" Ice Breaking
For experienced players looking to shave seconds off their time: Stop waiting for animations. On the right side, as soon as you make a match that chips the ice, look for the next move immediately. Don't watch the ice shatter. By pre-selecting your next move while the animation is playing, you can increase your Actions Per Minute (APM) significantly. This is crucial for breaking the 20 HP block fast enough.
Batch Processing for Background
During the final Yellow phase, do not place cups one by one. The game allows you to drag multiple cups of the same color onto the belt in rapid succession. As soon as the nozzle switches to Yellow, drag 3-4 Yellow cups at once. Since the background is a large, contiguous block of color, you won't miss any pixels, and you'll clear the final 20% of the level in half the time.
Ignoring Perfection in the Mid-Game
To speed up the Red/Orange phase, don't worry about getting 100% pixel coverage on every single cherry segment immediately. If you have a choice between painting a perfect pixel or clearing a cup to unlock the Red supply, choose to unlock the supply. You can always go back and touch up the pixels later (the game usually keeps the sand active for a moment or allows re-painting if missed). Prioritize flow over precision.
The "Reset" Threshold
If you are Speed Running, set a hard mental reset point. If you reach the 30-second mark and the Right-Side Ice Block is still above 15 HP, restart the level immediately. Trying to recover from that position will result in a time that is slower than a fresh start. Recognizing a "bad run" early saves minutes in the long run.