
Level 34
HARDHow to solve Sand Loop level 34? Get instant solution for Sand Loop 34 with our step by step solution & video walkthrough. Sand Loop 34 tips and guide.
Play Sand Loop Now
Experience the puzzle challenge firsthand
Game Screenshots
Sand Loop Level Guides
Sand Loop Level 34: The Lighthouse Seascape Complete Walkthrough
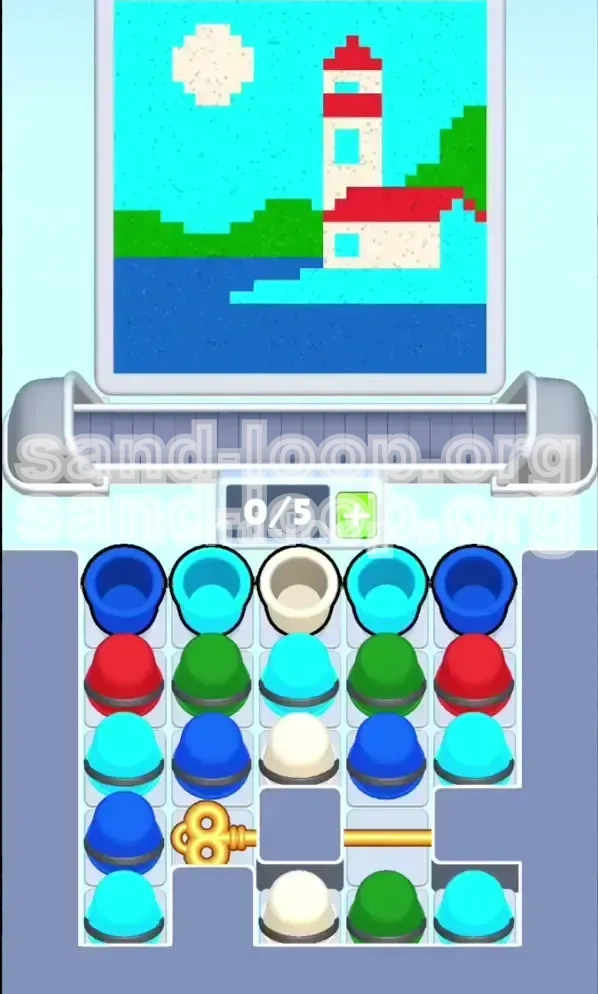
Welcome to the definitive guide for Sand Loop Level 34, "The Lighthouse Seascape." This stage represents a significant difficulty spike compared to previous coastal levels, introducing a mechanic known as "The Vertical Flip." In this level, the supply tray does not cooperate with the natural painting order, forcing you to use the conveyor belt as a strategic storage buffer rather than just a delivery system. You will paint a picturesque scene featuring a towering red-and-white lighthouse, rolling green hills, and a deep blue ocean, all under a bright cyan sky.
The primary challenge here is not color identification, but logistical management. You will be forced to access colors for the top of the painting (Sky/Hills) before you can reach the colors needed for the bottom (Water). To succeed, you must understand how to temporarily "park" incorrect colors on your conveyor belt without causing a jam, and retrieve them exactly when the sand level rises to meet them. This guide will break down every move, buffer strategy, and timing requirement to ensure a 3-star clear.
Level Analysis & Core Mechanics
Before diving into the steps, it is crucial to understand the structural constraints of Level 34. Unlike earlier levels where you simply tap from the bottom up, this level requires you to think several moves ahead.
- The Vertical Flip Mechanic: The most critical aspect of this level is the "Reverse Stack" in Column 2. The colors are stacked Cyan (Top), Green (Middle), and Deep Blue (Bottom). Since the canvas fills from the bottom up (Water first), you need the Deep Blue cup at the bottom. However, game physics require you to pick up the Cyan and Green cups to get to it.
- The Conveyor Belt Buffer: Your belt has 5 slots. In this level, slots 1 and 2 will be occupied by the "early pickup" colors (Cyan/Green) for the majority of the first phase of the game. You effectively have only 3 slots of active maneuvering space until the water is filled.
- The Gold Key Lock: The bottom-right section of the tray, containing essential White and Red cups for the lighthouse, is locked behind a gold bar. To open this, you must clear the stack in Column 2 to retrieve a Gold Key located on the 4th row.
Visualizing the Target Canvas
Understanding the layers of the painting helps in prioritizing your actions. The canvas is divided into four distinct vertical layers that must be filled in a specific order dictated by gravity:
- Layer 1 (Bottom): Deep Blue Water. This covers the bottom 25% of the canvas. This is your immediate priority.
- Layer 2: Green Hills. Sitting above the water, these rolling hills occupy the next 25% of the canvas.
- Layer 3: The Lighthouse. A complex structure in the center-top. It requires a rhythmic alternation of Red and White, with occasional Cyan "windows" breaking the white sections.
- Layer 4 (Top): Cyan Sky. The background for the lighthouse. This is the last layer to be filled.
Identifying the Color Palette
Confusion between similar colors is a common cause of failure. Here is the exact palette you will encounter:
- Deep Blue: A dark, navy blue. Used exclusively for the ocean water. Do not confuse this with the sky color.
- Cyan (Light Blue): A bright, electric blue. Used for the sky and the small square windows of the lighthouse.
- Bright Red: Used for the vertical stripes of the lighthouse tower.
- Pure White: Used for the alternating lighthouse stripes.
- Forest Green: Used for the grassy hills behind the lighthouse.
The "Reverse Stack" Obstacle
The central puzzle of this level is located in the second column from the left. We call this the "Reverse Stack" because it presents colors in the exact opposite order of how you need to deploy them.
The stack configuration is: 1. Top: Cyan (Sky Layer - Needed Last) 2. Middle: Green (Hill Layer - Needed Second) 3. Bottom: Deep Blue (Water Layer - Needed First)
Normal strategy dictates ignoring the top cups. However, the Gold Key is buried underneath this specific stack (on the 4th row). To get the key, you must dismantle this stack, forcing you to pick up the Cyan and Green cups long before you are ready to use them.
Strategic Objectives & Execution Plan
To beat Level 34, you cannot simply tap colors at random. You must follow a strict sequence of operations to manage your limited belt space. Here is the high-level execution plan:
Phase 1: The Instant Liquids
Your very first actions must focus on clearing "free" space. Do not touch the problematic Column 2 yet. Instead, look at the top rows of the far-left (Column 1) and far-right (Column 5) columns.
These columns typically hold Deep Blue cups at the very top. Because the water layer at the bottom of the canvas is empty, these Deep Blue cups will pour instantly (100% flow rate) the moment you tap them. This clears two cups from the board immediately without touching your conveyor belt. This creates essential physical space on the tray for later maneuvering.
Phase 2: The Key Retrieval Maneuver
Once the free blues are gone, you must turn your attention to Column 2 to retrieve the Gold Key. This is the most dangerous moment in the level.
You will execute the "Dig Down" maneuver: 1. Tap the Top Cup (Cyan): It moves to the belt but will not pour because the sky layer is full. It sits in Belt Slot 1. 2. Tap the Middle Cup (Green): It moves to the belt but will not pour because the hills are blocked by water. It sits in Belt Slot 2. 3. Tap the Bottom Cup (Deep Blue): This cup hits the belt, and because the water layer is active, it pours immediately.
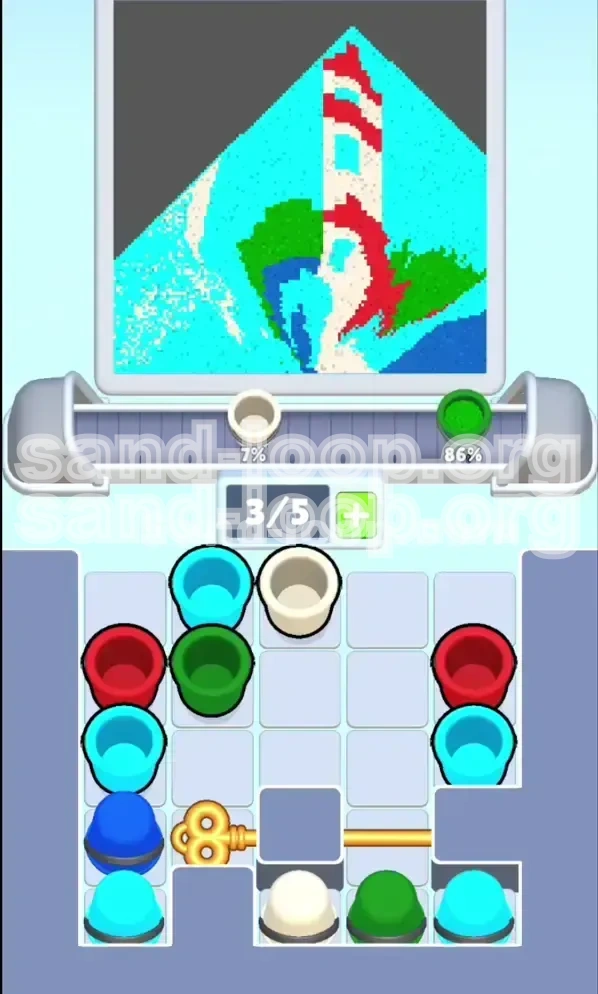
Result: You have now retrieved the Gold Key. You have two cups "buffered" (parked) on your belt. You have ~50% of your belt capacity remaining for other operations.
Phase 3: Unlocking the Supply
With the stack cleared, tap the exposed Gold Key.
This triggers a mechanical animation where the gold bar blocking the bottom-right quadrant retracts. This action is critical because it unlocks a fresh supply of Red and White cups. You cannot finish the lighthouse without this step. Do not focus on these Red/White cups yet, but acknowledge they are now available.
Phase 4: The Water Fill
Now that the key is used and the path is clear, return your focus to filling the bottom layer. Scan the entire board for any remaining Deep Blue cups.
Since you already have Cyan and Green cups occupying the first two slots of your belt, you must be careful not to jam the belt with other colors. Only tap Deep Blue cups. As you tap them, they will fly to the belt, bypass the buffered cups, and pour into the canvas. Continue this until the water meter is 100% full.
Phase 5: The Hills & Sky Release
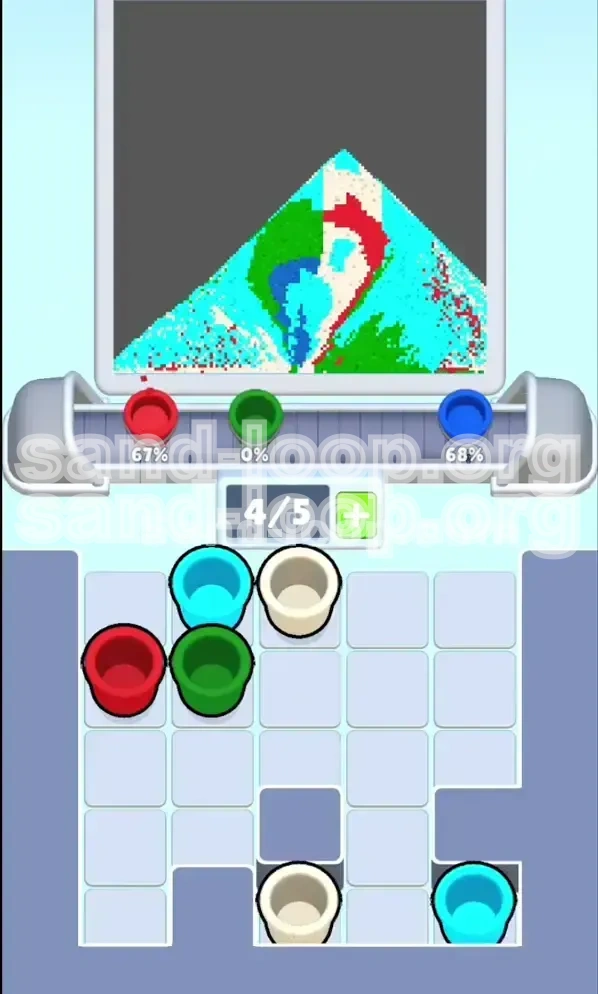
Once the water layer is complete, the sand level in the canvas rises. This "unlocks" the next layers.
1. The Green Hills layer becomes active. The Green cup you have been buffering on Slot 2 of your belt will automatically begin to pour. You may need to tap more Greens from the board to finish this section. 2. As the hills fill, the Cyan Sky layer becomes active. The Cyan cup on Slot 1 of your belt will now begin to pour.
This automatic release is why the strategy works: you parked the cars, and now the traffic jam has cleared so they can drive.
Phase 6: The Lighthouse Construction
The final phase requires manual dexterity. You now have access to the unlocked Red and White cups.
You must alternate taps between Red and White. The lighthouse is a narrow vertical slice. - Tap Red (Pours a stripe). - Tap White (Pours a stripe). - Tap Red (Pours a stripe).
Be careful not to queue three Reds or three Whites in a row, or the colors will mix on the canvas into a muddy pink, ruining the score.
Detailed Color Order & Processing Guide
Processing the colors in the wrong order is the fastest way to get a "Game Over." Here is the strict hierarchy you must follow, based on the laws of physics within the game engine.
Priority 1: Deep Blue (The Foundation)
Target: Bottom 20-25% of the canvas (Ocean). Rule: Always pour when available. Exception: Never pour if the belt is full (5/5 slots). If the belt is full, you have made a coordination error.
This color has the highest "gravity priority." It will pour even if you have other cups on the belt, provided those other cups belong to layers higher up (Green/Cyan). If you see a Deep Blue cup, it is almost always correct to tap it immediately unless you need to clear a specific blocker cup first.
Priority 2: Forest Green (The Mid-ground)
Target: The hills rising from the water. Rule: Pour only after Deep Blue is ~80% complete.
Green acts as the bridge. You will likely acquire Green cups early (due to the Key Dig) and have them sitting on your belt. Do not panic when they don't pour immediately. They are "waiting" for the water to displace enough volume. Once the water level rises, these Greens will start flowing automatically.
Priority 3: Red & White (The Focal Point)
Target: The Lighthouse tower. Rule: Strict Alternation (Red -> White -> Red).
These colors have zero "pour tolerance" for mixing. Because they occupy the same vertical band, pouring two Reds consecutively will overfill the Red stripe capacity and bleed into the White zone. You must rhythmically tap them. If you tap a Red, your very next tap must be a White.
Priority 4: Cyan (The Background)
Target: The Sky and Windows. Rule: Pour last.
Cyan is the "cap" of the level. It will not pour until the Green hills are mostly established. However, there is a micro-mechanic to watch for: The Windows. As the White stripes of the lighthouse rise, there are tiny pixel-gaps for windows. You generally do not need to aim for these specifically with a separate tap; the Cyan background usually fills them in naturally as the sky layer completes.
Understanding the "Wait" State
You will frequently encounter a situation where you tap a cup, it moves to the belt, circles around, and returns to the tray without pouring. This is not a bug.
This "Wait State" means the target layer on the canvas is physically blocked by a lower layer that hasn't risen high enough yet. - Example: You tap a Green cup. It loops. It means the water isn't high enough. - Action: Do not tap it again immediately. Find a Deep Blue cup to raise the water level.
Handling Overflow
If your conveyor belt reaches 5/5 cups and the next cup you tap needs to "Wait" (loop), you will suffer a Belt Jam, resulting in a level fail.
To avoid this: 1. Always keep at least 1 slot open on your belt (4/5 capacity). 2. If you are at 4/5 and the only available moves are "Wait State" colors, you are in a deadlock. You must restart the level, as you managed the queue incorrectly earlier.
Pro Tips & Common Mistakes to Avoid
Even experienced players can stumble on Level 34 due to its unique mechanics. Here is a breakdown of what to do and, more importantly, what not to do.
Common Mistake: The Premature Lighthouse Start
The Trap: You unlock the Red/White cups early and start tapping them immediately because they look available. The Consequence: You fill up your conveyor belt with Red and White cups. Meanwhile, the Deep Blue cups you need for the water are stuck behind the Reds/Whites on the tray. The belt jams because the Reds/Whites can't pour (the water level is too low to support the lighthouse base).
The Fix: Ignore the Red and White cups until the water layer is at least 50% filled. Even though they are unlocked, treat them as "inactive" until the foundation is laid.
Common Mistake: The Cyan Confusion
The Trap: Seeing the Cyan cup on the belt (from the initial dig) and assuming you need to use it for water details. The Consequence: You accidentally pour Cyan into the Deep Blue ocean, creating a visually jarring and incorrect color mix.
The Fix: Memorize the palette. Cyan = Sky Only. Deep Blue = Water Only. If you are working on the bottom half of the screen, never touch a Cyan cup.
Key Tip: Belt Management
Treat your conveyor belt like a rotating sushi bar. - Slots 1 & 2 are your "Buffer Zone" (for colors you dug up but can't use yet). - Slots 3 & 4 are your "Active Zone" (for colors currently pouring). - Slot 5 is your "Safety Zone" (keep this empty if possible).
If you see a cup in the Buffer Zone, do not try to force it to pour. Let it rotate. Its time will come naturally as the sand levels rise.
Key Tip: Rhythm Tapping
During the Lighthouse phase (Phase 6), speed is key. The game often gives you a massive cluster of Reds and Whites. - Do not tap: Red, Red, White, Red. - Do tap: Red, White, Red, White.
Develop a rhythm. "Red-White, Red-White." Tapping too fast without checking the color order leads to "Color Bleed," where the sand mixes into pink/orange, lowering your completion percentage.
Speed Run Tips: Fast Trackers
If you are aiming for a high score or time bonus, utilize the "Pre-load" technique. - When the level starts, immediately tap the two "Free Blues" (Cols 1 & 5). - Then, immediately perform the "Dig Down" on Column 2 (Cyan -> Green -> Blue).
Doing this within the first 5 seconds clears the central obstruction instantly. While the Blue pours, you can scan the board for the next Blues. This proactive approach prevents the "searching" animation from slowing you down later.
What To Do If You Get Stuck
Scenario: Your belt is full of colors that won't pour (e.g., three Greens and a Cyan), but the water is only 20% done.
Diagnosis: You tapped too many "top layer" colors before clearing the bottom layer. You are in a "Soft Lock."
Solution: Unfortunately, there is no "Undo" button in Sand Loop. However, you can sometimes recover if you have one slot open. Quickly scan the top rows of the columns for any Deep Blue that is immediately accessible. If you can tap one Deep Blue, it might pour, clear a slot, and start a chain reaction. If no Deep Blue is accessible, you must restart the level.
Advanced Walkthrough: Step-by-Step Instructions
Follow this exact sequence to guarantee victory. Do not deviate from the order of operations in the first 10 steps.
Step 1: The "Free Blue" Scan
As the level loads, your eyes should immediately dart to the top row. - Locate Column 1 (Far Left) and Column 5 (Far Right). - Identify the color of the top cup in both. - Action: If they are Deep Blue, tap them both immediately. If one is not Deep Blue (e.g., it's Green), leave it alone. Do not tap non-Blue cups yet.
Step 2: The Column 2 Excavation
Now, look at Column 2. You see the stack of three cups hiding the Key. - Action 1: Tap the Top Cup (Cyan). It moves to Belt Slot 1. - Action 2: Tap the Middle Cup (Green). It moves to Belt Slot 2. - Action 3: Tap the Bottom Cup (Deep Blue). It moves to Belt Slot 3.
Observation: The Deep Blue cup will pour. The Cyan and Green cups will just sit on the belt, circling. This is normal.
Step 3: Unlocking the Right Side
With Column 2 empty, the Gold Key is visible on the 4th row. - Action: Tap the Gold Key immediately.
Watch the bottom-right of the screen. The gold grid blocking the Red and White cups slides away. You now have access to the building materials for the lighthouse.
Step 4: The Water Rush (Deep Blue Phase)
Your conveyor belt has 2 occupied slots (Cyan, Green) and 3 empty slots. You are in a safe state. - Objective: Fill the remaining Deep Blue volume. - Action: Aggressively tap any Deep Blue cups you see on the board. Ignore the Reds and Whites for now.
As you tap them, they will enter the belt, pour instantly, and leave the belt. Your goal is to get the water level to 100%. As the water rises, you will notice the Green cup on your belt starts to shake or glow—indicating it's ready to pour.
Step 5: The Hills Rise (Green Phase)
Once the water hits ~90%, the Green cup on your belt will automatically activate and pour into the hills. - Action: If the Green cup pours and the hills aren't full, look for more Green cups on the board. - Note: By this point, the Cyan cup might also be pouring. Let it flow.
The bottom half of your canvas (Water and Hills) should now be complete. Your belt should be clearing up, becoming mostly empty again.
Step 6: The Lighthouse Rhythm (Red/White Phase)
Now you enter the endgame. The sky is likely still empty (or filling), but the main task is the tower. - Action: Go to the unlocked area (Bottom Right). - Pattern: Tap Red. Wait for pour. Tap White. Wait for pour.
Do not queue them up. Tap one, watch it hit the belt and pour, then tap the next. This manual pacing prevents the mixing of colors. Keep alternating until the lighthouse is tall and distinct.
Step 7: Final Touches (Sky & Windows)
With the structure built, finish the background. - Action: Tap the remaining Cyan cups. - Result: The sky fills blue, and the "windows" in the lighthouse white stripes will turn cyan automatically as the background layer fills in behind the structure.
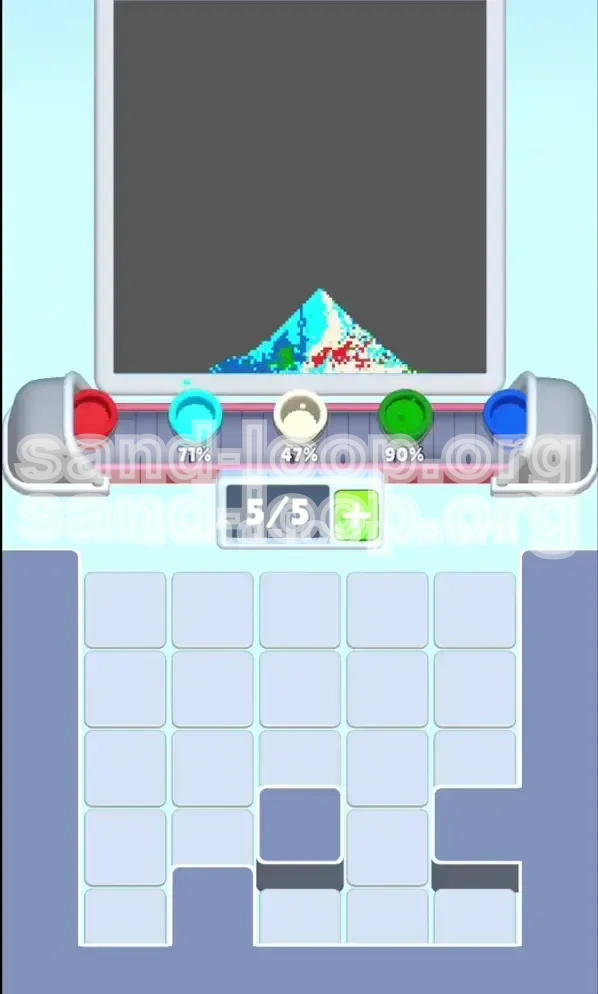
Once the final Cyan cup pours, the level is complete. Enjoy your vibrant Seascape!