
Level 36
HARDHow to solve Sand Loop level 36? Get instant solution for Sand Loop 36 with our step by step solution & video walkthrough. Sand Loop 36 tips and guide.
Play Sand Loop Now
Experience the puzzle challenge firsthand
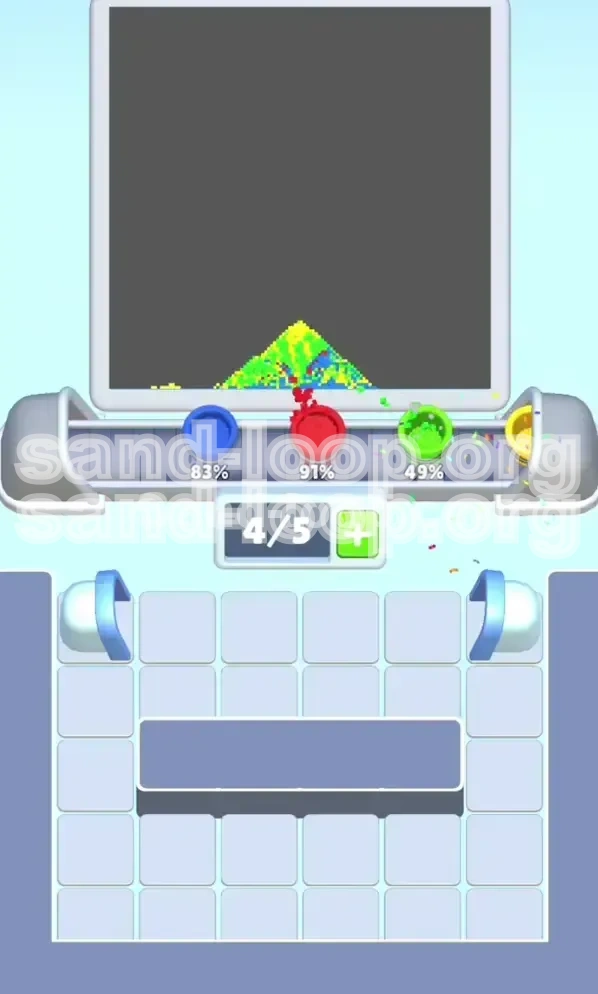
Game Screenshots
Sand Loop Level Guides
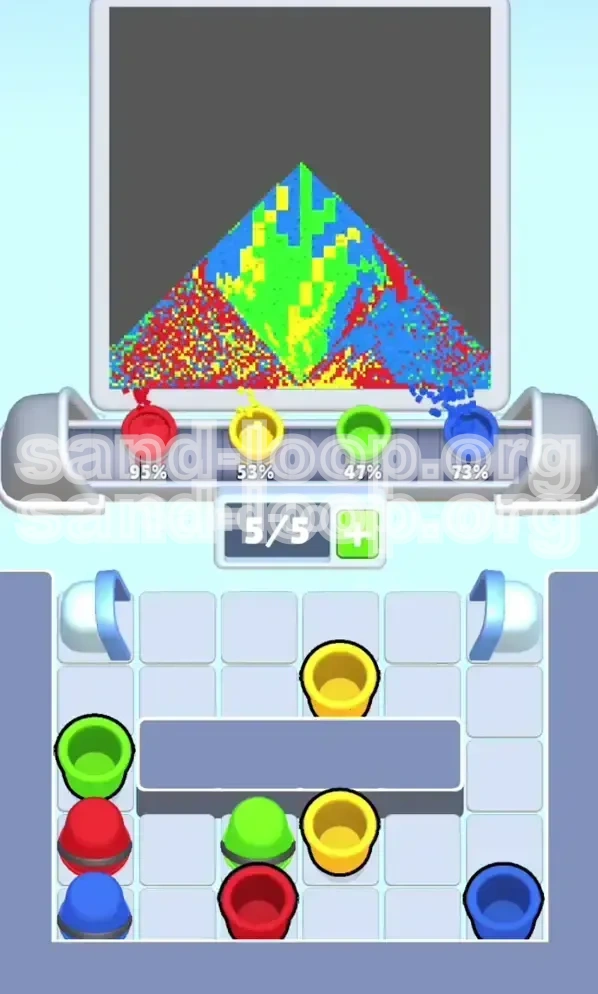
Level Overview: The "Red Poppies" Resource Challenge
Welcome to Level 36, a stage that separates the casual players from the strategists. Unlike previous levels where you could simply spray sand wildly to fill the meter, "Red Poppies" is a strict resource management puzzle. The core difficulty here is not the dexterity of your pouring, but the logic of your queue management. You are dealing with a highly restricted Belt Capacity of 5, and the specific colors you need (Red) are locked behind a multi-layered security mechanism.
This level introduces the "Twin Key" mechanic. The bottom half of your supply tray—containing the critical Greens and Reds—is sealed off by a heavy grey slab. To access it, you must play a specific opening sequence that feels counter-intuitive. Many players fail here by spamming Blue sky cups early, only to find their belt clogged with useless paint when the Red flowers finally unlock.
Key Stage Features
- The Twin Golden Keys: The bottleneck of the level. These are hidden behind the initial row of cups.
- The Grey Barrier: A massive stone slab covering 40% of your resources (Greens, Yellows, Reds).
- The "3" Ice Blocks: Side columns that unlock gradually, adding pressure to your belt management.
- 5-Slot Belt Limit: Extremely tight. You have zero room for error or holding unnecessary colors.
The Primary Difficulty Spike
The hardest part of this level is the "Wait." You will see the Blue meters open up immediately, tempting you to fill them. However, doing so creates a "traffic jam" on your conveyor belt. If your belt is full of Blue when the Red cups finally unlock, you cannot pick them up. This leads to a cascade failure where you are forced to waste Red cups or pour them in the wrong spot.
Visual Analysis of the Target
- Red (Petals): Located at the very top. Requires a high sand pile to reach.
- Green (Stems): Thin, vertical lines connecting the ground to the flowers. High risk of bleeding.
- Yellow (Ground): The absolute base layer. Must be established first to support upper layers.
- Blue (Sky): The background. Aggressive pouring here can destroy the thin Green stems.
Winning Condition
To secure the 3-star rating, you must finish with less than 5% waste and complete the image in under 90 seconds. This requires a disciplined trigger finger: knowing when to stop pouring one color to switch to another instantly.
Mental Preparation
Ignore the top screen's percentage meters for the first 30 seconds. Focus entirely on the bottom screen's tray logic. If you unlock the keys quickly, the level becomes a standard coloring job. If you fumble the keys, it becomes impossible.
Step-by-Step Walkthrough: From Lockdown to Bloom
This guide breaks down the level into three distinct phases: The Unlock Phase, The Foundation Phase, and The Detail Phase. Follow this order strictly.
Phase 1: Breaking the Initial Seal (Moves 1-4)
At the start, the bottom center of your tray is a solid block of grey. You cannot touch the Greens or Reds yet. Your only movable options are the Green and Yellow cups at the very top center.
- Move 1: Tap the Top-Center Green Cup. Add it to your belt.
- Move 2: Tap the Top-Center Yellow Cup. Add it to your belt.
- Crucial Pause: Look at the tray. The moment those two cups clear the dispenser, two vertical gold rods will slide away, revealing the Twin Golden Keys in the "Next" row.
- Move 3 & 4: Immediately tap both Golden Keys. Do not pour any sand yet. Your belt should now have 1 Green and 1 Yellow waiting, and 2 empty slots.
Phase 2: Opening the Reserves
Activating the keys triggers a massive shift in the level layout. The grey slab crumbles, and the vertical rods disappear. This unlocks the "Payload": the bottom row containing Green, Yellow, and the precious double-Red cups.
- Observe the Side Columns: Notice the '3' blocks on the far left and right. As you made your first moves, the counter ticked down. These are now turning into Ice Blocks.
- Belt Management Check: Your belt currently has 2 items. You have 3 empty slots.
- The Trap: Do not grab the newly exposed Reds yet. You need to build the ground first.
- Action: Grab the Bottom-Center Green and Bottom-Center Yellow that were just revealed. Place them on the belt behind your first two cups.
Phase 3: Establishing the Ground Layer (Yellow)
Gravity is your enemy here. If you paint the floating flowers before the ground is ready, the sand slides off into the void. You must build the "Yellow Sand Ground" to act as a catchment basin.
- Pouring Sequence: Take your first Yellow cup to the canvas.
- Target Zone: Pour slowly at the very bottom of the image. You are creating a flat, yellow platform.
- Volume Control: You want the Yellow meter to hit about 60% before you stop. If you overfill, the yellow sand will climb up the stem and ruin the green separation.
- Why this matters: This yellow platform prevents the Red flower sand from sliding off the screen later.
Phase 4: Constructing the Skeleton (Green)
With the ground set, you need to build the plant's structure. The Green stems are narrow and vulnerable. If the Blue sky touches them before they are "solid," the colors will bleed into a muddy teal.
- Precision Pouring: Take the Green cups. Focus the stream on the center vertical axis.
- Stability Check: Ensure the Green sand is piling up on top of the Yellow base. Do not let it touch the sides.
- Monitor Meters: If Green is at 50% and Blue is at 0%, you are in good shape. If Blue is rising faster than Green, you are pouring too aggressively or in the wrong spot.
- Next Batch: Keep an eye on the tray for the next Green cup spawning. You usually need 3-4 Green cups total to secure the stems.
Phase 5: The Final Red Bloom
This is the climax of the level. You have saved your Red cups (from the bottom row unlock) for last. By now, your sand pile should be high enough to support the flowers.
- Timing: Only pour Red when the Green stems are visually distinct and the Yellow ground is solid.
- The "Head" Shot: Pour the Red sand directly onto the top tips of the Green stems. Gravity will pull it down slightly, forming the flower head perfectly.
- Collision Physics: The Red sand will sit on top of the Green, which is sitting on the Yellow. This layering is crucial for the "pixel art" look.
- Final Polish: Once the flowers are formed, use the remaining Blue cups to fill the corners of the sky, being careful not to touch the Red petals.
Color Order Logic: The Dependency Chain
Why can't you just paint the sky first? In Sand Loop, physics dictates the strategy. Here is the scientific breakdown of the color dependency chain for Level 36.
The "Bottom-Up" Rule
Sand is an accumulative resource. Every pixel you pour adds weight to the stack.
- 1. Yellow (Base): Must be 100% complete before any other color touches the upper structure. It acts as the foundation.
- 2. Green (Support): Must be poured *onto* the Yellow. It cannot exist in mid-air. It must reach a certain height (approx 40% of screen) before Red can be introduced.
- 3. Red (Accent): The heaviest payload. It must land on Green. If it hits Yellow, it looks like dirt. If it hits Blue, it turns purple.
- 4. Blue (Background): Should be filled in the negative space *around* the growing plant. It is the "background" noise.
The Percentage Balancing Act
Watch the bars at the top of the dispenser.
- Ideal Ratio: Yellow (100%) > Green (80%) > Red (60%) > Blue (100%).
- The Risk: If Blue hits 90% before Green hits 30%, your belt is likely clogged with Blue, and you have failed the resource management aspect.
- Adjustment: If you see Blue rising too fast, physically stop pouring Blue. Leave the cup on the belt if you have to, just to find a Green or Yellow cup to rebalance the spawn rate.
Unlock Order vs. Pour Order
There is a critical distinction between *unlocking* colors and *pouring* them.
- Unlock Order: Green/Yellow (Top) -> Keys -> Green/Yellow/Red (Bottom).
- Pour Order: Yellow -> Green -> Red -> Blue.
- The Disconnect: Notice that Red unlocks early (Phase 2), but we don't pour it until Phase 5. This delay is the #1 skill tested in this level. You must have the discipline to hold the Red cup on your belt without pouring it.
Dealing with "Locked" Spawns
Sometimes, a color you need won't spawn because the dispenser is "blocked" by physics logic.
- Scenario: You need Red, but only Blue is spawning.
- Cause: The game detects you have too much Blue "waste" or unfilled space.
- Solution: Pour a small amount of Blue in the corner to clear the "buffer," forcing the machine to spawn the next color in the queue (Red).
Key Tips and Strategic Notes
Master these specific techniques to handle the "Twin Key" mechanism and the tight belt constraints.
The "Belt Slot" Mathematics
You have 5 slots. Here is the optimal loadout during Phase 2 (The Unlock):
- Slot 1: Green (Pouring/Active)
- Slot 2: Yellow (Waiting)
- Slot 3: Key (Used immediately)
- Slot 4: Key (Used immediately)
- Slot 5: Empty (Crucial for catching the newly unlocked Red)
If you fill Slot 5 with a random Blue cup before hitting the keys, you cannot pick up the Red that spawns from the unlock. You will be forced to pour the Blue, wasting time.
The "Tap and Wait" Technique
When you hit the Golden Keys, there is a 1.5-second animation where the barrier crumbles.
- Tip: During this animation, you cannot control the belt.
- Strategy: Plan your tap so that as the animation ends, your finger is already hovering over the newly exposed Red cup. This micro-optimization saves precious seconds on the speed run clock.
Identifying "Dummy" Cups
Not every cup on the tray is useful.
- The Side Blues: The Blue cups located under the '3' Ice Blocks are often "Dummy" cups. They are there to tempt you.
- The Rule: Ignore them until the very end. If you pick them up early, they sit on your belt, taking up space that is needed for the Greens and Reds required to build the flower structure.
The 50% Pouring Rule
In this level, precision trumps speed.
- Technique: When pouring the Green stems, do not drag your finger across the whole screen. Tap the specific spot where the stem meets the ground.
- Benefit: This creates a vertical pillar of sand rather than a messy mound. It preserves the "sky" pixels for the Blue color later.
Common Mistakes to Avoid
90% of failures in Level 36 happen because of these three specific errors. Learn to recognize them before you make them.
The "Premature Blue" Mistake
This is the most common failure mode. Players see the Blue sky is empty and instinctively start filling it.
- The Error: Filling 30-40% of the Blue sky before unlocking the Reds.
- The Consequence: When the Reds finally unlock, your belt is full of Blue. You have to dump the Blue (waste) or pour it over your unfinished stems (bleed).
- The Fix: Accept that the sky will be empty for the first 45 seconds. Trust the process.
The "Key Forget" Panic
In the heat of the moment, players clear the top Green/Yellow and immediately start pouring.
- The Error: Pouring the Green/Yellow immediately after picking them up, without hitting the keys first.
- The Consequence: You build a tiny bit of stem, but the rest of the level (Reds/Bottom Greens) remains locked behind the grey slab. You run out of paint on the belt with no way to get more.
- The Fix: Make hitting the keys a muscle memory action. Pick up cup -> Check Keys -> Pour.
The "Muddy Stem" Accident
This happens during the middle phase of the level.
- The Error: Pouring Blue sky too aggressively before the Green stems are wide enough.
- The Consequence: The Blue sand bleeds into the Green sand. Since blue is a darker pigment, it turns the stems a dark, ugly teal. The level detects this as "incorrect" and lowers your score percentage.
- The Fix: Keep the Blue stream thin and focused on the far edges. Never pour Blue directly next to a wet Green stem.
The "Overfilled Yellow" Base
Yellow is forgiving, but not infinite.
- The Error: Using 5 Yellow cups because you want to be safe.
- The Consequence: The yellow mound creeps up the screen, eating into the space reserved for the Red flowers. When you finally pour Red, it lands on Yellow instead of Green, looking like an error.
- The Fix: Stop pouring Yellow once the meter hits 60-70%. The remaining gaps can be filled later with Blue or Red.
Stuck? Troubleshooting and Speed Run Tips
If the level isn't clicking, or if you are chasing that #1 leaderboard spot, use these advanced tactics.
Troubleshooting: "My Belt is Stuck!"
Symptom: You have 5 cups on the belt, none are the color you need, and the dispenser isn't giving you the right one.
- Diagnosis: You have over-harvested. The game gives you colors based on what is missing on the canvas, but if your belt is full of "unpoured" paint, the logic gets confused.
- Emergency Fix: You must waste a cup. Drag a cup to the corner of the screen (off-canvas) to dump it. This opens a slot and usually forces the dispenser to spit out the "missing link" color you need.
Troubleshooting: "Reds Won't Appear!"
Symptom: You unlocked the barrier, but no Red cups are spawning.
- Diagnosis: You likely haven't poured enough Yellow/Ground yet. The game logic prevents Red (flowers) from spawning until there is a physical place for them to land.
- The Fix: Go back and finish the Yellow ground base. Once the Yellow meter is >50%, Reds will start spawning rapidly.
Speed Run Strategy: The "Double Tap"
For advanced players looking to shave seconds off the clock.
- The Move: Instead of tapping a cup and waiting for it to move to the belt, tap the cup, and immediately tap the *next* cup you want.
- Application: Use this on the Keys. Tap Green, Tap Yellow, Tap Key 1, Tap Key 2 in rapid succession (0.5 seconds).
- Result: Your belt fills up instantly, and the barrier animation starts sooner. This single trick can save 3-4 seconds on a clear run.
Speed Run Strategy: Ignoring the Perfection
Perfectionism is the enemy of speed.
- The Tip: Don't aim for 100% pixel-perfect lines on the Green stems. A slightly messy stem that is 80% filled is better than a perfect stem that takes 20 seconds to draw.
- Trade-off: The level is generous with overlap. As long as you get the colors roughly in the right zone (Yellow bottom, Green middle, Red top), the physics engine will settle the sand correctly.
- Goal: Focus on keeping the belt moving. A moving belt is a fast belt.