
Level 37
HARDHow to solve Sand Loop level 37? Get instant solution for Sand Loop 37 with our step by step solution & video walkthrough. Sand Loop 37 tips and guide.
Play Sand Loop Now
Experience the puzzle challenge firsthand
Game Screenshots
Sand Loop Level Guides
Sand Loop Level 37 Master Guide: The Golden Potion Challenge
Level Introduction
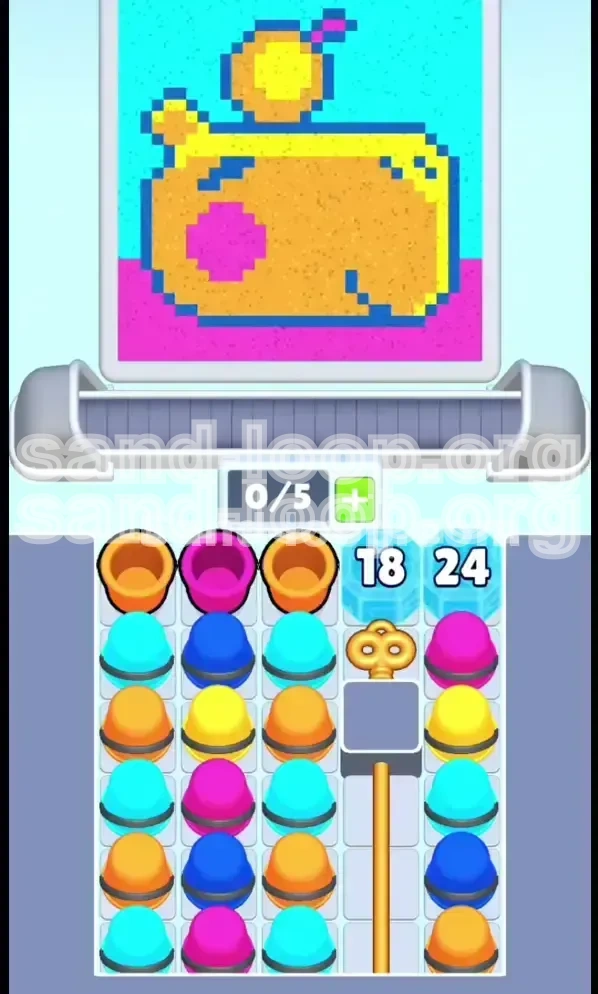
Sand Loop Level 37, titled "The Golden Potion," is a pivotal strategic stage that tests your resource management and spatial reasoning skills. Unlike previous levels where you could focus entirely on art, this stage introduces a hard "Ice Block" mechanic that restricts access to over 40% of your required colors until specific conditions are met. The target image—a glowing Golden Potion Bottle set against a Cyan background—requires a high degree of precision, especially regarding the layering order of the pink and yellow sands.
Primary Objectives
To achieve a three-star rating and complete the puzzle, you must accomplish three main goals:
- Breach the Ice Defense: Process 18 units of sand from the left columns to shatter the primary ice block.
- Secure the Golden Key: Lower the second counter (24 units) to retrieve the key and unlock the right-side supply tray.
- Construct the Potion: Layer Pink, Yellow, Orange, and Cyan sands in the correct "Bottom-Up" sequence to form the bottle without color contamination.
The Resource Deficit
The defining feature of Level 37 is the scarcity of sand. You begin with a deficit of approximately 30% compared to the volume required to fill the canvas. This means you cannot afford to waste a single cup of sand. Every misstep or accidental over-pour of a background color will force a restart, as the reserves in the right column are just enough to finish the level, with zero margin for error.
The Layering Logic
Physics in Sand Loop dictates that heavier, earlier pours sink to the bottom, while later pours settle on top. For the Golden Potion, the order is critical:
- Base Layer: Pink Foundation.
- Core Layer: Yellow Body.
- Detail Layer: Orange Stoppers and Accents.
- Background Layer: Cyan Void (must be poured last to avoid bleeding into the bottle).
Phase 1: The "Pink Foundation" Strategy
Establishing the Floor
The most common mistake in Level 37 is ignoring the floor. The target image features a distinct pink strip at the very bottom of the canvas. If you start by pouring yellow or blue, those colors will sink to the bottom layer, making it impossible to create a clean pink floor later.
Action: Immediately scan columns 1 and 2 for Pink cups. Tap them sequentially.
Placement Mechanics
When pouring the initial Pink sand, do not dump them all in one continuous stream. Instead, use a "tap-and-wait" rhythm. Pour one cup, wait for it to spread across the bottom 10% of the canvas, then pour the next. This creates a flat, solid foundation rather than a messy mound that eats up too much of your precious pink resource.
The Conveyor Lineup
Keep your conveyor belt managed. You want a queue of 3-4 Pink cups ready to go. If you see Blue or Yellow cups approaching the intake slot, slow down your tapping. Let the Pink cups queue up so you can lay the floor uninterrupted. This prevents "contamination" where a stray Blue cup slips into your Pink foundation.
Preserving the "Donut Hole" Pink
While the floor is important, remember that the potion bottle has a pink circle *inside* the yellow body. You need to reserve roughly 15-20% of your total pink sand volume for this detail. If you use 100% of your left-side Pink for the floor, you will be forced to use the reserve Pink from the right column, which delays your Ice Breaking phase. Try to stop pouring the floor when it is 90% complete, leaving the last 10% for later.
Dealing with Overflow
If you accidentally pour too much Pink and it starts rising up the sides of where the bottle should be, do not panic. You can actually use this to your advantage. The Pink sides can act as a "container" or wall to hold the Yellow sand you will pour next. Just ensure the Pink doesn't spill into the center "Donut Hole" area.
Calculated Waste
Sometimes, you must be ruthless. If a Purple or Green cup appears (rare, but possible depending on RNG), and you have zero use for it in the Golden Potion schema, you might need to "burn" it just to keep the Ice Counters moving. However, in Phase 1, prioritize Pink above all else.
Phase 2: The "Burn Phase" – Breaking the Ice
Understanding the Counters
Look at the Ice Blocks on the right side. You will see two numbers: 18 and 24. These represent "Action Points." You must process 42 cups total (18 + 24) to clear the path. The countdown only decreases when you pour sand from the unlocked left columns.
Speed Pacing
Once the Pink floor is laid, enter "Speed Pacing" mode. Fill the 5-slot conveyor capacity to the max. You are no longer aiming for artistic perfection; you are aiming for throughput. Pour Yellow, Orange, and Blue cups as fast as they appear.
The "Yellow Mound" Technique
Since the bulk of the bottle is Yellow, start dumping Yellow cups in the center of the canvas during this phase. Don't worry about the edges yet. By creating a massive mound of Yellow in the center, you are actually building the main body of the potion while simultaneously chipping away at the Ice Block counters. This is the most efficient way to multitask in this level.
Managing the Right-Side Lock
Do not attempt to interact with the right-most column. It is physically impossible. The Grey Gate is down. Focus entirely on draining Columns 1, 2, and 3. Visualize the Ice Blocks as a health bar for the level; you are "grinding XP" by pouring sand to lower that bar.
Watching for the "Key Drop"
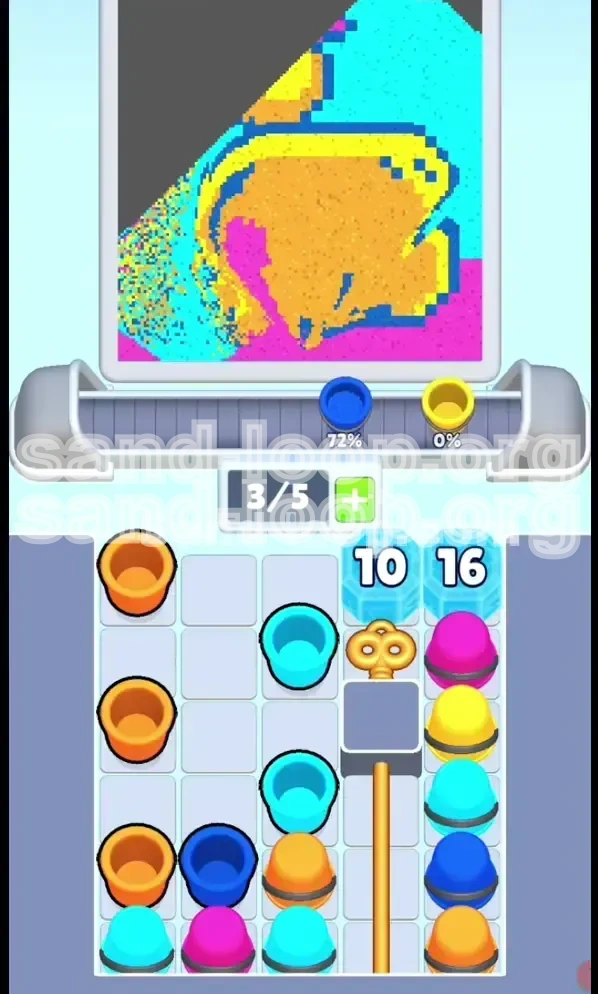
As the counter approaches zero (specifically the '24' counter), pay attention to the Golden Key icon underneath the ice. The moment the counter hits 0, the Ice shatters. You usually hear a distinct crystal-breaking sound effect. Pause for a split second here to ensure the game registers the Key retrieval before you blindly start tapping the new supply.
The Transition Point
This is the most dangerous moment in the level. The left columns are likely empty or sparse. The Grey Gate slides open. The game auto-fills your conveyor with the "Reserve Stack." Do not auto-tap! Look at what is now available on the right.
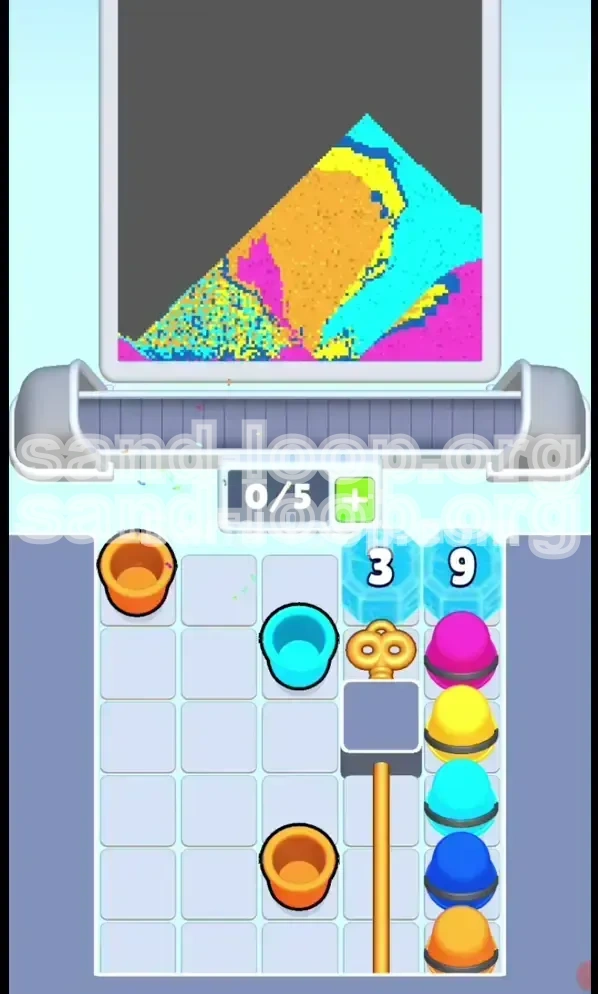
Phase 3: Unlocking and Utilizing the Reserve Column
The Reserve Stack Composition
Once the Grey Gate opens, you gain access to a curated stack of colors. From top to bottom, this is typically arranged as: Blue -> Cyan -> Yellow -> Pink -> Orange. (This may vary slightly, but Blue/Cyan is almost always at the top of the reserve).
Why Blue Comes First
The top of the reserve is usually Blue or Cyan. This is by design. The game forces you to finish the background or outlines last. If you try to grab the Pink at the bottom first, you have to waste the top layers. Accept the stack order and adapt your strategy.
The "Batching" Method
When the Reserve unlocks, do not tap cups one by one. The conveyor moves fast. Tap the entire supply stack 3-4 times in rapid succession to fill your conveyor belt instantly. This ensures you have a full "hand" of resources to work with for the final phase without interruption.
Handling the "Golden Key" Delay
Sometimes there is a 1-2 second delay between the Ice shattering and the Grey Gate opening. Do not tap frantically thinking the game has glitched. Wait for the mechanical sliding animation of the gate to finish before feeding new cups into the intake.
Inventory Assessment
Before pouring, take a quick mental inventory. You now have:
- A partially finished Pink floor.
- A massive mound of Yellow in the center (from Phase 2).
- A fresh supply of outlines (Blue) and background (Cyan).
Prioritizing the Bottle Outline
If your Yellow mound is messy and doesn't look like a bottle, use the new Blue cups to "cut" the shape. Pour Blue down the sides. The Blue sand is heavier than Yellow (in terms of visual layering logic) and will help define the silhouette of the bottle against the background you are about to pour.
Phase 4: The "Cyan Flood" and Final Detailing
The Background Danger Zone
You now have access to Cyan. Warning: Cyan is the "Void." It represents the empty air behind the bottle. If you pour Cyan before the bottle walls are solid (Blue) and the body is full (Yellow), the Cyan will flood inside the bottle, turning it green or muddy blue. The bottle must be a "closed container" before you unleash the flood.
The "Cyan Flood" Technique
Once the Blue outlines and Yellow body are solid, tap 3-4 Cyan cups in a row. Pour them onto the edges of the canvas, not the center. Let the Cyan roll down the sides and fill the background from the outside in. This prevents the Cyan from splashing over the top of the bottle and ruining the stopper.
Filling the "Donut Hole"
Remember that Pink circle in the middle of the bottle? Now is the time to fix it. If you have Pink cups left (either from the conveyor or the reserve), carefully tap one. Pour it gently into the center of the Yellow body. If the center is already full of Yellow, you might need to use a "displacement" strategy (pouring Blue/Cyan nearby to shift the sand) or just accept a slightly off-model art piece. Ideally, you saved that Pink cup from Phase 1.
The Stopper (Finishing Touch)
The very top of the bottle requires an Orange stopper. You likely saved one Orange cup from the "Burn Phase" or have one at the bottom of the reserve. Pour this last. It sits on top of the Yellow/Cyan pile. It acts as the cherry on top of the sunday.
Gap Filling with Blue
If you see ugly white gaps (canvas showing through) on the sides of the bottle, use your remaining Blue cups. Do not pour a full stream; tap the cup to release half a cup's worth of sand. This precision filling is what separates a "Clear" from a "Perfect" run.
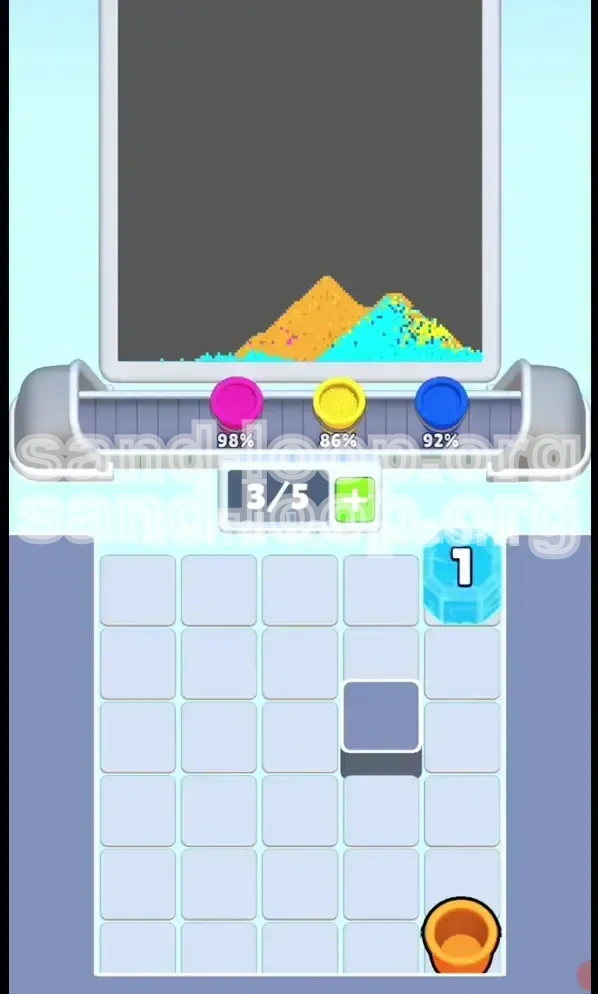
Final Review
Wait 5 seconds after the last pour. Sand takes time to settle. Sometimes a gap looks huge but fills itself as the sand shifts. If the level doesn't complete, check the corners of the canvas—often a tiny pocket of background remains unfilled, requiring one last drop of Cyan.
Advanced Strategies & Troubleshooting
The "Sand Bridge" Glitch
Sometimes, pouring sand too fast creates a "bridge" or arch over empty space, leaving a hollow pocket underneath. This is fatal in Level 37 because you run out of sand. Solution: If you see a bridge forming, tap the side of the screen or pour a different color on top of it to collapse the structure and fill the void.
Color Contamination
Symptom: Your potion looks green instead of Golden. Cause: You poured the Cyan background too early. Fix: You can't undo it, but you can try to bury the mistake by pouring thick Yellow on top. However, the transparent physics often make this impossible. It is usually better to restart immediately if Cyan touches the Yellow body too early.
The "Empty Left Column" Panic
Players often freak out when Columns 1-3 are empty and the Ice Block is still at 5/10. Don't Panic. Check the conveyor. There are often cups stuck in the intake tube that haven't registered yet. Or, check if a single cup is "stuck" behind a stack. Tap furiously to dislodge it.
Optimizing for Speed Runs
To finish Level 37 in under 60 seconds:
- Pre-plan your Pink floor (3 cups only).
- Mash Yellow during the Burn Phase without looking at the art.
- As soon as the Gate opens, tap the Reserve stack 5 times instantly.
- Pour Cyan in a continuous "U" shape around the bottle to seal it.
Dealing with RNG (Random Number Generation)
The left column colors are slightly randomized. If you get unlucky and receive 5 Blue cups in a row at the start, use them to create the side walls of your bottle immediately. Do not wait for Yellow. Adapt the art to the supplies you are given. The "Golden Potion" can be blue-tinted and still pass the level check.
Mental Checklist for Completion
Before hitting that final "Submit" or letting the timer run out, verify:
- Is the bottom strip Pink?
- Is the center Yellow (or Orange/Yellow mix)?
- Is the background Cyan (not white)?
- Are the outlines Blue?