
Level 222
HARDHow to solve Sand Loop level 222? Get instant solution for Sand Loop 222 with our step by step solution & video walkthrough. Sand Loop 222 tips and guide.
Play Sand Loop Now
Experience the puzzle challenge firsthand
Game Screenshots
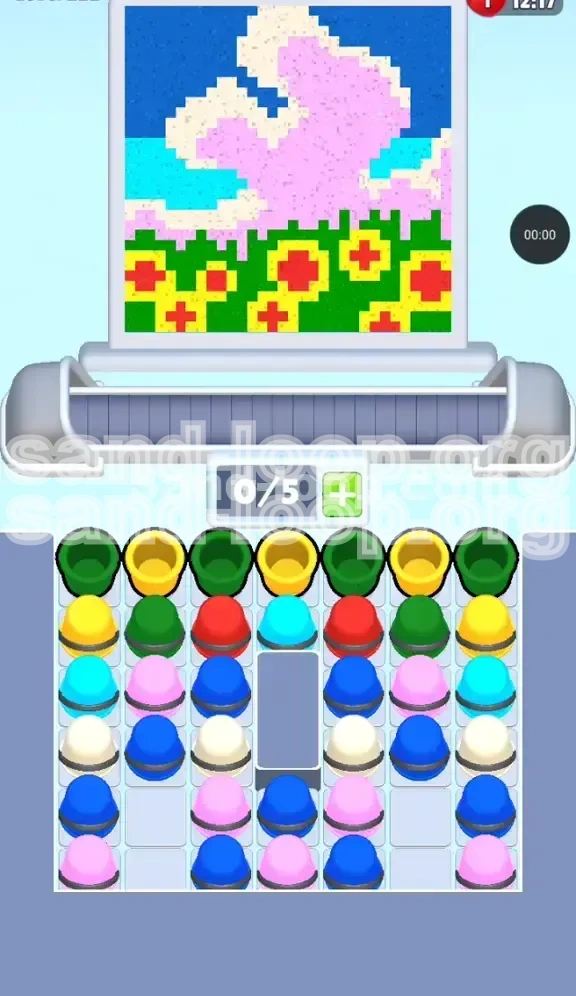
Sand Loop Level Guides
Sand Loop Level 222: The Flamingo Masterpiece
Visual Breakdown of the Canvas
Level 222 presents a vibrant, pixel-art landscape titled "The Flamingo & Flower Field." The artwork is vertically divided into four distinct color zones, which creates the primary challenge for this stage. The canvas features a large pink flamingo (occupying approximately 35% of the frame) standing in a field of flowers against a bright blue sky. Because the color regions are stacked vertically—grass at the bottom, sky at the top—your cup management strategy must be precise to avoid painting yourself into a corner.
The Inventory Trap
Unlike previous levels where you might pick colors at random, Level 222 locks essential colors behind a wall of "wrong" colors. The supply tray is arranged in a rigid vertical dependency. The colors you need for the top of the painting (Blue Sky, White Clouds) are buried at the very bottom of the stack. Conversely, the colors for the bottom (Green Grass, Yellow Flowers) are sitting right on top. This forces a strict "bottom-up" painting approach. If you try to rush the top layers first, you will physically clog your dispenser with unusable bottom-layer colors.
The 5-Slot Bottleneck
The conveyor belt in this level allows for exactly 5 slots. Given that there are 7 distinct colors in the palette (Green, Yellow, Red, Cyan, Pink, White, Blue), slot management is critical. You cannot simply load all your colors at once. You must treat the belt like a rotating queue, constantly replacing "dead" colors (colors you have finished using) with "active" ones. A common failure point is keeping a Green cup on the belt while you are trying to work on the Sky, effectively wasting 20% of your processing capacity.
Strategic Overview
To beat Level 222, you must adhere to a strict "Bottom-to-Top" execution protocol. You will begin by excavating the bottom layer of the cup stack (Green/Yellow), move through the middle layer (Red/Cyan/Pink), and finish with the bottom layer of the stack (Blue/White). Speed is secondary to rhythm; if you maintain a steady flow of 3-4 active cups on the belt, the level resolves itself naturally.
Mission Objectives and Color Strategy
Primary Goal: Clear the Grass Foundation
Your first objective is to secure the bottom 15% of the canvas. This region consists of a checkerboard pattern of Green grass and Yellow flower petals. You must clear the initial supply of Green and Yellow cups to unblock the Red and Cyan cups sitting beneath them. Do not move to the next phase until the bottom strip is 100% filled.
Secondary Goal: Flower Precision
Once the grass is laid, you must immediately insert Red centers into the Yellow flowers. This is the high-precision phase. The Red areas are small pixels (roughly 4x4 blocks). If you miss these now, it becomes incredibly difficult to retrieve Red cups later once the belt is full of Blue and White cups.
Tertiary Goal: The Horizon Line
After the flowers are complete, you must establish the "Horizon Line" using Cyan. This color separates the grass/field from the flamingo and sky. It acts as a buffer. Failing to lay the Cyan line correctly will result in your Pink flamingo bleeding into the Green grass, creating a muddy visual error.
Final Goal: The Flamingo and Sky
The final 50% of the level involves painting the massive Pink Flamingo and the Blue Sky. Because the Pink and Blue cups are located at the very bottom of the supply tray, they only become available after you have exhausted the Green, Yellow, and Red supplies. This phase is about volume filling—large open spaces require you to keep the belt full of Pink and Blue cups to maximize throughput.
Step-by-Step Walkthrough: The Excavation Phase
Step 1: The Green/Yellow Load-In
When the level starts, your supply tray will show a top row composed entirely of Green and Yellow cups.
- Action: Pull 3 Green cups and 2 Yellow cups onto the conveyor belt immediately.
- Execution: Focus the nozzle on the bottom strip of the canvas.
- Technique: Use the Green to fill the negative space (the dirt) between the flowers. Do not worry about staying perfectly in the lines yet; you will "erase" mistakes with the Yellow petals next.
Step 2: Petal Placement
With the background green laid, switch your active color to Yellow.
- Action: Target the pixelated flower shapes scattered across the green field.
- Tip: The Yellow petals act as a mask. If you accidentally paint over a green spot, it's fine. However, if you paint over a spot that is *supposed* to be a Red center, you will create more work for yourself later.
- Management: Once the Yellow cups are empty, remove them from the belt immediately to free up slots.
Step 3: Unblocking the Red Layer
As you empty the Green and Yellow cups, you will notice the "Next Row" of the supply tray revealing Red cups.
- Action: Do not wait for the Green to be 100% perfect. As soon as you see Red available, load 1 or 2 Red cups onto the belt.
- Reasoning: You need to strike while the iron is hot. The Red flower centers are small and easy to miss. Doing them now while you are still "zoomed in" on the bottom of the canvas saves time later.
Step 4: The Mid-Canvas Transition
With the bottom strip complete (Green/Yellow/Red), you must clear the belt of all "Earth Tones."
- Action: Eject any remaining Green or Yellow cups.
- Preparation: The supply tray should now be exposing the Cyan (Water) and Pink (Flamingo) layers.
- State Check: Verify that the bottom 20% of the painting is totally finished. You will not get a chance to come back down here easily.
Step-by-Step Walkthrough: The Flamingo and Sky
Step 5: Establishing the Cyan Horizon
Before you touch the Pink, you must lay down the Cyan "water/horizon" strip.
- Action: Load 2 Cyan cups.
- Placement: Paint the thin band of water located immediately above the grass field.
- Warning: Do not go too high. The Cyan strip is narrow. If you bleed into the Pink zone, the Flamingo will look like it is floating in mud.
Step 6: The Pink Flamingo Body
This is the most satisfying part of the level. The Flamingo is a massive, contiguous block of color.
- Action: Fill the remaining 4 slots on your belt with Pink cups.
- Technique: Aggressively fill the center of the canvas. The Pink zone is large and forgiving.
- Throughput: Keep the belt moving. Since this is a single-color task, you can process cups very quickly here.
Step 7: Digging for White and Blue
With the Pink body complete, you are left with the top of the canvas (Sky) and the details on the Flamingo (White accents).
- Action: You must now drain the Pink cups to access the very bottom of the tray, where White and Blue are hiding.
- Strategy: Load 1 White cup and 4 Blue cups.
- Detailing: Use the White to trace the edge of the Pink flamingo (the neck and wing definitions).
Step 8: The Final Sky Flood
The endgame is a race to fill the remaining empty space.
- Action: Use the Blue cups to flood the top 25% of the canvas.
- Finish: Ensure no "holes" remain in the sky. The background is the final layer, so you can be messy with the Blue as long as it stays within the upper bounds.
Advanced Tactics and Speed Run Tips
The "Two-Cup" Rule
To maximize your speed, never let the belt fill up with 5 colors unless absolutely necessary. In the early game (Grass/Flowers), try to operate with only 2 or 3 cups on the belt. This allows you to cycle through the "Supply Stack" faster, revealing the Red and Pink cups sooner. Keeping the belt lean is the key to preventing gridlock.
Recognizing the "Spacer" Block
In the supply tray, you may notice a Grey or "Spacer" cup mixed in with the colors. This is not a paint cup; it is a physical blocker designed to make the tray layout symmetrical.
- Tip: If you see a Spacer, treat it as a wild card. If you pull it, simply eject it immediately or use it to separate two cups of the same color on the belt to prevent accidental mixing.
Color Batching for Efficiency
Do not alternate colors on the belt unless the canvas requires it. For example, when painting the Flamingo, do not keep a single Blue cup on the belt "just in case." Eject the Blue temporarily to fill the belt with 5 Pinks. This "Batching" strategy reduces the number of times you have to stop and reload the dispenser, which is the biggest time sink in Sand Loop.
Handling "Dry Spells"
Sometimes, you will clear a color (e.g., Yellow) but still have unpainted pixels on the canvas. This happens if you poured inefficiently.
- Solution: Do not panic. Look at the supply tray. If the next color in the stack is Red, pull the Red. Use the Red cups to finish the flowers.
- Correction: Only later, when you have a spare slot, should you pull a "fresh" Yellow cup to touch up the missed spots. Never reverse the entire production line for a few pixels.