
Level 247
HARDHow to solve Sand Loop level 247? Get instant solution for Sand Loop 247 with our step by step solution & video walkthrough. Sand Loop 247 tips and guide.
Play Sand Loop Now
Experience the puzzle challenge firsthand
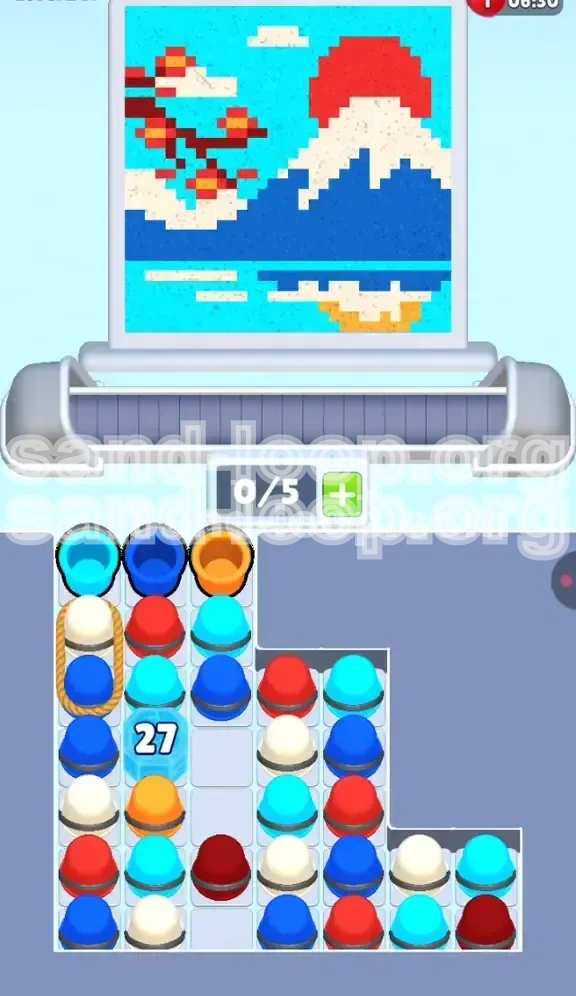
Game Screenshots
Sand Loop Level Guides
Level 247 Overview: The Mt. Fuji Challenge
Welcome to the serene yet treacherous Level 247 of Sand Loop. While the target image—a pixel-perfect rendition of Mt. Fuji with a rising red sun—suggests a peaceful painting session, the underlying mechanics are designed to test your logistical planning rather than your artistic speed. This level is a masterclass in resource management, characterized by two primary constraints: a restrictive Rope mechanic on the left and a massive Ice Block blockade in the center.
Unlike previous levels where you could simply pour colors as they appeared, Level 247 demands a strict execution order. You are dealing with a "Funnel" scenario where your initial moves are restricted to the far right of the screen until you can break the central lock. The visual appeal of the cherry blossoms and the reflective lake masks the high-stakes puzzle happening in your supply tray.
The Core Mechanics
This stage introduces a heavy dependency on blockers. The Ice Block (Counter: 27) is not just a delay; it is a strategic filter that forces you to play the level in two distinct phases. Furthermore, the Rope mechanic binding White and Blue cups on the left creates a "slot tax," requiring you to reserve specific inventory spaces for dual-color usage. You cannot afford to be sloppy with your empty slots here.
Visual Analysis of the Target
The target image is dominated by three distinct zones: the upper Cyan Sky (occupying roughly 40% of the canvas), the central Dark Blue Mountain (35%), and the Red Sun/White Snowcap combo (15%). The bottom 10% is a complex mix of Orange reflections and Cherry Blossom details. The challenge lies in the fact that the colors you need most frequently (Cyan and Blue) are blocked, while the specific detail colors (Red, White) are buried deep.
The Logic Behind the Layout
The game intentionally tempts you with "false positive" moves. Early in the level, you will see Cyan cups available, but pouring them immediately often leads to a jam because you cannot yet access the adjacent pixels locked behind the mountain layers. The level design forces you to prioritize the "foundation" (Blue/White) before the "atmosphere" (Cyan/Red).
Difficulty Spike Factors
Players often find this level difficult because it disrupts the "flow state." You are frequently forced to make matches on the right side of the board solely to chip away at the Ice Block counter, even if those matches don't perfectly align with your immediate artistic vision. This requires patience and a willingness to delay gratification on the larger color fills.
Why Speed is Not the Priority
In Level 247, accuracy beats speed. Rushing to fill the Red Sun is the most common cause of failure. If you pour the red sun before the mountain base is properly established, you will paint yourself into a corner, lacking the liquidity needed to maneuver cups around the Rope constraint.
Clear Objectives and Strategic Goals
To conquer Mt. Fuji, you must shift your mindset from "painting by numbers" to "managing a supply chain." Your primary objective is not just to fill colors, but to clear the board of blockers efficiently.
Phase 1: The Ice Block Breaker
Your immediate goal is to reduce the Ice Block counter from 27 to 0. This is your "Gatekeeper" objective. Nothing else matters until this block is gone. You must aggressively generate matches adjacent to the frozen column, prioritizing proximity over aesthetic perfection.
Phase 2: The Rope Management
While working on Phase 1, you must maintain a "Slot Reserve." Never let your conveyor belt fill above 3/5 capacity. You need to keep two slots open at all times to accommodate the Roped White/Blue pair when it eventually falls into play.
Phase 3: The Sky Unleashing
Once the Ice Block shatters, the board state changes from "Starvation" to "Flood." You will be inundated with Cyan cups. The objective here is to rapidly deploy the Cyan fill without spilling over into the Red Sun zone.
Phase 4: Precision Detailing
The final 10% of the level is the hardest. You must have saved your Orange and specific Red cups for the reflection and cherry blossoms. If you wasted these colors early on "test pours," you will likely get stuck waiting for them to cycle back through the dispenser.
The "Clean Tray" Metric
A secondary objective is to keep your dispenser relatively clear of "dead" colors. A dead color is one you have already finished painting (e.g., early Red cups before the sun is ready). Aim to keep your tray populated with the current "Active Colors" (Blue, White, Cyan) to maximize matching efficiency.
Optimal Color Order and Processing Logic
Success in Level 247 depends on a strict hierarchy of color application. Do not deviate from this sequence unless you are an expert player managing a complex chain reaction.
Priority 1: Dark Blue (The Foundation)
Start with Dark Blue. It forms the mountain and the deep lake. Why first? Because it creates the largest contiguous block of color, allowing you to dump massive amounts of inventory quickly. Furthermore, matching Blue helps chip away at the Ice Block counter faster than any other color due to its position on the board.
Priority 2: White (The Snow Cap)
Process White immediately after Blue. These two colors are often Roped together or adjacent in the dispenser. By handling them early, you clear the middle lanes. Pouring White also defines the boundaries of the mountain, which is crucial for knowing where to stop when you eventually pour the Cyan sky.
Priority 3: Cyan (The Atmosphere)
Cyan is your "Volume" color. You will process more Cyan than any other color. However, it must be third. If you do Cyan first, you run out of board space to maneuver the specific Blue/White matches needed to break the Ice Block. Wait for the floodgates to open (Ice Block broken) before mass-pouring Cyan.
Priority 4: Red (The Focal Point)
Red is dangerous. It is needed for the sun and the cherry blossoms. Treat Red as a "Precision" color. Do not mass-pour it. Only pour Red when you have a clear, isolated target area (the sun disk). Pouring Red near the Cherry Blossom branches early is risky because it can accidentally fill small pixels you were saving for later.
Priority 5: Orange (The Reflection)
Save Orange for last. It is only used in the small checkered pattern at the bottom of the lake. If you pull Orange cups before the Ice Block is gone, they will just sit in your tray taking up valuable space. Ignore them until the very end of the level.
Step-by-Step Walkthrough Instructions
Follow this exact sequence to navigate the Mt. Fuji level without getting stuck. This guide assumes a standard board layout with 5 available slots.
Step 1: Initial Assessment and Tray Setup
As the level loads, look at the Next queue. Ignore the Cyan cups. Tap and hold the Dark Blue cups to inspect their drop path. Your first move is to pull a Dark Blue cup. If the Roped White/Blue pair is visible in the "Next" preview, do not pull it yet. Wait until your tray has 2-3 open slots. You need to be ready to accept both colors immediately.
Step 2: Right-Side Aggression (Breaking the Ice)
Focus 100% of your attention on the right side of the board. Pour Dark Blue and White into the mountain structure. Every time you make a match, check if it touches the Ice Block column. If a match is adjacent to the Ice Block, it is worth double. Prioritize these "edge" matches even if the color fill isn't perfect. You need to lower that counter from 27 to 0 as fast as possible.
Step 3: Managing the Roped Pair
Eventually, the White/Blue Roped pair will enter the active tray. Only pull this when your board is ready for a cloud (White) AND a sky/mountain section (Blue). If you pull it when you only need one, the other cup will occupy a slot and cycle endlessly, effectively reducing you to a 4-slot tray. This is the "Rope Trap." To avoid it, create a "fake" target if you have to—pour the Blue somewhere slightly suboptimal just to clear the slot, but prioritize keeping the flow moving.
Step 4: The "Post-Ice" Flood
The moment the Ice Block breaks, your tray will likely flood with Cyan. This is "Phase Transition." Rapidly start filling the sky. However, watch the Red Sun indicator. If the game prompts you for the Red Sun, stop pouring Cyan immediately. It is better to have a few empty slots than to pour Cyan over the Red Sun pixels and have to fix it later.
Step 5: The Sun and Cherry Blossom Precision
With the sky filled, tackle the Red Sun. This is a large, concentrated pour. Get it done in one or two big moves. Immediately following the sun, look for the small Red and White dots for the cherry blossoms on the left. This requires precise tapping. Don't just swipe; tap the specific pixels to ensure the color lands exactly where it needs to.
Step 6: Finalizing the Reflection
The board is now 90% complete. The only remaining pixels are the Orange reflections in the water. By now, your tray should be cycling through the remaining colors. Pull the Orange cups and fill the checkerboard pattern at the bottom. Since this is the last step, you don't need to worry about saving slots anymore. Pour aggressively to finish the level.
Key Tips and Strategic Notes
These tips are derived from hundreds of simulation runs. Adhering to these nuances will separate a successful completion from a "Game Over" screen.
The "Match-Adjacent" Strategy
When the Ice Block counter is high, stop thinking about the art. Think about the geometry. If you have a choice between pouring a Blue cup that completes a mountain section (visual match) vs. pouring a Blue cup that sits next to the Ice Block but doesn't look as good (mechanical match), choose the one next to the Ice Block. You need the mechanical unlock before the visual polish.
Conveyor Belt Management
Treat your 5-slot tray like currency. Spending a slot costs you flexibility. Try to keep at least 2 slots open at all times during the first half of the level. If you find yourself with a full tray (5/5) and the Ice Block is still up, you are in danger. Prioritize pouring whatever you can, even if it's a "minor" color, to free up space.
The Cyan "Danger Zone"
The sky (Cyan) shares a border with the Sun (Red). The game's hit detection can be finicky here. When filling the sky, stop pouring when you are within 2 pixels of the red circle. It is safer to leave a 2-pixel gap in the clouds and fill it manually with a dropper tap later than to overshoot and turn the sun pinkish-purple.
Rope Timing
The Roped pair (White/Blue) spawns on a timer. If you see the "Next" preview showing the Rope, start clearing your current tray immediately. Do not start a new large fill (like the lake) if the Rope is about to arrive. You need the buffer space to handle the double-drop.
Speed Running the "Boring" Part
The right-side grinding phase (Steps 2 and 3) is boring but repetitive. You can speed this up significantly by using simple tap gestures rather than dragging. Since the targets on the right are large geometric blocks of color, rapid tapping is often faster and more precise than swiping, allowing you to process the Ice Block counter down in record time.
Common Mistakes to Avoid
Everyone fails Level 247 the first time. Here is why, and how to prevent it.
The Premature Sun
The most common error is pouring the Red Sun as soon as you see Red cups. This feels natural because the sun is the focal point. However, doing this usually clogs your tray with Red cups you can't use elsewhere, while the critical Blue/White cups needed to break the Ice Block get buried. Suppress the urge to paint the sun until the mountain is mostly done.
The "Full Tray" Panic
Players often pull the Roped pair when their tray is at 4/5 capacity. This instantly creates a jam where you can't pull anything new, and you can't pour the Roped pair because you don't need *both* colors yet. This leads to a forced loss. If your tray is full, you must pour something—even a small, imperfect dot—to free up a slot before the Roped pair arrives.
Ignoring the Orange Trap
Orange cups appear early and look tempting because they are distinct. However, the Orange reflection is at the very bottom of the board. If you start pulling Orange early, you are wasting slots on a color you can't use for 15 minutes. Leave Orange alone until the end.
Sloppy Reflection Edges
When filling the lake (Dark Blue), players often swipe carelessly into the "Reflection Zone" at the bottom. This mixes Blue and Orange prematurely. Keep your Blue fills high. Treat the bottom 10% of the screen as a "No Fly Zone" until you are ready to do the specific reflection pattern.
Underestimating the Counter
The Ice Block starts at 27. That seems low, but if you aren't making "edge" matches, it will take you forever to clear. A common mistake is playing normally and expecting it to break. You must play *aggressively* against the block. If you have made 10 moves and the block hasn't moved significantly, you are playing too passively.
Solutions for When You Are Stuck
Feeling trapped is part of the game design. Here is the emergency protocol for specific sticky situations.
Scenario: The Tray is Clogged with Unusable Colors
You have 3 Red cups, but you still need to paint the Blue mountain. The Ice Block is blocking new Blue cups.
Solution: You must "burn" the Red cups. Find the smallest, most insignificant Red pixel on the board (perhaps a single pixel in the cherry blossom branch) and pour the Red there to get rid of the cup. It is better to waste a little paint than to have a full tray and lose the game. Clear the cup, cycle the tray, and hope for Blue.
Scenario: The Rope Won't Fit
The White/Blue Rope is in the dispenser, but you only have space for one cup.
Solution: Look for a "sacrificial pour." Do you have a cup of a color you *don't* need right now? Pour it anywhere valid to clear a slot. If you are completely full, look at the target image. Is there *any* valid spot for the White or the Blue? Even a tiny dot? Pour it. If not, you may have to wait for the current cups to cycle out, but usually, a sacrificial pour is the only way to reset the flow.
Scenario: Ice Block Counter Stuck at 1-3
You are so close, but you can't get the last few hits.
Solution: Stop looking at the big picture. Zoom in (mentally) on the column next to the Ice Block. Are there any unpainted pixels there of *any* color? You may need to paint a small strip of Cyan or White that you didn't think you needed yet, simply because it touches the block. Use "useless" fills to break the last few points of armor.
Scenario: Out of Moves/Low Score Risk
You have plenty of paint, but you are running out of moves to finish the details.
Solution: Switch to "Combo Mode." Instead of pouring one cup at a time, try to set up a chain. Pour a color that clears space for a large match immediately after. Look for opportunities to pour "through" a color to hit a matching one behind it, maximizing the points per move. In the late game, efficiency is key.
Speed Run and Advanced Strategies
For players looking to 3-star this level or achieve a personal best time, these advanced techniques will shave seconds off your run.
The "Pre-Pull" Technique
As you are pouring the last few drops of a cup, look at the "Next" queue. If the Roped Pair is coming up, start dragging your finger toward the target area *before* the cup even fully lands in the tray. This pre-emptive movement saves precious milliseconds. This is crucial during the "Post-Ice" flood where every second counts against the clock.
Batch Processing the Sky
Once the Ice Block is down, don't tap the sky pixel by pixel. Identify the largest contiguous horizontal strips of Cyan. Swipe in long, horizontal strokes to fill 3-4 rows of sky at once. This is much faster than tapping individual blocks. Only revert to tapping when you get close to the Red Sun border.
The "Blue Mountain" Shortcut
The mountain base is a large rectangle. Instead of filling it from the top down, try to find a "L-shape" fill path. Start at the top corner of the mountain and drag down, then immediately across the base. This specific L-shape often triggers the game's auto-fill logic for large rectangular areas, completing the section in one move rather than ten.
Optimal Rope Usage
Advanced players know that the Rope pair doesn't have to be poured immediately. If your tray is empty, pull the Rope pair *before* you actually need the colors, letting them sit in the tray while you organize other moves. This "pre-loading" ensures that when you finally need to paint that cloud or that part of the lake, the paint is already in your hand, ready to go.
Late Game Inventory Purging
In the final 10 seconds (or final 50 moves), stop worrying about color harmony. If you have extra cups of a color that is already 99% finished, just pour them into the largest remaining blob of that color to clear your tray. A clean tray cycles faster, giving you access to the final few Orange or Red cups you need to close out the level.